CONNECT. MONITOR. CONTROL. © 2014 Red Lion Controls. All Rights Reserved 2
Quick Start Guide
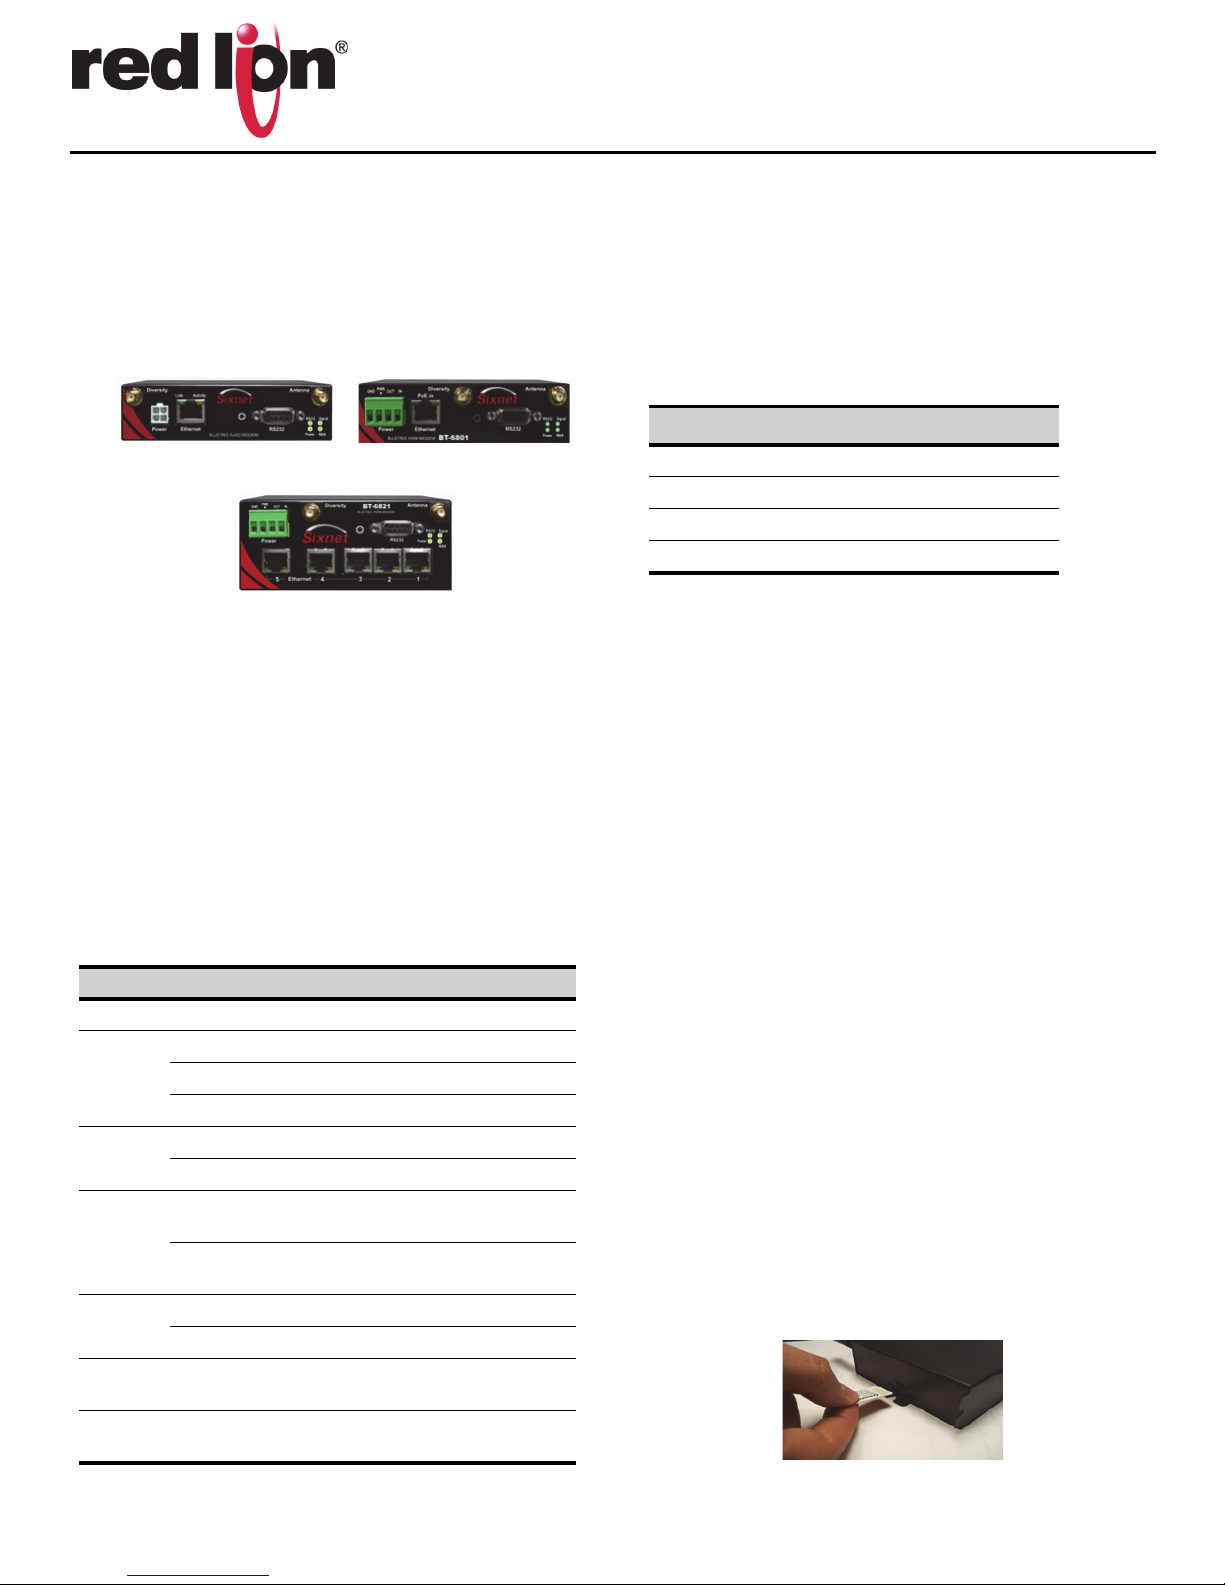
3. Wiring and power-up
1. Connect the modem to your computer using a standard Ether-
net cable. Alternatively, the RS-232 or USB ports can be used for
setup.
2. Connect the cellular antenna to the antenna connector.
3. Plug in the power connector to power-up the modem.
4. Start BlueVue Device Manager Software
1. Download and install the latest version of BlueVue Device Man-
ager from www.redlion.net.
2. When launched, it will attempt to connect to 192.168.0.1 by
default, once connected to the modem, the Modem Diagnostic
window will open. (Note that 192.168.0.1 connects to the Ether-
net cable. To connect to the USB port use 192.168.111.1):
Troubleshooting: If BlueVue displays “Detecting Modem at
192.168.0.1” indefinitely, then:
• Make sure the modem is powered on.
• Check the Ethernet Link LED on the modem. If it’s off, it usually
means you have a problem with the Ethernet cable or with your
computer’s network card.
• Close all other network connections (such as WiFi)
• Set your computer to obtain an IP address automatically
5. Confirm that the modem is acquiring a cellular signal
The Signal LED should be on or flashing, indicating that the modem has
a signal. BlueVue Device Manager displays signal information in the top
right of its window; a minimum of 1 bar is required to connect to the
carrier with the modem.
Troubleshooting: If the Signal LED is off, then there may be an issue
with the antenna or cellular coverage might be too low in your current
location.
6. Set the WAN data connection
1. In BlueVue Device Manager, click on the WAN button.
2. Set the Username and Password if provided by the carrier.
3. Set the APN as provided by the carrier.
4. Click Submit.
5. Confirm the modem has successfully connected to the cellu-
lar network:
•The WAN LED will be on or flashing.
•In BlueVue, click the DIAG button, the WAN IP should
indicate the IP address assigned to the modem by the
cellular network.
SETUP IS COMPLETE
The modem should be ready for use as a basic internet access point.
ADDITIONAL INFORMATION
For more advanced modem configuration, consult the support section
on our website. Visit our support page at www.redlion.net to access
the modem’s documentation, as well as configuration help, trouble-
shooting and firmware & software updates. Or contact Technical Sup-
INSTALLATION AND HAZARDOUS AREA WARNINGS
Suitable for use in Class I, Division 2, Groups A, B, C and D hazardous
locations, or non-hazardous locations only. All power, input and output
(I/O) wiring must be in accordance with Class I, Division 2 wiring meth-
ods and in accordance with the authority having jurisdiction.
WARNING - EXPLOSION HAZARD - DO NOT DISCONNECT EQUIPMENT
UNLESS POWER HAS BEEN SWITCHED OFF OR THE AREA IS KNOWN TO
BE NON-HAZARDOUS.
WARNING - EXPLOSION HAZARD - SUBSTITUTION OF COMPONENTS
MAY IMPAIR SUITABILITY FOR CLASS I, DIVISION 2.
AVERTISSEMENTS POUR INSTALLATION ET
ENDROITS DANGEREUX
Cet équipement est adapté pour une utilisation en Classe I, Division 2,
Groupes A, B, C et D pour endroits dangereux , ou endroits non-dan-
gereux seulement. Tout câblage électrique, entrée et sortie (I / O) doi-
vent être en conformité avec Classe I, Division 2 méthodes de câblage
et conformément à l'autorité compétente.
AVERTISSEMENT - RISQUE D'AVERTISSEMENT - NE DÉBRANCHEZ PAS
L'ÉQUIPEMENT PENDANT QUE LE CIRCUIT EST DIRECT OU À MOINS
QUE L'ENVIRONNEMENT SOIT CONNU POUR ÊTRE NON-DANGEREUX.
AVERTISSEMENT - RISQUE D'EXPLOSION - LA SUBSTITUTION DE TOUT
COMPOSANT PEUT NUIRE À LA CONFORMITÉ DE CLASSE I, DIVISION 2