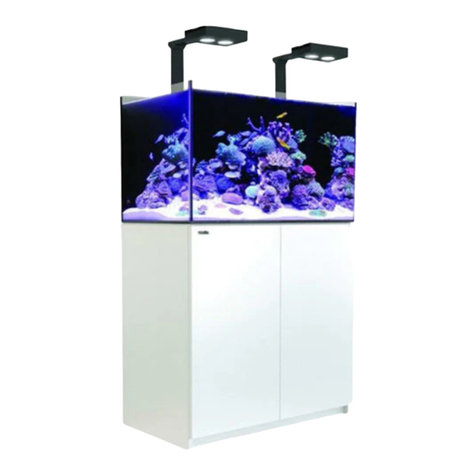
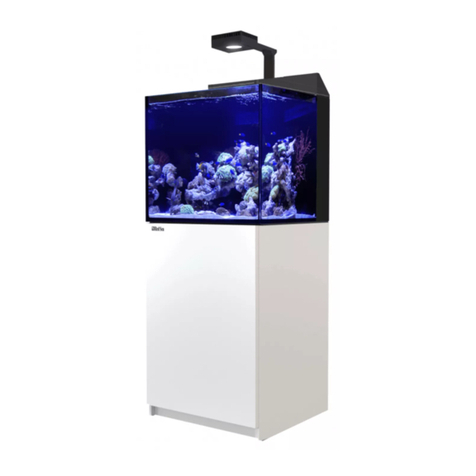
Red Sea MAX NANO User manual

MAX®NANO
Installation and Operation Manual
Cabinet Installation Guide
Podium Installation Guide
AI Prime HD LED Manual

®
Red Sea MAX®NANO
Complete Plug & Play® Open Top Reef System
Installation and Operation Manual
PRINTING INSTRUCTIONS
To print only the Installation and
Operation Manual, print pages 2-25.

1
ENG
Red Sea MAX®NANO
Installation and Operation Manual
Complete Plug & Play® Open Top Reef System
Installation and Operation Manual

Red Sea MAX® NANO
2
MAX® NANO Installation & Operation Manual
Safety .....................................................................4
Location ..................................................................5
Unpacking the MAX® NANO ...................................6
Components ...........................................................7
Assembly ................................................................8
Installation of Rear Sump Components ........................9
Installation of Automatic Top-Off ..........................13
Installation of LED Modules ...........................................14
Operation of Pump Switch-box ..............................15
LED Set up and programming ................................16
Initial Fill .................................................................17
Operation of the Protein Skimmer ........................17
General Aquarium Maintenance ............................18
Trouble shooting ....................................................20
Warranty .................................................................22
Installation and Operation Manual

3
ENG
Congratulations on your purchase of the
Red Sea MAX® NANO complete reef system.
The Red Sea MAX® approach to the coral reef experience is to create
an environment that is specifically attuned to the needs of coral and
all inhabitants on an artificial reef. In the ocean coral reefs flourish
only where specific physical conditions prevail, such as sufficient light,
adequate current, stable temperature and water quality.
The Red Sea MAX® system provides the conditions that enable you to keep
a thriving, healthy reef in your own home.
We hope that you enjoy your MAX® and wish you happy reefing.
To benefit from product update information and special offers exclusive to
registered MAX® owners, please register your MAX® on-line at redseafish.com
Installation and Operation Manual

Red Sea MAX® NANO
4
1 Safety
Please read and follow all safety instructions.
a. Do not operate any appliance if it has a damaged cord or plug, if it is
malfunctioning, or if it is dropped or damaged in any manner.
If the external cable is damaged, it shall only be replaced by the
manufacturer.
b. To avoid the possibility of the appliance plug or receptacle getting
wet, position the aquarium stand and tank to one side of a wall
mounted receptacle to prevent water from dripping onto the
receptacle or plug. You should create a "drip loop" (Figure 1) for each
cord connecting an aquarium appliance to a receptacle. The "drip
loop" is that part of the cord below the level of the receptacle, or
the connector. Use an extension cord, if necessary, to prevent water
traveling along the cord and coming into contact with the receptacle.
If the plug or receptacle does get wet, DO NOT unplug the cord.
Disconnect the fuse or circuit breaker that supplies power to the
appliance. Then unplug the device and examine for presence of water
in the receptacle.
c. To avoid injury, do not contact moving parts.
d. Always unplug an appliance from an outlet when not in use, before
putting on or taking off parts, and before cleaning. Never pull the cord
itself to remove the plug from the outlet. Grasp the plug and pull to
disconnect.
e. Do not use an appliance for anything other than its intended use.
The use of attachments not recommended or sold by the appliance
manufacturer may cause an unsafe condition.
f. Do not install or store the appliance where it will be exposed to the
weather or to temperatures below freezing point.
g. Make sure an appliance mounted on a tank is securely installed before
operating it.
Read and observe all the important notices on the appliance.
NOTE: A cord rated for less amperes or watts than the appliance rating
may overheat. Care should be taken to arrange the cord so that
it cannot be tripped over or pulled accidentally.
DANGER: To avoid possible electric shock, special care should be
taken when handling a wet aquarium. For each of the
following situations, do not attempt repairs yourself; return
the appliance to an authorized service facility for service or
discard the appliance.
WARNING: To guard against injury, basic safety precautions should be
observed, including the following:
Drip Loop
Figure 1
Installation and Operation Manual

5
ENG
2 Location
The first step in setting up the MAX® NANO is to choose
a suitable location.
Electric Supply
Ensure that the electric power supply outlet used for the MAX® NANO
is correctly rated for the system (75W), plus whatever additional
equipment (such as a heater) you plan on adding. The power supply
outlet must be grounded and connected to a circuit protected by a
RCD/RCCB (residual current device or residual current circuit breaker)
also known as a GFI/GFCI (ground fault circuit interrupter).
Floor
The floor directly below the legs must be level and rated for a static
loading of at least 14kg/cm2 (200 lbs/square inch).
Room temperature
Site selection is important for correct temperature maintenance.
We recommend that you keep the ambient room temperature a
comfortable and stable 22°C / 72°F. Avoid placing the tank in front of
an air conditioner, heating vents or direct sunlight. A well ventilated
room with moderate light is the best place to position the aquarium.
Accessibility
•Back: Ensure that there is at least 10cm (4") of clearance behind the
MAX® to allow for sufficient air circulation for a chiller and general ease
of operation.
•Sides (Rear): Ensure that there is sufficient room (approximately
60cm/24”) between both sides of the aquarium and any adjacent walls
or furniture for access to the rear of the tank. This is required for the
regular maintenance of the surface skimmer, protein skimmer, flow
pump and filter media as well as installing/removing cables to the
Pump Switch-box.
General considerations
Ensure that the area surrounding the aquarium is waterproof and
consider moving away anything that water might damage or which may
be corroded by salt.
Installation and Operation Manual

Red Sea MAX® NANO
6
3 Unpacking the MAX®NANO System
Please read this section carefully before proceeding.
1. Remove the EVA mat and the protective packaging from around the
top of the tank.
2. Remove the components and any packaging materials that are packed
inside the aquarium.
3. Open the accessory box and remove all of the parts for later
assembly.
Removing the aquarium
With one person positioned at either side of the box, grasp the upper
rim of the aquarium and gently lift it out and place on the designated
surface.
CAUTION: The aquarium has a bare glass bottom. Before removing the
aquarium from the box prepare a smooth, soft, clean flat
surface that can hold its weight and place the EVA mat on it.
NOTE: Every precaution has been taken to ensure the safe arrival of the
MAX® NANO aquarium system, however before installing a new
glass aquarium it is advisable to inspect it for damage or leaks.
Place the aquarium in a suitable location and fill the tank and rear
sump to approximately 2.5cm (1”) below the top of the glass.
Leave the water standing for 15 minutes and inspect for leaks.
Syphon all of the water out before moving.
Approximate weights of Aquarium (empty)
Model Metric (kg) Imperial (lb)
NANO 23 51
Installation and Operation Manual

7
ENG
4 Components
MAX® NANO system main components
MAX® NANO type glass aquarium with integral rear sump 75L (20 gal)
MAX® NANO Cabinet (optional) Self-assembly
Pump Switch-box
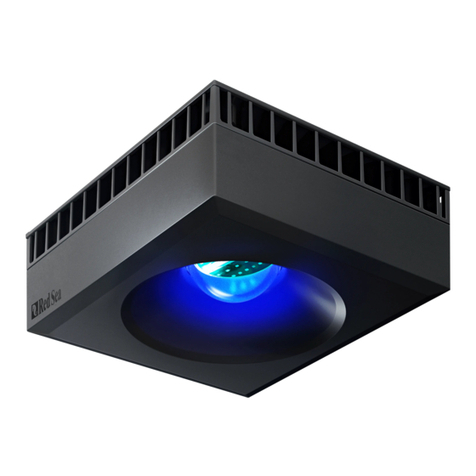
LED – Prime HD™ light units 55W
Rear Sump Protein Skimmer NANO
Circulation pumps 1 x 950lph (240 gph)
Filter sponges 2
Carbon media with drawstring bag 100g
Rear Sump Screen
Automatic Top-Off
Installation and Operation Manual

Red Sea MAX® NANO
8
5 Assembly
Perform the assembly and installation of all of the components in the
order described below before adding the water to the system.
5.1 Cabinet assembly
Detailed instructions for the assembly of the MAX® NANO cabinet can be
found in the accompanying graphic manual.
The assembly of the cabinet requires the use of a regular crosshead
screwdriver. Do not use an electric screwdriver.
Adjustment of the Push-To-Open (PTO)
door opening unit.
Pressing the end of the PTO unit by 1.5mm
(
1/16”) will spring the shaft
forward by 5cm (2”) to the open position.
Pushing the PTO shaft back inside the cabinet will lock it in the closed
position.
After assembling the cabinet door, make sure that the PTO is in the closed
position and allow the soft close hinges to fully close the door. With the
door in the closed position press the door in the region of the PTO. The door
should spring open. If the door does not spring open adjust the position
of the PTO by rotating the front end of the shaft anticlockwise half a turn.
Repeat this adjustment until pressing the door causes the PTO to operate.
After assembly, place the cabinet in the desired location.
5.2 Pump Switch-box
Align the Pump Switch-box with the holes provided in the rear wall of the
aquarium and fix into position with the screws provided. Do not attach
the LED mounting arm or module at this time.
5.3 Placing Aquarium
Lifting the glass aquarium onto the cabinet will require 2 people. The top
of the cabinet is approximately 86cm (34”) from the floor. Ensure that
anyone lifting the aquarium is physically suitable for such an operation
and has been instructed in the correct methods of lifting heavy objects.
Aquarium must be lifted from the bottom.
Place the EVA mat on the top of the cabinet or other surface that will be
supporting the aquarium. The EVA mat is smaller than the aquarium. Place
the glass flush with the back of the mat and 3mm (1/8") from each of the
sides.
Before lifting aquarium, place the assembled cabinet in the final
operating position (see location above) and set the glass aquarium in
position on top.
The back and sides of the glass should be flush with the rear and side
edges of the top of the cabinet.
Once the aquarium is correctly aligned with the cabinet, check that the
cabinet has not moved. If necessary readjust the position of the cabinet.
NOTE: Left and Right designations in this manual are when looking
from the front of the Aquarium. NOTE: Do not plug the Switch-box power cable to your power outlet
until instructed to do so.
WARNING: If you are not experienced in the construction of self
assembly furniture, seek suitably qualified assistance.
Installation and Operation Manual
9
ENG
6 Installation of Rear Sump Components
1. Detachable Surface Skimmer
2. Protein Skimmer
3. Carbon
4. Circulation Pump
5. Pump Outlet Nozzle
6. Bubble trap sponge
7. Skimmer Outlet Sponge
8. Automatic Top Up
9. Micron Filter Bag
MAX® NANO rear sump component assembly diagram
9
7
2
5
6
3
1
8
4
Installation and Operation Manual

Red Sea MAX® NANO
10
Overview of the MAX® NANO filtration and
circulation system
The MAX® NANO rear sump has a complete multistage filtration system
consisting of a REEF-SPEC® protein skimmer, activated carbon and
mechanical filtration materials.
Water circulation in the aquarium and sump is approximately 12
times the entire water volume per hour with forced flow through the
mechanical and chemical filter media while the protein skimmer treats
the water at the SPS spec of approximately 3 times per hour.
The water flows from the aquarium to the rear sump via a detachable
surface skimmer that directs the organics laden water from the upper
surface of the main tank into the rear sump.
From the surface skimmer the water is immediately channeled through a
micron filter bag before entering the skimmer chamber. If the filter bag
is not cleaned frequently enough and becomes blocked, the water will
bypass the micron filter without affecting the overall operation of the
rear sump.
After the skimmer chamber the water is positively drawn through
the REEF-SPEC® carbon and the bubble stripping sponge filter by the
circulation pump located at the bottom of the sump, that returns the
filtered water back to the aquarium through a multidirectional outlet
nozzle. When the pumps are running, the water in the aquarium will be
maintained at approximately 2.5cm (1”) below the rim.
To maintain a constant water height in the system the MAX® NANO includes
an automatic Top-Off system with a 1.5 liter freshwater reservoir which
should be enough to compensate for about 2 days of evaporation. The rear
sump will continue to run efficiently even after evaporation of approximately
1 liter (with an insignificant rise in salinity) and therefore the MAX® NANO
should run for at least 3 days without adding water to the system.
6.1 Protein Skimmer:
The MAX® NANO protein skimmer
consists of three parts: skimmer
body, collection cup and skimmer
pump.
Familiarize yourself with the
skimmer pump by disassembling and
reassembling all of the component
parts. Ensure that the impeller
chamber cover is correctly positioned
and properly secured by the bayonet
ring. Before use check that the pump
and power cable are not damaged.
Diagram key :
a. Skim adjuster
b. Venturi inlet
c. Air pipe
d. Small air pipe
Assemble the skimmer as shown in the diagram.
1. Set the skim adjuster to its lowest position.
2. Connect the air pipe from the venturi inlet of the skimmer pump to
the outlet of the silencer.
3. Connect the small air pipe on the inlet of the silencer.
4. An optional air valve is provided for use with the skimmer. Initially do
not attach the air valve; it is only to be used if required as described
in the operation instructions.
NANO skimmer
b
a
Installation and Operation Manual

11
ENG
5. Hold the pump cable at the
side of the skimmer, as shown
in the diagram and slide the
skimmer into the skimmer
compartment so that the
silencer just touches the glass
partition.
6. Feed the cable over the back
wall and connect to the left
hand cable of the Pump
Switch Box by tightening the
connector nut.
6.2 Surface Skimmer:
The removable surface skimmer is
supplied assembled in the correct
position in the dividing wall between
the tank and the rear sump. To
remove the surface skimmer simply
raise in the upward direction. Note
the surface skimmer incorporates a
channel that directs the water to the micron filter.
6.3 Micron Filter:
Check that the micron filter bag is
installed in the Filter Bag Holder at
the left of the rear sump.
Place the small black sponge onto
the filter bag holder as shown in
the diagram so that the sponge
is also touching the side of the
skimmer.
Surface Skimmer/comb
skimmer cable
filter bag and sponge
NOTE: The MAX® NANO is supplied with a 225 Micron thin mesh filter
bag (#40580). 100 micron fine polishing filter bags (#40581)
are available from Red Sea dealers.
NANO skimmer
c
d
Installation and Operation Manual

Red Sea MAX® NANO
12
6.4 Carbon:
Wash the carbon filter material under running water several times to
remove residual dust. It is recommended to soak it in water for 24-72 hrs.
before usage otherwise during the first 3 days after set-up the carbon
may float and release micro air bubbles from inside its pores.
Lower the washed carbon into the chamber to the right of the skimmer
so that it rests on the grid located approximately 30cm (12”) below the
top surface of the glass. To enable easy replacement of the carbon, place
the drawstring of the carbon bag over the silencer of the skimmer.
6.5 Circulation Pumps:
Familiarize yourself with the multidirectional outlet as
shown in the drawing.
Familiarize yourself with the circulation pump by
disassembling and reassembling all of the component
parts. Ensure that the impeller chamber cover is
correctly positioned and properly secured by the
bayonet ring and that the flow valve is in the fully
open position. Screw the hose barb provided into the
outlet of the pump.
1. Before use, check that the pump and power cable
are not damaged.
2. Thread the outlet bayonet connector onto
the flexible pipe and assemble the flexible
pipe to the pump so that the outlet elbow is
perpendicular to the pump as shown in the
drawing.
3. Insert the Eyeball Seat into the Outlet Holder that
is fixed into the glass. This part is a tight fit so that
it will not float out during any pump maintenance
but can be removed if necessary for cleaning.
4. Insert the Eyeball outlet followed by the seal into
the Outlet Holder.
5. Lower the pump into the pump chamber until the
Outlet Elbow with the Bayonet connector is opposite
the Outlet Holder.
6. Screw the Bayonet to the Holder until firmly in
position. Check that the Eyeball is free to rotate but
held securely in the desired position. Initially adjust
the nozzle to the downward position to prevent
splashing when the pump is first switched on.
7. Feed the cable over the back wall and connect to
the right hand cable of the Pump Switch Box by
tightening the connector nut.
8. With the circulation pump secured in position, hold the pump cable
against the back wall, close to the Switch Box and push the black filter
sponge into the pump chamber so that the slit in the sponge is in line
with the flexible pipe.
Installation and Operation Manual
13
ENG
6.6 Sump Screen:
Position the sump screen above the front wall of the rear sump. Align the
hinges above the clips on the top of the side walls and push firmly into
position. Push the rear of the sump screen until it clicks into position.
To rotate, pull the top of the screen forward until the screen lays flat on
the top of the tank.
7 Automatic Top-Off (ATO):
The MAX® NANO ATO unit is supplied fully assembled and should not need
any adjustment before installing on the system however make sure that
the float valve is at the correct angle as shown in the diagram. Hold the
circulation and skimmer pump cables to the side of the Pump Switch
Box and slide the ATO into position on the rear wall of the sump. Make
sure that the cable of the circulation pump is located in the recess at the
bottom of the reservoir.
NOTE: Do not add RO water to the ATO until you have the correct
amount of seawater in the system.
Installation and Operation Manual

Red Sea MAX® NANO
14
8 Installation of LED Modules
The LED unit for the MAX® NANO is attached to the mounting arm by a
ball joint, allowing tilt and swivel. The mounting arm is attached to the
aquarium by the hole provided for it in the top of the Pump Switch-box
The complete LED assembly can be rotated from side to side for ease
of aquascaping and maintenance of the rear sump, specifically when
removing the skimmer.
1. Thread the LED cable
through the ball-seat as
shown in the diagram until
the ball-seat is about 10cm
(4") from the LED unit.
2. Using a cross head
screwdriver, partially
attach the ball-seat to the
mounting arm with the 2
screws provided, one full
rotation of the screwdriver
should be enough to hold
the ball-seat in position.
3. Carefully move the LED unit
into position so that ball
sits correctly in the ball-
seat while threading the
cable through the recess
provided for it.
4. Press the ball-seat to the
mounting arm, trapping
the ball in between the
parts and tighten the 2
screws until the ball is held
firmly.
Tip – place the LED unit
on a work surface with
the ball protruding over the edge, hold the mounting arm with
one hand at the connector end and press on the ball-seat from
underneath so that you have easy access to the screws from above.
5. Thread the cable through
the hole in the bend of the
mounting arm and push
the cable-hole plug into
position.
6. To attach the LED mounting
arm to the switchbox hold
it so that the pin at the
bottom of the arm is over
the hole in the switchbox
and the LED unit is facing
sideways as shown in
the diagram. Place the
cable over the back of the
aquarium.
Installation and Operation Manual
15
ENG
7. Lower the pin into the hole
and when the flat part on
the arm is in resting on the
Pump Switch Box, rotate
the arm to the forward
position.
Thread the cable through
the recess provided in the
back of the Pump Switch
Box.
Find a suitable safe place to locate the power supply, such as in the
cabinet.
Connect the DC connector from the LED unit to the power supply but do
not plug the power supply into the wall outlet until you are ready to set
up the LED unit.
9 Operation of Pump Switch-box
The Pump Switch-box is designed to provide easy on/off control of the
circulation and skimmer pumps during routine activities such as feeding
or maintenance.
Ensure that the 2 switches are in the off position and plug the power
cable to the wall outlet. Do not switch the pumps on until both pumps
are fully submerged in water.
The cable connectors are designed to prevent any ingress of water when
used in the designed manner. The connectors are not waterproof and
must not be immersed in water.
Installation and Operation Manual

Red Sea MAX® NANO
16
10 LED Set up and programming
The LED modules have a built-in Wi-Fi network and must be connected to
a smartphone or Wi-Fi enabled computer to get the benefits of all of the
features. To set up and program the LED’s follow the instructions provided
with the LED modules.
Programming guidelines:
Photoperiod: Day/moonlight
The day photoperiod should be between 8 – 12 hours with no more
than 4 hours at maximum intensity and at ramp up/down rate of
approximately 25% (of maximum intensity) per hour. Corals and fish
must have daily periods of darkness. LED moonlight should be limited to
1% of the maximum light intensity for a maximum period of 6 hours.
Acclimation
To prevent photo-inhibition due to the high intensity of LED lights, an
acclimation period is recommended for new systems or when introducing
new corals.
Acclimation will vary for different kinds of corals however it
recommended to allow a period of 8 weeks for new set-ups as follows:
Set the day photoperiod as described above however the 4 hour peak
intensity to should not exceed 60% of maximum. Increase the peak
intensity by 10% every 2 week.
During the acclimation period look for signs of photo stress and photo-
inhibition such as:
•Whitening/Bleachingoftheuppersectionofthetissue(thelower
section will continue to show pigments and zooxanthellae).
•Polypsretraction.
•Gasbubblesinsidethesofttissue.
In the event of any of the above symptoms immediately reduce the peak
intensity by 20% for about 4 weeks and thereafter increase by 5% per
week until maximum intensity is reached.
When introducing new corals to already acclimated systems, start by
positioning them at the lower levels of the aquarium and gradually
raising them to their desired position over a period of several weeks.
Keep watching for signs of photo inhibition/stress and if necessary return
an affected coral to lower levels for recuperation.
2 4 6 8 10 12 14 16 18 20 22 24
DAY IN HOURS
% OF MAXIMUM INTENSITY
8 weeks
4 weeks
Begin Acclimation
Photoperiod
100%
80%
60%
40%
20%
0%
NOTE: Red and Green wavelengths are not recommended for use in
Reef systems as they may promote the outbreak of unwanted
Algae or Cyanobacteria.
Installation and Operation Manual

17
ENG
11 Initial Fill
Follow the mixing instructions for mixing your artificial sea water. It is
advisable to place any substrate or live rocks in the tank before adding
the water as this will significantly affect the overall volume of water
required.
Add the seawater to the main tank, rear sump and directly into the
skimmer (to prevent it floating instead of filling with water) until the
water is at the level of the circulation pump outlet nozzles. Turn on the
skimmer pump and circulation pump and add more water to the system
until the water level in the rear sump is approximately 10cm (4") below
the rim of the aquarium.
12 Operation of the Protein
Skimmer
Adjustment of the skimmer will be necessary from time to time due to
the constant changes in density and organic material in the water.
The consistency of the foam produced by the protein skimmer is
controlled by raising and lowering the Skim Adjuster.
The foam will be formed in the upper part of the skimmer body and
will build and climb up the neck of the collection cup. Set the position
of the Skim Adjuster so that the water level in the skimmer body is
approximately at the base of the neck.
If the foam is too dry or it starts to accumulate lower in the neck,
gradually raise the Skim Adjuster until the desired foam consistency is
achieved. If the foam is too wet, lower the Skim Adjuster.
Over-Skimming
An uncontrollable flow of aerated water into the collection cup.
In the event of over-skimming the excess water will flow back into the
sump from the overflow slot located at the top of the collection cup.
To control the over-skimming make sure that the Skim Adjuster is set in
its lowest position, add the air valve to the top of the air inlet pipe and
reduce the air intake until the foam stabilizes. Continue controlling the
skimmer by adjusting the air intake. When the skimmer is stable with the
air valve fully open, remove the valve and control the skimmer with the
Skim Adjuster.
NOTE: If you have mixed your saltwater for the initial fill inside the
aquarium wait until the salt is fully dissolved and that the water
has reached the desired salinity and temperature before trying
to set the final water level.
Installation and Operation Manual

Red Sea MAX® NANO
18
New Skimmers or Set-ups
Skimmers only produce foam if the
water contains the proteins that bind
to the surface of the air bubbles and
give the bubbles the structural rigidity
they need to ascend the neck of the
skimmer and settle in the collection
cup. In a new aquarium set-up the bio-
load is low and the amount of proteins
is negligible.
New skimmers sometimes need
a short break-in period of a few days before they begin to function
efficiently. Over-skimming is common while harmless chemical residues
that affect the surface tension of the water are neutralized.
Feeding and Supplementing
Skimmers are very susceptible to the effect of surface active compounds
such as foods and supplements that are added regularly to the aquarium.
Such materials can significantly affect the foam production and in some
cases cause over-skimming. Immediately before adding such materials
switch the skimmer off and leave off for 30 minutes or however long it
takes until the skimmer will return to its normal foaming action without
repositioning the Skim Adjuster.
Collection Cup
Monitor the amount of skimmate that accumulates in the collection cup
and empty the cup on a regular basis. When emptying the cup, clean the
inside of the neck by rinsing it with water, as the build-up of skimmate in
the neck will adversely affect the skimmer performance. If you wash the
cup with detergent make sure to rinse it thoroughly before returning it to
the skimmer.
13 General Aquarium
Maintenance
The long-term success and health of the inhabitants of your MAX®
aquarium depends on you. Proper planning makes reef care easier to
manage and quicker to perform. This will leave you more time for the
real goal: enjoying your aquarium. Care of the tank should follow a
regular, logical pattern. Divide the tasks into daily, weekly and monthly
procedures, including equipment checks, feeding, water parameter
testing and adjustments.
You may find it helpful to make a systematic checklist of care activities
and keep a log of the activities performed. Your log does not need to be
complicated; you will need to track the following:
• The tank’s parameters – pH, salinity, temperature, etc.
• The general appearance of the tank and individual species.
• Equipment changes – when you changed light tubes or replaced
heaters, etc.
• Replacement of carbon or other filter media.
• Information specific to each animal – when they were added, moved
or removed, their approximate size, any signs of stress or ill health etc.
Water levels
Check the water level in the ATO on a daily basis and add fresh water
as required to compensate for any evaporation. If the water in the
aquarium is too high check that the surface skimmer is not blocked.
Surface Skimmer
Remove and clean the surface skimmer at least once a week to allow
proper water flow and stable water level differentiation between the
aquarium and the rear sump. Periodically soak in a weak acidic solution
(vinegar, citric acid) until any calcium carbonate deposits have dissolved.
Wash thoroughly before returning to the aquarium.
Installation and Operation Manual
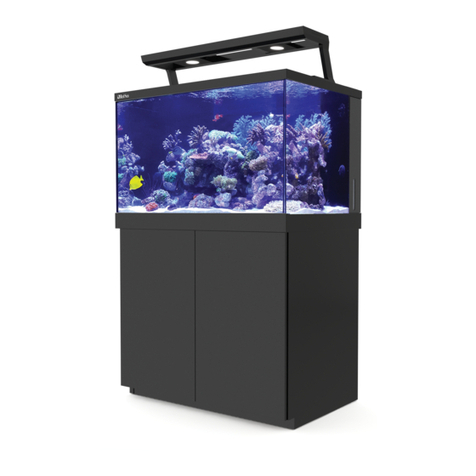
Table of contents
Other Red Sea Other manuals

Red Sea
Red Sea REEFER Series User manual

Red Sea
Red Sea ReefLED 50 User manual

Red Sea
Red Sea Complete Plug & Play MAX E-170 User manual

Red Sea
Red Sea MAX E Series User manual

Red Sea
Red Sea MAX S-Series User manual

Red Sea
Red Sea REEFER 250 User manual

Red Sea
Red Sea REEFER DLX 425 User manual

Red Sea
Red Sea REEFER DLX 525 User manual

Red Sea
Red Sea MAX User manual

Red Sea
Red Sea MAX S-Series User manual