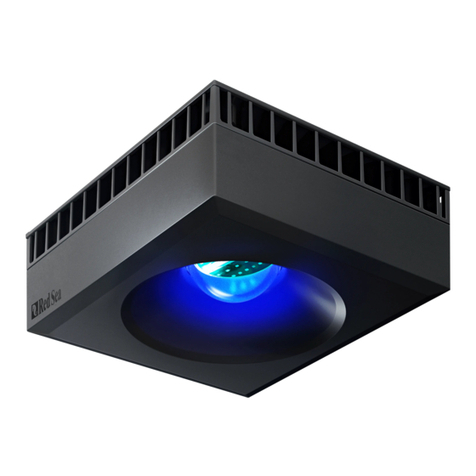
Red Sea Hydra 26 User manual

Red Sea Hydra 26™HDLED
Scan this QR to register
& activate your Red Sea
Hydra 26™HD LED *Hydra TwentySix HD is a registered Trade Mark of AI
ENG DE FR JP CHN


ENG
DE
FR
JP
CHN
2-7
10-15
18-23
26-31
34-39


1
ENG
Red Sea Hydra 26™HDLED
ENG

Red Sea Hydra 26™ HD LED
2
Connection and set-up of Wi-Fi controller
Safety warnings
Incorrect use of this device could cause bodily injury or death.
Read and follow all of the safety guidelines in the Red Sea MAX®manual
before assembling and/or using this LED module.
Do not attempt any repairs to the modules. Any unauthorized repairs will
void your warranty.
Important Notes:
Install the LED modules above the aquarium as instructed in the MAX®
Installation and operation manual.
Note down the unique serial number (RSMAX26-D89760XXXXXX) for each
LED module as shown on the label located above the DC power socket.
When appropriate, switch the light switch on the power center to the ON
position and follow the instructions to connect the LED modules to your
smartphone, tablet or Wi-Fi enabled computer.
On initial power-up, all LEDs will switch on in an un-configured mode.
For MAX®systems with multiple LED modules, designate the first LED
module you connect to the Wi-Fi as the “parent” and thereafter add the
other modules as “children”.
Initial Connection:
Smartphones and tablets:
1. Download the iOS or Android “myAI” apps at:
http://www.redseafish.com/my_ai/
or Scan the QR:
2. From your device, go to Wi-Fi settings and select one
of the networks labeled with the serial number of
the LED module.
It may take a few moments to appear.
3. Open the “myAI” app and follow the on-screen instructions
to finish connecting the LED modules to your network.
Wi-Fi enabled computers
1. Register your product at:
www.redseafish.com/max-register
2. From your computer, connect to one of the networks labeled with the
serial number of the LED module. It may take a few moments to appear.
3. In your browser connect to http://RSMAX26-D89760XXXXXX.local
(XXXXXX from the serial number) and follow the on-screen instructions
to finish connecting the LED modules to your network.
3
ENG
Controller settings
The controller provides automatic and manual modes for the lights.
When the “Auto” mode is selected the LED module will vary spectrum and
intensity according to the 24 hour cycle that you program.
When the “Manual” mode is selected the LED module will operate
continuously at the fixed spectrum and intensity as set on the manual
setup screen. Moving to “Manual” from “Auto” will show the current
setting of all color channels. Any changes made during “Manual” mode
will be deleted when returning to “Auto” mode.
Spectrum and Intensity
Select the “Manual” control option and see the effect of raising/lowering
the intensity of individual color channels and the effect of various
combinations. (Note: For systems with multiple LED modules, “child” units
should change together with the “parent”) The HD function automatically
reallocates the “unused” power from one color channel to others up to the
maximum allowable power for the other channels. The reallocation depends
on the prior relative intensity of the channels and therefore the sequence in
which color intensity changes are made will affect the final result.
Recommended
REEF-SPEC®setting for
maximum power for
Reef aquariums.
118% 118% 140% 116% 0% 0% 60%
Power Usage UV Violet Royal Blue Green Cool WhiteDeep Red
AVAILABLE
Manual Auto
Spectral Output
88W
NORMAL
RANGE
?

Red Sea Hydra 26™ HD LED
4
Day / Night Programing
Before setting up your 24 hour program refer to the general programming
guidelines given in the MAX®instruction manual.
1. Set the Date, Time and Time zone.
2. Select the “Easy Setup” option to program the basic daily cycle. Use
the right slider button to set the desired maximum “Day” intensity
for each color channel. Set the “Nite” intensity for each color channel
to by sliding the left slider button to the left.
Set the maximum intensity suitable for your tank and then use the
acclimation option as described below to gradually acclimate your
corals to the LED lighting.
3. Set the “Lunar” option to “OFF”. If you wish to have moonlight at
night manually add the desired light to the program graph.
Manual Auto
8:00PM4:00PM12:00PM8:00AM
EASY SETUP
Cancel
Min & Max Ramp
Sunrise & Sunset
Nite: 0 Day. 140royal
Nite: 0 Day. 116blue
Nite: 0 Day. 0green
Nite: 0 Day. 0deep_red
Nite: 0 Day. 60cool_white
uv Nite: 0 Day. 118
Nite: 0 Day. 118violet
Save
Sunrise
8:00am
12:00am 12:00am
4:00pm 4:00
Sunset
Lunar Start Lunar End
Enable Lunar
Ramp Time
OFF

5
ENG
To manually add program points to the graph, drag the green bar to the desired time, Right-click to open the color intensity set window for that point,
then click on save or close window to exit.
Manually adding the moonlight setting to the 24 hour program
Moonlight – Maximum Intensity Moonlight – Begin ramp-down Begin Night (dark period)
RGB Kelvin
Delete
1% 0% 0% 0% 0%0% 1%
Save
8:30 PM
Delete Save
11:00 PM
RGB Kelvin
1% 0% 0% 0% 0%0% 1%
Easy Setup
Delete Save
11:30 PM
RGB Kelvin
0% 0% 0% 0% 0%0% 0%
Easy Setup

Red Sea Hydra 26™ HD LED
6
Acclimation
To set and activate the acclimation option, click on “EDIT” and then click
on the ON/OFF button.
Set the Start and End date for the acclimation period.
Move the cursor to the right hand slider to set the starting percentage
reduction equally for all color channels. i.e. if you want to start at 60%
intensity set the “Starting Percentage Reduction“ to 40%.
Click on “Save” to exit the window. The dates of the active acclimation
period will now be shown on the control screen. The acclimation function
will automatically switch off at the end of the set acclimation period.
The acclimation settings can be adjusted or switched off at any time.
Button Function
To reset the LED Module’s network setting, press and hold the button until
the LED indicator blinks green.
To reset the LED Module to its factory default settings, press and hold the
button until the LED indicator blinks red
Note: When the LED Module is in an un-configured state, all of the LEDs
will be permanently on. Pressing the button will increase all color channel
intensities by 20%.
?
Disabled
Acclimation
EDIT
?
Start: Jan 1, ‘15
End: Feb 26, ‘16
Acclimation
EDIT
Save
Start
Jan 1, ‘15
End
Feb 26, ‘15
40 40 40 40 40 40 40 40
ALL
Starting Percent Reduction
Acclimation ON
OFF ONEDIT

7
ENG
Maintenance
• Do not lay objects on top of the LED Module or power supply
• Do not lay the LED Module on objects while powered on
• Inspect the LED Module regularly
• Unplug the LED Module from the outlet when cleaning to prevent
any shock hazards
• Wipe the LED Module with a damp cloth once a week.
DO NOT use Ammonia based cleaners. Avoid the power plug area.
A can of compressed air may be used to blow dust out of the heat
sink fins. Wiping and blowing unwanted buildup will help prevent
salt creep and hard water spots from accumulating.
• Do not allow any liquids to pool on top of or inside the LED Module.
For instruction videos, FAQs and support, visit:
support.aquaillumination.com
Scan this QR to register & activate your Red Sea
Hydra 26™HD LED
LED Indicator States
Pulsing Blinking Solid
●Blue +●Green
booting
● Green
Parent attempting
to connect to
home network
●Blue
Child attempting to
connect to home
network
● Green
Parent with schedule
hosting access point.
Not connected to home
network
●Blue
Child fails to connect to
network. Hosting an access
point
●Red
Contact Tech support
●Red + ● Green + ● Blue
Firmware update
●Blue + ●Green
Un-configured state
●Blue +●Green
Configuring children
● Green
Potential parent
successfully
connected to a
home network
●Blue
Child successfully
connected to home
network
●Red
Thermal cooldown


9
ENG
DE
Red Sea Hydra 26™HDLED

Red Sea Hydra 26™ HD LED
10
Anschluss und Konfiguration der WiFi-
Steuerung
Sicherheitswarnungen
Der unsachgemäße Gebrauch des Geräts kann zu Verletzungen oder zum
Tode führen. Lesen und befolgen Sie alle Sicherheitsrichtlinien der Red
MSea MAX®Bedienungsanleitung vor der Montage und/oder Verwendung
dieses LED-Modules.
Versuchen Sie nicht Reparaturen an den Modulen durchzuführen. Durch
jede nicht autorisierte Reparatur erlischt die Garantie.
Wichtiger Hinweis:
Installieren Sie LED Module über dem Aquarium anhand der Beschreibung
in der Max Installations- und Bedienungsanleitung.
Notieren Sie sich die Seriennummer (RSMAX26-D89760XXXXXX) eines
jeden einzelnen LED Modules, welche Sie auf dem Aufkleber oberhalb des
Stromsteckers finden.
Wenn angebracht, schalten Sie den Lichtschalter am Power Center ein und
folgen Sie den Anweisungen, um die LED-Module mit Ihrem Smartphone,
Tablet oder WiFi-fähigen Computer zu verbinden. Beim erstmaligen
Einschalten werden alle LEDs eingeschaltet und befinden sich in einem
nicht-konfigurierten Modus.
Bei MAX®Systemen mit mehreren LED Modulen bezeichnen Sie das
erste LED Modul, welches Sie über WiFi anschließen als “Parent” und die
folgenden als “Children”.
Erste Verbindung:
Smartphones und Tablets:
1. Laden Sie sich wahlweise die iOS oder Android App “myAI” unter der
folgenden Adresse herunter:
http://www.redseafish.com/de/my_ai/
2. Gehen Sie zu den WiFi Einstellungen an Ihrem Gerät
und wählen Sie eines der angezeigten Netzwerke,
die mit der beschrifteten Seriennummer am LED
Modul übereinstimmt, aus. Es kann einen Moment
dauern bis diese erscheinen.
3. Öffnen Sie nun die “myAI”-App und folgen Sie den
Anweisungen auf dem Bildschirm, um die LED-Module mit
Ihrem Netzwerk zu verbinden.
WiFi-fähige Computer
1. Registrieren Sie Ihr Produkt unter:
www.redseafish.com/de/max-register
2. Stellen Sie eine Verbindung über Ihren Computer zu einem der
angezeigten Netzwerke, die mit der beschrifteten Seriennummer am
LED Modul übereinstimmen, her. Dies kann einen Moment lang dauern.
3. Gehen Sie über Ihren Browser zu der Seite:
http://RSMAX26-D89760XXXXXX.local (XXXXXX entspricht der
Seriennummer) und folgen Sie den Anweisungen auf dem Bildschirm,
um die LED-Module mit Ihrem Netzwerk zu verbinden.

11
ENG
DE
Controller Einstellungen
Der Controller hält automatische und manuelle Modi für die Beleuchtung
bereit.
Wenn der “Auto” Modus ausgewählt wurde, dann variieren am LED
Modul das Spektrum und die Intensität im 24 Stundenzyklus anhand der
Programmierung.
Wenn der “Manual” Modus augewählt wurde, dann arbeitet das LED
Modul mit einem festen Spektrum und Intensität, so wie es am manuellen
Setup-Bildschirm eingestellt wurde. Das Ändern der Einstellung von “Auto”
zu “Manual” bewirkt, dass die aktuellen Farbeinstellungen übernommen
werden. Sämtliche Änderungen, die im “Manual” Modus getätigt wurden,
werden bei Umstellung zum “Auto” Modus gelöscht.
Spektrum und Intensität
Wählen Sie die "Manual" Steuerungsoption und sehen Sie sich die
Auswirkungen der Anhebung / Absenkung der Intensität der einzelnen
Farbkanäle und die Wirkung verschiedener Kombinationen an. (Hinweis:
Bei Systemen mit mehreren LED Modulen sollten die “child” Einheiten
zusammen mit der “parent” Einheit geändert werden) Die HD Funktion
ordnet automatisch “ungenutze” Ressourcen aus einem Farbkanal auf
andere Kanäle bis zur maximalen Kraft um. Die Umverteilung ist abhängig
von von dem Stand der relativen Intensität der Kanäle und somit beeinflusst
die Reihenfolge in denen Farbintensitätsänderungen erfolgen das
Endergebnis.
Empfohlene REEF-SPEC®
Einstellung für die maximale
Intensität im Riffaquarium.
118% 118% 140% 116% 0% 0% 60%
Power Usage UV Violet Royal Blue Green Cool WhiteDeep Red
AVAILABLE
Manual Auto
Spectral Output
88W
NORMAL
RANGE
?

Red Sea Hydra 26™ HD LED
12
Tag / Nacht Programmierung
Bevor Sie Ihr 24-Stunden-Programm einrichten, halten Sie sich an die
allgemeinen Bedienungshinweise aus der Max Bedienungsanleitung.
1. Stellen Sie Datum, Uhrzeit und Zeitzone ein.
2. Wählen Sie die Option “Easy Setup” zur Schnellkonfiguration, um
den grundlegenden täglichen Zyklus zu programmieren. Verwenden
Sie den rechten Schieberegler, um die gewünschte maximale
"Day" Tagesintensität für jeden Farbkanal festzulegen. Stellen
Sie die "Nite" Nachtintensität für jeden Farbkanal auf Null, indem
Sie den linken Schieberegler nach links ziehen.Stellen Sie die
maximale Intensität für das Aquarium ein und nutzen Sie dann die
Option Akklimatisierung, wie unten beschrieben, um Ihre Korallen
allmählich an die LED-Beleuchtung zu gewöhnen.
3. Setzen Sie die Option "Lunar" auf "OFF". Wenn über Nacht jedoch den
Mondschein gewünscht wird, dann können Sie das gewünschte Licht
manuell zur Programmanzeige hinzuzufügen.
Manual Auto
8:00PM4:00PM12:00PM8:00AM
EASY SETUP
Cancel
Min & Max Ramp
Sunrise & Sunset
Nite: 0 Day. 140royal
Nite: 0 Day. 116blue
Nite: 0 Day. 0green
Nite: 0 Day. 0deep_red
Nite: 0 Day. 60cool_white
uv Nite: 0 Day. 118
Nite: 0 Day. 118violet
Save
Sunrise
8:00am
12:00am 12:00am
4:00pm 4:00
Sunset
Lunar Start Lunar End
Enable Lunar
Ramp Time
OFF

13
ENG
DE
Um Programmpunkte manuell zu der Grafik hinzuzufügen, ziehen Sie den grünen Balken auf die gewünschte Zeit, ein Mausklick mit der rechten
Maustaste öffnet das Einstellungsfenster für die Farbintensität, klicken Sie auf Speichern oder Fenster schließen, um die Konfiguration zu beenden.
Manuelles Hinzufügen der Mondeinstellung in das 24-Stunden-Programm
Mondlicht – Maximale Intensität Mondlicht – Mondphase Nachtanfang (Dunkelphase)
RGB Kelvin
Delete
1% 0% 0% 0% 0%0% 1%
Save
8:30 PM
Delete Save
11:00 PM
RGB Kelvin
1% 0% 0% 0% 0%0% 1%
Easy Setup
Delete Save
11:30 PM
RGB Kelvin
0% 0% 0% 0% 0%0% 0%
Easy Setup

Red Sea Hydra 26™ HD LED
14
Akklimatisierung
Zum setzen und aktivieren der Akklimatisierungsoption, klicken Sie auf
“EDIT” und anschließend auf den EIN-/AUS-Schalter.
Geben Sie das Anfangs- und Enddatum für die Akklimatisierungsphase an.
Bewegen Sie den Cursor zu dem rechten Schieberegler, um den
prozentual reduzierten Startwert für alle Farbkanäle festzulegen. Beispiel:
wenn Sie mit 60% Intensität starten möchten, dann müssen Sie die
Einstellung “Starting Percentage Reduction" auf 40% setzen.
Drücken Sie auf “Save”, um das Einstellungsfenster wieder zu verlassen.
Die Daten zu der aktiven Akklimatisierungsphase werden Ihnen nun am
Übersichtsbildschirm angezeigt. Die Akklimatisierungsfunktion schaltet
sich am Ende der Phase automatisch ab.
Die Akklimatisierungseinstellungen können jederzeit geändert oder
ausgeschaltet werden.
Tastenfunktion
Um die Netzwerkeinstellungen vom LED Modul zurückzusetzen, halten Sie
den Knopf gedrückt bis der LED Indikator grün blinkt.
Um das LED Modul auf die Werkseinstellung zurückzusetzen, halten Sie
den Knopf gedrückt bis der LED Indikator rot blinkt.
Hinweis: Sofern sich das LED Modul in einem nicht konfiguriertem Zustand
befindet, leuchten alle LEDs permanent. Jeder Tastendruck erhöht die
Farbintensität aller Farbkanäle um 20%.
?
Disabled
Acclimation
EDIT
?
Start: Jan 1, ‘15
End: Feb 26, ‘16
Acclimation
EDIT
Save
Start
Jan 1, ‘15
End
Feb 26, ‘15
40 40 40 40 40 40 40 40
ALL
Starting Percent Reduction
Acclimation ON
OFF ONEDIT

15
ENG
DE
Wartung
• Stellen Sie keine Gegenstände auf dem LED Modul oder der
Stromversorgung ab.
• Stellen Sie das LED Modul niemals auf andere Objekten ab, solange
es eingeschaltet ist.
• Überprüfen Sie das LED Modul regelmäßig.
• Ziehen Sie das LED-Modul bei Reinigungsarbeiten aus der Steckdose,
um Stromschläge zu vermeiden.
• Wischen Sie das LED Modul einmal pro Woche mit einem feuchten
Tuch ab. Verwenden Sie KEINE Ammonikreiniger. Umgehen Sie den
Netzsteckerbereich. Verwenden Sie eine Dose Druckluft, um den
Staub aus den Kühlrippen zu blasen. Das Reinigen unerwünschter
Ablagerungen verhindert die Entstehung von Salzkrusten und
Wasserflecken.
• Vermeiden Sie, dass Flüssigkeiten an oder in das LED Modul
gelangen.
Für Videoanleitungen, FAQs und Support besuchen Sie:
support.aquaillumination.com
Scanne diesen QR-Code, um deine Red Sea Hydra
26™HD LED zu registrieren & zu aktivieren.
LED Anzeigeindikatoren
pulsierend blinkend fest
●Blau +●Grün
laden
● Grün
"Parent" versucht
mit dem Heimnetz
zu verbinden
●Blau
"Child" versucht
mit dem Heimnetz
zu verbinden
● Grün
"Parent" sucht einen
Netwerkzugriff. Nicht mit
dem Heimnetz verbunden
●Blau
"Child" hat keine
Verbindung zum Netzwerk
●Rot
Suchen Sie technische
Unterstützung auf
●Rot + ● Grün +● Blau
Firmware Update
●Blau + ●Grün
unkonfigurierter Zustand
●Blau +●Grün
Konfigurierung
"children"
● Grün
Möglicher "Parent"
erfolgreich mit dem
Heimnetz verbunden
●Blau
"Child" erfolgreich
mit dem Heimnetz
verbunden
●Rot
thermische
Abkühlphase

Table of contents
Languages:
Other Red Sea Other manuals

Red Sea
Red Sea MAX E Series User manual

Red Sea
Red Sea MAX S-Series User manual

Red Sea
Red Sea MAX NANO User manual

Red Sea
Red Sea ReefLED 50 User manual

Red Sea
Red Sea Complete Plug & Play MAX E-170 User manual

Red Sea
Red Sea REEFER DLX 525 User manual

Red Sea
Red Sea Complete Plug & Play MAX E-170 Quick start guide

Red Sea
Red Sea REEFER Series User manual

Red Sea
Red Sea REEFER DLX 425 User manual

Red Sea
Red Sea MAX User manual