manuals.online logo
Brands
  1. Home
  2. •
  3. Brands
  4. •
  5. Redback
  6. •
  7. Amplifier
  8. •
  9. Redback A 4937 User manual

Redback A 4937 User manual

www.redbackaudio.com.au Redback® Proudly Made In Australia 1
Redback® A 4937 Balanced Mic/Line Preamp Wallplate
OVERVIEW:
The Redback® A 4937 accepts either a microphone level, line level, music or bluetooth input and converts the signal
to a balanced high level output. The high level output signal is carried via Cat5e/6 cable, (suitable for distribution up to
300m without interference) back to Redback® compatible devices such as the Redback® A 4930 Hub, Redback® A 4942,
Redback® A 4946 or Redback® A 4493 Source selector wall plate.
Microphone inputs are balanced XLR inputs, while the Line input is via 2 x RCA sockets, or 3.5mm audio jack for portable
devices. A bluetooth receiver offers the ability to interface Bluetooth audio devices.
Each input has it’s own dedicated volume while a master volume sets the overall output volume.
VOX muting is available which mutes the AUX, Music and Bluetooth inputs when any microphone input is active. The VOX
sensitivity is adjustable via the front of the wallplate.
Operating Manual
A 4937 3 Mic, Line + Bluetooth Input Preamp Wallplate
User manual revision number: 1.0 106/10/2023
SPECIFICATIONS:
Frequeny Response
Mic input:.....................................................140Hz - 20kHz
Aux input:....................................................140Hz - 20kHz
Music input:..................................................140Hz - 20kHz
Input Sensitivity
Mic input: ......................................... 1mV -13mV balanced
Aux input: ................................... 40mV - 800mV balanced
Music input: ................................ 40mV - 800mV balanced
Connectors
Mic Input: ........................................................... 3 pin XLR
Aux Input: ............................................................. 2 x RCA
Music Input: ...................................... 3.5mm Stereo Socket
Output: ............................................................ RJ45 8P8C
Data transmission: ...... Cat5e/6 cabling (max 300 metres)
Weight: .............................................................. ≈0.19kg
Dimensions: ........... ≈145mm(L) x 115mm(W) x 50mm(H)
Power: ................................... Powered over Cat5e/6 cable
www.redbackaudio.com.auRedback® Proudly Made In Australia2
Redback® A 4937 Balanced Mic/Line Preamp Wallplate
CONNECTING THE A 4937 WALL PLATE TO THE A 4930 MIC/LINE HUB
Figure 1 shows the connection diagram when connecting the A 4931 or A 4937 wall plates to the Redback® A 4930 MIc/
Line Hub. The A 4931 and A 4937 wall plates can be connected to any of the four wall plate RJ45 connectors as shown.
The A 4937 has a set of DIP switches on the rear which determine how the audio is output from the wallplate.
When the A 4937 is used with the A 4930 there are only two possible audio output options.
1) The audio from the A 4937 wallplate microphone inputs, line, music or Bluetooth input are mixed together and output
to the A 4930 Hub.
DIP Switches set as follows: 1-OFF ,2-OFF, 3-OFF, 4 - OFF.
2) The A 4937 wallplate microphone inputs have VOX priority over the AUX, Music and Bluetooth inputs. I.e. the audio from
the AUX, Music and Bluetooth inputs will be over ridden by the MIc inputs when a microphone is used.
DIP Switches set as follows: 1-OFF ,2-ON, 3-OFF, 4 - OFF.
The VOX sensitivity of the microphones is adjusted by the VOX sensitivity pot on the front of the A 4937.
Fig 1.
1 2 3 41 2 3 4
12 3 4
1 2 3 4
ON
Manufactured in Australia
24VDC
Input
+-
www.redbackaudio.com.au
Output 1
Mic -
Aux Out
24VDC
Input
+_
Wall Plates
3 4
12
Mic +
Gnd
1 2 3 4
SW 1
Output 2
Mic -
Aux Out
Mic +
Gnd
Mixed
Mic -
Aux Out
Mic +
Gnd
Output 4
Mic -
Aux Out
Mic +
Gnd
Output 3
Mic -
Aux Out
Mic +
Gnd
Output
By Altronic Distributors Pty. Ltd.
SW 1 DIP Switch Settings
SW ON OFF
1
2
Output 1 Mixed
3
4
Output 1 Mic Lvl Output 1 line Lvl
Output 2 Mixed
Output 2 Mic Lvl Output 2 line Lvl
SW 2 DIP Switch Settings
SW ON OFF
1
2
Output 3 Mixed
3
4
Output 3 Mic Lvl Output 3 line Lvl
Output 4 Mixed
Output 4 Mic Lvl Output 4 line Lvl
SW 3 DIP Switch Settings
SW ON OFF
1
2
Not Used
3
4
Not Used
Not Used
M/Output Mic Lvl M/Output line Lvl
1 2 3 4
SW 2
1 2 3 4
SW 3
1 2 3 4
ON
Rear of A 4931 WallPlate
(Maximum 300m)
(Maximum 300m)
(Maximum 300m)
(Maximum 300m)
Rear of A 4937 WallPlate
A 4930
DIP Switches
1 2 3 4
ON
1 2 3 4
ON
Rear of A 4931 WallPlate
www.redbackaudio.com.au Redback® Proudly Made In Australia 3
Redback® A 4937 Balanced Mic/Line Preamp Wallplate
CONNECTING THE A 4937 WALLPLATE TO THE A 4493 SOURCE SELECTOR WALL PLATE
Figure 2 shows the connection diagram when connecting the A 4937 wall plates to the Redback® A 4495 Zone Selection
plates. The A 4495 wall plates are typically used with the Redback® A 4480B 8 x 8 Audio Switcher.
The A 4937 has a set of DIP switches on the rear which determine how the VOX (voice operated switch) priority functions.
Dip switch 3 when set to ON, activates the VOX function. If this switch is in the OFF position the audio from the A 4937
will only override the A 4495 Input Source Wall Plate if the “Local Input” button has been selected on the A 4495 (see
relevant instruction manual for details). In this mode the Mic and AUX, Music and Bluetooth inputs from the A 4937 will
be mixed - there is no priority.
If DIP switch 3 is set to ON then the following VOX priorites result from DIP switches 1 and 2 without the need for the
“Local Input” button to be selected on the A 4495 Input Source Wall Plate.
DIP Switch 1 set to ON: The Microphones and the AUX, Music and Bluetooth input will mix together and the audio from
the A 4937 will then override the A 4495 zone input audio source.
DIP Switch 2 set to ON: The Microphones only, will activate the VOX circuit and mute the AUX, Music and Bluetooth input
if used. The audio from the A 4937 will then override the A 4495 zone input audio source.
DIP Switch 4 set to OFF
Fig 2.
BLUETOOTH FUNTIONALITY
When the A 4937 is rst powered up, or after the pairing has been reset by holding down the “Press to Pair” button, the
Bluetooth connection is available (or connectable). The BT Status LED will ash blue in this mode.
Press the button “Press to pair” to pair the A 4937 to your phone/device. The BT status LED will ash red/blue in this mode.
The connection labelled “A4937_REDBACK_BT” should appear in your pairing list. Pair as per your devices standard proce-
dure. The BT status LED will be a solid blue when connected.
To clear the pairing list or to kick a user off the bluetooth connection, hold down the “Press to Pair” button until the blue
LED ashes quickly. The Bluetooth connection is now available.
ZONE PLATES OR PRESET PLATES
SW1 2
CAT5 cable
Max 300M
A 4495 Zone Selector
Wallplates.
CAT5 cable
Max 100M
Output levels
Voice Chime Alert
Over & Evac
24VDC In
(4A M205)
Lift/Chassis ZONE PLATES OR PRESET PLATE
Keyboard
INPUTS
SW2 SW1
8 7 6 5 4 3 2 1
SW5 ON OFF
1 Phantom Phantom
Power On Power O
2 Mic Level Line Level
Switches 3 & 4 Not Used
Vox
Level
Volume
Priority Input
L R
Vox
Level Trigger
To Paging Consoles/Preset Plate
3 4
1 2 3 4
ALERT - EVACUATION MODULE
1 2 3 4
L
R
SW3
EV
COM
CH1/
CAN
CH2
AL
21
3
1 - Shield
2 - Hot
3 - Cold
1 - Shield
2 - Hot
3 - Cold
21
3
SW3 Input 1 & 2 XLR
Phantom Power Settings
SW ON OFF
(1) Input 1 ON OFF
(2) Input 2 ON OFF
Triggers
OUTPUTS
8 7 6 5 43 2 1
EMERGENCY INPUT
DC Fuse
Earth Lift
+
-
24VDC In Power Fail
+_
Manufactured in Australia By
Altronic Distributors Pty. Ltd.
www.redbackaudio.com.au
BCD & DIP SWITCH SETTINGS
DIP SWITCH CHIME CONTACT
4 5 6 7 CH2 CH1/CANCEL
OFF OFF OFF OFF Pre Announce DingDong
ON OFF OFF OFF PreAnnounce Repeating Bong
OFF ON OFF OFF Pre Announce Repeating Bing
OFF OFF ON OFF PreAnnounce CANCEL
OFF OFF OFF ON DingDong Pre Announce
ON ON ON ON Ding Dong Repeating Bong
OFF ON ON ON DingDong Repeating Bing
ON OFF ON ON DingDong CANCEL
ON ON OFF ON Repeating Bong PreAnnounce
ON ON ON OFF Repeating Bong Ding Dong
OFF OFF ON ON Repeating Bong RepeatingBing
OFF ON OFF ON Repeating Bong CANCEL
OFF ON ON OFF Repeating Bing Pre Announce
ON ON OFF OFF Repeating Bing Ding Dong
ON OFF ON OFF RepeatingBing Repeating Bong
ON OFF OFF ON Repeating Bing CANCEL
The Alert/Evacuation module has multiple chime options, a recordable
voice-over message and adjustable alert to evacuation tone switch-over times.
These options are selectable inside the unit, via the BCD rotary switch and
DIP switches located on the alert/evacuation module (refer to below settings).
ON OFF
Momentary Alert
& Evac operation
Latched Alert
& Evac operation
1
2
3
4
Voice-over
message ON
Voice-over
message OFF
Not Used NotUsed
Mic recording
enabled
Mic recording
disabled
DIP
SW
1 2 3 4
SW5
1 2
(Maximum 500mA per output)
8 7 6 5 4 3
1
SW4
(Not Used)
16GB
Maximum
Micro SD Card
2
1 2 3 41 2 3 4 1 2 3 4 1 2 3 4 1 2 3 4
Aux Input Sensitivity
DIP Switch Settings
SW1 ON OFF
(1) Input 1 0.3V 0.7V
(2) Input 2 0.3V 0.7V
(3) Input 3 0.3V 0.7V
(4) Input 4 0.3V 0.7V
SW2 ON OFF
(1) Input 5 0.3V 0.7V
(2) Input 6 0.3V 0.7V
(3) Input 7 0.3V 0.7V
(4) Input 8 0.3V 0.7V
2 1
3
21
3
2 1
3
2 1
3
21
3
21
3
21
3
21
3
21
3
21
3
21
3
A 4937 Local Mic/Line
Input wallplate.
A 4480B
www.redbackaudio.com.auRedback® Proudly Made In Australia4
Redback® A 4937 Balanced Mic/Line Preamp Wallplate
REDBACK is a registered trademark of Altronic Distributors Pty Ltd
You may be surprised to learn that Altronics is still manufacturing hundreds of product lines right here in Australia. We
have resisted the move offshore by offering our customers better quality products with innovations to save them time and
money.
Our Balcatta production facility manufactures/assembles:
Redback public address products
One-shot speaker & grill combinations
Zip-Rack 19 inch rack frame products
We strive to support local suppliers wherever possible in our supply chain, helping to support Australia’s manufacturing
industry.
Redback Audio Products
100% developed, designed & assembled in Australia.
Since 1976 we have been manufacturing Redback ampliers in Perth, Western Australia. With over 40 years experience
in the commercial audio industry, we offer consultants, installers and end users reliable products of high build quality with
local product support. We believe there is signicant added value for customers when purchasing an Australian made
Redback amplier or PA product.
Local support & feedback.
Our best product features come as a direct result of feedback from our customers, and when you call us, you speak to a
real person - no recorded messages, call centres or automated push button options.
It’s not only the assembly team at Altronics who are employed as a direct result of your purchase, but hundreds more at
local companies used in the supply chain.
Industry leading 10 year warranty.
There’s a reason we have the industry leading DECADE warranty. It’s because of a long tried and tested history of bullet-
proof reliability. We’ve heard PA contractors tell us they still see the original Redford amplier still in service in schools.
We offer this comprehensive parts & labour warranty on almost every Australian Made Redback public address product.
This offers both installers and end users peace of mind that they will receive prompt local servicing in the rare event of any
problems.
Published by Altronic Distributors
© 2023 Altronic Distributors
BLUETOOTH APP
A bluetooth connection APP will be available for Android devices.
The APP will allow custom labelling of the connection name and can apply a PIN to the connection. The default name for
the connection is A4937_REDBACK_BT.
To allow the APP to connect to the A 4937, and change the label name and/or PIN, follow these steps.
1) set DIP switch 4 to “ON”. The BT Status LED will ash RED (Note: It may take up to 3 seconds). Once a connection to
the APP has been established the LED will become solid RED.
2) Change the label and/or PIN using the APP.
3) set DIP switch 4 to “OFF”

Other Redback Amplifier manuals

Redback A 4230A User manual

Redback

Redback A 4230A User manual

Redback A 4377A User manual

Redback

Redback A 4377A User manual

Redback A 4230 User manual

Redback

Redback A 4230 User manual

Redback PHASE 5 A 4395A User manual

Redback

Redback PHASE 5 A 4395A User manual

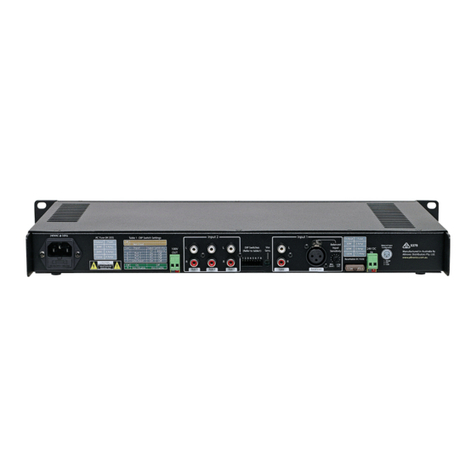
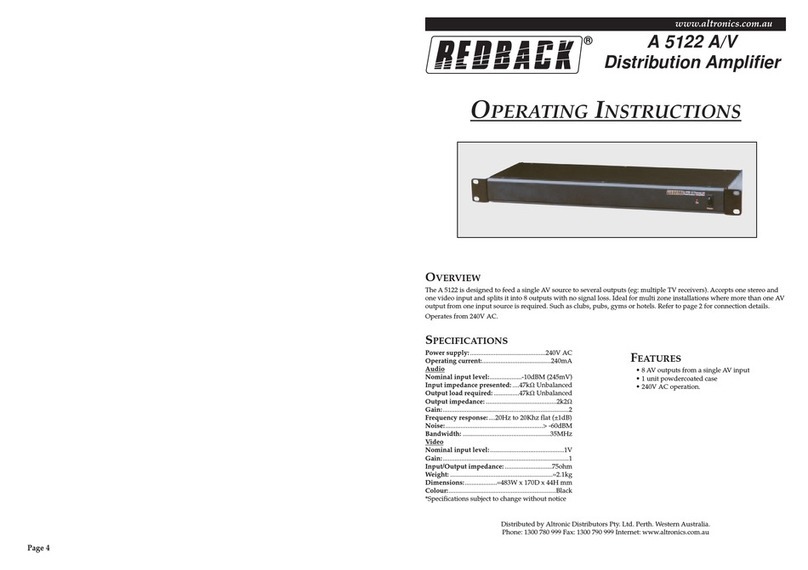
Redback A 5122 User manual

Redback

Redback A 5122 User manual

Redback A 4262B User manual

Redback

Redback A 4262B User manual

Redback A 4310 User manual

Redback

Redback A 4310 User manual

Redback A 4270 User manual

Redback

Redback A 4270 User manual

Redback A 4260A User manual

Redback

Redback A 4260A User manual

Redback A 4037 User manual

Redback

Redback A 4037 User manual

Redback A 2082 User manual

Redback

Redback A 2082 User manual

Redback PHASE 5 A 4264 User manual

Redback

Redback PHASE 5 A 4264 User manual

Redback A 4031B User manual

Redback

Redback A 4031B User manual

Redback A 4920 User manual

Redback

Redback A 4920 User manual

Redback A 4235 User manual

Redback

Redback A 4235 User manual

Redback A 4024 User manual

Redback

Redback A 4024 User manual

Redback A 4370A User manual

Redback

Redback A 4370A User manual

Redback A 4372 User manual

Redback

Redback A 4372 User manual

Redback A 4031C User manual

Redback

Redback A 4031C User manual

Redback A4260B User manual

Redback

Redback A4260B User manual

Redback A 4314 User manual

Redback

Redback A 4314 User manual

Redback A 4582 User manual

Redback

Redback A 4582 User manual

Redback A 4020A User manual

Redback

Redback A 4020A User manual

Redback Phase 5 A 4390A User manual

Redback

Redback Phase 5 A 4390A User manual

Popular Amplifier manuals by other brands

Deaf Bonce Apocalypse Sport owner's manual

Deaf Bonce

Deaf Bonce Apocalypse Sport owner's manual

Orion XTREME 800.4 2 owner's manual

Orion

Orion XTREME 800.4 2 owner's manual

Kenwood KAC-921 instruction manual

Kenwood

Kenwood KAC-921 instruction manual

Crown Power Base-2 Schematic diagram

Crown

Crown Power Base-2 Schematic diagram

Demeter Amplification HXM-1 HX series user guide

Demeter Amplification

Demeter Amplification HXM-1 HX series user guide

RAM BUX 2.8 Operation manual

RAM

RAM BUX 2.8 Operation manual

Bellari HA540 MK2 Connection guide

Bellari

Bellari HA540 MK2 Connection guide

Toa A-2030 CE-AU operating instructions

Toa

Toa A-2030 CE-AU operating instructions

Pallas WB-215 User instructions

Pallas

Pallas WB-215 User instructions

StetSom R400.4 user manual

StetSom

StetSom R400.4 user manual

Sharp SM-207H Operation manual

Sharp

Sharp SM-207H Operation manual

AUSTRALIAN MONITOR K SERIES - brochure

AUSTRALIAN MONITOR

AUSTRALIAN MONITOR K SERIES - brochure

MCL MT4000 TWTA installation guide

MCL

MCL MT4000 TWTA installation guide

Denon PMA-1600NE owner's manual

Denon

Denon PMA-1600NE owner's manual

Motion Sound PRO-3X manual

Motion Sound

Motion Sound PRO-3X manual

Crate V5 owner's manual

Crate

Crate V5 owner's manual

Shanling UA2 quick start guide

Shanling

Shanling UA2 quick start guide

Eden Never Compromise WT405 Operation manual

Eden

Eden Never Compromise WT405 Operation manual

manuals.online logo
manuals.online logoBrands
  • About & Mission
  • Contact us
  • Privacy Policy
  • Terms and Conditions

Copyright 2025 Manuals.Online. All Rights Reserved.