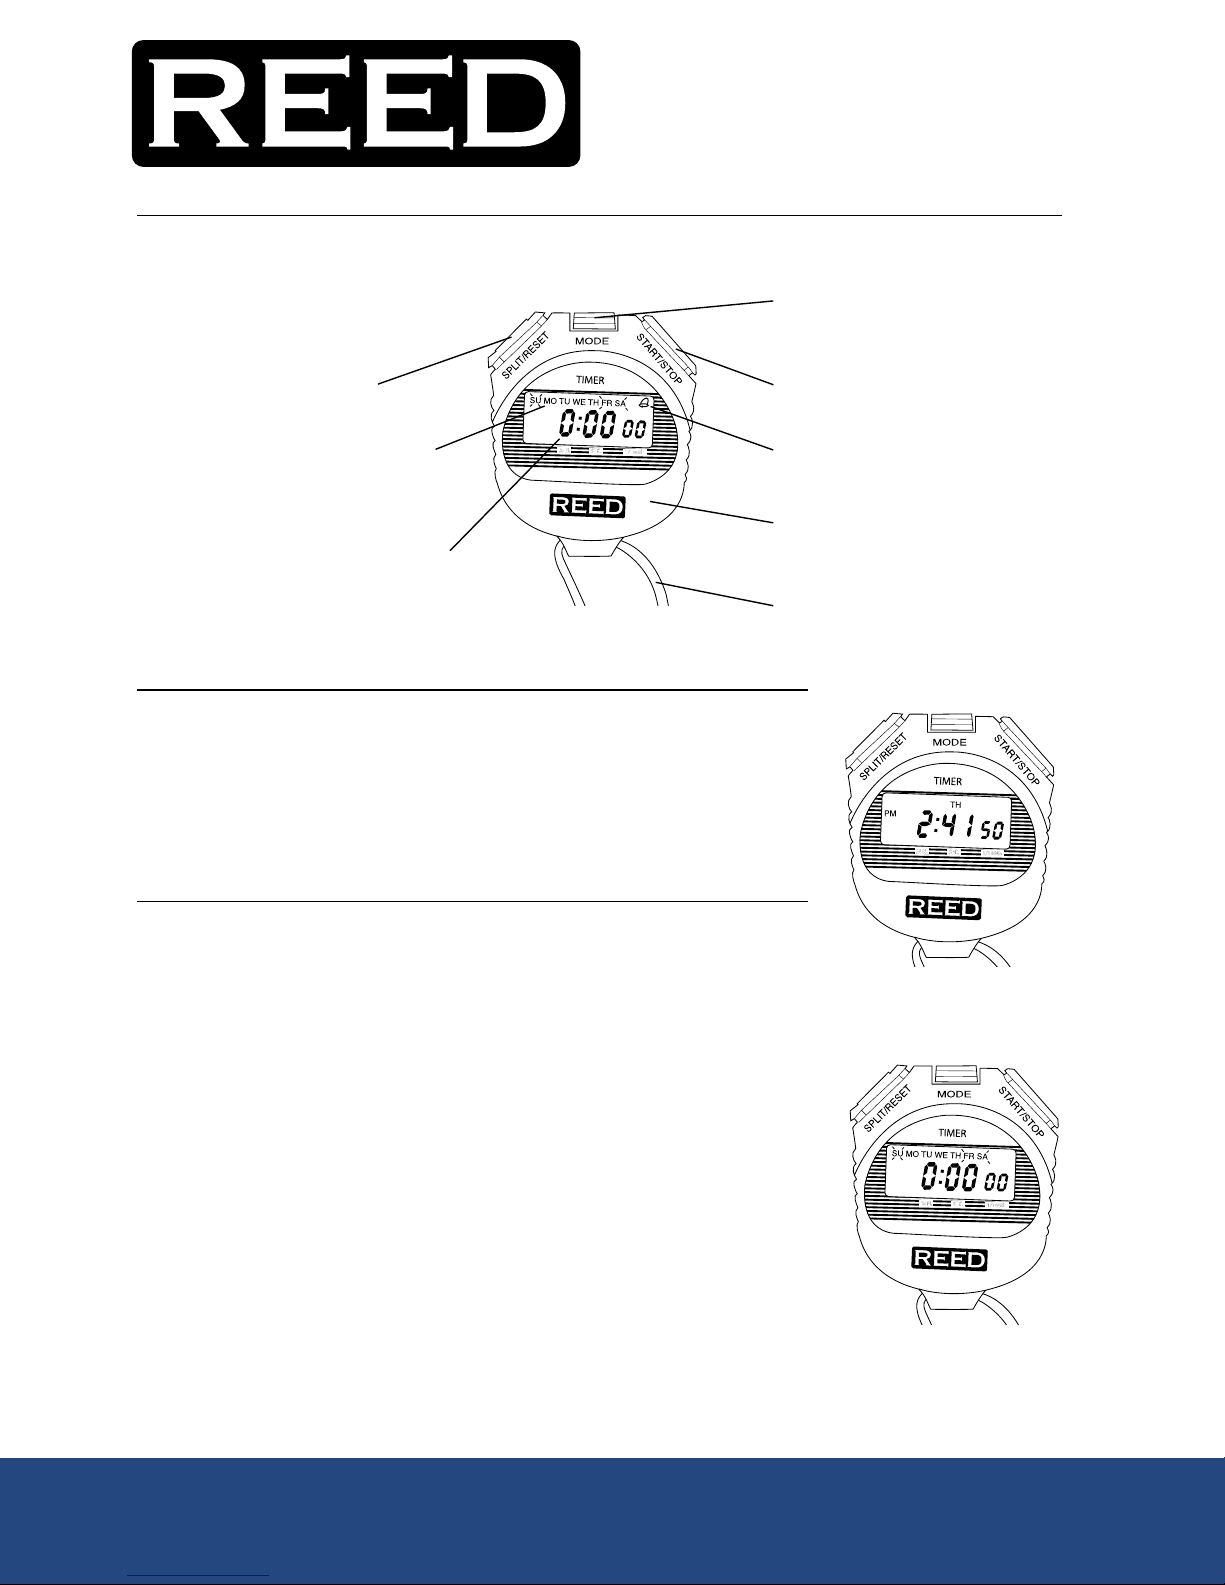
Alarm on/off
To turn the alarm on, press the MODE button until the display returns to the Normal Time Display mode. Once the
Normal Time Display appears, press and hold the SPLIT/RESET and START/STOP buttons simultaneously. The
icon will appear which means the alarm is turned on.
To turn the alarm off, follow the same procedure as above until the icon disappears.
Alarm Setting:
1. Press MODE button until MO and the hour digit(s) start flashing on the display.
2. Press START/STOP button to change the hour digit(s).
3. Press SPLIT/RESET button to confirm the hour selected. Then the minute digits will flash.
4. Press START/STOP button to change the minute digits.
5. Press MODE button to go back to the Normal Time Display.
SNOOZE FUNCTION
Snooze Function ON:
When the alarm is activated, press the SPLIT/RESET button to turn the alarm OFF.
After 5 minutes, the alarm will activate again.
Snooze Function OFF:
To deactivate snooze function, press the START/STOP button when the alarm goes off.
This turns the alarm and snooze functions OFF.
The alarm and snooze functions will turn OFF after one minute if no button is pressed.
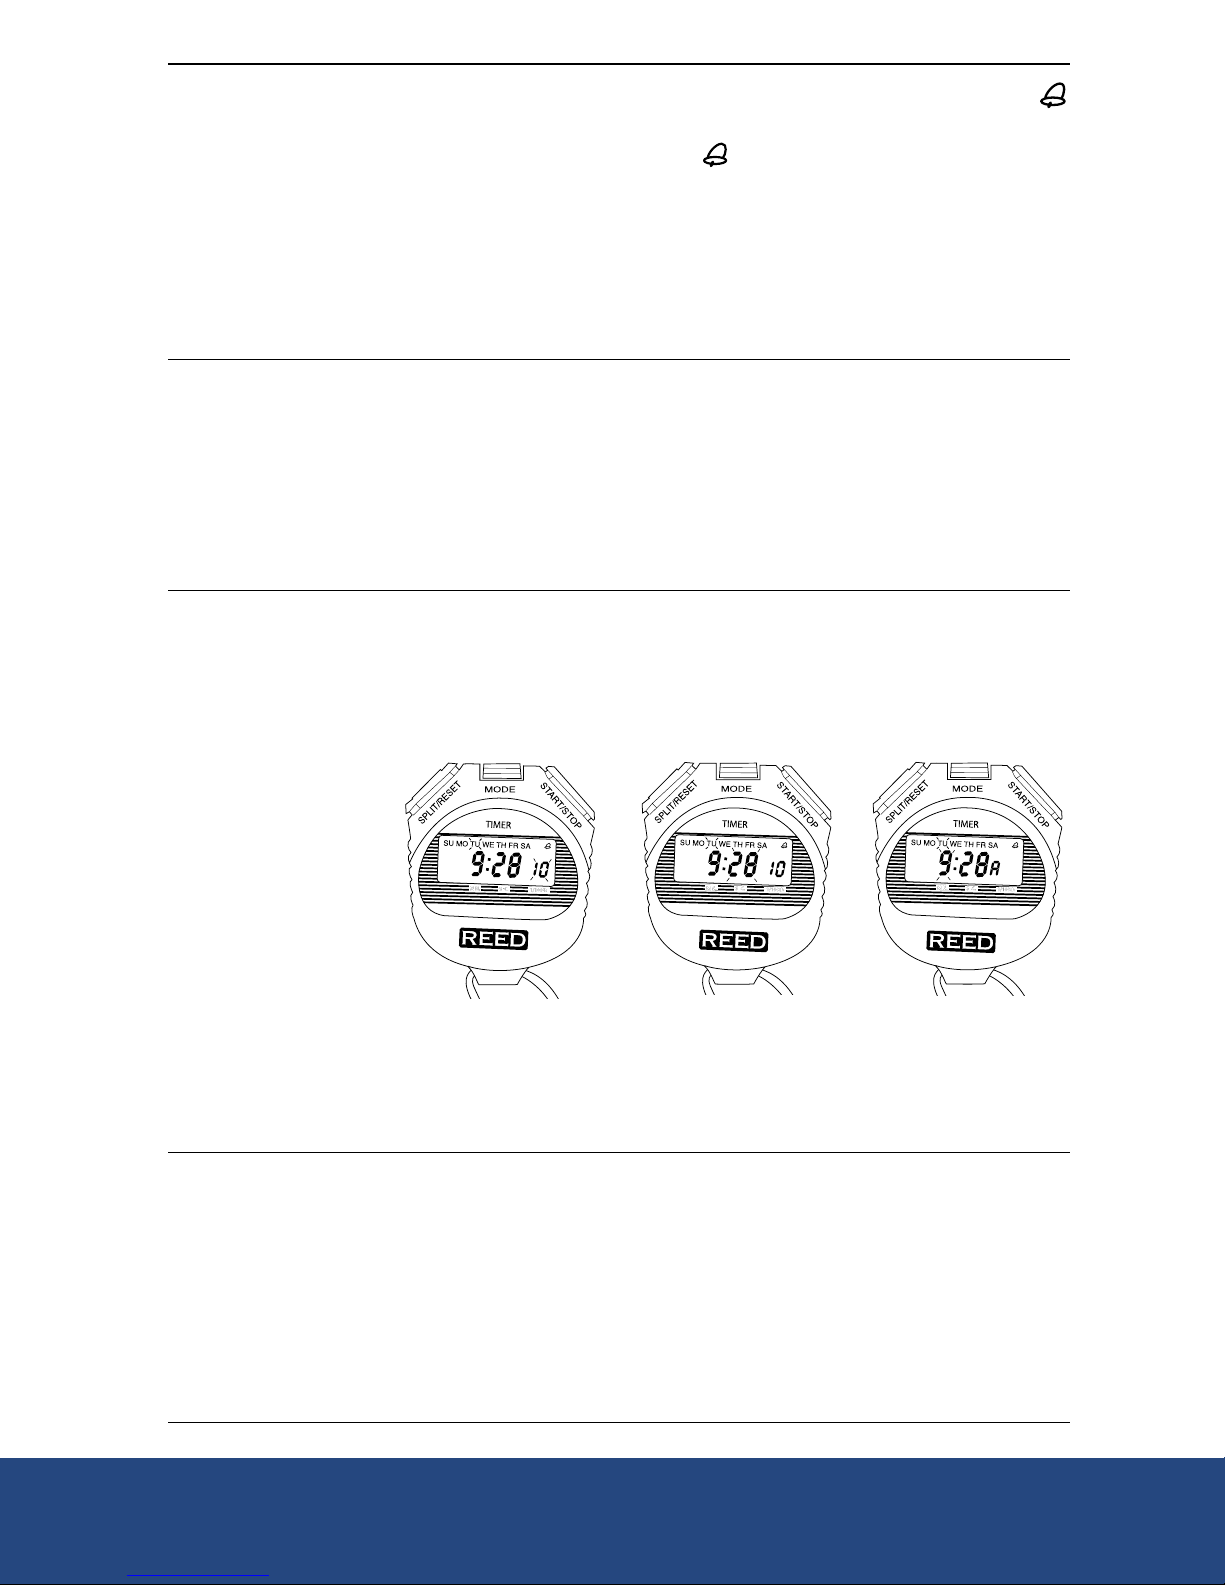
Setting normal time display
1. Press the MODE button until you see TU and the second digits flashing (Figure 3).
2. Press the START/STOP button to set the second digits back to 00. To select the minute digit(s), press the SPLIT/
RESET button once, then press the START/STOP button to set the desired minutes.
3. Press and hold the START/STOP button to scroll through the minutes (Figure 4).
4. Press the SPLIT/RESET button to confirm the selected minutes and change the hour digit(s). You will see the
hour digit(s) flashing and one of the following letters on the right side of the LCD (where the seconds digits used
to be) (Figure 5):
• A – 12 hour clock, AM time
• P – 12 hour clock, PM time
• H – 24 hour clock
Changing the HOUR digit(s):
1. Press the START/STOP button or press and hold the START/STOP button to scroll to the desired hour digit.
2. For 12 Hour format, press the START/STOP button and set desired hours in AM (A) or PM (P).
3. For 24 Hour format, press the START/STOP button until 12 P has passed, and an “H” appears on the right side of
the LCD. Continue to press the START/STOP button and change hour figure.
Setting the date and day of the week
To change the day figure:
After setting the hour, press the SPLIT/RESET button again. The day will flash; change the day digit(s) by pressing
the START/STOP button.
To change the month figure:
Press the SPLIT/RESET button again. The month figure will flash; change the month digit(s) by pressing the START/
STOP button.
To change the day of the week:
Press the SPLIT/RESET button again. The day of week figure will flash; change the letter configuration by pressing
the START/STOP button. (Starting with “SU” – Sunday, at the very top left of the LCD).
To confirm all time and date settings, press the mode button
NOTE: To change any of the above, press the SPLIT/RESET button and follow all of the above procedures.
To view the date
Go back to the Normal Time mode display by pressing the MODE button. Press the START/STOP button to view the date.
Figure 3 Figure 4 Figure 5
REED Instruments