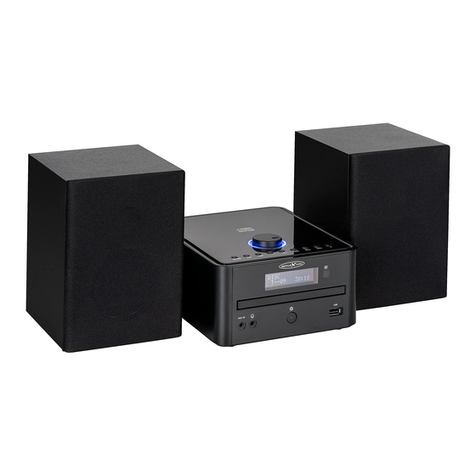
Reflexion HIF2080 User manual

EN
User Manual
Internet/DAB/UKW/CD/Bluetooth & Phono.
COMBO
HIF2080

EN
2
Inhalt
WHATS IN THE BOX................................................................................................3
SAFETY INSTRUCTIONS........................................................................................3
CONTROL BUTTONS AND CONNETCTIONS........................................................6
REMOTE CONTROL ................................................................................................8
FIRST INSTALLATION .............................................................................................9
GENERAL CONTROLS..........................................................................................11
FIRST SETUP.........................................................................................................13
MANUAL CONTROL...............................................................................................18
THE MAIN MENU ...................................................................................................19
INTERNET RADIO MODE......................................................................................20
DAB/DAB+ MODE...................................................................................................23
FM MODE ...............................................................................................................25
CD MODE ...............................................................................................................27
AUX MODE.............................................................................................................28
BLUETOOTH MODE ..............................................................................................28
USB MODE.............................................................................................................30
VINYL MODE..........................................................................................................31
USB RECORDING (DIGITIZING)...........................................................................33
STREAM MUSIC.....................................................................................................34
WEATHER INFORMATION IN THE STANDBY DISPLAY.....................................37
CONFIGURATIONS................................................................................................38
APP.........................................................................................................................56
STREAM MUSIC.....................................................................................................57
TECHNICAL SPECIFICATIONS.............................................................................58
WARRATNY............................................................................................................60

EN
3
WHATS IN THE BOX
•HIF-2080
•2 x Loudspeaker with loudspeaker cable
•Remote control
•User manual
Also required for the remote control
•2 x Batterie Typ AAA, 1,5 V (not included)
Recommended app
To control your stereo system via mobile device, you need an app that can establish a
connection between your Combi turntable and your mobile device.
SAFETY INSTRUCTIONS
These operating instructions are intended to familiarize you with the functionality of
this product. Please keep these instructions in a safe place so that you can refer to
them at any time. Pass them on to subsequent users.
Please follow the safety instructions when using the device.
The device may only be used for its intended purpose in accordance with these
operating instructions.
Modifications or changes to the product impair product safety. Attention risk of injury!
All changes and repairs to the device or accessories may only be carried out by the
manufacturer or by persons expressly authorized by him.
Make sure that the product is operated from an outlet that is easily accessible so that
you can quickly disconnect the device from the mains in an emergency.
The "light flash" stands for possible electric shocks caused by uninsulated material
can be triggered within the device. Remove for security reasons
never the cover.
The "exclamation mark" marks functions for which you have read the attached notes
Read carefully to avoid operational or maintenance problems.

EN
4
Never open the housing without authorization. Never carry out repairs yourself!
Handle the product carefully. It can be damaged by bumps, blows or falling from
even a small height.
Keep the product away from moisture and extreme heat.
Never immerse the product in water or other liquids.
CAUTION: TO REDUCE THE RISK OF ELECTRIC SHOCK, DO NOT REMOVE
COVER (OR BACK). THERE ARE NO USER-SERVICEABLE COMPONENTS
INSIDE. ONLY HAVE MAINTENANCE WORK TO BE CARRIED OUT BY
SPECIALIZED PERSONNEL.
CAUTION: TO PROTECT YOURSELF FROM THE RISK OF ELECTRIC SHOCK,
DO NOT EXPOSE THIS PRODUCT TO RAIN OR MOISTURE.
CAUTION: Do not install the device in a confined space such as a building. B. in a
bookshelf or similar.
CAUTION: Ventilation openings must not be covered. The device must be set up in
accordance with the manufacturer's instructions.
Avoid improper physical or mechanical use of the power cord, e.g. B. twisting,
kinking, piercing, wedging in a door or stepping on it. Pay particular attention to
plugs, sockets and the points where the cable emerges from the device.
The power supply to the device is disconnected via the mains plug. The power plug
must always be easily accessible in an emergency.
CAUTION: The device should not be exposed to water (dripping or splashing) and no
objects filled with liquids should be placed on the device, e.g. B. Vases.
CAUTION: Do not use high voltage equipment (such as electric fly swatters) near this
device. Otherwise there is a risk of malfunction due to electromagnetic interference.
Do not under any circumstances open the housing of the device.
Never place this device on top of other electrical devices.
Do not expose the device to direct sunlight, open flames or excessive heat.
Ensure that you have easy access to the power cord, plug or power supply unit to
disconnect the device from the power supply.
No possible sources of danger may be placed on the device (eg objects filled with
liquids, burning candles).
Caution: To avoid hearing damage, use the headphones at high volume for short
periods of time. Set the volume to an appropriate level. The higher the volume, the
faster hearing damage can occur.
CAUTION: This device has a laser system. In order to use the device correctly, read
this user manual carefully and keep it in a safe place. Contact a qualified service
company for maintenance. Operations, settings or processes that are not mentioned
in these instructions can release dangerous radiation. To avoid direct contact with the
laser beam, the housing must not be opened.efore commissioning, check the device
EN
5
and its connecting cable as well as accessories for damage. Do not use the device if
it is visibly damaged.
Only operate the device on standard household sockets. Check whether the mains
voltage specified on the type plate matches that of your mains supply.
Do not squeeze the connection cable, do not pull it over sharp edges or hot surfaces;
Do not use the connecting cable for carrying.
In the event of malfunctions during operation and before cleaning, pull out the power
plug of the device.
Never pull the plug out of the socket by the power cord or with wet hands.
The device is intended exclusively for household or similar purposes. It may not be
used for commercial purposes!
The device is only suitable for use in dry interior rooms.
Make sure that the device is stable during operation and that you cannot trip over the
power cord.
Never use the device after a malfunction, e.g. if the device has been dropped into
water or has been damaged in any other way.
The manufacturer assumes no responsibility in the event of incorrect use resulting
from non-compliance with the instructions for use.
Technical changes and errors reserved.

EN
6
CONTROL BUTTONS AND CONNETCTIONS
1. TFT LCD Display
2. CD-driveLaufwerk
3. Power / Menu button
Press the switch the device on or off.
Short key press to open the menu.
4. Preset button
Hold for about 3 seconds to save an FM / DAB station as a favorite.
Briefly press the button to open the favorites list (preset list).
1 2 3 4 5 6 7 8 9 10 11 12 13 14
14 15 16 17

EN
7
5. Record button
Start USB recording.
6. Stopp button
Press to stop CD / USB playback.
7. Play / Pause button
Press to pause or resume CD / USB playback.
8. Eject button
Open / close the CD drive.
9. Previous track (<)
CD / USB playback of previous tracks.
10. Next track (>)
CD / USB playback of next track.
11. Remote control receiver
Keep space in front of the receiver free as the reception of the remote control
will be disturbed or completely interrupted.
12. USB jack
USB interface for USB sticks (version 2.0 max. 32GB).
13. Headphone jack
Connection for headphones (3,5mm / 32 Ohms).
14. Menu control / volume adjustment
Down / Up (turn left / right): menu up, menu down.
OK / Scan (press): Confirm menu item / VHF, DAB start search.
Volume - / + (turn left / right): increase volume, decrease volume.
15. Power connection
AC 100-240V
16. LINE OUT
3.5mm audio output. Transfer audio signal to another audio device.
17. AUX-IN
3.5mm audio input. Transfer audio signal from another device to this device.
18. Speaker connections (L/R)
Connections of the speakers included in the scope of delivery.
Pay attention to the correct polarity when connecting the loudspeakers (+/-).

EN
8
REMOTE CONTROL
1.
Power On / Off (Standby)
2.
Hold for about 3 seconds to save an FM / DAB station as a favorite.
Briefly press the button to open the favorites list (preset list).
3.
Start USB recording
4.
Mute speakers (on / off)
5
7
8
10
11
13
14
1 2 3 4
6
9
12
15
OK

EN
9
5.
Open the main menu.
6.
Open / close the CD drive.
7. CD / USB playback buttons
: CD / USB previous track.
: CD / USB pause / resume playback.
: CD / USB next track.
: CD / USB stop playback.
8.
Press several times to switch through the different modes.
9.
Access to the alarm clock function.
10. Menu navigation buttons.
▲: Menu navigation up
▼: Menu navigation down.
◄: Menu navigation left.
►: Menu navigation right.
OK: Confirm your entry.
11.
Decrease the volume.
12.
Increase the volume.
13. Numeric buttons (0-9)
14.
Dim the display.
15.
Set the equalizer.
FIRST INSTALLATION
Connect speakers
1. Place your stereo system on a flat, firm surface that can support its weight. Make
sure there is sufficient air circulation and / or distance to other objects.
2. Place your speakers on a flat, firm surface. Make sure they are within cable reach
of the stereo.

EN
10
3. Connect the loudspeakers with the loudspeaker cable supplied to the loudspeaker
connections of your stereo system in the same color and on the side (R / L). To do
this, simply pull the connection terminal up (red connection) or down (black
connection), insert the end of the cable and allow the terminal to open.
Insert batteries in remote control
1. Slide open the battery compartment on the back of the remote control in the direction
of the arrow.
2. Insert two new AAA, 1.5 V batteries (not included) in the battery compartment. Pay
attention to the polarity information on the bottom of the battery compartment.
3. Slide the battery compartment cover back until it clicks into place.
Power supply
Connect your stereo system to a suitable socket.
Loosen the transport lock
The platter is fixed for safe transport. Loosen the transport lock by turning the fixing screw
clockwise (see vinyl mode).
Install the app (optional)
To control your stereo system via mobile device, you need an app that can establish a
connection between your stereo system and your mobile device. Find a suitable APP in the
Google Play Store (Android) or App Store (iOS) and install it on your mobile device.
Note:
Please note the system requirements of the mobile device specified in the store,
which must be present in order to use the app.

EN
11
GENERAL CONTROLS
The HIF2080 can be controlled both via the buttons on the device itself, via the remote
control and via the app. The buttons on the remote control are shown in the table. It is
controlled via the app via your mobile device.
Control command
Taste
Aktion
Standby On
Standby/Menu
Press
Press
Standby Off
Standby/Menu
Press for 3 s
Press
Open the main menu
Standby/Menu
Press
Press
Play / pause
►II-
Press
Press
Stop
■
Press
Press

EN
12
Next track
►
Press for 3 s
Press
Previous track
◄
Press for 3 s
Press
Volume +
Selector
switch
Press
Press
Volume -
Selector
switch
Press
Press
Eject CD
Eject button
Press
Press
Choose
Selector switch
Press
◄/ ►
Press
Press
Open / confirm / save
Selector switch
Press
Press
Letters / characters /
numbers input
Selector switch
Turn or press
Number buttons
Press
Open menu / submenu /
menu item
Selector switch
Press
Press
Exit menu
◄
Press

EN
13
Press
Display brightness
Press
Favorites list
Preset-button
Press
Press
Station search
Selector switch
Press
Alarm clock menu
Press
Equalizer
Press
Sound on / off
Press
Mode
Press
FIRST SETUP
Manual WiFi setup
1. Turn on your stereo. Wait for it to boot up. This may take a few moments.
2. Set the desired system language by turning the selector switch or using the arrow
buttons on the remote control.
3. Confirm your selection by pressing the selector switch or the OK button on the
remote control.
4. Confirm the privacy policy by pressing the selector switch or the OK button on the
remote control.
5. Specify whether the network should be checked after switching on. Turn the
selector switch or use the arrow buttons on the remote control to select the option
you want.

EN
14
6. Confirm your selection by pressing the selector switch or the OK button on the
remote control.
7. Start the manual network configuration by turning the selector switch or using the
arrow buttons on the remote control to select the option Yes.
8. Confirm your selection by pressing the selector switch or the OK button on the
remote control. It searches for WiFi networks in the area.
9. Turn the selector switch or use the arrow buttons on the remote control to select
the required 2.4 GHz network.
Note:
You can recognize 5 GHz networks by the fact that "5G" is usually appended to
the network name.
10. Confirm your selection by pressing the selector switch or the OK button on the
remote control.
11. OK the password of the selected WiFi network by turning the selector switch
(counterclockwise: numbers & special characters, clockwise: AaBbCc) or pressing
the number buttons on the remote control.
Notes:
We recommend OKing the password using the remote control as this will take
less time. You can OK special characters on the remote control by repeatedly
pressing button 1.

EN
15
Next input field: ► button
Previous input field: ◄ button
12. Confirm the password by pressing the selector switch or the OK button on the
remote control. Your stereo system will be connected to the WiFi network. This may
take a few moments. After a successful connection, the main menu is shown on the
display. The WLAN symbol at the top left turns white and shows the network
strength.
WPS WiFi setup
1. Turn on your stereo. Wait for it to boot. This may take a few moments.
2. Select the desired system language by turning the selector switch or using the
arrow buttons on the remote control.
3. Confirm your selection by pressing the selector switch or the OK button on the
remote control.
4. Confirm the privacy policy by pressing the selector switch or the OK button on the
remote control.
5. Specify whether the network should be checked after switching on. Turn the
selector switch or use the arrow buttons on the remote control to select the
option you want.
6. Confirm your selection by pressing the selector switch or the OK button on the
remote control.
7. Start the WPS configuration by turning the selector switch or using the arrow
buttons on the remote control to select Yes (WPS).

EN
16
8. Confirm your selection by pressing the selector switch or the OK button on the
remote control.
9. Now press the WPS button on your router within 120 seconds.
Note:
Depending on your router, you may need to hold down the WPS button for a
few seconds. You can find information on this in the operating instructions for
your router.
10. Your stereo system is connected to the WiFi network. This may take a few moments.
After a successful connection, the main menu is shown on the display. The WLAN
symbol at the top left turns white and shows the network strength.
Continue without WiFi setup
Note:
An internet connection is required for some functions as well as control via the
app. As long as the WLAN connection is not set up, not all of its functions can
be used.
The WLAN connection can also be set up at a later point in time: Main menu ►
Configuration ► Network ► Wireless Network Configuration or Wireless
Network (WPS PBC).

EN
17
1. Turn on your stereo. Wait for it to boot. This may take a few moments.
2. Select the desired system language by turning the selector switch or using the
arrow buttons on the remote control.
3. Confirm your selection by pressing the selector switch or the OK button on the
remote control.
4. Confirm the privacy policy by pressing the selector switch or the OK button on the
remote control.
5. Specify whether the network should be checked after switching on. Turn the
selector switch or use the arrow buttons on the remote control to select the option
you want.
6. Confirm your selection by pressing the selector switch or the OK button on the
remote control.
7. Exit the WLAN setup by turning the selector switch or using the arrow buttons on
the remote control to select the No option.
8. Confirm your selection by pressing the selector switch or the OK button on the
remote control. The main menu is shown in the display.

EN
18
MANUAL CONTROL
Turn on
Turn on your stereo by plugging it into a suitable power outlet. The display lights up and your
stereo system starts up.
Turn on a device
In standby mode, the time is shown on the darkened display. Turn on your device by
pressing the Standby / Menu button on the control panel or the Standby button on the
remote control. The display lights up, the main menu is shown.
Switch off the device (standby)
Put your stereo system into standby mode by pressing and holding the Standby / Menu
button on the control panel for approx. 3 seconds or pressing the Standby button on the
remote control. The display goes dark and the time is shown.
Turn Off
1. Put your stereo in standby mode. The display is darkened and the time is shown.
2. Turn off your stereo system by unplugging it from the power supply. The display
goes out.

EN
19
THE MAIN MENU
NOTE:
With the exception of the Settings menu, this menu is also available in the app.
Control via the app is faster and offers a greater range than control via the
remote control.
Internet radio
Media center
AUX
FM
Bluetooth
DAB/DAB+
Configuration
CD
Local station
Vinyl

EN
20
INTERNET RADIO MODE
NOTE:
An internet connection is required to use internet radio mode.
Menu structure
Menü
Untermenü
Funktion/Option
My Favorite
Favorite list
Manage favorites list
Radio station
Global Top 20
Select radio station
Genre
Country / Location
Highlight
Sleep radio
Birds
Listen to soothing
sounds
Lullaby
Piano
Rain
Spa
Space
Wave
White Noise
History
Channel list
Select radio station
Service
Search radio station
OK the station name
Add new radio station
OK URL (should end
in .m3u / .m4a / .mp3)
App
App-QR-Code
Table of contents
Other Reflexion Stereo System manuals

Reflexion
Reflexion HIF2002 User manual

Reflexion
Reflexion HIF1987 User manual

Reflexion
Reflexion HIF1897T User manual

Reflexion
Reflexion HIF-6880USMPT User manual

Reflexion
Reflexion HIF79FM User manual

Reflexion
Reflexion HIF1937 User manual

Reflexion
Reflexion HIF79DAB User manual

Reflexion
Reflexion HIF2002DAB User manual