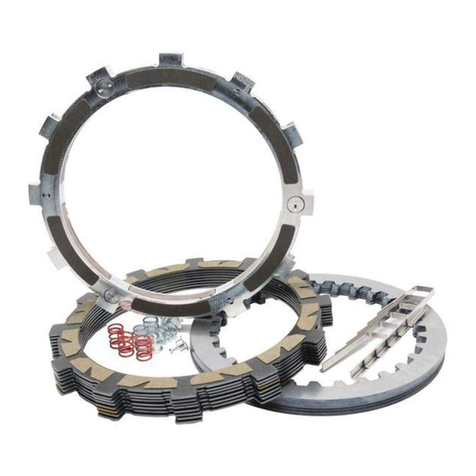
Rekluse RadiusX FTR 1200 Operation manual

DocID:191-6216200A
Revision:
081720 ©2019
Rekluse Motor Sports
Rekluse Motor Sports, Inc.
customerservice@rekluse.com
INSTALLATION & USER’S
GUIDE
RadiusX
Indian
FTR 1200, FTR Rally, & FTR 1200 S

Pg.
2
Doc ID:
191-
6216200A
Doc Rev: 081720
TABLE OF CONTENTS
OVERVIEW ...........................................................................3
INSTALLATION TIPS ............................................................3
TOOLS NEEDED...................................................................4
INCLUDED PARTS ...............................................................5
DISASSEMBLE THE CLUTCH .............................................6
CLUTCH PACK INSTALLATION.........................................10
Notes for installation........................................................10
Clutch pack......................................................................10
PRESSURE PLATE INSTALLATION..................................13
PRIMARY COVER INSTALLATION....................................15
SET THE INSTALLED GAP ................................................18
CHECK FREE PLAY GAIN..................................................19
Learn how to check Free Play Gain ................................19
Two Ways to Check for Free Play Gain ..........................21
The Rubber Band Method ...................................................21
The Hand Method................................................................24
Adjust the Installed Gap.......................................................25
BREAK IN THE NEW CLUTCH...........................................26
EXP TUNING OPTIONS......................................................28
Changing the EXP springs ..................................................29
SHIFTING AND OPERATION .............................................30
MAINTENANCE...................................................................32
Disk inspection examples................................................32
TROUBLESHOOTING.........................................................34
NEED ADDITIONAL HELP?................................................35
Doc ID: 191
-
6216200A
Doc Rev: 081720
Pg. 3
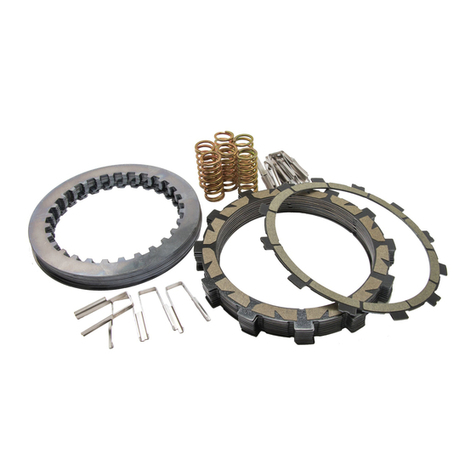
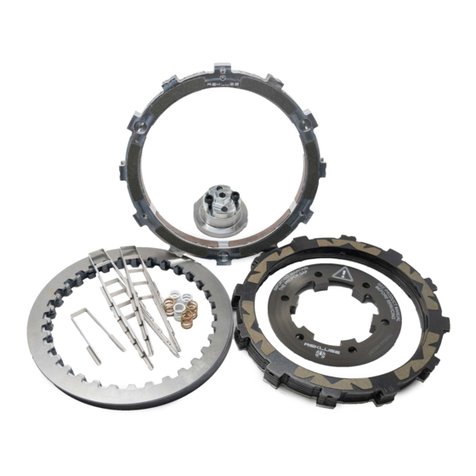
This kit replaces the OE (Original Equipment) or “stock”
clutch pack with a Rekluse-designed high quality clutch pack
designed specifically for your bike model. The following is a
summary of what is replaced:
·All OE steel drive plates will be replaced with Rekluse
drive plates
·All OE friction disks will be replaced with Rekluse
TorqDrive®friction disks and EXP disk
·The OE pressure plate springs will be replaced.
·Read the safety information sheet included with your kit.
·If you install this product for a customer or another
person, instruct them to read the Safety Information
document and the Installation and User Guide before
operating the bike with the product.
·Protect eyes and skin –wear
safety glasses and thin disposable
work gloves. Work in a well
ventilated area.
·Read this entire document before
performing any steps.
·Use clean, quality oil that meets JASO-MA or JASO-
MA2 engine oil standards for best performance.
·Rekluse offers Factory Formulated Oil™ developed
specifically for Rekluse products. Rekluse Factory
Formulated Oil is a perfect complement to any OEM or
aftermarket wet clutch. Visit www.rekluse.com to learn
more.
·Use the torque values listed in the instructions.
Otherwise, use the torque specifications found in your
OE service manual.
OVERVIEW
INSTALLATION TIPS

Pg.
4
Doc ID:
191-
6216200A
Doc Rev: 081720
·4mm allen wrench
·5mm allen wrench
·6mm allen wrench
·8mm socket
·10mm socket
·12mm socked
·12mm wrench
·Torque wrench in-lb
·Torque wrench ft-lb
·Picks
·Fluid catch container
TOOLS NEEDED

Doc ID: 191
-
6216200A
Doc Rev: 081720
Pg. 5
Visit www.rekluse.com/support for a full parts fiche
illustration and part numbers.
INCLUDED PARTS
Item
Description
Qty.
13
EXP 3.0 BASE - HD Big Twin
2
51
Fasteners - 1/4-Turn Pin
6
60
EXP Adjustment Springs
6
60.1
Pressure Plate Springs
3
63
Drive Plate - 0.040in BT CVO
6
68
Drive Plate - 0.065in BT CVO Top
1
69.1
TorqDrive Friction Disk - Thin
5
69.2
Friction Disk - LC8 / CVO - Thick .150in
3.81mm
2
70
Basket Sleeves
12
85
EXP Wedges
6
Not Shown
Velcro straps
2
Not Shown
Orange Free Play Gain rubber band
1
Not Shown
Clutch lever warning label
1
68

Pg.
6
Doc ID:
191-
6216200A
Doc Rev: 081720
1.Stand the bike up on a suitable bike stand or lift.
2.Drain the engine oil into a suitable container by removing
the two oil drain plugs.
3.Remove the center exhaust heat sheild.
DISASSEMBLE THE CLUTCH

Doc ID: 191
-
6216200A
Doc Rev: 081720
Pg. 7
4.Remove the front exhaust heat sheild.
5.Unplug the oxygen sensor connector from the front
header pipe.
6.Remove the head pipe fasteners securing the head pipe
to the cylinder head.
7.Loosen the two exhaust clamps securing the front and
rear header pipes.
8.Remove the front head pipe assembly.

Pg.
8
Doc ID:
191-
6216200A
Doc Rev: 081720
9.Remove the jam nut from the clutch cable housing and
pull the housing out from the engine case.
10. Remove the clutch cable from the actuator arm.
11. Remove the primary cover bolts.
12. Remove the primary cover.

Doc ID: 191
-
6216200A
Doc Rev: 081720
Pg. 9
13. Remove the following clutch components: pressure plate
bolts, spring ring, springs, pressure plate, clutch pack,
judder spring, and judder spring seat.
bolts
springs
pressure plate
judder spring
judder spring seat
clutch pack
Pack
spring ring

Pg.
10
Doc ID:
191-
6216200A
Doc Rev: 081720
Notes for installation
·Some friction disks are marked with a small colored dot.
This mark is used for processing and can be ignored.
·See the Setup Sheet located at the back of the manual for
the proper clutch pack configuration.
·The OE basket has “half slots” at the top of the basket
tangs. This Rekluse product requires the entire clutch pack
be installed into the MAIN (deeper) basket slots. Installing
the clutch pack into the “half slots” will cause performance
issues. See the following picture for reference.
Clutch pack
1. Soak the EXP disk and all friction disks
in engine oil for 5 minutes. Make sure
the EXP and friction disks are coated on
both sides.
CLUTCH PACK INSTALLATION
Use main (deeper)
basket slots

Doc ID: 191
-
6216200A
Doc Rev: 081720
Pg. 11
2. Inspect the clutch basket for notching. Do not install
sleeves or use product with a notched basket. Notched
basket tang faces can cause the sleeves to break. Do not
use baskets that have been filed, machined, or modified
on the tangs. Replace basket if necessary.
Failure to inspect the basket and replace if necessary
could result in death, serious injury, and/or property
damage.
3. Install ALL the Rekluse basket sleeves into the basket
slots. Make sure the sleeve tabs sit against the inside of
the basket, then push the sleeves down until they contact
the bottom of the tang slot. See pictures for reference.
OE basket
Basket sleeve

Pg.
12
Doc ID:
191-
6216200A
Doc Rev: 081720
4. Install a TorqDrive friction disk followed by a 0.40” drive
plate.
5. Continue to alternate the remaining 4 TorqDrive friction
disks with 4 of the 0.040” steel drive plates.
6. On top of the last drive plate, install the EXP assembly.
7. Install the last 0.040” drive plate
TorqDrive Frictions
0.040” Drive Plates
EXP

Doc ID: 191
-
6216200A
Doc Rev: 081720
Pg. 13
1. Turn the pressure plate over onto a work bench. Place
one .150” thick friction disk on to the pressure plate.
2. Next place the .065” drive plate on to the pressure plate
and place the last .150” thick friction disk.
3. To install the pressure plate, hold onto the friction tabs
and pressure plate, align the pressure plate with the
center hub and the friction tabs with the basket tangs.
PRESSURE PLATE INSTALLATION

Pg.
14
Doc ID:
191-
6216200A
Doc Rev: 081720
4. Install the Rekluse pressure plate springs, followed by the
OE spring ring and bolts.
5. Evenly tighten the bolts, then torque the bolts to 80 in-lb
(9 N-m).

Doc ID: 191
-
6216200A
Doc Rev: 081720
Pg. 15
1. Clean the gasket surface of the crankcase and primary
cover.
NOTE: If the primary gasket was damaged during
disassembly it will be necessary to replace the gasket.
(Indian part # 5416661 GASKET, PRIMARY COVER AP)
2. When reinstalling the primary cover, make sure that the
clutch rack is angled so the clutch shaft will align and
slowly place the cover onto the engine case.
3. Check the position of the actuator arm. The actuator arm
should be positioned like the actuator arm in the image
below. If the arm is not in this position, remove the cover,
make the necessary adjustments and repeat step 2.
NOTE: The actuator arm will not be in the same position as it
was with the OE clutch, this will be adjusted when setting the
installed gap
4. Tighten the bolts using the pattern indicated in the picture
below in small increments before torqueing the cover bolts
to 106 in-lb (12 Nm).
PRIMARY COVER INSTALLATION

Pg.
16
Doc ID:
191-
6216200A
Doc Rev: 081720
5. Reattach the clutch cable to the actuator arm.
6. Reinstall the clutch cable to the engine case, but do not
adjust the cable, cable adjustment will occur when setting
Free Play Gain.
7. Reinstall both oil drain plugs, torque to 15 ft-lbs (20 Nm)
and fill with oil to factory specifications (oil and filter
change approximately 4 US quarts).
NOTE: Make sure to reinstall the sealing washers to the
drain plug bolts before reinstalling the bolts
8. Install the head pipe assembly.
9. Install the head pipe fasteners and torque to 16 ft-lbs (22-
Nm).
10. Position the two exhaust clamps and torque to 144 in-
lbs (16 Nm).
11. Plug in the oxygen sensor connector from the front
header pipe.
1
3
9
7
16
14
17
13
8
11
10
12
15
4
6
2
5

Doc ID: 191
-
6216200A
Doc Rev: 081720
Pg. 17
12. Install the front exhaust heat sheild and torque the
fasteners to 88 in-lbs (10 Nm).
13. Install the center exhaust heat sheild and torque the
fasteners to 88 in-lbs (10 Nm).

Pg.
18
Doc ID:
191-
6216200A
Doc Rev: 081720
The “installed gap” is the separation in the clutch pack
created by the tension adjusted into the clutch cable. This
gap is what allows the clutch to spin freely until the desired
RPM is reached for engagement. The installed gap must be
set correctly.
1. At the clutch perch set the adjuster to the mid-point.
2. Next, at the cable adjuster, turn the top nut clockwise until
there is no free play in the lever.
3. Once there is no free play in the lever turn the top nut
clockwise an additional 6 complete turns to lift the
pressure plate. This is your starting point and not the
final adjustment.
4. Check Free Play Gain (next section) to adjust the cable
tension to its final setting. If there is not enough Free
Play Gain, turn the cable adjuster counterclockwise until
Free Play Gain is within specification. Turn the cable
adjuster clockwise if there is too much Free Play Gain
until the Free Play Gain is within specification.
NOTE: Free Play Gain specification is between 1/8”-1/4”
(3mm-6mm) lever movement
5. Once proper Free Play Gain is achieved, tighten the jam
nut.
SET THE INSTALLED GAP
Cable adjuster

Doc ID: 191
-
6216200A
Doc Rev: 081720
Pg. 19
It is very important that you understand how to verify the correct
installed gap by checking Free Play Gain. The installed gap is
what allows the auto function of the product to perform properly.
Correct Free Play Gain = Correct installed gap
Setup, break-in, and rechecking the installed gap is CRUCIAL.
Failure to properly maintain your installed gap can result in
premature wear or failure of your clutch. Use the following steps
to verify the installed gap by checking Free Play Gain.
Failure to check and verify Free Play Gain can cause
failure or damage to this product.Setting the correct
installed gap is critical for clutch performance.
Learn how to check Free Play Gain
If you are familiar with checking Free Play Gain, check for
Free Play Gain then skip to the “Adjust the Installed Gap”
section.
If Free Play Gain is new to you, follow the instructions below
to help you learn this important step. You can also view the
video entitled “How to Check Free Play Gain” on our website
at https://rekluse.com/support/videos.
Checking Free Play Gain allows you to externally monitor
the installed gap so you can know when to make an
adjustment if the installed gap is too large or too small.
The correct installed gap is verified by observing and feeling
the increased free play movement in the clutch lever. This
extra movement is called “Free Play Gain.”
CHECK FREE PLAY GAIN

Pg.
20
Doc ID:
191-
6216200A
Doc Rev: 081720
·If there is too much Free Play Gain, the installed gap
is too small.
oThe vehicle may drag and stall because it has
difficulty disengaging the clutch. It may also be
difficult to shift.
oToo much Free Play Gain will not hurt the clutch, but
it will negatively affect clutch performance. dd
·With too little or no Free Play Gain, the installed gap is
too large.
Lever with “slack”
removed
Lever position
around 2,000 RPM
Free Play Gain
1/8”-1/4” (3 mm-6 mm) l
ever movement
e
Pl
th “slack”
This manual suits for next models
1
Table of contents
Other Rekluse Motorcycle Accessories manuals

Rekluse
Rekluse TorqDrive Clutch Pack Operation manual

Rekluse
Rekluse CoreManual TorqDrive Operation manual

Rekluse
Rekluse RadiusX BMW S1000 Operation manual

Rekluse
Rekluse EXP Operation manual

Rekluse
Rekluse RadiusX Clutch Operation manual

Rekluse
Rekluse Core EXP 2.0 User manual

Rekluse
Rekluse CoreManual Operation manual

Rekluse
Rekluse CoreEXP 3.0 User manual

Rekluse
Rekluse EXP Installation instructions

Rekluse
Rekluse RadiusX Clutch Operation manual