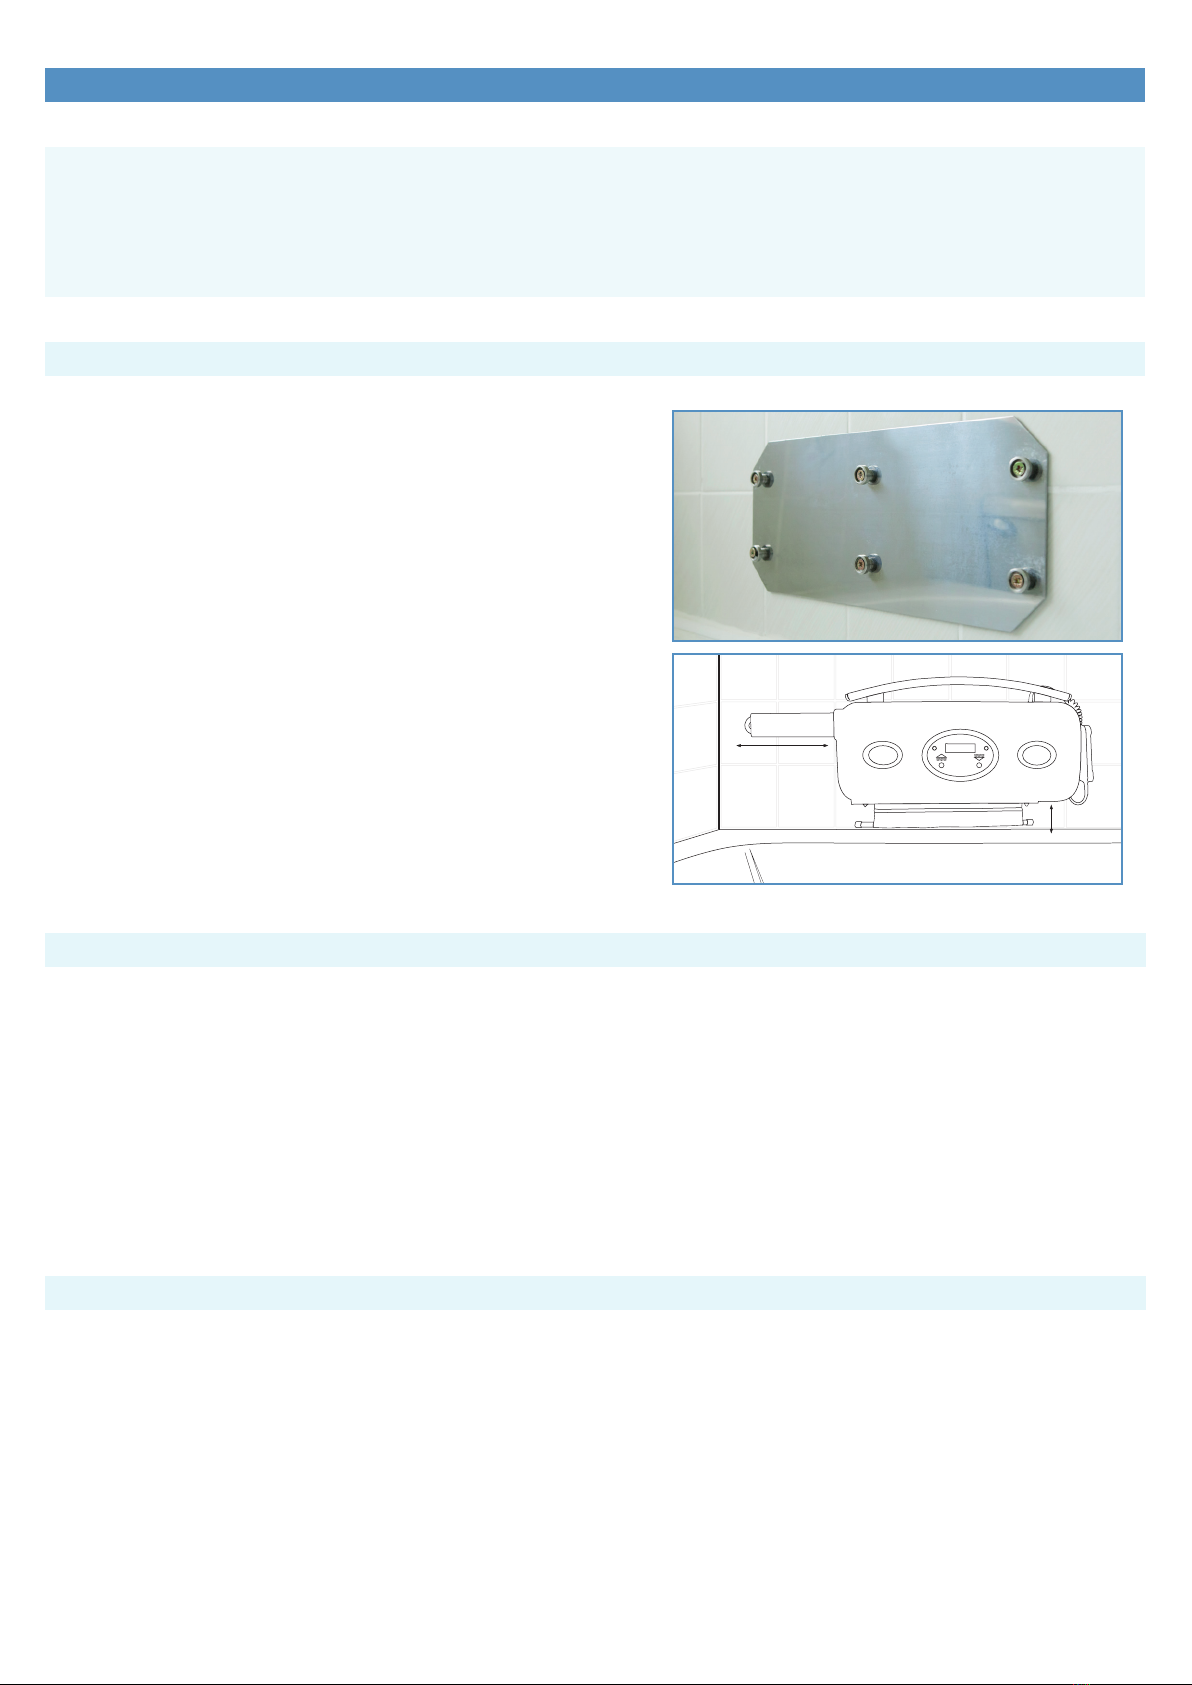
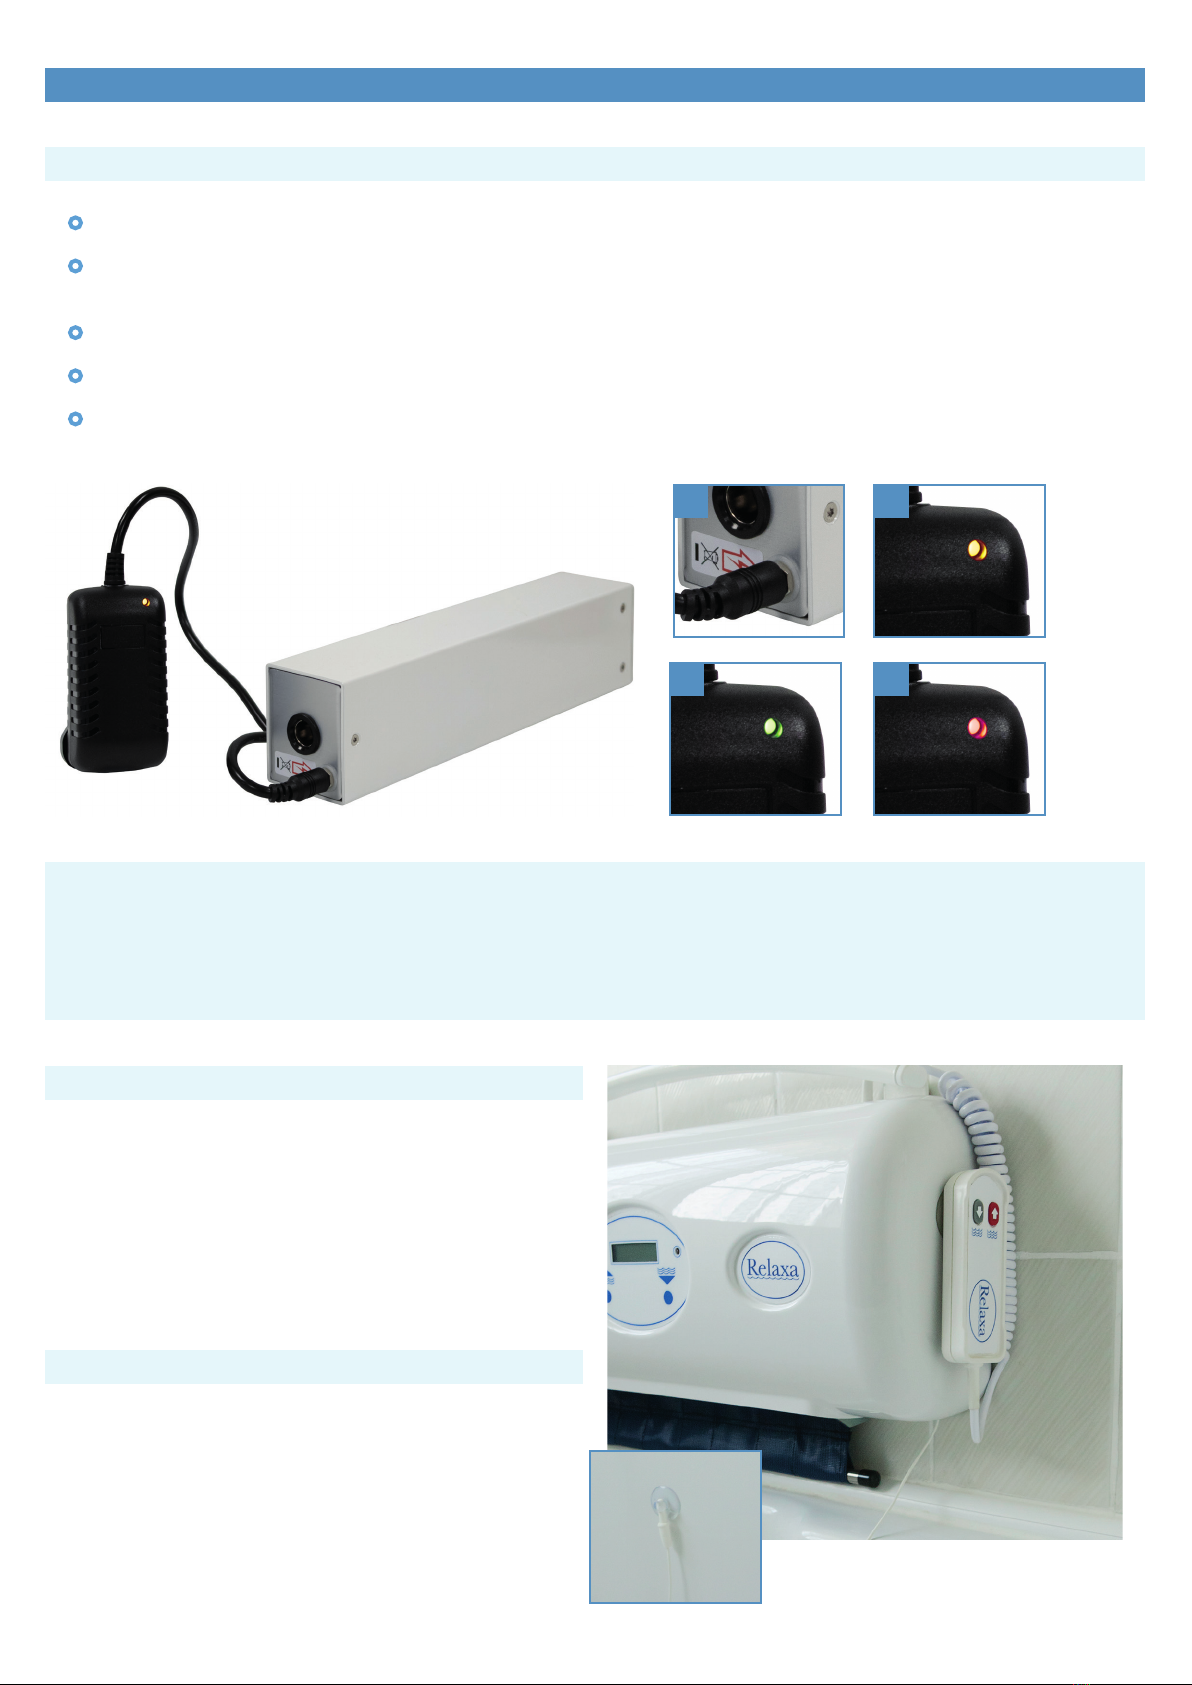
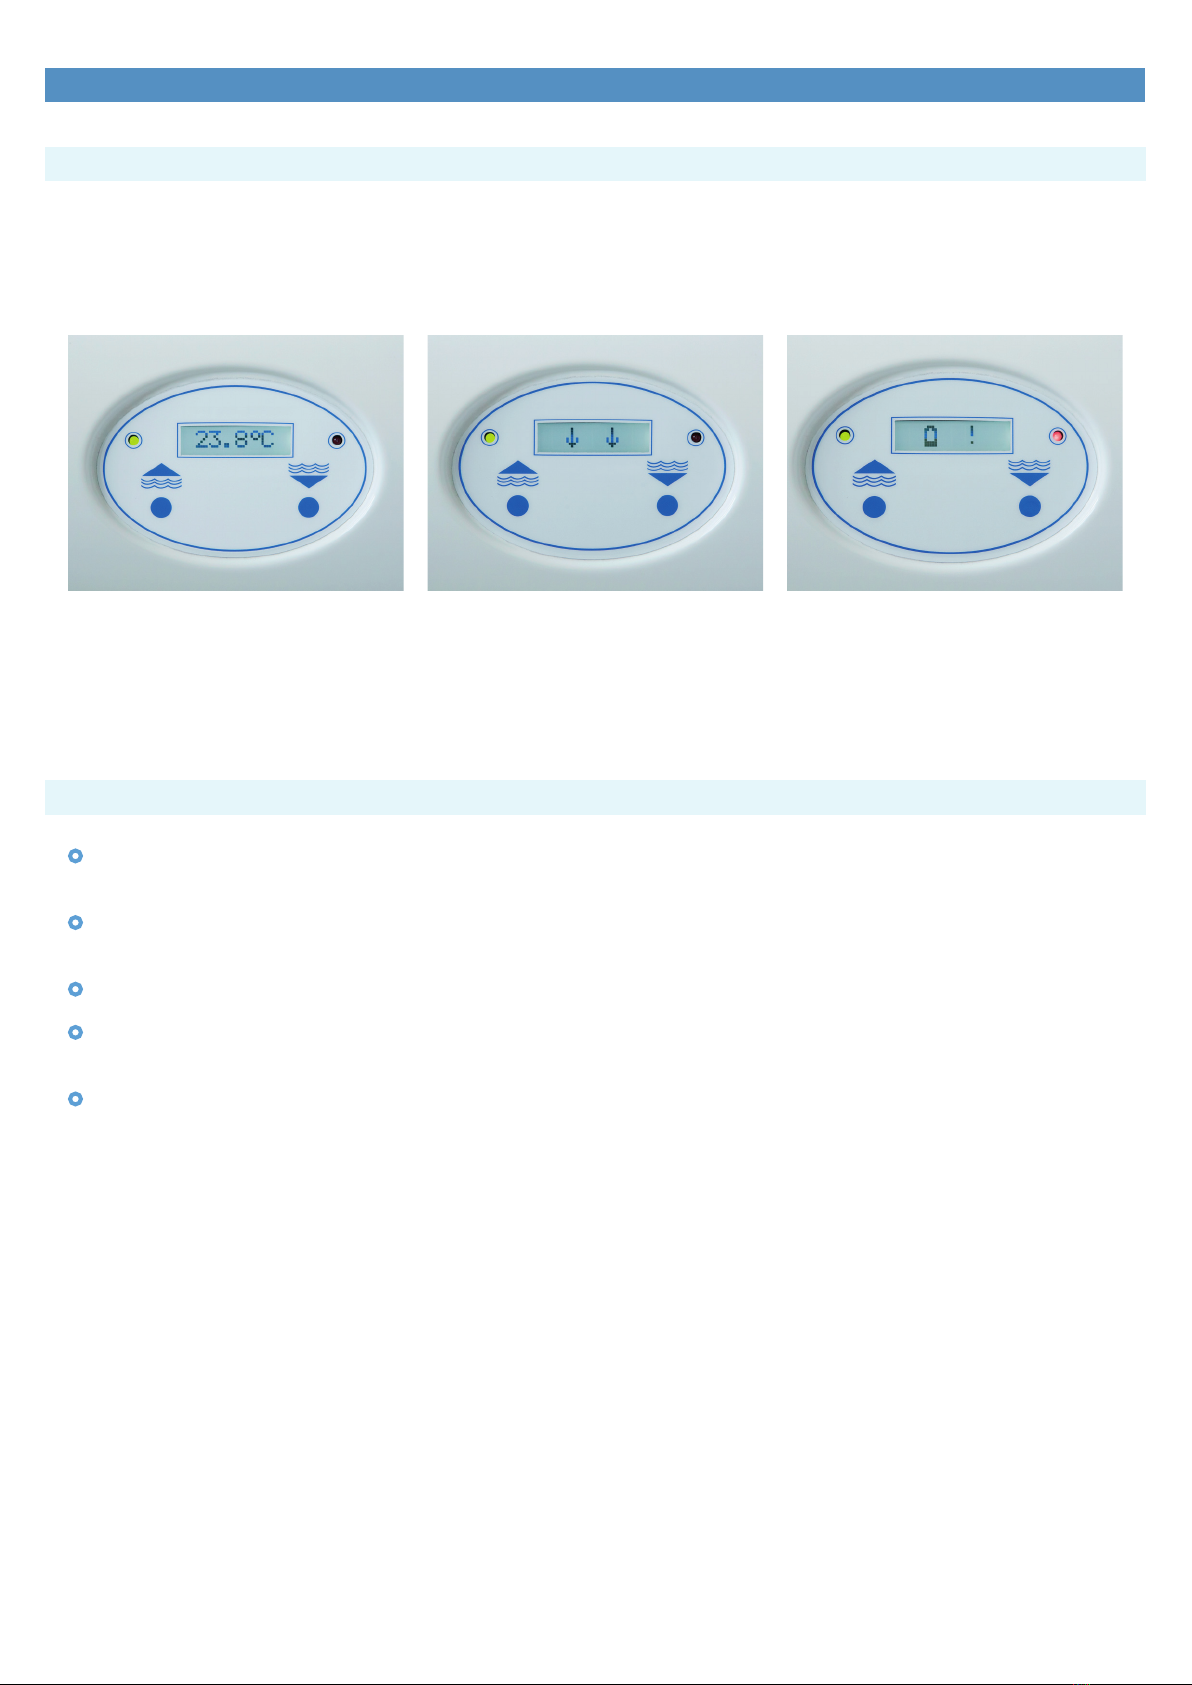
When the battery is fully charged, and the temperature probe is in position the bath lift is ready to be used.
OPERATION
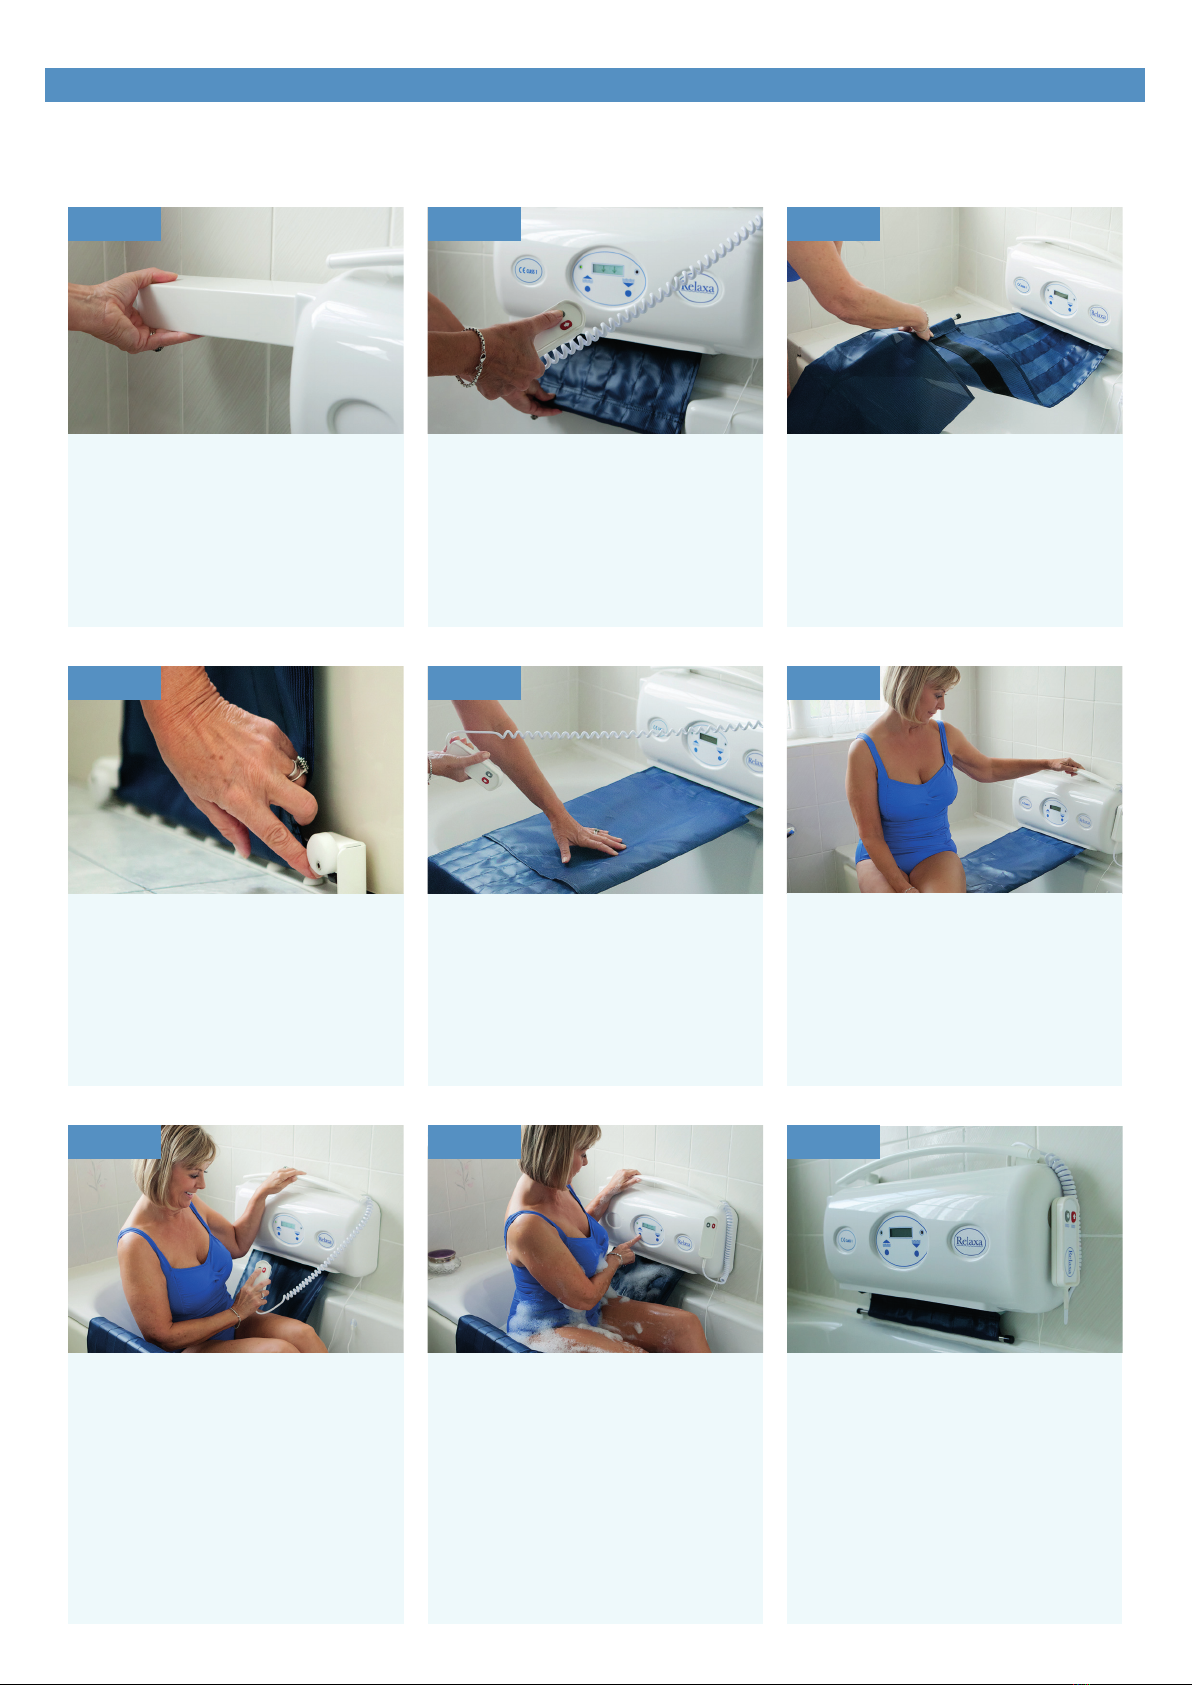
STEP 1
Place the battery in the hole on
the left-hand side of the bath lift.
Ensure it is rmly pushed into
position.
Press the down button and feed
out the belt suciently for it to
reach the mounting bar on the
oor by using the control buttons
on the bath lift unit or the
handheld controller.
STEP 2
To t the belt sleeve, fold the belt
as shown and slip on the sleeve.
STEP 3
By rotating the discs the anchor
bar can be located into the
mounting bar itself. Turn the
discs to ensure the anchor bar is
positively locked in.
THIS IS VERY IMPORTANT.
Tighten up the belt by pressing the
‘UP’ button until the belt is taut
across the bath. The automatic
cut out will stop the belt when it is
tight. The bath lift is now ready for
the bather to sit on the belt.
STEP 4 STEP 5 STEP 6
The bather should ease their legs
over the side of the bath and
into the water holding on to the
grab rail for extra support. Sit in
the middle of the belt sleeve, as
close to the unit as possible, in an
upright position.
Hold the DOWN button for 1-2
seconds before releasing and
slide the belt sleeve to readjust
positioning on the belt. Repeat this
process to be slowly and gently
lowered to the bottom of the bath.
Now sit back and enjoy a relaxing
bath.
STEP 7
When the bather is ready to exit
the bath, press the UP button and
this will raise and return the lift
back to the original bath height, so
that the bather can hold on to the
grab rail and place their feet over
the edge and onto the oor.
STEP 8
With the belt slackened, free the
end secured to the oor anchor.
Next REMOVE THE BELT SLEEVE
and then press the UP button and
the belt will retract. Ensure that the
belt is level and square as it feeds
back into the bath lift unit. Leave
about 75mm (3”) of the belt outside
the unit so that it is easy to access
for the next use.
STEP 9