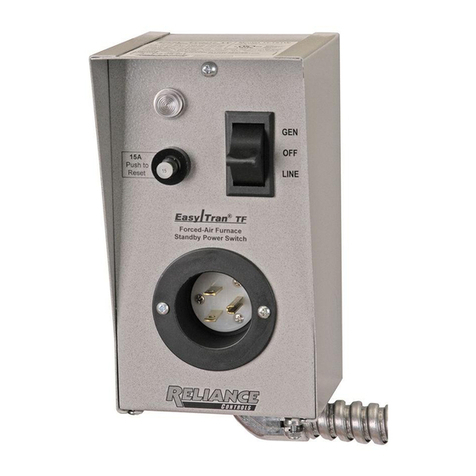
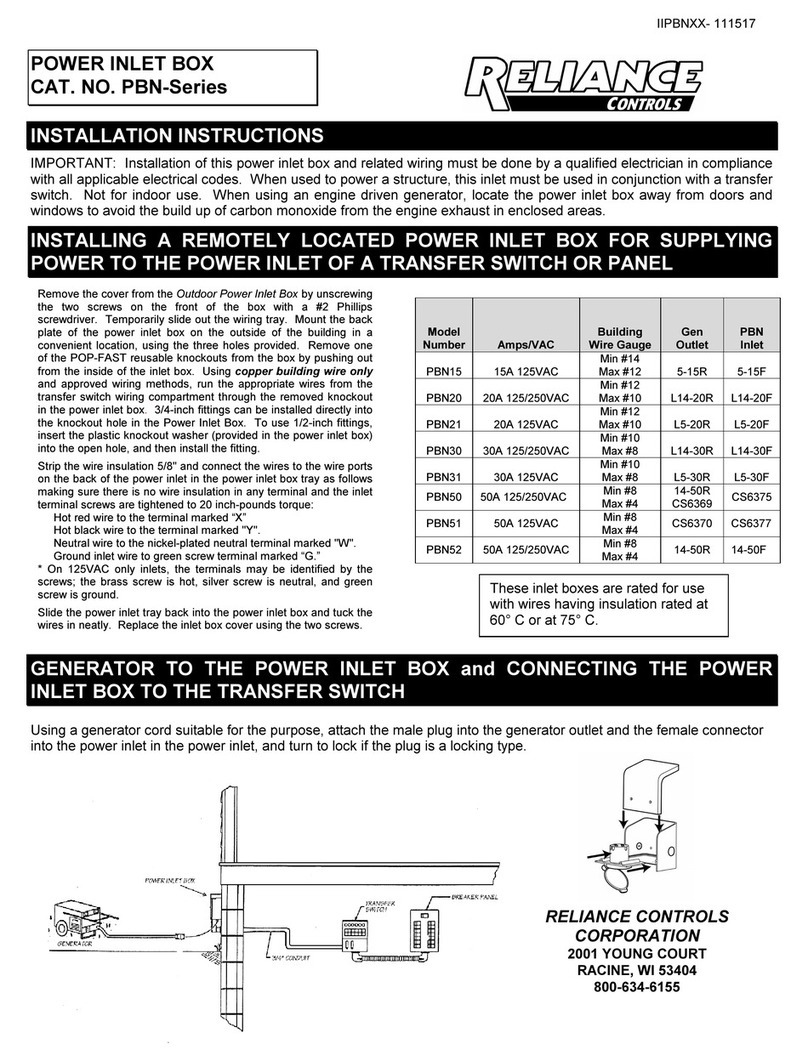
Reliance Controls PRI/TRAN 2 RN Series User manual

MANUAL TRANSFER SWITCH KITS FROM
INDOOR
and
OUTDOOR RATED
INSTALLATION AND OPERATING
INSTRUCTIONS
RN Series Non-Metallic
TABLE OF CONTENTS
Tools Needed for Installation 1
Power Inlet Box Models 1
Safety Symbols Used in this Manual 1
About Generators and Transfer Switches
Key Product Components 3
Pre-Planning the Load on Your Generator 4
Installation Instructions 5
Mounting the Transfer Switch 5
Connecting the Conduit 5
Connecting Ground and Neutral 6
Installing 1 0 and 40v Circuits 6-7
Completing the Installation 7
Installing and Wiring the Power Inlet Box 8
Finishing Up 9
Operating Instructions 9
Specifications 10
RN 01-17

1
1.
Power Drill
2.
Wire Stripper and Cutter (10 to 14 gauge)
3.
Insulated Screwdrivers
(#2 Phillips 1/4" Flat Tip or #2 Square Tip depending on
your load center)
4.
Hammer
5.
Marking Pencil
6.
Tape Measure
7.
Three Wall Anchors with at Least a 3/8” Flange
8.
Enough 10-3 (or proper rated wire size) with Ground
Building Wire to reach from where you install your
Outdoor Power Inlet Box to where you install your
transfer switch
9.
Battery Powered Lighting during Installation
10.
A Non-Contact Voltage Detector (optional)
This RN series Pro/Tran 2 model (indoor/outdoor) does not come with any provision to install a power inlet on the transfer
switch cabinet itself, so a power inlet box must be used Refer to page 8 for power inlet box installation.
The power inlet configuration ideally will be the same as the generator receptacle being used Several power inlet box
options are available, below are some part numbers and configurations
1 PB30 or PBN30 (NEMA L14-30) = 30 amps 125/250 volts (4 wire)
2 PB20 or PBN20 (NEMA L14-20) = 20 amps 125/250 volts (4 wire)
3 PB31 or PBN31 (NEMA L5-30) = 30 amps 125 volts (3 wire)
4 PB15 or PBN15 (NEMA 5-15) = 15 amps 125 volts (3 wire)
Danger indicates an imminently hazardous
situation that, if not avoided, could result in
death or serious injury.
Warning indicates a potentially hazardous
situation that, if not avoided, could result in
death or serious injury.
Caution indicates a potentially hazardous
situation that, if not avoided, may result in
minor or moderate injury.
Transfer switches are required for use with portable generators by rticle
702 of the 2017 National Electrical Code
Member of the National Electrical Manufacturers Association
Congratulations on your purchase of the Reliance Controls generator power transfer switch. Reliance has been
manufacturing transfer switches and equipment in Racine, Wisconsin since 1983 and has been producing high quality
electrical equipment for over 100 years. Reliance is the Loadside® transfer switch used in nearly 90% of the installations
done by professional electricians. Your transfer switch is UL 1008 listed, C UL listed, and meets all requirements of the
2017 National Electrical Code.
TOOLS NEEDED FOR INSTALLATION
SAFETY SYMBOLS USED IN THIS MANUAL
Improper installation of the transfer
switch could cause damage or
personal injury by electrocution or fire. Installation must be
performed by a qualified electrician, or others
knowledgeable of electrical systems, in compliance with
all applicable electrical codes. Do not overload.
Reliance Controls Corporation is not
responsible for damage or injury
caused by incorrect installation of this
transfer switch.
OUTDOOR REMO
TE POWER INLET BOX OPTIONS
L14-30 (locking)
L14-20 (locking)
L5-30 (locking)
5-15 (straight blade)

2
Generators and transfer switches are dependent on one another as a system to power your home in a power outage
situation. The Reliance Controls transfer switch system is needed because 1) your portable generator is very powerful and
the power it creates must be safely controlled to protect you and your electric utility provider, 2) even with all of its power,
your generator probably cannot power all of the electrical circuits and devices in your home without help from a transfer
switch with load management capabilities, and ) a transfer switch is required by the National Electrical Code when using a
portable generator to power your home's wiring.
The Reliance Controls transfer switch is designed to let you control and distribute your generator’s power. It correctly
distributes the power from your portable generator to your home circuitry through your electrical load center. It also
eliminates the need for messy cords running to your electrical appliances through open doors and windows. The Reliance
Controls transfer switch working with your generator takes the worry and inconvenience from power outage situations.
The Reliance Controls transfer switch distributes the power from your generator through its toggle switches to the
corresponding selected branch circuits that power the major appliances you choose to operate during a power outage (such
as your sump pump, refrigerator or furnace). However, because each of these branch circuits may power several other
electrical devices other than your major appliances, such as the items plugged into wall sockets and permanently installed
lighting, we recommend that you do a little pre-planning by:
1. Picking the key electrical appliances you want to power in an emergency
2. Finding the essential circuit breakers that control these devices
. Creating a map of all of the other electrical devices plugged into or wired into these circuits
A tear-off Home Circuit Mapping Chart on the back of this manual should be completed and posted next to your transfer
switch to help you in managing the load on your generator. Make sure you note on the chart which electrical devices you will
not need during a power outage so that these can be turned off prior to starting your generator.
During a power outage, you can run your generator and transfer switch system in two ways:
•
You can set up your transfer switch to run all of its circuits at the same time once you flip the toggles to the GEN position.
Setting your system up in this way will be discussed in the “Balancing the Load” section later.
•
You can also use the load management function of the Reliance Controls transfer switch that allows you to alternate the
devices you choose to run at any given time. If your generator is running at or near its maximum output, selected circuits
can be switched off and others can be switched on for brief periods of time. For example, you can run a microwave oven
for a brief period from the transfer toggle switch that controls your microwave circuit, if you first turn off the transfer switch
toggle switch that controls your furnace—for that same brief period.
Typical Generator and Transfer Switch Installations
ABOUT GENERATORS AND TRANSFER SWITCHES
Generator Plugged into Outdoor Power Inlet Box Wired to Transfer
Switch Mounted Indoors Next to Indoor Load Center
(IN OOR INSTALLATION)
Generator Plugged into Outdoor Power Inlet Box Wired to Transfer
Switch Mounted Outdoors Next to Outdoor Load Center
(OUT OOR INSTALLATION)

3
Watt Meters
Circuit Breakers Wiring Compartment
Circuit Toggle Switches
Wiring Compartment
Circuit breakers. Each transfer s itch circuit has a 1-inch interchangeable circuit breaker that protects the
branch circuit hen the circuit toggle s itch is in the GEN position. In the LINE position, each branch circuit is
protected by the breaker in the load center.
Circuit toggle switches. These s itches allo you to select either GEN (generator) or LINE (utility) as the
po er source for the branch circuits that have been ired through the transfer s itch. The OFF position is
generally not used, as a s itch in the OFF position stops the po er from the branch circuit from both utility and
generator po er at the circuit toggle s itch.
andle ties. Handle ties are inserted into t o adjacent toggle s itches and are used for 240 volt circuits
or multi- ire branch circuits. They may be removed for 120 volt circuits. See page 7 for instructions on
removing and adding handle ties.
Wiring Compartment. This is the iring space that is used to make the hard- ire connections from the remote
po er inlet box.
Watt Meters. Backlit attage meters monitor and display the po er (in atts) hen the generator is supplying
po er. This helps realize the efficiency of the total generator po er and helps in balancing the loads.
LEFT METER = CIRCUITS A, C, E RIG T METER = CIRCUITS B, D, F
KEY COMPONENTS OF THE RELIANCE CONTROLS TRANSFER SWITCH AND
POWER TRANSFER KIT

4
Living Room
Outlets
(200+ Watts)
Before you begin installing your Reliance Controls transfer switch system, you need to create a plan for the appliances you choose
to run during a power outage. To do this, it’s helpful to first know how your generator produces power. If your generator has four-prong
locking 20 or 0 Amp output receptacles, and is set-up for home stand-by operation, it likely will produce 120/240 Volt power, or power
similar to your electrical utility. This type of power generation is useful as it: 1) allows common 120 Volt circuits, such as lights or small
appliances, to be operated, and 2) allows two 120 Volt circuits to be linked together to operate a 240 Volt device, such as a well pump.
Because of the way in which larger portable generators are designed, they generate power in two equal halves. A generator which
has output of 5000 continuous running watts, for example, generates power from two 2500 watt “sides”. In setting up a transfer switch
to get the most power from your generator, it is desirable to “balance the load” between the two phases (sides) of your transfer switch.
Devices which will consume the most of the generator’s wattage should be divided between the two phases. A load balancing example is
shown in Figure 1. *Only a 240v circuit is already balanced.
For example, consider wiring the house breaker controlling the sump pump to toggle switch C, the refrigerator breaker to toggle switch D,
the furnace to switch E, and the breaker controlling your living room outlets to switch F. You may want to reserve switches A and B to be
linked with a handle tie and wired to a double pole breaker controlling, for example, a 240 volt circuit such as a water heater or well pump.
The Residential Wattage Requirements Table below shows sample wattages used by typical household appliances and can help
you plan the setup of your transfer switch. Use the running watts of your appliances rather than starting watts when dividing them
between the two halves of the transfer switch. Check your appliances for actual wattage ratings if possible.
Your Reliance Controls transfer switch allows you to manage the load on your generator manually by switching appliances on and
off as you need them, so the capacity of either half of your generator is not exceeded. However, if you prefer not to manage your
transfer switch loads manually, leave a buffer equal to the largest start-up wattage requirement of all of the appliances you are going to
run continually when doing your calculation. This buffer, along with the peak wattage of your generator, will allow for the periodic motor
start-up of any one large appliance, such as your refrigerator. You can visually monitor the amount of wattage being used by the
appliances your generator is powering at any time by viewing the watt meters (if included) near the top of the transfer switch.
PRE-INSTALLATION PLANNING OF THE GENERATOR LOAD
TYPICAL RESIDENTIAL WATTAGE REQUIREMENTS
Running Add Start-Up
Appliance Wattage Wattage
Furnace (1/3 HP) 700 1,400
Furnace (1/2 HP)
875
2,100
Window Air Conditioner
6000 BTU 1,200 2,100
12,000 BTU
1,700
2,900
Well Pump (1/3 HP) 750 1,400
Well Pump (1/2 HP) 1,000 2,350
Sump Pump (1/3 HP) 800 1,300
Sump Pump (1/2 HP)
1,050
2,150
Refrigerator
800
2,300
Garage oor Opener (1/4 HP) 550 1,100
Garage oor Opener (1/3 HP) 750 1,400
Home Security System
200
0
Lights
On Bulb
On Bulb
Stereo
200
0
TV
200
0
Computer
200
0
Microwave
Check oven
Check Oven
Coffee Maker
1,750
0
Keurig®
1,350
0
Toaster
1,000
0
Electric Fan
200
0
Clothes Washer
1,150
2,300
Clothes ryer (Gas) 700 1,800
ishwasher (Cool ry) 700 1,400
ishwasher (Hot ry) 1,450 1,400
Vacuum Cleaner 1,000
0
Hair ryer Check ryer Check ryer
Iron
1,200
0
Circular Saw 800 2,000
Well Pump
(1,000 Watts)
Sump Pump
(1,050 Watts)
Refrigerator
(800 Watts)
Furnace
(875 Watts)
Figure 1
A B C D E F
Left Meter = A, C, E Right Meter = B, D, F

5
A. Mounting the Transfer Swit h
1.
Remove the bottom wiring compartment (2 lower screws).
Position the transfer switch so that its bottom center and the
included 16 inch conduit will reach the desired knockout on
your load center. The end of the conduit whip should be lined
up with a 3/4" knockout hole on your load center (Figure 2).
2.
Mark the position of the three mounting holes with a pencil.
The bottom wiring compartment must be removed to access
the two lower mounting holes.
3.
Anchor the transfer switch to the wall with three
appropriate anchors (with a flange of at least 3/8").
NOTE: Do not attempt to bend the flexible
conduit whip beyond its structural capabilities.
B. Connecting the Flexible Conduit Whip to
Your Load Center
1.
Set up battery-powered lighting to clearly illuminate
your work area.
2.
Turn off the main utility breaker (Figure 3).
3.
Remove the cover of your load center. Keep in mind that the
wires on the utility side of the main breaker are still live and if
contacted could cause serious injury or death. If available
use a non-contact voltage detector to insure that the power is
off on the non-utility side of the main breaker.
4.
Remove the appropriate knockout hole in your load center
with a screwdriver and hammer. (See step A-1 above.)
5.
Insert all of the wires extending from the end of the flexible
conduit whip through the knockout hole. Install and connect
the conduit connector attached to the whip into the
knockout hole.
INSTALLATION INSTRUCTIONS
Even with the ain power
switch turned off, the wires
on the utility side of the ain
breaker are still live and
contact with the can cause
serious injury or death.
Figure 3
Figure 2
Mounting Holes (3)

6
C. Conne ting the Neutral and Ground Wire
1.
Find the white wire (Neutral) and the green wire (ground)
among the wires from the transfer switch that you have
inserted into the load center.
2.
Strip approximately 5/8” from the end of the white wire.
Locate the neutral bar and partially unscrew a terminal
screw on the bar. Insert the stripped end of the wire into the
side of the bar under the screw and retighten the screw.
(Figure 4)
3.
Locate the ground bar. (It should be labeled.) Connect the
green wire to the ground bar in the same way as in step
#2. In service entrance load centers the ground bar and
Figure 4
When Installing 120 Volt Circuits
neutral bar are frequently the same; if so the ground and
neutral wires can be connected to either.
D. Installing 120 Volt Cir uits
This section provides instructions for connecting the wires
from your transfer switch to the circuit breakers in your load
center which control your appliances.
You should refer to the load planning you did previously to
insure that side #1 and side #2 of the transfer switch are
balanced. Wire the circuits starting with any 120V circuit.
If a selected circuit is part of a multi-wire branch circuit, insure the
other branch circuit that shares the neutral is also connected to the
transfer switch. The two circuits must be connected to opposing legs
(phases) of the generator power and a handle tie must be installed on
the switch handles so that both legs are transferred at the same time.
Failure to properly install a multi-wire branch
circuit could result in overloading the neutral wire.
The transfer switch circuits with 0 Amp breakers must be connected only to
branch circuits with 0 Amp breakers in the load center. Do not connect transfer
switch circuits to any branch circuits greater than 0 Amps, except circuits A & B
which may be connected to 30 Amp circuits. Any of the breakers can be changed.
NOTE: The transfer switch circuits with 15 Amp breakers can be connected to
branch circuits with either 15 or 0 Amp breakers in the load center.
If you will not be installing any 240 Volt or multi-wire circuits
remove the factory-installed handle tie(s) on the unit (See
Page 7)
Let’s assume that according to your load balancing plan you
will use Switch E to supply power to the furnace (Figure 5)
1.
Turn off the furnace circuit breaker. Disconnect the wire
that is attached to the circuit breaker.
2.
Find the black wire and red wire from the transfer switch
marked E.
3.
Cut the red wire at a length convenient for it to reach to the
furnace circuit breaker. Strip 5/8” from the end of the wire.
Connect the red wire to the furnace circuit breaker and
retighten the screw on the breaker.
4.
Cut the black wire from the transfer switch to a length
convenient for attaching it to the wire you removed from the
furnace circuit breaker in #1. Strip 5/8” from the end of the
wire.
5.
Insert both wires—the one removed from the furnace circuit
breaker and the black wire for Switch E — into an
appropriate wire connecter. Tighten the connection and
push the connected wires back into the wiring compartment
of the load center.
This completes the connection of Switch E for your furnace.
Label Switch E as “Furnace” on the identification circuit
chart.
6.
Repeat Steps 1 through 5 for each of the remaining switches
on your transfer switch according to your load balancing plan
taking into account the following:
•
See the next section for installing 240 Volt Circuits
•
Remember to “Balance the Load” dividing appliances
with higher wattages between each phase as best
you can.
(Phase 1 = A, C, E. Phase 2 = B, D, F)
WARNING
WARNING
Figure 5

7
E. Installing 240 Volt Circuits
Reliance Controls 6-Circuit Transfer switch (In Kit) is shipped from
the factory with one installed handle tie on two adjacent circuits.
Let’s assume that, according to your set-up plan, Switches A & B
on the 6-Circuit transfer switch will be used to supply power to your
well pump, a 240 Volt appliance. (Figure 6)
1.
Find the two red and the two black wires marked A & B.
2.
Turn off the double pole breaker for the well pump in the load
center.
3.
Disconnect the two installed wires on the double pole breaker.
4.
Cut the two red wires from marked A & B at a length
convenient for them to reach to the double pole breaker. Strip
5/8” from the end of each red wire. Connect both red wires to
the double pole circuit breaker in place of the wires you just
removed from that breaker. It doesn’t matter in what order.
5.
Cut the two black wires marked A & B to a length convenient to
reach the wires you removed from the double pole breaker in
# . Strip 5/8” from the end of each wire.
6.
Connect one of the wires you removed from the double pole
breaker in # with one of the black wires (either A & B) with
an appropriate wire connector. Similarly, connect the other
wire you removed with the remaining black wire with an
appropriate wi re connector.
F. Completing the Installation of the
Transfer witch
When you have wired all of the circuits from the transfer switch into
your load center and have properly installed the green and white
wires to the ground and neutral bars, you have finished the
installation.
Just a few more steps to wrap things up.
1.
Replace the cover of the load center.
2.
If you have not already done so, fill in the chart on the transfer
switch to identify your emergency circuits and the toggle
switches they correspond to.
3.
Do not turn the main and individual circuit breakers in your load
center back on until you have installed all other transfer switch
components in Sections G and H which follow.
When Installing 240 Volt Circuits
The transfer switch circuits with 20 Amp breakers must be con-
nected only to branch circuits with 20 Amp breakers in the load
center. Do not connect transfer switch circuits to any branch cir-
cuits greater than 20 Amps, except A and B positions ( 0A max).
A 20 amp breaker can be changed to a 15 amp breaker if needed.
NOTE: The transfer switch circuits with 15 Amp breakers can be
connected to branch circuits with either 15 or 20 Amp breakers
in the load center. This is because there is 12 AWG behind all
switches except A and B which use 10 AWG.
Removing handle ties.
If there are no 240 volt or multi-wire circuits in the transfer switch installation, handle ties on the
switches are not needed. To remove a handle tie, place the handle-tied switches in a position opposite of the other
switches. Rotate the cylindrical spacer between the switches upward repeatedly until the threaded shaft is exposed on the
ri ht switch. Grab the threaded shaft and continue to rotate the spacer upward until the spacer is free, bein carefully not
to drop the spacer when it becomes free. Remove the shaft from the switch. If the shaft is not exposed after several
revolution of the spacer, insert a small slot screwdriver in the hole in the ri ht switch and continue rotatin the spacer
upward while the screw driver prevents the shaft from rotatin .
Adding handle ties.
If additional ties are needed to accommodate additional 240 volt or multi-wire circuits, they can be
added to adjacent pairs of switches.
Figure 6
WARNING

8
G. Installing and Wiring the Outdoor Power
Inlet Box (included in kit)
Since you will be operating your generator outdoors in a location
remote from your electrical load center, you will need to install an
outdoor power inlet box on an exterior wall. Because it is hardwired
directly to your transfer switch, the power inlet box gives you the
flexibility to locate your generator just about anywhere, especially
away from any openings such as doors and windows.
Reliance Controls Power Inlet Boxes are UL listed and should only
be used with proper wire sizes, which are dependent on the
application such as the size of generator and length of wire.
To install the Reliance Power Inlet Box model PB 0 (Figure 7):
1.
Loosen the screw at the bottom front of the box and lift off the
cover.
2.
Choose which knockout hole on the box is most convenient to
where you will be running the building wire into your transfer
switch. Remove the knockout with a screwdriver and hammer.
3.
Plan to run enough building wire (check electrical codes for the
need for conduit) to reach your transfer switch, allowing extra
length for ease of wiring at the transfer switch end.
4.
Using approved wiring methods, place a cable or conduit
connector (check codes) in the inlet box knockout hole and run
enough building wire into the box to allow easy wiring. Tighten
the connector.
5.
Mount the back plate of the power inlet box where it will be
convenient. Use the three holes in the plate.
6.
Strip 5/8” from each building wire lead. Loosen the green
grounding screw on the inside of the box and insert the stripped
end of the building wire ground under one side of the grounding
screw and retighten.
7.
On the bottom of the inlet plug, insert the white wire into the
hole marked “W” and tighten the screw on the side of the plug.
Do the same with the red wire into the hole marked “X” and the
black wire into the hole marked “Y”.
NOTE: Red or Black can connect to either the X or the Y
terminals, as these “hot” terminals are not specific to the color of
Red or Black.
8.
Replace the cover of the power inlet box and tighten
the screw.
Figure 7
H. Wiring the Power Inlet Box to the
Transfer witch
All Reliance Controls transfer switches are designed to allow
hardwiring between the outdoor power inlet box and the transfer
switch’s internal wiring compartment.
To hardwire your transfer switch to the building wire from the power
inlet box (Figure 8):
1.
Remove the front bottom wiring compartment cover plate of the
transfer switch by unscrewing the two screws securing the plate.
Once the plate is removed, the 4 wire leads necessary to
connect the incoming building wires from the generator are now
accessible.
2.
Punch out the knockout hole on the side of the transfer switch
wiring compartment.
3.
Using approved wiring methods, place a cable or conduit
connector (check electrical codes) in the knockout hole, and pull
enough building wire into the inside of the wiring compartment
to provide sufficient working length. Tighten the connector.
4.
Complete the wiring by connecting the building wire neutral
to the pre-stripped WHITE neutral in the transfer switch, and
the building wire ground to the pre-stripped GREEN ground
wire in the transfer switch.
Connect the incoming building red wire to the pre-stripped
transfer switch RED or BLACK wire, and then connect the
incoming building black wire to the other pre-stripped
transfer switch RED or BLACK wire. Use appropriate wire
connectors. Finish by pushing the wires back into the
compartment, putting the wiring compartment cover back in
place and replacing the screws.
Figure 8

9
I. Finishing Up
According to your individual installation requirements, after you have completed all the steps necessary leading up to this point, complete
the system installation by doing the following:
1.
Turn on all of the circuit breakers in your load center.
2.
Turn on the main breaker.
3.
Position all switches on the transfer switch to the LINE position.
4.
IMPORTANT! In order to insure that all wiring connections have been properly completed and that your system functions properly under
generator power, it is important to test each circuit before turning on any devices or appliances connected to that circuit. Correct voltage
output can and should be checked with a voltage meter at any convenient electrical outlet on each branch circuit that is wired through the
transfer switch. This should be done under generator power with the appropriate circuit toggle switch in the “GEN” position. It’s best to
test 1 circuit at a time.
Generator and Transfer witch Maintenance
You want your generator to be ready when you need it – so, it is important to maintain your generator according to your generator manual and
manufacturer’s suggested maintenance. We recommend that you run your generator’s power through the transfer switch periodically to
insure that everything is operating properly and that you are ready for the next power outage.
Operation of Transfer witch
With your Reliance Controls trans er switch installed, it is not necessary to turn o any o your load center breakers when starting your
generator, even when utility power is ully unctional. This is because the double throw break-be ore-make action o the trans er
switch toggle switches prevents eeding generator power to the utility and, conversely, prevents eeding utility power back to your
generator.
A. Transferring from Utility Power to Generator Power in an Emergency
1.
Make sure that all switches on the Reliance Controls transfer switch are in the LINE position.
2.
Plug the male end of your power cord into the generator.
3.
Plug the female end of your power cord into the outdoor power inlet box.
4.
Start your generator outdoors and let it warm up, as instructed in your generator manual.
5.
Turn the toggle switches on your Reliance transfer switch to the GEN position one at a time.
If you have a Reliance transfer switch with watt meters, you can monitor the power that is being used by your generator.
B. Transferring back to Utility Power When the
Power Is Restored
1.
Move all switches on the Reliance Controls transfer switch back to
the LINE position.
2.
Turn off your generator.
3.
Unplug your power cord and store it.
AFCI and GFCI Circuit Breakers:
can be installed in this trans er switch, speci ic wiring methods are necessary.
Accessory wiring kits and neutral bars are available. Please contact us directly or more in ormation on adding or connecting to
AFCI/GFCI type breakers.

10
TRANSFER SWITCH PRODUCT SPECIFICATIONS
NOTES

A B C D E F
Controls these
essential
appliances I will
need during a
power outage
So I will need to
turn these other
devices off which
are on the same
circuits
HOME CIRCUIT MAPPING CHART

Five Year Limited Warranty
Reliance Controls Corporation (“Reliance”) warrants this Protran® Manual Transfer Switch
(“Switch”) to be free from failure to perform as intended due to defects in materials and
workmanship for a period of fi e (5) years from date of manufacture, pro ided the Switch has
been installed and used in accordance with manufacturer’s instructions and has not been
subjected to misuse, alteration, accident, or repair not performed by Reliance. If, within such
warranty period, the original purchaser gi es written notice to Reliance at the address shown
below and the Switch has been pro en to Reliance’s reasonable satisfaction to be defecti e,
then Reliance at its sole option shall either: (i) supply a replacement component(s) for the defecti e
component(s) or (ii) repair or replace the Switch. Reliance’s obligation is strictly limited to said
repair or replacement of the Switch, and Reliance shall not be liable for any incidental, special or
consequential damages. The cost of labor to remo e or install a replacement component or
Switch is not included in this warranty. The foregoing warranty is exclusi e and in lieu of all
other expressed or implied warranties, if any, including but not limited to implied warranties of
merchantability and fitness for a particular purpose. Reliance strongly recommends that the
purchaser seek the ad ice of a licensed electrician to determine the suitability of this product,
and for its proper installation in accordance with all applicable state and local building codes. This
warranty gi es you specific legal rights, and you may ha e other rights which ary from state to
state.
Warranty registration can be completed online at www.reliancecontrols.com
To do so simply mouse over the "Customer Support" tab, then select "Warranty Details and
Registration".
Reliance Controls Customer Service: (800) 634-6155
Email: Support@reliancecontrols com
Website: www reliancecontrols com
Reliance Controls Corporation
2001 Young Ct.
Racine, WI 53404
Table of contents
Other Reliance Controls Switch manuals
Popular Switch manuals by other brands

LevelOne
LevelOne GTL-2880 Quick installation guide

OnQ Technologies
OnQ Technologies 8 Port 10/100 Ethernet Switch Installation instructions manual

Limente
Limente Smart 100 quick start guide

UUGear
UUGear Zero4U user manual

HB Products
HB Products HBSC2 instruction manual

ZyXEL Communications
ZyXEL Communications GS3700 Series user guide

Enterasys
Enterasys SmartSTACK EPIM1000-S1SX 1000BASE SX-SC Quick installation guide

Gigabyte
Gigabyte GN-GT8S user guide

Cabletron Systems
Cabletron Systems MMAC-Plus 9F116-01 user guide

Microsonic
Microsonic zws-15/CD/QS operating instructions

Lantech
Lantech IES-5416DF Series user manual

OTS
OTS ET4111Pp Series manual