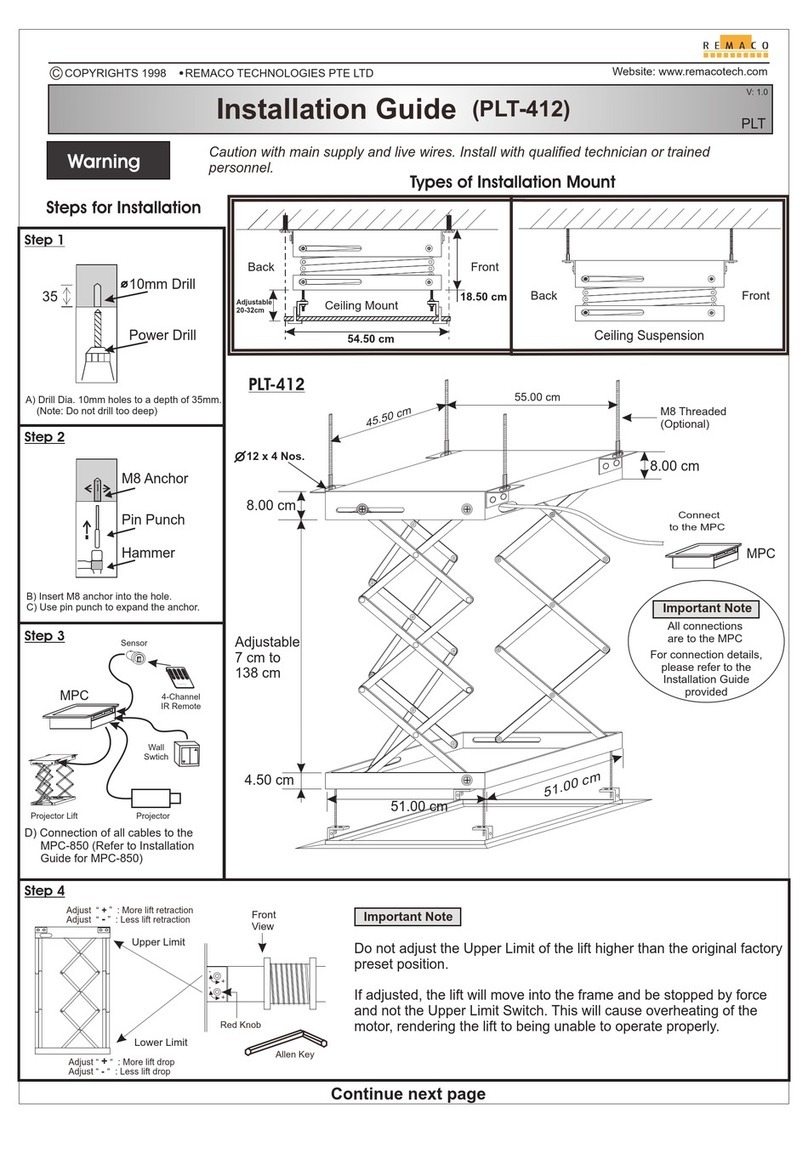
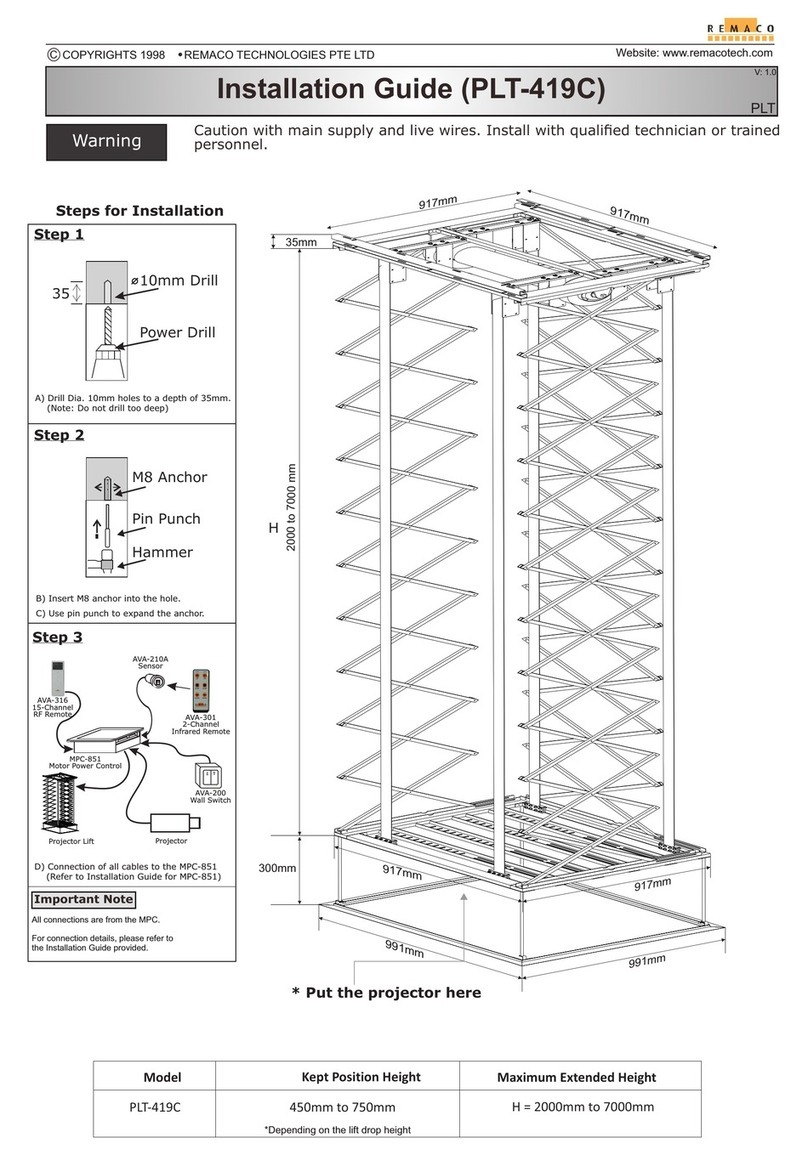
Remaco PLT-418C User manual

Model Kept Position Height Maximum Travel Distance
PLT-418C 863mm 4100mm
Warning Take pre-caution when handling main supply and live wires. Install with qualified
technician or trained personnel.
Installation Guide (PLT-418C)
CWebsite: www.remacotech.com
COPYRIGHTS 1998 REMACO TECHNOLOGIES PTE LTD
PLT
V: 6.0
*Depending on the lift drop height
333mm
4630mm
861mm
594mm
532mm
787mm
532mm
787mm
Top Frame
C-Hook
Bracket
Scissor Bar
Stainless Steel
Wire
(4 nos)
Motor
Bottom Frame
Perforated Hole
Ceiling Enclosure
Threaded Rod
Back
Front
Types of Installation Mounts
Mount Directly To Concrete Ceiling
Front View
LCD/Laser Projector
Front View
Suspended From Concret Ceiling
with Threaded Rod
←Threaded Rod (Optional)→
Concrete
Concrete
LCD/Laser Projector
Load Capacity
70kg
Load Capacity: 20kgs
Drop Height: 120cm
3-Core
Power Supply
AC Cable
3-Core
Power Supply
AC Cable
4-Core DC Control
(Contact Closure)

Drill Dia. 10mm holes to a depth of 55mm..
(Note: Do not drill too deep)
10mm Drill
Power Drill
55
Step 1
Insert M8 anchor into the hole.
Use pin punch to expand the anchor.
Hammer
M8 Anchor Bolt
Step 2
Steps for Installation
LCD/Laser Projector
Concrete
Ceiling Enclosure
Threaded Rod
Bottom Frame
Stainless Steel
Wire
(4nos)
Top Frame
C-Hook Bracket
787 x 41 x 30mm
M8 Anchor
594 x 861mm (Ceiling Enclosure, Outer)
False Ceiling
(Plaster Ceiling)
583 x 850mm (Ceiling Cut Hole Size)
Hollow Ceiling
Frame
COM
Contact Closure (Dry Contact)
Up (Red)
Down (Black)
Common (Yellow)
Not in use (Green)
Cable color legend
** AVA-200
Spring-Loaded
Mechanical Switch
* Stop - press any button to stop
movement
**A/V Control System
(e.g. AMX / Creston)
Momentary Contact closure connection (dry contact, normally open, voltage free).
Recommended to set close contact for 1.5sec for best working condition.
Any voltage above 3Vdc voltage will damage this ESC
Suitable to use with control systems (example: AMX, Crestron, Extron, ..etc)
Warranty void if damaged is caused by inappropriate use
**
634 x 901mm (Hollow Ceiling Frame, Outer)

299 mm299 mm
222 mm 223 mm 222 mm
498 mm
594 mm
861 mm
To cut out plaster ceiling hole to the size of the hollow
frame so that it can be mounted securely.
Hollow Ceiling
Frame
To Cut Out Plaster Ceiling
Hole (& insert Ceiling Frame
into this hole)
Plaster Ceiling
(False Ceiling)
Screws to hold Hollow
Ceiling Frame onto
Plaster Ceiling
583mm
850mm
Step 4 Step 5
1. Lift up
2. Slip in
Step 6: RF Remote Operation
Move Upward Stop Movement Move Downward Move to third limit
(for maintenance purposes)
Press and hold (STOP) for 2 sec.
Up Stop Down Stop for
2 sec.
Step 3

Step 7: Mechanical Switch (AVA-200, AVA-200+, Third-Party Control)
Pairing RF Remote to Electronic Motor
P2 x 1
Switch (OFF) first then
Switch (ON)
Motor
beeps
press setting button (P2)
one time
within 5 sec.
press (DOWN) button
one time
Direction 1
press (UP) button
one time
UP x 1
DOWN x 1
OFF x 1
ON x 1
P2 x 1
press setting button (P2)
one time
within 5 sec.
Motor roll
up and down
Motor roll
up and down
Motor
beeps
Direction 2
(Change Direction)
Motor
beeps
Motor roll
up and down
Motor roll
up and down
Step 8: Pairing, Limit Position Settings, and Deleting
Up
Move Upward
Stop
Press any button to
STOP movement
Down
Move Downward

Setting of Upper and Lower Limit
P2 x 1
press setting button (P2)
one time
UP x 1
press (UP) button
one time
within 5 sec
P2 x 1
press setting button (P2)
one time
within 5 sec.
UP x 1
press (UP) button
again to adjust
the upper limit
Motor
beeps
Motor roll
up and down
Motor roll
up and down
Motor roll
up and down
STOP (5sec)
press and hold
(STOP) button
for 5 sec
prepare to press
(STOP)
when reaching desired
limit position
DOWN x 1
press (DOWN) button
again to adjust
the lower limit
STOP (5sec)
press and hold
(STOP) button
for 5 sec
prepare to press
(STOP)
when reaching desired
limit position
Motor roll
up and down
Motor roll
up and down
Motor Beeps.
Lower limit setting
successful.
Motor Beeps.
Upper limit setting
successful.
Motor
beeps
STOP x 1
press (STOP) button
one time
STOP x 1
press (STOP) button
one time
Successful
Remote
EXITS
teaching
mode
Remote
ENTERS
teaching
mode

Setting of Third Limit (Below Lower Limit for Maintenance)
P2 x 1
press setting button (P2)
one time
Motor roll
up and down
Down
limit position
DOWN x 1
press (DOWN) button
one time
within 5sec
Motor roll
up and down
DOWN x 1
press (DOWN) button
one time
Motor roll
up and down
press (DOWN) button
one at a time until
reaching desired limit.
Motor rolling
downward in steps
P2 x 1
press setting button (P2)
one time
within 5 sec.
Motor roll
up and down
Motor
beeps
STOP x 1
press (STOP) button
one time
Motor roll
up and down
STOP (5sec)
press and hold
(STOP) button
for 5 sec
Motor roll
up and down
Motor
beeps
Delete the Limits
P2 x 1
press setting button (P2)
one time
DOWN x 1
press (DOWN) button
one time
P2 x 1
press setting button (P2)
one time
within 5 sec.
Motor
beeps
Motor roll
up and down
Motor roll
up and down
Successful
Successful
Delete Memory of RF Remote Pairing
P2 x 1
press setting button (P2)
one time
STOP x 1
press (STOP) button
one time
P2 x 1
press setting button (P2)
one time
within 5 sec.
Motor
beeps
Motor roll
up and down
Motor roll
up and down
Successful
(Delete all pairing memory)
Motor
beeps
Motor
beeps
Remote
ENTERS
teaching
mode
Remote
EXITS
teaching
mode

Fine Tuning of Upper/Lower Limit
press (DOWN) button
one time until
reaching desired
lower limit postion
press (UP) button
one time until
reaching desired
upper limit postion
UP x 1
DOWN x 1
Motor roll
up and down
Motor move
in steps
Motor move
in steps
press (UP) and (DOWN)
button together for
3 sec.
press STOP button
and hold for 3 sec.
STOP x 1
STOP x 1
press STOP button
and hold for 3 sec.
Appendix A (Set Only When Required)
Adding 2nd RF Remote
P2 x 1
press setting button (P2)
of RF Remote (RF 1)
one time
Successful
P2 x 1
press setting button (P2)
of RF Remote (RF 1)
one time within 5 sec.
Motor roll
up and down
Motor roll
up and down
P2 x 1
press setting button (P2)
of RF Remote (RF 2)
one time within 5 sec.
RF 1
Motor
beeps
(UP+DOWN) x 1 Motor move
in steps
Motor move
in steps
Successful
Successful
Motor roll
up and down
Motor
beeps
Delete Third Limit Position
P2 x 1
press setting button (P2)
of RF Remote (RF 1)
one time
Successful
STOP x 1
press STOP button
and hold for 3 sec.
Motor roll
up and down
Motor roll
up and down
STOP x 1
press STOP button
and hold for 3 sec.
Motor roll
up and down
Motor
beeps
RF 1 RF 2
** Once fine tuning lower limit is adjusted, third limit position will be erased and need to redo.

Appendix B (Another Setting method by Motor Button)
Motor
Button
Change Direction
Successful
Motor roll
up and down
Motor
beeps x 3
Motor
Press and Hold
Button
for 5 sec.
Factory Default Reset
Successful
Motor roll
up and down
Motor
beeps x 3
Press and Hold
Button
for 10 sec.
(Do not release)
Motor roll
up and down
Motor
beeps x 3
Motor roll
up and down
5sec. Next 5sec.
Motor

End
Appendix C (Assemble threaded rod and spring to ceiling enclosure)
Parts:
1. Ceiling Enclosure
2. 4nos. x Threaded Rod & Spring
3. Springs, Nuts and Washers
Insert threaded rod and spring as shown
and tighten with nuts and washers.
Fully assembled ceiling enclosure.
Simple Method to insert false ceiling
Lay false ceiling board 45 degree on false ceiling frame
as shown.
Rotate and false ceiling board will position correctly.
Other manuals for PLT-418C
1
Table of contents
Other Remaco Lifting System manuals
Popular Lifting System manuals by other brands

Simon, Evers & Co
Simon, Evers & Co K 658791 operating manual

Tractel
Tractel tirfor TU-8 Operating and maintenance instruction manual

Viking Arm
Viking Arm 051022 manual

sarvaria
sarvaria Multilift installation guide

Sinoboom
Sinoboom GTJZ1930SE Maintenance manual

Mcombo
Mcombo 6360-SEC212W Operating instruction