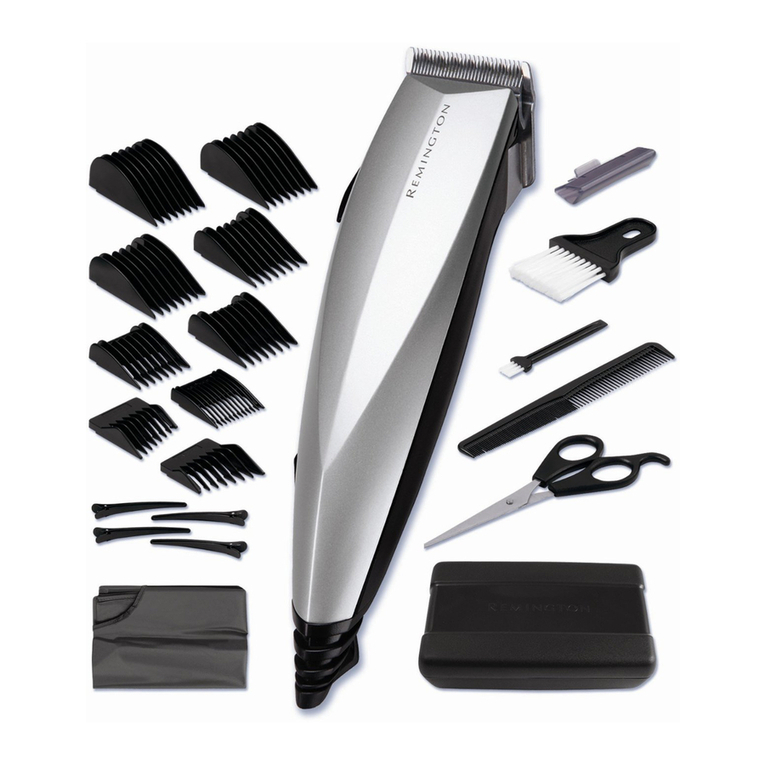
B.
D.
E.
F.
G.
H. L.
I. M.
J. N.
K.
O.
C.
IMPORTANT SAFETY
INSTRUCTIONS
SAVE THESE INSTRUCTIONS
How to Use
■ Do not use outdoors or operate where
aerosol (spray) products are being used
or where oxygen is being administered.
■ Do not use this appliance with a
damaged or broken cutter as injury
may occur.
■ Always store your appliance and cord
in a moisture-free area. Make sure your
cord is disconnected from the appliance.
■ Make sure unit is “off” before plugging
in, always attach plug to appliance first,
then to outlet. To disconnect, turn all
controls to “off”, then remove plug from
outlet.
■ For household use only.
■ The power unit is intended to be
correctly oriented in a vertical or floor
mount position.
■For additional protection the installation
of a residual current device (RDC) with
a rated residual operating current not
exceeding 30mA is advisable. Ask an
electrician for advice (Argentina/Chile).
When using an electrical appliance, basic
precautions should always be observed,
including the following. Read all instruc-
tions before using this appliance.
READ ALL
INSTRUCTIONS
BEFORE USING.
KEEP AWAY FROM
WATER.
DANGER
As with most electrical appliances,
electrical parts are electrically live even
when the switch is off. To reduce the
risk of death by electric shock:
■ Do not reach for an appliance that has
fallen into water. Unplug immediately.
■ Do not use while bathing or in the
shower.
■ Do not place or store appliance where it
can fall or be pulled into a tub or sink.
■ Do not place in or drop into water or
other liquid.
■ Always unplug immediately after using.
■ Always unplug this appliance before
cleaning.
WARNING
To reduce the risk of burns, fire,
electric shock or injury to persons:
■ An appliance should never be left
unattended when plugged in.
■ This appliance is not intended for use by
people (including children) with reduced
physical, sensory or mental capabilities, or
lack of experience and knowledge, unless
they have been given supervision or
instruction concerning use of the appliance
by a person responsible for their safety.
■ Children should be supervised to ensure
they do not play with the appliance.
■ Use this appliance only for its intended
use as described in this manual. Do not
use attachments not recommended by
manufacturer.
■ Never operate this appliance if:
– The power cord or plug is damaged.
– Has fallen into water
– Has been damaged, broken or not
working properly.
– In either case immediately take the
device to the repair center.
Note: If the power cord is damaged it
must be replaced by qualified personnel
or an authorized service center in Latin
American.
■ Keep the cord away from heated
surfaces. Do not wrap the cord around
the appliance.
■ Never drop or insert any object into any
opening.
CAUTION: This product is
not suitable for use in bath
or shower.
Usage Tips
Cleaning and Maintenance Guarantee - see separate insert
® Registered Trademark and TM
Trademark of Spectrum Brands, Inc.©
2020 Spectrum Brands, Inc.
08/20 Job#25825-01
T22-0001294-E
Spectrum Brands, Inc.
Middleton, WI 53562
Diseñado en USA
HECHO EN CHINA
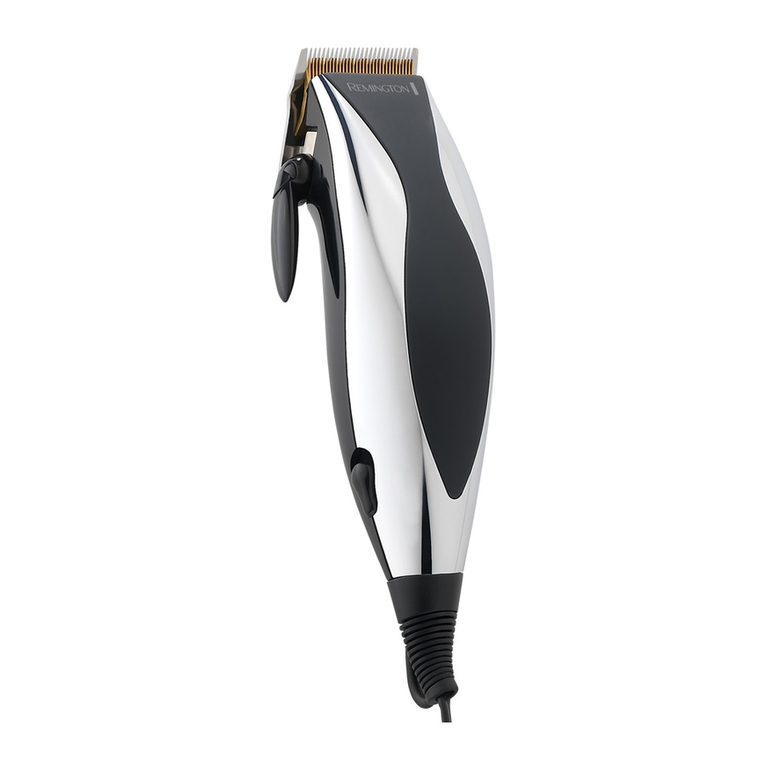
Type: HC5850
Características eléctricas
110V: 120V ~ 60Hz 6W
220V: 220-240V~ 60/50Hz
This warranty shall not be valid where it is contrary
to U.S. and other applicable laws, or where the
warranty would be prohibited under any economic
sanctions, export control laws, embargos, or
other restrictive trade measures enforced by the
United States or other applicable jurisdictions. This
includes, without limitation, any warranty claims
implicating parties from, or otherwise located in,
Cuba, Iran, North Korea, Syria or the disputed
Crimea region.
Removeable Blade
■Place blade guard onto the blades
before removing.
■To remove blade, hold the clipper
with front of blade teeth facing
away.
■Push the blade cartridge out, using
the thumb cut out on the back of
the clipper.
■The blade can be easily brushed for
cleaning
NOTE: DO NOT CLEAN BLADE OR
CLIPPER HANDLE WITH WATER OR
UNDER THE TAP
To Install Blade
■To reattach blade, slide cartridge
back into clipper body.
■When pushing blade back into posi-
tion, ensure that you do not push
on the metal blades; there is a
plastic portion of the blade car-
tridge that should be pushed in.
Giving a Comfortable, Even Cut
Allow the clipper to cut through the hair
without moving it too quickly. Moving the
clipper too quickly may create a pulling
sensation.
Use short strokes when cutting, and ini-
tially use the longest trimming guide. You
can always use a closer trimming guide
later if you want a closer cut.
How to Give a Haircut
1. Start at the
back of the
head. Holding
the clipper as
shown, lightly
stroke upward
making sure you
are taking off the
desired amount
of hair. Work
your way up to the crown of the head in
layers. When completed, comb the area to
remove any loose hair and to determine
whether you need any further cutting.
2. Repeat the same procedure for each side
of the head. Make sure the length of the
hair is trimmed to the same length on
both sides of the head.
3. To cut the hair at the top of the head, hold
the hair between your fingers and cut a
small amount at a time. Cut from the front
to the back.
4. The final trim can
be made with the
hair clipper or the
included scissors.
Make sure to
check over the
entire head for
any uneven
areas. For styled hair or giving quick trims,
you may prefer using your hair clipper
without the trimming guide.
Very short styles
1. Using the 12mm
trimming guide,
hold the comb
flat against the
head and move
the hair clipper
from the back of
the neck to the
crown of the head.
2. Cut in a similar manner from the side to
the top of the head. Then cut from the
front to the crown of the head.
3. If a “Flat Top”
style is desired,
then remove the
trimming guide
and use the
barber’s comb.
Trim a little at a
time until a flat
look is achieved.
Trimming Beards &
Mustaches
1. Comb your beard
in the direction it
grows.
2. Determine the
length you want
the beard to
remain, and fit
the appropriate
trimming guide.
Remember the
3mm guide will
give you the shortest beard while the
12mm or 25mm will give you the longest.
If you want a longer beard you can use
the barber’s comb as a trimming guide.
3. Start trimming under your chin and work
toward your ear and beard line. Cut in
different directions for a uniform trim.
4. Lightly stroke the edge of your mustache
in a downward movement.
Before using read the important safety
instruction section in front of the
manual.
Blade Care
The life of your clippers will depend on
frequency of use, care, application of
oil, and hair type and condition. Blades
should be replaced
when cutting efficien-
cy has deteriorated.
Before Cutting
Hair
1. Place a cape around
the neck of the
person whose hair is
being trimmed or cut.
2. This person should be seated so that the
top of his head is at your eye level.
3. Comb the hair as it is normally styled.
4. Comb out all knots and tangles.
5. Ensure the hair is dry. Hair clippers
perform best with dry hair, making it
easier to see how much hair is being cut.
6. Hold the hair clipper in the palm of one
hand with your thumb resting firmly
on the top of the hair clipper. This grip
provides comfortable cutting control.
Although the hair clipper may be used
with the left or right hand, using it right-
handed allows you to access the taper
lever more easily.
Attaching Guide Comb
1. Select the trimming guide that matches
the length you want the hair to be after
the cut.
2. Guide combs should be installed by first
hooking the blade teeth to front side of
guide comb. Then press the back of the
guide comb down until it snaps into place.
3. Ensure comb is attached before beginning
to cut hair.
4. To remove, pull the snap tab on back side
of guide comb and pull the comb off.
After each use:
■Brush the accumulated hair from the
cutters. Do not submerge the clipper in
water.
Cleaning Cautions:
■Do not use liquid cleaners on the cutters
or harsh or corrosive chemicals on the
cutter casing.
■Unplug the clipper from the power outlet
when not in use and when cleaning.
Storage
■Always store this appliance and cord in a
moisture-free area.
■Do not wrap the cord around the
appliance.
■Do not store in temperatures above 140ºF.
Blades
■It is recommended to oil the blades after
every use.
■Place 1 to 2 drops of lubricating oil on the
moving blade and turn on the clipper. The
oil should distribute on its own. Wipe off
any excess oils.
Troubleshooting
Clipper cutters do not move:
■The cutting unit may be dirty and clogged.
Clean the unit as directed in Cleaning
& Maintaining section.
■Always clean the blade and clipper before
storing.
■Always place the blade protection guard
back on the clipper blades before storing.
For digital manual,visit www.remingtonlatam.com
Use and Care Guide
A.
Sku: HC5850 (110) F, (220) A & R
