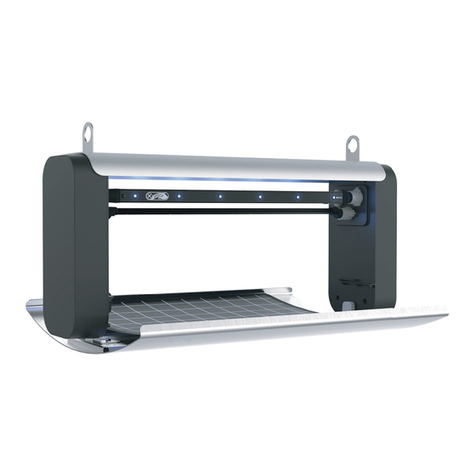
Rentokil RADAR X User manual

RADAR X
Applicable to: Standard / Connect Variants
This manual is based on the latest information and is provided subject to
alteration. We reserve the right to change the construction and/or configuration
of the product and versions at any time without obligation.
All rights reserved. No part of this document may be reproduced, stored in a database or any other retrieval
system, or published, in any form or way, electronically, mechanically, digitally per photo print or microfilm
or any other way without written permission from the author.

2
Introduction
Safety Instruction
Attention
Warning
Warning Translations
Product Description
Product Function (Connect Variants Only)
Limitation of Liability & Damages
Product Disposal
Environmental Restrictions
Product Range
Installation
1. Prior to RADAR X Installation
2. Site Installation
3. Fitting the Battery
4. Battery Level
5. Site Survey (Connect Variants Only)
6. Open Catch Tray
7. Setting the Trap Doors
8. Setting the Trigger Mechanism
9. Fitting CO2Canister
10. Refitting the Catch Tray
11. Arming the Module
Servicing & Maintanence
1. Status Check
2. Enter Service Mode
3. Within Service Mode
4. Cleaning
5. Setting the Trap
6. Removing a used CO2Canister
7. Fitting a new CO2Canister
8. Refitting the Catch Tray
9. Reactivate the Trap
How to Swap Trays
1. Open Catch Tray
2. Remove and Replace Catch Tray
3. Close and Lock the Catch Tray
Contents
4
4
4
5
7
7
8
8
9
10
11
11
12
13
13
13
14
14
14
15
15
16
17
18
18
18
19
19
20
20
21
21
21

3
How to Swap Sensor Pods
1. Remove Battery
2. Open Catch Tray
3. Remove Rodent Sensor Pod
4. Replace Rodent Sensor Pod
5. Close and Lock the Catch Tray
6. Reactivate the Trap
Fitting the Lanyard
1. Parts required to Fit the Lanyard
2. Fitting the Lanyard
2. Removing the Lanyard
System Information
Enter System Information
Operating the UI
Operating the User Interface
Error Codes
Error Code Details
Advanced Diagnostic
Mode
LED Test
Motor Test
Temperature Test
Accel Test
Side Pod Test
Exit Advanced Diagnostic Mode
Further Information
Technical Details
Product Code Summary
Approvals
Contents
22
22
22
23
23
23
24
24
24
25
27
29
30
34
35
36
37
37
38
39
39
40

4
RADAR X is a discreet, humane and non-toxic solution of mouse control. Designed
specifically for high risk market segments where even a single mouse cannot be
tolerated. RADAR X is suitable for food and pharmaceutical manufacturers, hospitality,
educational and health establishments.
Safety Instructions
• Only use the Battery Packs that are supplied by Rentokil.
• Do not use the trapping device if it is damaged.
• Do not expose the trapping device to corrosive liquids.
• Do not use this trapping device near to water sources.
• This trapping device contains a pressurised Carbon Dioxide (CO2) canister and
should not be heated or incinerated.
• Only “approved”, supplied by Rentokil RADAR or RADAR S 8g (0.28oz) gas canisters
are to be used in the trapping device.
• This appliance can be used by children aged from 8 years and above and persons
with reduced physical, sensory or mental capabilities or lack of experience and
knowledge if they have been given supervision or instruction concerning use of the
appliance in a safe way and understand the hazards involved. Children shall not play
with the appliance. Cleaning and user maintenance shall not be made by children
without supervision.
Note: A. If the equipment is used in a manner not specified by the manufacturer
then the protection provided by the equipment may be impaired.
B. Save these instructions.
Attention
Users can perform the maintenance tasks described in this document. Users must not
perform any other repairs or maintenance.
Each canister can only be used once. RADAR X requires no maintenance other than
cleaning and management of the batteries and CO2canisters.
Warning
Only personnel with appropriate skills and training must install or service this trapping
device. Do not install this trapping device in areas where dangerous concentrations of
inflammable or explosive substances may be present in the air. Only install this product
indoors shielded from direct sunlight. Do not install the trapping device in a barn, stable,
or similar location. Children must not play with this trapping device. The appliance is to
be kept out of reach of children.
Introduction

5
Warning Translations
NL: Waarschuwing
Deze val mag uitsluitend geïnstalleerd of onderhouden worden door personeel dat over de juiste
vaardigheden en training beschikt. U mag deze val niet installeren op locaties waar gevaarlijke
concentraties van brandbare of explosieve stoen aanwezig kunnen zijn in de lucht. Installeer dit
product alleen binnen en niet in het directe zonlicht. Installeer deze val niet in een schuur, stal
of vergelijkbare locatie. Kinderen mogen niet met deze val spelen. Dit product moet buiten het
bereik van kinderen worden bewaard.
FR: Avertissement
Ce dispositif de piégeage devra exclusivement être installé ou entretenu par du personnel
dûment formé et qualifié. N’installez pas ce dispositif de piégeage dans des endroits présentant
des concentrations dangereuses de matières inflammables ou explosives dans l’air. Installez
exclusivement ce produit dans un environnement intérieur, à l’abri de la lumière directe du soleil.
N’installez pas le dispositif de piégeage au sein d’une grange ou d’une étable, ou tout autre
endroit similaire. Les enfants ne doivent pas jouer avec ce dispositif de piégeage. L’appareil doit
rester hors de portée des enfants.
DE: Warnung
Nur Personen mit entsprechender Kompetenz und Schulung dürfen diese Falle installieren oder
warten. Installieren Sie diese Falle nicht in Bereichen, in denen gefährliche Konzentrationen
brennbarer oder explosiver Stoe in der Luft vorhanden sein könnten. Installieren Sie dieses Gerät
nur in Innenräumen an einem vor direkter Sonneneinstrahlung geschützten Ort. Installieren Sie
die Falle nicht in einer Scheune, einem Stall oder an einem ähnlichen Ort. Kinder dürfen nicht mit
dieser Falle spielen. Das Gerät muss außerhalb der Reichweite von Kindern auewahrt werden.
DK: Advarsel
Kun personer med tilsvarende kompetencer og uddannelse må installere og servicere denne
fælde. Fælden må ikke anbringes i områder, hvor luften indeholder farlige koncentrationer af
letantændelige eller eksplosive stoer. Produktet må kun installeres indendørs og beskyttet mod
direkte sollys. Fælden må ikke installeres i en lade, stald eller et lignende sted. Børn må ikke lege
med fælden. Anordningen skal være utilgængelig for børn.
CZ: Varování
Instalaci a servis této pasti mohou provádět pouze řádně kvalifikovaní a proškolení pracovníci.
Past neinstalujte do míst, kde může být ve vzduchu nebezpečná koncentrace hořlavých nebo
výbušných látek. Tuto past je možné instalovat pouze ve vnitřních prostorách na místo chráněné
před přímým slunečním zářením. Past neinstalujte do stodol, stájí ani jiných podobných prostor. S
pastí si nesmí hrát děti. Uchovávejte zařízení mimo dosah dětí.
ES: Advertencia
La instalación o el mantenimiento de este dispositivo de captura deben correr a cargo de personal
con la formación y las destrezas adecuadas. No instale el dispositivo de captura en áreas en las
que puedan concentrarse sustancias inflamables o explosivas en el aire. Instale este producto
únicamente en el interior, en un lugar protegido de la luz solar directa. No instale el dispositivo de
captura en graneros, establos ni lugares similares. Los niños no deben jugar con el dispositivo de
captura. El aparato debe mantenerse fuera del alcance de los niños.
PT: Aviso
Este dispositivo de armadilha apenas deve ser instalado e mantido por pessoal com a devida
competência e formação. Não instale este dispositivo de armadilha em áreas em que o ar possa
conter concentrações perigosas de substâncias inflamáveis ou explosivas. Instale este produto

6
apenas em interiores, afastado da luz solar direta. Não instale o dispositivo de armadilha em
celeiros, estábulos ou locais semelhantes. As crianças não devem brincar com este dispositivo de
armadilha. Este dispositivo deve ser mantido fora do alcance das crianças.
FI: Varoitus
Tämän laitteen saa asentaa ja huoltaa vai henkilöstö, jolla on siihen tarvittavat taidot ja koulutus.
Tätä loukkua ei saa asentaa alueille, joiden ilmakehässä saattaa olla vaarallisia syttyvien tai
räjähtävien aineiden pitoisuuksia. Tuotteen saa asentaa vain sisätiloihin, suoralta auringonvalolta
suojattuun paikkaan. Loukkua ei saa asentaa latoon, talliin eikä muihin vastaaviin paikkoihin.
Lasten ei pidä antaa leikkiä tällä loukulla. Se on pidettävä lasten ulottumattomissa.
IT: Avvertenza
Solo personale dotato di adeguate competenze e formazione deve installare o riparare questa
trappola. Non installare questa trappola in zone in cui potrebbero essere presenti nell’aria
concentrazioni pericolose di sostanze infiammabili o esplosive. Installare questo prodotto
esclusivamente all’interno, protetto dalla luce solare diretta. Non installare la trappola in un fenile,
una stalla o luoghi simili. I bambini non devono giocare con questa trappola. L’apparecchio deve
essere tenuto fuori dalla portata dei bambini.
SK: Varovanie
Inštaláciu a údržbu tejto pasce smie vykonávať iba personál s patričnými znalosťami a vzdelaním.
Neinštalujte túto pascu v oblastiach, kde sa môžu vo vzduchu nachádzať nebezpečné koncentrácie
horľavých alebo výbušných látok. Tento výrobok inštalujte iba v interiéri tienený proti priamemu
slnečnému svetlu. Neinštalujte pascu v stodole, maštali alebo na podobnom mieste. Deti sa s
touto pascou nesmú hrať. Pasca sa musí uchovávať mimo dosahu detí.
SV: Varning
Den här fällan får endast installeras och underhållas av personer med lämpliga färdigheter och
träning. Installera inte den här fällan i områden där farliga koncentrationer av brandfarliga eller
explosiva ämnen kan förekomma i luften. Den här produkten ska endast installeras inomhus
skyddad från direkt solljus. Installera inte fällan i en lada, stall eller liknande. Låt inte barn leka
med den här fällan. Enheten måste hållas utom räckhåll för barn.
NO: Advarsel
Kun personer med tilstrekkelig kunnskap og opplæring skal installere eller reparere denne
musefellen. Plasser ikke musefellen i områder der farlige konsentrasjoner av brennbare eller
eksplosive stoer kan være tilstede i luften. Dette produktet må bare installeres innendørs og
borte fra direkte sollys. Musefellen må ikke installeres i en låve, stall eller lignende sted. Barn skal
ikke leke med musefellen. Apparatet skal oppbevares utilgjengelig for barn.
EL: Προειδοποίηση
Ηεγκατάστασηκαιοιεργασίεςσυντήρησηςαυτήςτηςσυσκευήςπαγίδευσηςπρέπειναεκτελούνται
μόνο από προσωπικό με τις κατάλληλες δεξιότητες και εκπαίδευση. Μην εγκαθιστάτε αυτή τη
συσκευή παγίδευσης σε περιοχές όπου επικίνδυνες συγκεντρώσεις εύφλεκτων ή εκρηκτικών
ουσιών μπορεί να είναι παρούσες στον αέρα. Εγκαθιστάτε αυτό το προϊόν μόνο σε εσωτερικούς
χώρους σε μέρος προστατευμένο από το άμεσο φως του ήλιου. Μην εγκαθιστάτε τη συσκευή
παγίδευσης σε σιταποθήκη, στάβλο ή παρόμοια τοποθεσία. Τα παιδιά δεν πρέπει να παίζουν με
αυτήν τη συσκευή παγίδευσης. Η συσκευή πρέπει να φυλάσσεται μακριά από παιδιά.
TR: Uyarı
Yalnızca uygun kabiliyete ve eğitime sahip olan personel bu kapanın kurulumunu yapmalı ve
servisini üstlenmelidir. Bu kapanı havada tehlikeli konsantrasyon oranında yanabilen veya patlayıcı
maddenin bulunduğu alanlara kurmayın. Bu ürünü yalnızca kapalı mekanlarda, doğrudan güneş
ışığına maruz kalmayacak şekilde kurun. Kapanı ahır veya benzeri bir yere kurmayın. Çocuklar bu
kapan ile oynamamalıdır. Cihaz, çocukların erişemeyeceği bir yerde saklanmalıdır.

7
RADAR X is a stand alone, battery powered
trapping device that has been designed to
capture, dispatch and contain mice eciently,
hygienically and humanely. It is designed
primarily for high risk customers, such as
food processing plants, pharmaceutical
manufacturing and computer suites, where
there is zero pest tolerance or conventional
baiting is not allowed. However, the many
product features of RADAR X make it
suitable for a wide range of customers as it
can operate in a variety of environments.
Intruding mice are captured as soon as they
are detected, immediately reducing the risk
to the customer. They are then dispatched by
concentrated release of carbon dioxide (CO2)
into the tightly sealed trapping device. CO2 is
capable of dispatching mice extremely rapidly
and is widely recognised as a humane method
of control. The mouse is unconscious within
15-20 seconds and fatal levels are reached
within 45 seconds of the trapping device’s
activation.
RADAR X has been designed by Rentokil to
exploit the travelling habits of mice as opposed
to more traditional methods which target their
feeding behaviours, e.g. baiting. Correctly
installed trapping devices will typically be
placed at wall / floor junctions, relying on a
mouse’s natural curiosity and tendency to run
against walls. RADAR X can be configured
to have a single chamber only. Whether
configured as a single or as a dual, when the
mouse enters through the trap, it triggers the
device to immediately close the door, trapping
the mouse inside a tightly sealed chamber.
Simultaneously, a pressurised gas canister is
pierced and fills the relevant tray with carbon
dioxide.
The customer is provided with 24/7 pest
control and can be reassured that the product
is both eective and humane, reducing the
risk to their stock and premises.
It is recommended to replace batteries at 12
monthly intervals to maximise the installed
system performance.
Product Description
RADAR X signals the capture of a mouse
sending a message to the Connect Control
Panel and then server. A technician will
receive an alert and arrive promptly to empty,
clean, service and reset the trapping device.
Rigorous testing and quality controls have
been implemented at every stage of the
manufacturing process to ensure that RADAR
X is a high quality product that is capable of
supporting a high quality service proposition.
The Long Reach radio system ensures
reliable connectivity remotely to the control
panels. Beacon signals are emitted from the
control panels, so the RADAR X will connect
to the control panel with the best connection.
In an system with multiple control panels,
the RADAR X will select an alternative if the
connection to the initial one fails.
The loss of connection to the radio system
will cause sensors to retry the connection
and attempt to make a new one if it can. If
connection continues to be unsuccessful the
software automatically increases the time
between attempts to conserve battery life.
The maximum number of trapping devices
that can be connected to a control panel is
300 and so if more trapping devices are
required then an additional control panel will
be required.
Product Functions (Connect Variants Only)
8
Limitation of Liability & Damages
The product and the softwares within are provided on an “as is” basis. The manufacturer
and manufacturer’s resellers (collectively known as “The Sellers”) disclaim all warranties,
express, implied or statutory, including and without limitation the implied warranties of
non-infringement, merchantability or fitness for a particular purpose, or any warranties
arising from course of dealing, course of performance, or usage of trade. In no event
will the sellers be liable for damages or loss, including but not limited to direct, indirect,
special, wilful, punitive, incidental, exemplary or consequential damages, damages for
loss of business profits, or damages for loss of business of any customer or third party
arising out of the use or the inability to use the product, including but not limited to those
resulting from defects in the product or documentation. In no event shall the sellers’ total
cumulative liability of each and every kind in relation to the product exceed the cost to
replace.
The product described in this manual is subject to continuous development and
improvement and Rentokil reserve the right to alter the specification or design without
prior notice. Rentokil cannot accept any liability for any loss or damage arising from the
use of any information contained within this manual, or from any incorrect use of the
product described herein. Rentokil can accept no liability whatsoever for any loss or
damage arising from the product being serviced maintained or repaired by unauthorised
personnel.
Product Disposal
The Waste of Electrical and Electronic Equipment WEEE Directive 2012/19/EU has been
put in place to recycle products using best available recovery and recycling techniques
to minimise the impact on the environment, treat any hazardous substances and avoid
increasing landfill. The symbol shown below and on the product means that the product is
classed as Electrical or Electronic Equipment and you should not put it into your domestic
waste bin. When you have no more use for it, please dispose of the product according to
your local authority’s recycling scheme. For more information, please contact your local
authority or the retailer where you bought the product.

9
Details
The system electronics are protected by IP65
rating however excessive levels of water can
damage the device. Take care to locate trapping
devices away from areas where local high
pressure washing is carried out or where the unit
could be at risk of being immersed in water.
It is important that trapping devices are kept
clean, especially if installed in areas where high
levels dust, grease or spray from water are
present. Cleaning guidelines must be followed to
prevent damage to the trapping devices.
Care must be taken to locate trapping devices
away from pedestrian trac to avoid false
activation.
Extremely low temperatures (i.e. unheated
warehouses) could aect RADAR X’s performance
and may result in the trapping device entering
low battery status mode. The unit will trigger
should the ambient temperature exceed 50°C as a
safety precaution due to the limitation of the CO2
cannister(s).
High humidity and / or condensation could
result in damage to the trapping device’s control
electronics and result in false activations.
High vibration due to localised machinery / fridge
compressors etc could aect the performance of
the trapping device and result in false activations.
RADAR X has been specifically designed for
indoor applications only. The product is not
suitable for outdoor use.
Environmental
Restrictions
High levels of
surface water
High levels of
dust / grease
Knocking
/ Kicking
Extreme
Temperatures
<-5°C (+23°F)
>+50°C (+122°F)
High humidity
(> 80% )
condensation
High levels of
vibration
Indoor Use Only
Environmental Restrictions

10
i. SKU Variants
ii. Component Parts for Installation
1. Main Trapping Device
2. Catch Trays x2
3. CO2 Canisters x2
4. RI Service Key
5. Battery
6. Battery Door Cover
7. Sensor Units x2
8. Lanyard
RADAR X Dual Connect
Model No. 304840
Serial No: 919
Product Range
1.
2. 2.
3.
4.
5.
6.
7.
RADAR X Dual
Model No. 304839
Serial No: 120
See Page 21 for single trap configuration
8.

11
RADAR X trapping devices should be sited along wall / floor junctions, behind
machinery and equipment, i.e. anywhere where bait boxes and mouse monitor
units (MMU’s) would normally be placed. Trapping devices should be secured with a
lanyard if possible to prevent the trapping device being accidentally moved, knocked
or removed by unauthorised persons. See page 24 for more lanyard information.
Installation
2. Site Installation
1. Prior to RADAR X Installation
While unpacking, check for any signs of shipment damage and, if found,
notify both transporter and supplier in writing immediately of receipt with
full details of the damage that has occurred. Retain the equipment and
packing materials for inspection. Check that all parts have been received
as ordered. Make sure that all packaging is removed from the trapping
device before use.

12
3. Fitting the Battery
Unlock the
battery door
Connect
the battery
contacts
Remove the door
Insert the battery
Fold the cables
between battery
and connector
Replace & lock
the door
Click

13
Battery capacity % displayed for 2 seconds with
Battery Level (Icon ) solid.
To assess network signal strength and the number of control panels required for a
site, the Range Check Mode can be used.
With the device Interface active, hold the RI Service Key Magnet over the sensor
for 3 seconds and Range Check Mode will be enabled. The user interface LEDs will
show this and give a reading r- to r9. Higher the “r” number, the stronger the signal.
The signal strength will show for 1 hour to allow technician to survey the site.
The Connect LED Identifier (Icon ) will also flash to indicate signal strength:
5. Site Survey (Connect Variants Only)
LED IDENTIFIER:
Flashes Purple:
Trying to connect
Flashes Red:
No signal
Flashes Yellow:
Weak signal
Flashes Blue:
Good signal
6. Open Catch Tray
1.
2.
4. Battery Level
Eg: Battery is at 99%
To exit the Range Check Mode before the 1 hour duration, hold the RI Service Key
Magnet over the sensor for 3 seconds. When in Range Check Mode, a tap of the
Service Key Magnet will go into System information (see page 25).

14
8. Setting the Trigger Mechanism
7. Setting the Trap Doors
Click
Click
Click
9. Fitting CO2Canister
Click
Ensure a new and undamaged CO2Canister is fitted

15
10. Refitting the Catch Tray
11. Arming the Module
Click
Click
If unit is deployable the Device Status (Icon ) will
go solid and the unit is capable of trapping after 30
seconds. And can now be left. Alternatively, use the
magnetic key to cycle through the “Status Check” as
described on pg 16.
NOTE: The heart will display even if canister(s) are
not loaded as there is no active electrical check for
their presence. Therefore it is up to the technician
to ENSURE viable CO2 canister(s) are loaded when
commissioning/servicing.
If the Service Mode ( ) flashes at the same time as the user
interface displays “FA” the unit needs to be decommissioned
and returned. If the unit has a solvable Error the Service Mode
icon will flash, along with which side requires the service via
the Arrow Status icon where relevant.
Tapping will provide exact code of the failure, Error Code
Table can be found on the underside of the unit, or on page
26 of this manual for a more detailed explanation. For
all but “FA”, if the fault persists after corrective action try
disconnecting the battery, wait 5 seconds and reconnect the
battery. If this fails decommission and return the device. See
page 25 for more interface information.
1
2

16
Servicing & Maintenance
1. Status Check
Use the RI Key Magnet to activate the Interface
Active
Magnet
Zone
Tap 1
First tap using the RI Magnet Key, will display the units
health. If not OK the Service Mode (Icon ) will flash
and an error code will appear on the display indicating
a service is required. The appropriate Arrow Icon will
indicate which side the error is on.
Eg: Error 5 (Trigger pin not
set) on right side of unit.
Error code meanings can be
found on the label on the
underside of the unit, or on
page 28 of this manual.
If pest triggered (Mouse),
“tr” is displayed a service is
required.
Eg: Left side triggered.
If all OK Device Status
(Icon ) will be solid. A
service may not be required.
Unit will be capable of
trapping after 60 seconds.
NOTE: The heart will display even if canister(s) are not loaded as there is no active
electrical check for their presence. Therefore it is up to the technician to ENSURE viable
CO2 canister(s) are loaded when commissioning/servicing.
See Page 27 for more
Interface information.

17
2. Enter Service Mode
Tap 4
Cycles Interface back to Battery Level screen. At any point during these Taps, opening a
tray will Enter Service Mode and exit Status Check.
Second tap using the RI Magnet Key, will display Battery
Level (Icon ) along with the percentage of battery level.
Eg: 30% battery remaining
Eg: Right chamber
activated 3 days ago
Third tap using the RI Magnet Key, will display Catch
Duration (Icon ) along with the left Arrow Status icon and
number of days since the left hand side triggered. This will
be shown for 2 seconds before the right Arrow Status icon
and number of days since the right hand side triggered is
shown.
Tap 2
Tap 3
NOTE: The interface display must be active before entering service mode.
You are only required to enter Service Mode if there is an error shown on the
interface display, or if a tray is visibly damaged and needs replacing. See
previous section (1. Status Check).
1.
2.
When the Interface is active open one of the two catch trays. This will access service
mode.

18
4. Cleaning
Cleaning: Always Wear protective gloves when cleaning the unit.
Radar X units should only be cleaned with a damp cloth taking care to remove all dust
and dirt that may accumulate within the box and on the outer case during normal use.
After any activation where a rodent corpse is found within the box, the deceased animal
should be carefully removed and bagged for disposal. Sanitising wipes should then
be used to clean the internal area of the box, ensuring all detritus within the Radar X is
fully cleaned and removed. The external areas can be cleaned using a damp cloth. All
used Sanitising wipes, and other waste, including gloves should be disposed of as Pest
Control waste in line with Rentokil Initial Waste Policy, whilst complying with local waste
regulations. The Radar X must always be sanitised/cleaned after any activation, and
before resetting.
Always wash hands after servicing. Do not use industrial or commercial cleaning sprays
within the Radar X.
5. Setting the Trap
Click
Click
3. Within Service Mode
Eg: LHS catch tray open,
not armed
When in Service Mode the
interface will indicate which
catch tray is open and
whether that side is armed.
Eg: LHS catch tray
open and armed
If the open catch tray is not armed it will be indicated on the display with flashing , if the
same catch tray is open and is armed the display will show and not flash. If both sides
are open and armed will be displayed.

19
Once the trigger pin is armed, the once flashing
will become and go solid on.
NOTE: You will not be able to arm the trigger pin
until you reset the gate in “5. Setting the trap”
3 4
7. Fitting a new CO2
Canister
Ensure a new and undamaged CO2Canister is fitted
Click
6. Removing a used CO2Canister
Click
1 2
Note: CO2Canister MUST be replaced after each trigger event.

20
9. Reactivate the Trap
If all is OK the Device Status (Icon ) will be solid. The
service is now complete.
Note: The unit will allow a SELF deploy as long as
one side is set correctly. i.e. it is possible to allow a
unit to SELF deploy even if one side is not functional.
NOTE: The heart will display even if canister(s) are
not loaded as there is no active electrical check for
their presence. Therefore it is up to the technician
to ENSURE viable CO2 canister(s) are loaded when
commissioning/servicing.
The signal strength will be shown for 2 min. After
which it will automatically exit Service Mode and
Deploy. Alternatively Tap the key to the Interface
to exit Service Mode immediately and Deploy.
8. Closing the Catch Tray
Click
Click
Table of contents
Other Rentokil Insect Control Equipment manuals