ReSound Unite User manual

USER GUIDE
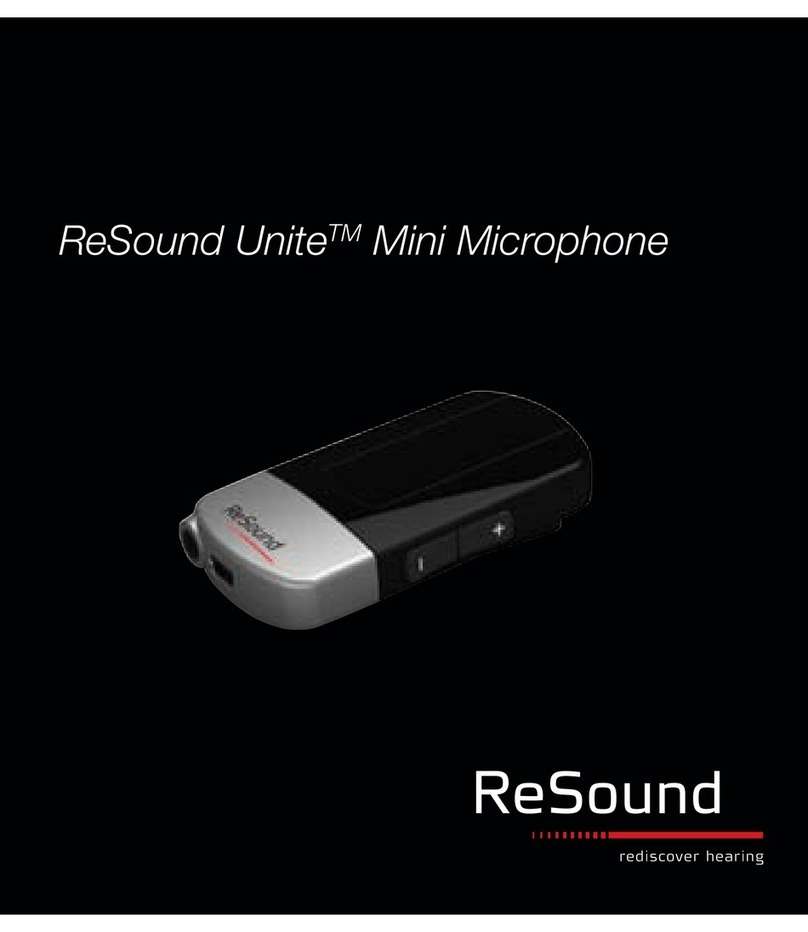
ReSound Unite^’'* Mini Microphone
ReSound
rediscover hearing
Welcome
Thank you for selecting ReSound.
ReSound Unite Mini Microphone is a high-tech and robust product that streams speech and
audio signals directly to your hearing aids.
The Mini Microphone can also be connected to a computer, cell phone or other audio device
and can transform your hearing aids into wireless headphones.
Please read this manual carefully to avoid any problems in the operation and fully benefit
from the Mini Microphone. ."Л
Consult your hearing care professional if you have any questions.
1
GNT^Sound^S
LautfuDbjerg 1
2750 B a la o ^ Denmark
■j
Информация получена с официального сайта
Федеральной службы по надзору в сфере здравоохранения
www.roszdravnadzor.ru
4
Contents
Description.........................................................................................................................3
Getting Started...................................................................................................................4
Charging the Battery.......................................................................................................... 4
Turning your Mini Microphone ON and OFF......................................................................4
Pairing to your hearing instruments
.....
.
...............................................................................4
Start streaming...................................................................................................................6
Stop streaming...................................................................................................................6
Wearing Your ReSound Unite™ Mini Microphone
.............................................................
7
Light indicator....................................................................................................................7
Using the Line-in...............................................................................................................7
Volume control..................................................................................................................8
Important Information.........................................................................................................8
Maintenance and Care.........................................................................................................8
General warnings...............................................................................................................8
General precautions........................................................................................................... 9
Built-in battery care........................................................................................................... 9
Charger care.....................................................................................................................10
Troubleshooting Guide.....................................................................................................11
Technical specifications....................................................................................................13
Warranty and Repair.........................................................................................................13
Acceptance and sale certificate..........................................................................................14
Информация получена с официального сайта
Федеральной службы по надзору в сфере здравоохранения
www.roszdravnadzor.ru

I
Description
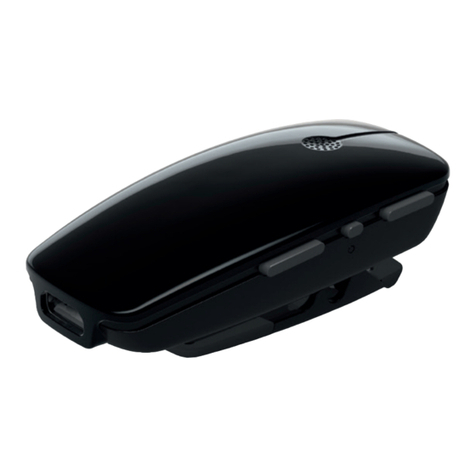
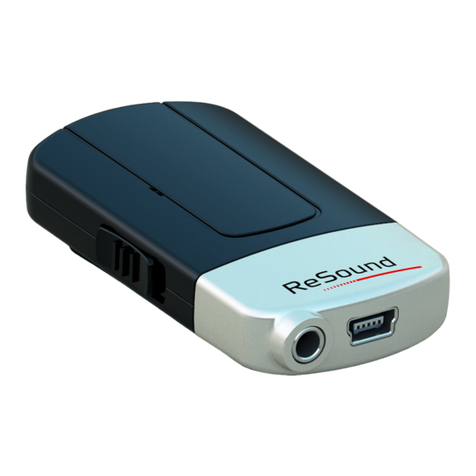
1. Mini-USB connector for charging
2. Microphone inlet
3. Line-in input
4. ON/OFF switch
5. Volume control
6. Light indicator
7. Clip
8. Pairing button
Информация получена с официального сайта
Федеральной службы по надзору в сфере здравоохранения
www.roszdravnadzor.ru
h
Getting Started
Charging the Battery
Before using your ReSound Unite™ Mini Microphone, you need to fully charge the
rechargeable battery. To charge it, plug the charging cable as shown in the picture to the
right. Then plug the other end of the charging cable into a power outlet.
During the charging process, the LED indicator will show a solid red light. When fully
charged and still connected to the charger, the LED will turn solid green interrupted by a red
blink every 2 seconds.
Charging an empty battery typically takes about 3 hours. It is safe to leave the charger
connected overnight - the battery cannot be overcharged.
When charging your ReSound Unite™ Mini Microphone for the first time, leave it to
charge for at least 3 hours, even if the battery indicator indicates that the battery is fully
charged.
For safety reasons, recharge the battery only with the charger supplied by ReSound
together with the Mini Microphone.
Do not charge the Unite Mini Microphone while it is on your body.
Turning your Mini Microphone ON and OFF
To turn ON your Mini Microphone, slide the ON/ OFF switch (4) down to the ON position.
A white “I” icon will be visible on the switch and the LED indicator will now blink green
every 2.5 seconds.
To turn it OFF, slide the ON/OFF switch up to the OFF position. The LED will now stop
blinking.
If battery level is low the LED will blink yellow every 2 seconds.
Pairing to your hearing instruments
Note! The following information is intended primarily for your hearing care professional,
who in most cases will complete the tasks that are necessary before the ReSound Unite^'^^
Информация получена с официального сайта
Федеральной службы по надзору в сфере здравоохранения
www.roszdravnadzor.ru
Mini Microphone can be used with your hearing instruments. However, the process is
designed to be simple and most people can do it themselves.
It is possible to pair up to three Unite^"^ streaming devices, e.g. one Mini Microphone and
two TV streamers, with a given pair of hearing instruments. Therefore, channel 1, 2 or 3 must
be selected when starting the pairing process.
Pairing the M ini M icrophone in channel 1
1. Make sure ReSound Unite™ Mini Microphone is turned ON. Your hearing instruments
must be OFF - open the battery door.
2. Remove the silver cap from the Mini Microphone. With the tip of a pen or similar object,
press the small pairing button one time on the front of your ReSound Unite™ Mini
Microphone (as shown in the picture). The LED will now blink yellow once every 2
seconds to indicate that is ready to be paired in channel 1.
Your ReSound Unite™ Mini Microphone will remain in pairing mode for 20 seconds.
3. While pairing mode is activated (20 sec), close the battery doors of both hearing
instruments and make sure they are ON. A successful pairing will be indicated by an
audible melody played in both hearing instruments. You are now ready to use the Mini
Microphone!
Pairing the Mini Microphone in channel 2 or 3
To pair the Mini Mierophone in channel 2, press the pairing button twice. The LED will now
blink yellow twice every 2 seconds to indicate that it is ready to be paired in channel 2. Close
the battery doors on the hearing instruments.
To pair the Mini Microphone in channel 3, press the pairing button three times. The LED will
now blink yellow three times every 2 seconds to indicate that it is ready to be paired in
channel 3. Close the battery doors on the hearing instruments.
Pairing blinking pattern:
Pairing button pushes LED blinking pattern Channel
1 1
2 2
3 3
Информация получена с официального сайта
Федеральной службы по надзору в сфере здравоохранения
www.roszdravnadzor.ru
Start streaming
Turn on the Mini Microphone and make sure your hearing instruments are turned on as well.
Streaming may be started in one of two ways.
1. Press and hold the push button on both hearing instruments for about three seconds in
order to listen to the streamed audio signal. If your hearing instruments have been set up
with device-to-device synchronization, press the button only on one of the instruments.
The second instrument will switch to the same program automatically. Once ReSound
Unite™ Mini Microphone has been connected an audible melody will play in your
hearing instruments and will be followed by the streamed sound.
2. If you have a ReSound Unite™ Remote Control, simply press the Unite™ streaming
button. Doing so will briefly show a search icon in the remote control display. Once the
hearing instruments connect to ReSound Unite™ Mini Microphone, a short melody will
be played in both ears to confirm the presence of streamed audio and a streaming icon
will appear in the display. The streamed sound can now be heard in your hearing
instruments.
Start stream ing on a 2nd or 3rd ReSound Unite™ M ini M icrophone unit
If your hearing instrument is paired to more than one streaming device, you can start
streaming in two ways.
1. Press and hold the hearing instrument push button for about 3 seconds a 2nd or 3rd time
to access the 2nd or 3rd ReSound Unite™ streaming device.
2. If you use a Unite^"^ Remote Control, press the streaming button on the Unite^'^ Remote
Control a 2nd or 3rd time to access the 2nd or 3rd ReSound Unite™ streaming device.
r ^
9 MM
i < > <
R
MM >:
Searching for Mini
Microphone Connected to Mini
Microphone Streaming button
The up to 3 ReSound Unite™ streaming devices are initially labeled by letter designator A, В
or C, and the device in use is shown on the Remote Control display.
Stop streaming
• By briefly pressing the Program button on the ReSound Unite'^'’'^ Remote Control, you
will return to the previous program of your hearing instrument.
• With the ReSound Unite™ Remote Control (optional) you just have to press the "P"
button, located in the center of the key pad. This will return the hearing instruments to
the last program used. You may also press the home button to return to your default
settings.
• If you are using the telephone with ReSound Unite™ Phone Clip or PhoneNow™,
streaming of ReSound Unite™ Mini Microphone will be temporarily disrupted. When
you have ended your phone call, streaming will resume.
Информация получена с официального сайта
Федеральной службы по надзору в сфере здравоохранения
www.roszdravnadzor.ru
д.
Note! You may get out of range (>7 m) from your ReSound Unite™ Mini Microphone. The
connection will be then interrupted. If you get back in range within 5 minutes, your hearing
instruments will automatically reconnect and continue streaming.
Wearing Your ReSound Unite™ Mini Microphone
Clip your ReSound Unite™ Mini Microphone on the speaker’s jacket or other clothing. Place
the device within a range of 10-20 cm from the speaker’s mouth.
Light indicator
The Light indicator (6) provides information on the status of your device. The LED patterns
and their meanings are given in the table below.
Blinks Meaning
1 1 1 1 Normal operation
Battery low
O H I ОШ Ш о ш т
L^ndlging
Fully charged - still connected
to charger
Pairing in channel 1
Pairing in channel 2
Pairing in channel 3
Using the Line-in
The Line-in (3) can be used to stream audio signals from most auxiliary audio devices
through the ReSound Unite™ Mini Microphone’s line input directly to your hearing
instrument.
1. Insert the included jack cable into the Line-in plug on the ReSound Unite™ Mini
Microphone.
2. Plug the other end of the jack cable into the AUDIO OUT on the audio device you want
to stream from.
r 'S 'T
''iJN ote: When using the ReSound Unite™ Mini Microphone with a TV, the
HEADPHONE output terminal is usually located on the side or front of the TV. When using
the HEADPHONE output terminal on the TV, usually only the person wearing the hearing
instruments will hear the sound, and the TV speakers are muted. Your TV may support
speakers and HEADPHONE being on simultaneously. Check your TV manual for
instructions.
Информация получена с официального сайта
Федеральной службы по надзору в сфере здравоохранения
www.roszdravnadzor.ru

Volume control
ReSound Unite™ Mini Microphone has been designed to provide a comfortable listening
level from the moment it is activated. However, for some devices or listening environments it
may be desirable to adjust the listening volume. This can be accomplished in a variety of
ways. Keep in mind that volume adjustments apply to the streamed signal only, not the
volume of normal environmental sounds.
• Use the “+” and keys (5) to adjust volume to a comfortable level. Make sure that your
hearing instruments are comfortably adjusted before you change the settings with the
volume control.
^^^^Note: When using the Mini Microphone as a microphone the last volume setting will be
stored. When using the Line-in, the volume setting will revert to the default level when the
Mini Microphone is turned OFF and ON again to avoid an uncomfortable loud initial sound
level when used with different audio sources.
• Use the Resound Unite^^* Remote Control to adjust the streaming volume in the hearing
instrument. Ask your hearing care professional for more information about this product.
• The volume can in some cases be further adjusted at the signal source, for example by
turning the TV itself, stereo system, computer, etc. down. In many cases this will adjust
the volume of both streamed audio (transmitted wirelessly to your hearing instruments)
and non-streamed audio (sounds reaching the hearing instrument microphones in the
normal fashion). Of course, this will also affect listening volume for others in the room.
Important Information
Maintenance and Care
• Clean the ReSound Unite™ Mini Microphone using a damp cloth. Never use household
cleaning products (washing powder, soap, etc.) or alcohol to clean the device.
• When ReSound Unite™ Mini Microphone is not in use, turn it OFF and store it safely.
• Protect ReSound Unite^^'^ Mini Microphone from excessive moisture and heat. Protect it
from excessive shock and vibration.
• Protect the microphone and charger inlets from debris and dirt. If necessary, use the
cleaning brush provided with your hearing instruments to clean these areas.
General warnings
• Young children can wrap cords and lanyards / key chains around their neck causing the
risk of strangulation. Therefore, always keep cords and lanyards / key chains out of reach
of children.
• ReSound Unite^'’^ devices use low-powered digitally coded transmissions in order to
communicate with other wireless devices. Although unlikely, nearby electronic devices
may be affected.
• In that case, move the ReSound Unite^w Mini Microphone away from the affected
electronic device.
• Avoid exposing your product to rain, moisture or other liquids to protect against damage
to the product or injury to you.
• Keep the product and any cords and cables away from operating machinery.
Информация получена с официального сайта
Федеральной службы по надзору в сфере здравоохранения
www.roszdravnadzor.ru

If the product overheats, if the product has been dropped or damaged, if the product has a
damaged cord or plug, or if the product has been dropped in a liquid, discontinue use and
contact your hearing care professional.
Dispose of the product according to applicable regulations of the Russian Federation.
Do not use the product in environments where there is a danger of ignition of flammable
gasses.
General precautions
Do not use this device in locations where it is forbidden to use electronic devices (e.g.
airplane).
X-ray radiation (e.g. CT scans, MRI scans) may adversely affect the correct functioning
of this device. We recommend that you switch the device OFF before undergoing X-ray
procedures and keep it outside the room.
High-powered electronic equipment, larger electronic installations and metallic
structures may impair and significantly reduce the operating range.
Your hearing instruments and this device were given a unique communication code
during the fitting. This ensures that the device will not affect hearing instruments worn
by others.
Do not make any changes or modifications to this device.
Opening the ReSound Unite™ Mini Microphone might damage it. If problems occur
which cannot be resolved using recommendations given in Troubleshooting Guide,
consult your hearing care professional.
ReSound Unite™ Mini Microphone may only be repaired by an authorized service
center.
Do only connect ReSound Unite™ Mini Microphone to connections which it is explicitly
Intended for.
Built-in battery care
Your wireless device is powered by a rechargeable battery.
The full performance of a new battery is achieved only after two or three complete
charge and discharge cycles.
The battery can be charged and discharged hundreds of times, but will eventually wear
out.
Unplug the charger from the electrical plug and the product when not in use. to save
energy and minimize the risk of fire.
If left unused, a fully charged battery will lose its charge over time.
Leaving the product in hot places, such as in a closed car in the summer conditions, will
cause the battery to heat, reduce its capacity and lifetime.
A product with a cold battery may not work temporarily, even when the battery is fully
charged. Battery performance is particularly limited in temperatures well below freezing.
Caution! The battery used in this product may present a risk of fire or chemical bum if
mistreated.
Do not attempt to open the product or replace the battery. It is built-in and not
changeable. Use of other batteries may present a risk of fire or explosion and injury.
Recharge the ReSound Unite™ Mini Microphone only with a power supply unit that has
been supplied together with the product.
Информация получена с официального сайта
Федеральной службы по надзору в сфере здравоохранения
www.roszdravnadzor.ru

Dispose of the product with the built-in battery according to applicable regulations of the
Russian Federation.
Charger care
Make sure to read this carefully before use.
• Do not attempt to charge your product with anything other than the ReSound charger
provided. The use of any other charger may damage or destroy the device and the
battery. Use of other chargers may invalidate the warranty.
• Charge the product according to the instructions supplied with the product.
• When you disconnect the power cord, grasp and pull the plug, not the cord.
• Never use a charger that is damaged.
• Do not attempt to disassemble the charger as it may be damaged and you may be
exposed to electric shock.
• Avoid charging your product in extremely high or low temperatures.
• Do not charge the ReSound Unite™ Mini Microphone while it is on your body.
10
Информация получена с официального сайта
Федеральной службы по надзору в сфере здравоохранения
www.roszdravnadzor.ru

roubleshooting Guide
SYMP OM CAUSE
The streaming button on the Remote
Control is pressed but with no effect at all The Mini Microphone and hearing
instruments have not been paired. The
Remote Control and hearing instruments
are not within wireless range.
The push button on the hearing instrument
has been pressed for more than 3 seconds
but with no effect at all
The Mini Microphone and hearing
instruments have not been paired.
The pairing button on the Mini Microphone
is pressed but no pairing melody is played
in the hearing instrument
The Mini Microphone and hearing
instrument are not within wireless range.
The Mini Microphone and hearing
instrument have not been simultaneously in
pairing mode.
PO SSIB LE R E M E D Y
Carry out pairing process.
Assure that Remote Control and hearing instruments are within wireless range and
activate streaming again.
___________________________ ________________
Carry out pairing process.
Assure that Mini Microphone and hearing instruments are within wireless range and
repeat pairing process.
repeat pairing process and assure that the battery doors on both hearing instruments are
closed within 20 seconds after the pairing button has been pressed on the Mini
roubleshooting Guide
SY M P O M CAUSE
The streaming button on the Remote
Control is pressed but no streamed audio
signal is found when searched for
(indicated by an ‘X’ icon on the display)
The Mini Microphone and hearing
instrument are not within wireless range.
The Unite Mini Microphone is not powered
on.
The battery level of the Mini Microphone is
too low to support streaming.
An audio device has been connected to the
Line-in plug but the device is powered off
or the output has been muted.
___________
PO SSIB LE R E M E D Y
Assure that the Mini Microphone and hearing instruments are within wireless range and
activate streaming again.
Power on the unite Mini Microphone and activate streaming again.
Charge the battery.
Power on or unmute the external audio device.
roubleshooting Guide
SY M P O M CAUSE
11
Информация получена с официального сайта
Федеральной службы по надзору в сфере здравоохранения
www.roszdravnadzor.ru

There is no sound in the hearing
instruments although still being in the
streaming program
The Mini Microphone and hearing
instrument are not within wireless range.
The Mini Microphone is no longer powered
on.
The battery level of the Mini Microphone is
too low to support streaming.
An audio device has been connected to the
Line-in plug but the device is powered off
or the output has been muted.
___________
POSSIBLE RE M E D Y
Assure that the Mini Microphone and hearing instruments are within wireless range again.
Power on the unite Mini Microphone and activate streaming again.
Charge the battery.
Power on or unmute the external audio device.
roubleshooting Guide
SY M P O M CAUSE
A hearing instrument unintentionally drops
out of the streaming program The Mini Microphone and hearing
instrument have not been within wireless
range for more than 5 minutes.
The battery in the hearing instrument is so
depleted that it no longer supports audio
streaming.
________________________
The sound from the Mini Microphone is
too high or is distorted An audio device has been connected to the
Line-in plug and the audio level from this
device is too high.
__________________
PO SSIBLE R EM EDY
Take the necessary corrective action as described for the ‘no sound’ symptom above and
activate streaming again.
Replace the battery in the hearing instrument with a new one, and activate streaming
again. ____________________________________________________________
Adjust the volume using the “+” and keys on the Unite Mini Microphone, or using the
volume control on the external audio device itself, until the best sound level and quality is
obtained.
roubleshooting Guide
SY M P O M CAUSE
The sound level from the Mini Microphone
is very low The Mini Microphone is not worn correctly
by the speaker.
The sound received by the Mini
Microphone is very low.
An audio device has been connected to the
Line-in plug and the audio level from this
device is too low.
POSSIBLE R E M EDY
Clip the unite Mini Microphone on the speaker's jacket or other clothing or hang it around
12
Информация получена с официального сайта
Федеральной службы по надзору в сфере здравоохранения
www.roszdravnadzor.ru

the speaker's neek using the lan ard, so that the device is within 10-20 cm from the
speaker's mouth
Adjust the volume using the “+” and ke s on the Mini Microphone.
Adjust the volume using the and ke s on the Unite Mini Microphone, or using the
volume control on the external audio device itself, until the best sound level and qualit is
obtained.
roubleshooting (iuide
SYM P OM
1'hc sound from the Mini Microphone is
still cither too low or too high
_________
CAUSE
The audio volume level of the hearing
instruments is not suitable for listening.
The sound I'rom the Unite Mini
Microphone is distorted or drop-outs occur
frequentl
The Mini Microphone and the hearing
instruments are on the edge of the wireless
range.
The Unite Mini Microphone and hearing
instruments are not within sufficient “line-
of- sight”._________________________
PO SSIBLE REM E D Y
Adjust the volume either on the hearing instruments themselves (if provided with a
volume control), or alternatively (option), using the “+” and keys on the Remote
Control._____________________________________________________________
Assure that the Mini Microphone and hearing instruments are within wireless range.
Assure that no significant obstacles will obstruct the hassle-free streaming from the Mini
Microphone to the hearing instruments.
_______________
_____________________
Technical specifications
Operating range:
Power supply:
Wireless:
Operating temperature:
Storage temperature:
up to 7 meters or more
built-in battery
2.4 GHz
0 to 45°C
-20 to 45°C
Temperature test, transport and storage information
The product is subject to various tests in temperature and damp heating cycling between
25°C and +70°C according to internal standards of the manufacturer.
Warranty and Repair
The warranty maintenance of ReSound Unite™ devices is provided by
The product is covered by a free warranty for a period of one year from the day of purchase
(the repair service will mark the type of performed repair on the warranty card):
• provided that the date of purchase is specified in this user guide and warranty card and
that they bear the seal of the trading company;
• provided that the device is clean. If the date of purchase is not specified, the warranty
shall come into force from the date of audit.
13
Информация получена с официального сайта
Федеральной службы по надзору в сфере здравоохранения
www.roszdravnadzor.ru

The following ReSound Unite™ devices are not covered by warranty:
• devices with any signs of mechanical damage;
• devices with any signs of chemical exposure;
• devices subjected to unauthorized disassembly and misuse in violation of operation
conditions specified in this user guide.
In the above cases, the repair shall be performed at the buyer’s expense.
Acceptance and sale certificate
ReSound Unite ™ products are registered in the Russian Federation.
Registration Certificate No. RZN 2015/2727 dated June 4, 2015.
Declaration of Conformity ROSS DK.IM28.D02086 dated June 25, 2015.
ReSound Unite™ Mini Microphone
Serial number
Date of audit
Date of sale
Stamp
Seal
Manufacturer:
GN ReSound A/S
Lautrupbjerg 7
DK-2750 Ballerup
Denmark
12-month warranty leaflet No. 2 for ReSound Unite Mini Microphone
Serial number
________________
Date of audit
_______________
Received
_______________________
Representative of repair contractor Seal
12-month warranty card No. 2 for ReSound Unite Mini Microphone
Serial number
________________
Date of audit
___________________
Stamp
Date of sale
_________________
Representative of repair contractor Seal
12-month warranty leaflet No. 1 for ReSound Unite Mini Microphone
Serial number
________________
Date of audit
_______________
Received
_______________________
Representative of repair contractor Seal
12-month warranty card No. 1 for ReSound Unite Mini Microphone
14
Информация получена с официального сайта
Федеральной службы по надзору в сфере здравоохранения
www.roszdravnadzor.ru

и
Serial number
Date of audit _
Date of sale Stamp
Representative of repair eonlraetor Seal
Please consult your local hearing care professional concerning disposal of your accessory.
Worldwide Headquarters
GN ReSound A/S
Lautrupbjerg 7
DK-2750 Ballerup, Denmark
Tel.: +45 45 75 11 11
Fax:+45 45 75 11 19
http://www.resound.com
Representative Office in Russia
GN ReSound A/S (Denmark)
111397, Moscow
Zelyony pr-t 20, Office 631
Tel./Fax: +7 (495) 989-48-18
http://www.gnresound.ru
ReSound
rediscover hearing
.'•" Л
GN ReSdund A/S
Lautrupbjerg 7
2750 Batjen nmark
15
Информация получена с официального сайта
Федеральной службы по надзору в сфере здравоохранения
www.roszdravnadzor.ru

[Перевод с английского и датского языков на русский язык]
Руководство пользователя
Мини-микрофон ReSound Unite^’'*
ReSound
rediscover hearing
Введение
Благодарим Вас за выбор компании ReSound.
Мини-микрофон ReSound Unite является высокотехнологичным и надежным
аксессуаром, который передает голос собеседника и аудиосигналы напрямую в
слуховые аппараты.
Мини-микрофон можно также подключить к компьютеру, мобильному телефону или
другому аудиоустройству и превратить Ваши слуховые аппараты в беспроводные
наушники.
Пожалуйста, внимательно прочитайте настоящее руководство пользователя, чтобы
избежать сложностей при эксплуатации и узнать обо всех возможностях мини
микрофона.
При возникновении вопросов, обратитесь к Вашему специалисту-сурдологу.
Inodnucbl
[Штамп:
«Джи-Эн РиСаунд А/С»
Лаутрупбьерг 7
2750 Баллеруп - Дания]
Информация получена с официального сайта
Федеральной службы по надзору в сфере здравоохранения
www.roszdravnadzor.ru

Содержание
писание.......................................................................................................................................3
Подготовка к работе.....................................................................................................................4
Зарядка батареи.............................................................................................................................4
Включение / Выключение мини-микрофона.............................................................................4
Сопряжение со слуховыми аппаратами.....................................................................................4
Начало передачи сигнала.............................................................................................................6
кончание передачи сигнала......................................................................................................6
Крепление мини-микрофона ReSound Unite™..........................................................................7
Световой индикатор.....................................................................................................................7
Подключение к внешнему аудиоустройству.............................................................................7
Регулятор громкости....................................................................................................................8
Важная информация.....................................................................................................................8
бслуживание и уход...................................................................................................................8
бщие рекомендации безопасности...........................................................................................8
бщие меры предосторожности.................................................................................................9
Безопасная работа со встроенной батареей...............................................................................9
Безопасная работа с зарядным устройством
............................................................................
10
Выявление неисправностей.......................................................................................................10
Технические характеристики....................................................................................................12
Гарантия и ремонт......................................................................................................................13
Свидетельство о приемке и продаже........................................................................................ 13
Информация получена с официального сайта
Федеральной службы по надзору в сфере здравоохранения
www.roszdravnadzor.ru

1. Разъем для зарядного устройства
2. Вход микрофона
3. Вход line-in
4. Переключатель Вкл./Выкл.
Описание
5. Регулятор громкости
6. Световой индикатор
7. Клипса
8. Кнопка сопряжения
7
8
Информация получена с официального сайта
Федеральной службы по надзору в сфере здравоохранения
www.roszdravnadzor.ru

Подготовка к работе
Зарядка батареи
Перед началом работы необходимо полностью зарядить батарею мини-микрофона
ReSound Unite'^’^. Для зарядки вставьте кабель зарядного устройства в разъем, как
показано на рисунке справа. Другой конец кабеля вставьте в розетку.
Во время зарядки световой индикатор будет красного цвета постоянно. Когда батарея
полностью зарядится и аксессуар все еще будет подключен к сети, световой индикатор
поменяется на постоянный зеленый, который каждые две секунды будет прерываться
красным миганием.
Зарядка пустой батареи займет около трех часов. Можно оставить зарядное устройство
подключенным всю ночь - батарея не перегрузится.
При зарядке мини-микрофона ReSound Unite'*''^ в первый раз оставьте его
заряжаться минимум на три часа, даже если индикатор Вам сообщает, что батарея
уже полностью заряжена.
В целях безопасности, пожалуйста, пользуйтесь зарядным устройством ReSound,
которое поставляется в комплекте с мини-микрофоном.
f @ Не заряжайте мини-микрофон Unite в период ношения его на теле.
Включение / Выключение мини-микрофона
Чтобы включить Мини-микрофон, переместите переключатель Вкл./Выкл. (4) вниз. При
этом на переключателе будет виден белый индикатор «I» и световой индикатор будет
мигать зеленым цветом каждые 2,5 секунды.
Чтобы выключить мини-микрофон, переместите регулятор Вкл./Выкл. вверх. Световой
индикатор при этом перестанет мигать.
Если батарея будет близка к разрядке, световой индикатор начнет мигать желтым цветом
каждые 2 секунды.
Сопряжение со слу овыми аппаратами
Внимание! Нижеприведенная информация предназначена преимущественно для
специалистов, которые настраивают мини-микрофон ReSound Unite^''^ перед тем, как его
можно будет использовать со слуховым аппаратом. Тем не менее, данный процесс
настолько прост, что может быть выполнен практически каждым.
Информация получена с официального сайта
Федеральной службы по надзору в сфере здравоохранения
www.roszdravnadzor.ru

к одной паре беспроводных слуховых аппаратов можно подключить до трех стримеров
Unite™. Например, один мини-микрофон и два ТВ-стримера. Поэтому, перед началом
сопряжения необходимо выбрать соответствующий канал: 1, 2 или 3.
С опряж ение в канал е 1
1. Убедитесь, что мини-микрофон ReSound Unite™ включен. Слуховые аппараты,
напротив, должны быть отключены, дверцы батарейных отсеков должны быть
открыты.
2. Снимите серебряную насадку с мини-микрофона. Кончиком ручки или другим
острым предметом один раз нажмите кнопку сопряжения на лицевой стороне мини
микрофона ReSound Unite™ (как показано на рисунке). После этого световой
индикатор начнет мигать желтым цветом каждые 2 секунды, информируя, что Мини
микрофон готов к сопряжению в канале 1.
Мини-микрофон ReSound Unite™ будет находиться в режиме сопряжения 20 секунд.
3. В период, пока активен режим сопряжения (20 сек), закройте батарейные отсеки на
обоих слуховых аппаратах и убедитесь, что они включены. При успешном
сопряжении в слуховых аппаратах прозвучит мелодия. Теперь мини-микрофон готов к
использованию!
С оп ряж ение в канале 2 и 3
Для сопряжения мини-микрофона в канале 2, нажмите кнопку сопряжения два раза.
Световой индикатор после этого начнет мигать желтым цветом дважды каждые 2
секунды, информируя, что мини-микрофон готов к сопряжению в канале 2. Закройте
батарейные отсеки слуховых аппаратов.
Для сопряжения мини-микрофона в канале 3, нажмите кнопку сопряжения три раза.
Световой индикатор после этого начнет мигать желтым цветом трижды каждые 2
секунды, информируя, что мини-микрофон готов к сопряжению в канале 3. Закройте
батарейные отсеки слуховых аппаратов.
Таблица индикации сопряжения:
Количество нажатий Количество миганий светового
индикатора Канал
11
22
33
Информация получена с официального сайта
Федеральной службы по надзору в сфере здравоохранения
www.roszdravnadzor.ru
Other manuals for Unite
8
Table of contents
Languages:
Other ReSound Microphone manuals

ReSound
ReSound Mini Microphone User manual

ReSound
ReSound MICRO MIC Instruction Manual

ReSound
ReSound Clip-On User manual

ReSound
ReSound Clip-On User manual

ReSound
ReSound Unite User manual

ReSound
ReSound MICRO MIC User manual

ReSound
ReSound MICRO MIC User manual

ReSound
ReSound Unite User manual

ReSound
ReSound Unite Mini Microphone Instruction Manual

ReSound
ReSound Multi Mic User manual