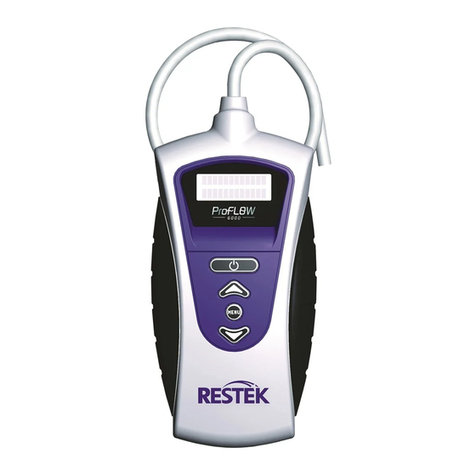
Restek 22839 User manual

Restek’s
Electronic
Leak Detector
(cat.# 22839)
Instruction Manual

© 2008 Restek Corporation
No part of this manual may be reproduced in any form or by any means without the prior agreement or permission by Restek Corporation.
Printed in the U A, Restek Corporation, 110 Benner Circle, Bellefonte, PA 16823

www.restek.com 1
Table of Conte n t s Page
1.0 Introduction ................................................................ 2
2.0 Battery Charging......................................................... 3
3.0 Powering Up ................................................................ 3
4.0 Zeroing the Unit ......................................................... 3
5.0 Prior to Operation ...................................................... 4
6.0 Detecting Leaks .......................................................... 4
7.0 pecifications .............................................................. 4
8.0 Maintenance................................................................ 5
9.0 Troubleshooting.......................................................... 6
10.0 Technology of the Unit ............................................. 7
11.0 Interpretation of Results ........................................... 8
12.0 ervice .......................................................................... 9
Restek Electronic Leak Detector

2www.restek.com
perating Instructions
1.0 Introduction
Restek’s portable Leak Detector is specifically designed for use with gas chro-
matography (GC) systems. It detects minute leaks of any gas with a thermal
conductivity different from air. The reference gas inlet (Figure 1) draws in
ambient air for comparison to air drawn into the sample probe. A leak is
indicated by both an LED light display and an audible alarm.
Restek’s Leak Detector is manufactured by Restek so you are assured of the
same Restek quality and service you have come to recognize with the Restek
name.
Should you require assistance at anytime regarding our Leak Detector, please
contact Restek Technical Service at 1-800-356-1688 or 814-353-1300, ext. 4.

www.restek.com 3
2.0 Battery Charging:
Only use the universal charger provided. The Leak Detector should be fully charged prior to use. When the unit’s charge is low, the
green battery indicator LED light will begin to blink when the unit is powered up (Figure 1). The Leak Detector cannot be used during
the charging cycle.
3.0 Powering Up
Depress and hold the power button (Figure 1) until the unit
responds with the wake-up mode. The leak detector will run
through a self-calibration sequence for approximately 15
seconds. During this time D N T attempt to zero the unit.
4.0 Zeroing the Unit
After the LED lights stop flashing, the unit is ready for use. The
instrument may need to be zeroed periodically between uses, espe-
cially if it is moved from room to room, or between areas of dif-
fering temperature or humidity. Do not attempt to zero the unit
while the probe is stored in the holder. The probe MUST be
removed from the storage container before zeroing the unit. To re-
zero, press the Zero switch. The unit will run a self-calibration
sequence for approximately 4 seconds. When all LED lights stop
flashing and the green LED light is lit, the unit is ready for use.
N TE: To avoid false readings, do not attempt to use the unit while the self calibration sequence is in progress.
UUnniitt ssttaattuuss wwhhiillee eennggaaggeedd wwiitthh CChhaarrggee LLEEDD
tthhee wwaallll cchhaarrggeerr CCoonnddiittiioonn
Pre-charge qualification
(immediately following plug-in) 1Hz flash
Unit is charging Continuous on
Unit is fully charged Off
NNOOTTEE::Replacement of the rechargeable cells in this unit is performed at the factory.
TThheerree aarree nnoo sseerrvviicceeaabbllee ppaarrttss iinn tthhiiss uunniitt.. OOppeenniinngg tthhee ccaassee oorr ttaammppeerriinngg wwiitthh tthhee
iinntteerrnnaall ppaarrttss wwiillll vvooiidd tthhee ffaaccttoorryy wwaarrrraannttyy..
Figure 1 Leak Detector schematic.

4www.restek.com
5.0 Prior to peration
Verify the operation of the Leak Detector before each use by sampling gas from a GC split vent, or other source of hydrogen or
helium. Also, visually inspect the probe tip, reference gas inlet, and exhaust port for obstructions (Figure 1).
IMP RTANT:
Fittings being checked must be clean and dry; liquid leak detecting agents, dust, and other debris may damage
the Leak Detector if drawn into the probe.
The Leak Detector responds to almost any gas you can smell, and many gases that you can’t smell. Solvent vapors, split vent
exhaust, or even strong air currents around the probe or reference inlet can cause instability or false positive readings. Be care-
ful not to breathe into the reference inlet when checking for leaks or to cover/block the inlet with your hand.
6.0 Detecting Leaks
Slowly move the probe tip around fittings and other potential leak sources. If the Leak Detector senses a gas other than air, the
LED bar graph will begin to light, and an alarm will sound when the last LED light illuminates. The red LED lights indicate
helium and hydrogen leaks. The yellow LED lights indicate a nitrogen, argon, or carbon dioxide leak. Remove the probe from
the vicinity of the leak and allow the unit to return to zero. If a large amount of gas has entered the probe, it may take a few
seconds for the instrument to clear itself. Please do not attempt to zero the unit while it is clearing out the gas from the probe.
This may cause the unit to malfunction. Place the probe near the leak again to confirm its location. The reference gas inlet
(Figure 1) must not be restricted or the unit will not operate correctly. Similarly, the exhaust port allows the gas being tested to
exit the Leak Detector and must remain unobstructed. The exhaust port is located in the probe docking station.
CAUTI N:
This unit is
NOT
designed for determining leaks of combustible gases. A combustible gas detector should be used
for determining combustible gas leaks in a hazardous environment.
7.0 Specifications
Power Rating: 12 Volts DC (battery charger supplied) Warranty: One year warranty.
Battery Rating: 6 hours normal operation Certifications: CE and apan
perating Temp. Range: 32°–120°F (0°–48°C) Compliance: WEEE, RoHS
Humidity Range: 0–97%

www.restek.com 5
8.0 Maintenance
Avoid spilling liquids onto the unit or it may malfunction. If a liquid is spilled onto the unit, turn off the power immedi-
ately, remove heavy liquids with a dry towel, and let the unit sit until the liquid dries. Dust and debris can enter the probe
tip of the Leak Detector and, over time, can clog the small-bore tubing inside the unit. To prevent this, clean the probe tip
periodically. To clean the probe tip, unscrew the cap to expose the brush (Figures 2 and 3). Gently clean the brush, using a
small brush or your fingers to remove dust and debris, then replace the cap. Do not use liquids to clean the probe. Liquids
can damage the Leak Detector if drawn in through the probe.
Information on where to have the unit sent for maintenance or service is listed at the end of this document.
Figure 3 Cap removed,
exposing probe tip brush for
cleaning.
Figure 2 Cap unscrewed
and partially removed.

6www.restek.com
9.0 Troubleshooting
*Contact Restek or your Restek representative for return instructions for servicing a damaged unit. Additional charges may
apply if the warranty has expired or the unit is damaged due to misuse.
uuggggeesstteedd oolluuttiioonnPPoossssiibbllee CCaauussee
PPrroobblleemm
Clean the probe tip to remove any debris
Visually inspect probe line for holes*
Recharge or return to Restek for battery replacement*
Probe clogged
Probe line punctured
Weak battery
ensitivity decreased
Re-zero detectorDetector not zeroedResponse decreased
LED bar graph stays lit during operation Detector re-zeroed before unit was purged out
Reference gas inlet covered by hand or
other object
Allow adequate time for detector to purge, then
re-zero
Remove obstruction

www.restek.com 7
10.0 Technology
The Leak Detector measurement is based on thermal conductivity comparisons between the probe air and a reference air. The
device employs a dual thermistor technology which measures the ratio of [probe]:[reference] heat exchange values and dis-
plays the results on an LED scale (Figure 4). Under ideal operating conditions, a ratio of 1:1 indicates identical air samples for
both [probe] and [reference], and therefore no leak is present.
Because of slight differences in air temperature and/or humidity between the reference inlet (Figure 1) and the probe tip, a
small response indicated by a single red or yellow LED light is generally insufficient to positively identify a gas leak. Small to
moderate leaks are reliably indicated with four red LED lights, larger leaks are indicated with all red LED lights or yellow LED
lights lit and the continuous alarm is audible.
LEFT: Dual analysis is achieved with heater
elements positioned in separate flow chambers.
RIGHT: Probe and reference air streams are
simultaneously monitored for thermal
conductivity. Differences in air composition
are indicated by differences in the heater
element currents.
Figure 4 Schematic layout of the Leak Detector technology.

8www.restek.com
11.0 Interpreting the Results
Figure 5 illustrates the Leak Detector’s LED light response
range. The greater the number of red or yellow LED lights lit
correlates in general to the size of the leak. N TE: The Leak
Detector is not a quantitative device, rather it is designed to
detect leaks in gas line connections commonly associated with
laboratory equipment
**This unit is NOT designed for determining leaks of combustible gases. A combustible gas detector should be used for determining combustible gas leaks in a
hazardous environment.
Minimum Detectable Indicating
Leak Rate LED Light
Gas (atm cc / sec.) Color
Helium 1.0 x 10⁻⁵Red
Hydrogen** 1.0 x 10⁻⁵ Red
Nitrogen 1.4 x 10⁻³ Yellow
Argon 1.0 x 10⁻⁴ Yellow
Carbon dioxide 1.0 x 10⁻⁴ Yellow
Figure 5 LED light response chart for the Leak Detector. A 1:1 ratio of IProbe : IReference indicates no leak present. Red LED
lights indicate the presence of one or more of the following gases: helium or hydrogen. Yellow LED lights indicate the
presence of one or more of the following gases: nitrogen, argon, or carbon dioxide.

www.restek.com 9
Tip drift
Tip drift is the phenomenon when a false LED light response is registered as the unit is quickly turned or swept in dramatic
arc movements. Tip drift is inherent to all dual thermistor leak detector technology and is based in large part on the asymme-
try of the flow cells; shaking or tipping the unit influences the air flow profiles which impacts the rates of heat exchange. If the
device is functioning normally, the LED light signal will return to zero in 3-5 seconds after the unit is held still. In extreme
cases, the unit may require another ‘zero’ cycle before using. To avoid tip drift, be sure to hold the unit steady while making
measurements.
12.0 Service
The Restek Leak Detector carries a one year limited warranty from time of purchase. Please have the Leak Detector serialn
Number available when calling Restek with any concerns you may have. Additional charges may apply if the warranty is
expired or the damage is due to misuse.
Expected battery lifetime is two years from time of purchase. Customers will need to return the unit to Restek for battery
replacement. At that time, preventative maintenance services can also be performed on the unit. A fee will be charged for
servicing the unit.
For questions, problems, repair services:
Within the USA:
Call Restek Technical Service at 800-356-1688 or 814-353-1300, ext. 4
utside the USA:
Contact your Restek representative

Turning Visions Into Reality
I O # 204-07 [006]
Rev. Date 06/08
Other manuals for 22839
1
Table of contents
Other Restek Measuring Instrument manuals