manuals.online logo
Brands
  1. Home
  2. •
  3. Brands
  4. •
  5. Rev-A-Shelf
  6. •
  7. Kitchen Appliance
  8. •
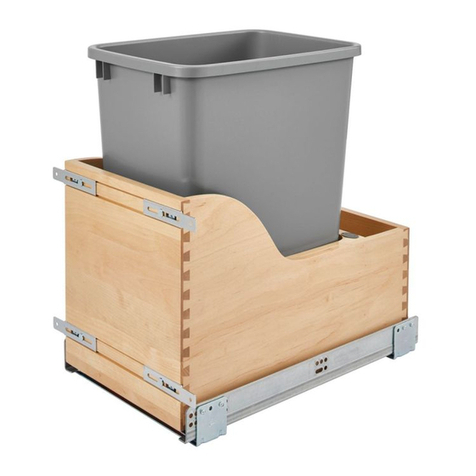
  9. Rev-A-Shelf Wood Classics 4WCTM-12DM1 User manual

Rev-A-Shelf Wood Classics 4WCTM-12DM1 User manual

INSTALLATION INSTRUCTIONS
for Top Mount Pull-Out Waste Containers with
Door Mounting Brackets
For Model: 4WCTM-27-4
Step 2:
Install front of slide to face
frame. Hole is placed 3
/8" from
front of cabinet. Bottom of
slide should be 13 1
/8" from
cabinet oor. Use #8 x 5/8"
Low Prole Truss Head Screw
Step 1:
Install rear bracket to
rear of slide.
Step 3:
If rear of cabinet is thin-
ner then 1
/2", install a
1/2" x 3" wide furring
strip to the back of the
cabinet cenered 141
/4"
from oor of cabinet. 141/4"
123/4"
141/4"
131/8" 13 1/8"
Step 4:
Measure from inside
cabinet wall to inside
face frame (A) distance
should be measured
the same at rear of
cabinet (B).
(A)
(B)
Cabinet Member
Slides
Step 5:
Mount Rear Bracket.
Extend the slide rear mounting
bracket until it contacts the rear
(Furring Strip). Bottom of slide
should be 13
1/8" from cabinet
oor. Rear mounting bracket
should be the same distance
from the side cabinet wall at rear
of slide as it is up front. Drive mounting screw in center
horizontal slot of rear mounting bracket, tighten. Tighten
screw in front bracket.
Step 6:
Install wood unit (with slides attached) into cabinet, en-
gaging product member slides into cabinet member slides,
push unit until it locks in place.
Top View
Product Member
Cabinet Member
Rear Mounting Bracket
presure  ts over end of slide.
Rear Bumper Stop
FW: I-WCTM150
For models: 4WCTM-12DM1, 4WCTM-15DM2, 4WCTM-18DM2
and 4WCTM-27-4
2409 Plantside Drive • Jeffersontown, KY 40299
800-626-1126 • 502-491-2215 fax
www.rev-a-shelf.com
I-WCTM150 7-04
STEP 4:
Take Dimension C (from Step 1)
and divide it by two. Measure this
distance to the left of the center point
on the inside of the cabinet door and
make a vertical line. Measure this
distance to the right of the
center point on the inside of
the cabinet door and make
another vertical line
(See illustration 3)
STEP 6:
Hang door with brackets attached on the
mounting screws on to the product
members. Tighten bottom screws
securely. Tighten top screws (with washer)
snugly allowing for future adjustment.
(See illustration 5)
STEP 3:
Add Dimension A and Dimension B together. Measure this distance from
bottom of the inside of your cabinet door and mark a horizontal line.
(See illustration 3). Measure center point on inside of cabinet door
and mark this point as well.
A+B
Dimension C
Equal
STEP 7:
Be sure bumper pads (not provided) are installed to
all four corners of door. Push door closed and apply
pressure to all four corners
making sure door is flush
with cabinet.
(See illustration 6).
STEP 8:
Pull door open, from
sides of door at slide level.
(See illustration 7).
Securely tighten
top screws.
STEP 9:
If your cabinet door is not straight (even all around) you can
adjust it by loosing the screws on one of the sides, properly
align the cabinet door and re-tighten the screws.
illustration 5
illustration 3
illustration 6
illustration 7
Door...
crooked
all around
Door...
straight
after
adjustment
Door
Door
STEP 2:
Measure the distance from the bottom face
frame to bottom of the Door Bracket. Note as
Dimension A. Measure your door overlap.
Note as Dimension B.
(See illustration 2)
NOTE: On frameless cabinets measure from
the bottom of the cabinet opening to the
bottom of the Door Bracket.
illustration 2
A
B
Side View
Slide
Door
STEP 1:
Measure outside to outside dimension of Door
Brackets.
Note as Dimension C.
Dimension C
STEP 5:
Remove Door Brackets from
product members and screw to
inside of cabinet door with
#6 x 1/2'' flat head screws.
NOTE: Line up door bracket to
cabinet door by aligning door
bracket with the vertical and
horizontal lines you have marked
in Steps 3 & 4.
(See illustration4)
INSTALLATION INSTRUCTIONS
For Top Mount Waste Container Door
Mounting Brackets
illustration 4
illustration 1
Cabinet Floor
A
+
B
Bottom of Door Bracket
STEP 5:
Peel off the exterior layer of tape.
Now carefully line up your desired
door position by eyesight using
the drawer above and any cabinets
to your left or right as a gauge for
correct alignment.
STEP 6:
Press the door firmly onto the
door brackets with the two sided
tape. Put pressure directly on the
sides, in position with the brackets
to allow for good adhesion.
ALTERNATIVE “EASY INSTALL”
for Top Mount Pull-Out Waste Containers WITH
Door Mounting Brackets Tape
Your Door Mount Kit also includes two pieces of specially designed two-sided tape. Follow the directions below for quick and easy installation
method that is usually much faster for “In-Home” retro-fitting:
STEP 1:
Follow steps one through six on “Installation
Instructions” (front page).
STEP 3:
Peel off one side of each of the (2) tape strips provided and
carefully place over the door bracket flanges
STEP 2:
Make sure you have correctly
selected the correct positioning of
our Door Bracket Flanges so that
the mounting holes will be located
in a position to insert the fastners
(screws) in the thick, outside
section of the door panel.
STEP 4:
Loosen the 4 bolts (2 each side) that connect the door brackets to
the product member bracket. Pull them forward (towards you) and
tighten them. This will insure that the face of the door bracket
extends slightly outside of the front frame of your cabinet.
STEP 9:
• Final adjustment
• Loosen the four bolts and make adjustments if necessary.
(See Step 9 on previous page)
STEP 7:
Carefully pull the door out from the sides and mark several
holes on each side through the brackets as a reference in
case the tape does not hold the bracket to the door.
STEP 8:
Fasten the brackets to the door
using the tape as a temporary
hold while you insert #6 x 1/2"
wood screws.
I-WCTM150
INSTALLATION INSTRUCTIONS
for Top Mount Pull-Out Waste Containers with
Door Mounting Brackets
For Models: 4WCTM-1550DM-1 and 4WCTM-2150DM-2
Step 2:
Install front of slide to face
frame. Hole is placed 3/8" from
front of cabinet. Bottom of
slide should be 19" from
cabinet floor. Use #8 x 5/8"
Low Profile Truss Head Screw
Step 1:
Install rear bracket to
rear of slide.
Step 3:
If rear of cabinet is thin-
ner then 1/2", install a
1/2" x 3" wide furring
strip to the back of the
cabinet cenered 201/8"
from floor of cabinet. 201/8"
185/8"
201/8"
19" 19"
Step 4:
Measure from inside
cabinet wall to inside
face frame (A) distance
should be measured
the same at rear of
cabinet (B).
(A)
(B)
Cabinet Member
Slides
Step 5:
Mount Rear Bracket.
Extend the slide rear mounting
bracket until it contacts the rear
(Furring Strip). Bottom of slide
should be 19" from cabinet
floor. Rear mounting bracket
should be the same distance
from the side cabinet wall at rear
of slide as it is up front. Drive mounting screw in center
horizontal slot of rear mounting bracket, tighten. Tighten
screw in front bracket.
Step 6:
Install wood unit (with slides attached) into cabinet, en-
gaging product member slides into cabinet member slides,
push unit until it locks in place.
Top View
Product Member
Cabinet Member
Step 7:
Mount Door…See seperate instruction sheet included.
Rear Mounting Bracket
presure fits over end of slide.
Rear Bumper Stop
FW: I-WCTM150

This manual suits for next models

3

Other Rev-A-Shelf Kitchen Appliance manuals

Rev-A-Shelf 544-10C User manual

Rev-A-Shelf

Rev-A-Shelf 544-10C User manual

Rev-A-Shelf RV657211 User manual

Rev-A-Shelf

Rev-A-Shelf RV657211 User manual

Rev-A-Shelf MONSTER 51 SERIES User manual

Rev-A-Shelf

Rev-A-Shelf MONSTER 51 SERIES User manual

Rev-A-Shelf 4WCSC-1532DM16-1 User manual

Rev-A-Shelf

Rev-A-Shelf 4WCSC-1532DM16-1 User manual

Rev-A-Shelf RS4WCSD User manual

Rev-A-Shelf

Rev-A-Shelf RS4WCSD User manual

Popular Kitchen Appliance manuals by other brands

Antunes, AJ Roundup STS-200 owner's manual

Antunes, AJ

Antunes, AJ Roundup STS-200 owner's manual

Gastrodomus DAG4 instruction manual

Gastrodomus

Gastrodomus DAG4 instruction manual

Basbau BB401 user manual

Basbau

Basbau BB401 user manual

Mistral MLAF50V instruction manual

Mistral

Mistral MLAF50V instruction manual

Nostalgia Electrics MINI RETRO POPCORN MAKER RHP-310 Instructions and recipes

Nostalgia Electrics

Nostalgia Electrics MINI RETRO POPCORN MAKER RHP-310 Instructions and recipes

TEFAL Hv2 Booklet

TEFAL

TEFAL Hv2 Booklet

Siemens KF Series Instructions for use

Siemens

Siemens KF Series Instructions for use

Continental Electric CE23361 instruction manual

Continental Electric

Continental Electric CE23361 instruction manual

Metcalfe NS350A Installation, operating instructions and parts list

Metcalfe

Metcalfe NS350A Installation, operating instructions and parts list

Orbegozo MCP 6000 instruction manual

Orbegozo

Orbegozo MCP 6000 instruction manual

Ventura Ibrido Assembly manual

Ventura

Ventura Ibrido Assembly manual

Cuizimate RBSGRILLSW04 instruction manual

Cuizimate

Cuizimate RBSGRILLSW04 instruction manual

MPM MMM-03M user manual

MPM

MPM MMM-03M user manual

Maxim M4SSG instruction manual

Maxim

Maxim M4SSG instruction manual

Westfalia 84 76 93 instruction manual

Westfalia

Westfalia 84 76 93 instruction manual

Moffat WALDORF 800 Brochure & specs

Moffat

Moffat WALDORF 800 Brochure & specs

Russell Hobbs 25950 manual

Russell Hobbs

Russell Hobbs 25950 manual

Jetboil MICROMO instructions

Jetboil

Jetboil MICROMO instructions

manuals.online logo
manuals.online logoBrands
  • About & Mission
  • Contact us
  • Privacy Policy
  • Terms and Conditions

Copyright 2025 Manuals.Online. All Rights Reserved.