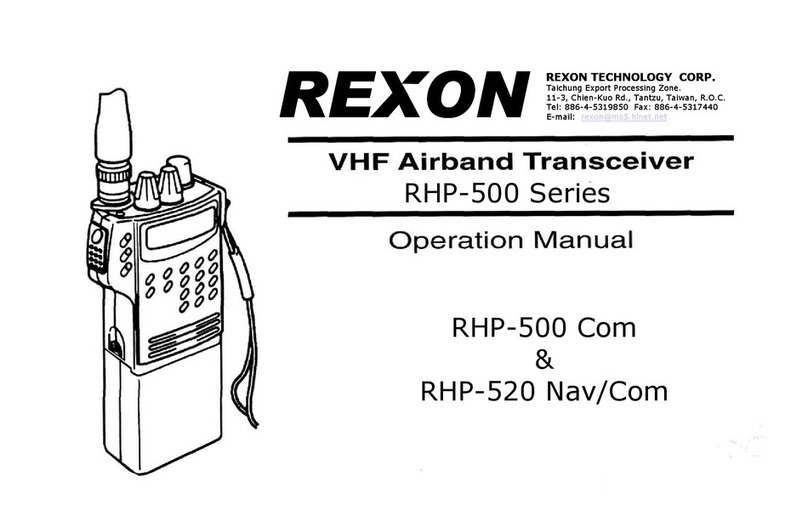
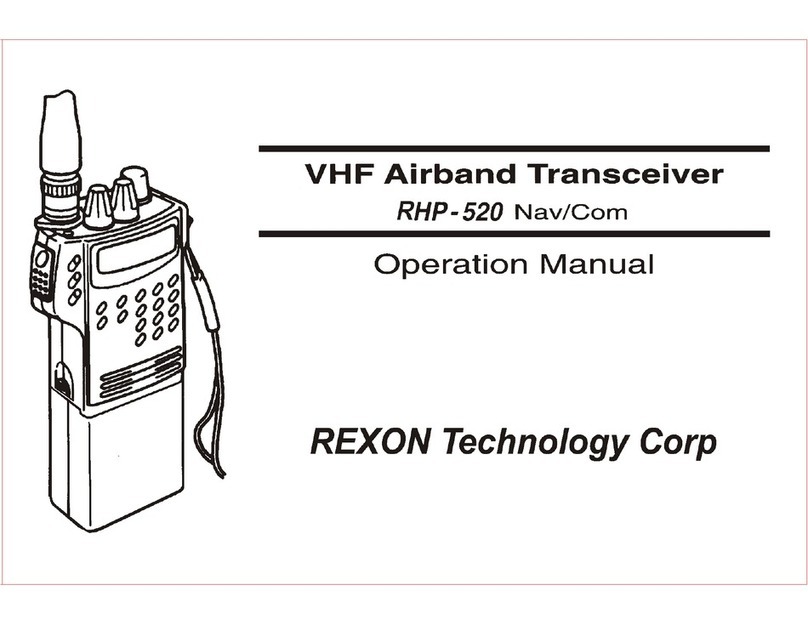
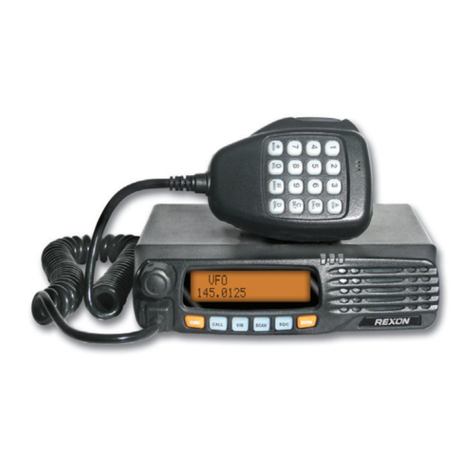
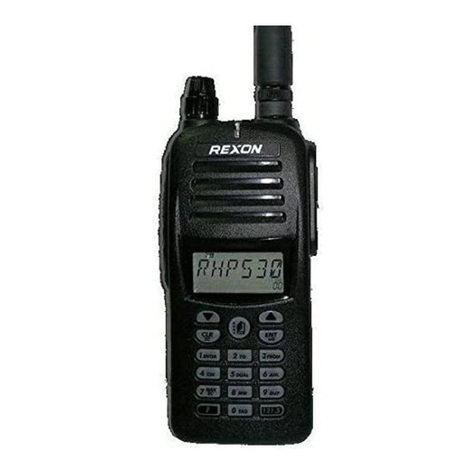
REXON rl-328cq User manual

RL-328CQ
INSTRUCTION MANUAL
VHF/UHF TRANSCEIVER
RoHS

Table of Contents
Packing List ������������������������������������������������������������������������������������������������1
Cautions ������������������������������������������������������������������������������������������������������1
Parts Name & Functions ������������������������������������������������������������������������2
Fitting & Removing the Battery Pack������������������������������������������������3
To install the battery pack ���������������������������������������������������������������� 3
To remove the battery pack������������������������������������������������������������� 3
Charging the Battery Pack ��������������������������������������������������������������������3
Symbols Description�������������������������������������������������������������������������������4
Basic Operation�����������������������������������������������������������������������������������������5
Turn the radio ON & OFF������������������������������������������������������������������� 5
Monitor���������������������������������������������������������������������������������������������������� 5
Transmitting ������������������������������������������������������������������������������������������ 5
Channel Selection ������������������������������������������������������������������������������� 5
Emergency Alarm�������������������������������������������������������������������������������� 6
Turbo /Call Function �������������������������������������������������������������������������� 6
Keypad Lock ������������������������������������������������������������������������������������������ 6
Setting Reverse Frequency Function ������������������������������������������� 6
Scan Function ��������������������������������������������������������������������������������������� 6
Priority Channel Function����������������������������������������������������������������� 7
Scan Type Selection���������������������������������������������������������������������������� 7
Channel /VFO Mode Selection �������������������������������������������������������8
VFO Mode With Channel Number������������������������������������������������� 8
DTMF Dial String���������������������������������������������������������������������������������� 8
BCLO & BTLO������������������������������������������������������������������������������������������ 8

Store/Delete a channel ��������������������������������������������������������������������������8
Operation������������������������������������������������������������������������������������������������� 10
Menu operation ���������������������������������������������������������������������������������10
VOX Sensitivity Level������������������������������������������������������������������������10
Transmit Power Setting�������������������������������������������������������������������10
Squelch Level��������������������������������������������������������������������������������������10
Backlight Setting �������������������������������������������������������������������������������11
Display Color Setting������������������������������������������������������������������������11
Beep Setting����������������������������������������������������������������������������������������11
ANI Setting�������������������������������������������������������������������������������������������11
+/- Potential Dierence� ������������������������������������������������������������������11
TOT (Time-Out Timer) ����������������������������������������������������������������������12
Beat Frequency Setting�������������������������������������������������������������������12
Frequency Step Setting�������������������������������������������������������������������12
CTCSS and DCS Setting �������������������������������������������������������������������12
Operation Voice Setting������������������������������������������������������������������13
Channel Spacing Selection ������������������������������������������������������������13
Quick index of menu ��������������������������������������������������������������������������� 14
Self-Programming ������������������������������������������������������������������������������� 16
CTCSS & DCS Code ������������������������������������������������������������������������������� 17
CTCSS CODE ����������������������������������������������������������������������������������������17
DCS CODE���������������������������������������������������������������������������������������������17
Technical Specications���������������������������������������������������������������������� 18

PAGE 1
Packing List
Please check following table�
ITEMS Q’TY
RL-328CQ Radio 1
Antenna (MX type) 1
Battery Pack 1
Rapid Charger 1
Belt Clip 1
Instruction Manual 1
Cautions
* NEVER transmit without antenna�
* USE DC power supply, take notice of power voltage must be
between 6V and 8V to avoid damaging the unit�
* PLEASE keep the radio dry� Rainwater or damp will corrode
electronic circuits�
* DO NOT open the unit� Non-expert handling of the unit may
damage it�
* DO NOT forget to remove the radio from the charger when
the battery is fully-charged�
* MAKE SURE the radio is turned o while charging�
* AVOID storing the radio under the sunshine or in hot areas�
High temperature can shorten the life of electronic devices, and
warp or melt certain plastics�
* AVOID storing the radio in dusty, dirty areas�
* Risk of explosion if battery is replaced by an incorrect type�
* Dispose of used batteries according to the instructions�

PAGE 2
Parts Name & Functions
Power/Volume
Knob: Rotate it to
turn on the trans-
ceiver and to adjust
the volume�
Antenna Connector:
Fit the antenna to this
MX Type connector
Loudspeaker
Microphone
LCD Display
UP & Down Button
ESCAPE Button
[ESC]
ENTER Button
[ENT]
Battery Pack
Release Buckle
PTT Button
TURBO/CALL Button
MENU Button
External Speaker
/Mic Connector
LED: Indicates radio
status
M
ESC
2PR
5SQ
8CO
0PR
4PW
7BL
LK
3VX
6SB
9BP
#TR
*
1SC
MONITOR Button
[MON]

PAGE 3
Fitting & Removing the Battery Pack
Charging the Battery Pack
To install the battery pack
To remove the battery pack
1) Connect the jack of AC adaptor into the
socket of the charging cradle�
2) Plug the AC adaptor into the power outlet�
3) Insert the radio into the cradle�
4) Charge the radio with standard charger for
10-12 hours; with rapid charger for 2 hours
1) Fit the bottom edge of the battery pack into
the holes of the transceiver cabinet bottom�
2) Push the battery pack down to the transceiver
aluminum chassis till the end click�
1) Keep pressing the release buckle of the battery pack and lift the
battery pack up from the transceiver body� Note it is normal for
this buckle to be sti�
CAUSION
Do not dispose of re
Do not short circuit
To be charged only with specied charger

PAGE 4
Symbols Description
+-
Indicates battery condition.
Indicates VOX is activated
Indicates reverse frequency
Indicates squelch is activated
Indicates the channel with scanning
Indicates bell call is activated
Indicates when the keypad has been locked
Indicates frequency scanning
Indicates Digital Coded Squelch (DCS)
Indicates VFO with channel numbers
Indicates Continuous Tone Coded Squelched System (CTCSS)
Indicates the PRIority channel (Dealer Programmable)
Displays VFO or channel numbers
Indicates the strength of TX or RX signal
Dispersion to hyper received frequency
Dispersion to under received frequency

PAGE 5
Basic Operation
Turn the radio ON & OFF
1) Rotate the PWR/VOL knob clockwise till the radio is turned on� The
radio gets started to auto test for two seconds� During auto testing, all
icons will appear on LCD�
2) After auto testing is done, LCD will show channel number and what
functions have been activated by your dealer�
3) Rotate the PWR/VOL knob clockwise to increase its volume or counter
clockwise to reduce its volume�
4) To turn the radio o, rotate the PWR/VOL knob counter clockwise
until the end click�
Monitor
Press the “MON” button on the side of the radio to open the squelch�
This allows you to override the squelch and the CTCSS or DCS tones� It is
useful to monitor the channel before you transmit and ensure there is no
one using the channel when you have CTCSS or DCS tones programmed�
Transmitting
Before transmitting, you can monitor the channel you are using to
ensure it is not busy� Keep pressing “PTT” button and start talking at ap-
proximately 2 inches from the MIC jack� During transmitting, the LED on
the top of the radio will glow red� Release “PTT” button when you have
nished talking�
Channel Selection
In channel mode, pressing the button to increase the channel num-
ber or the button to decrease it� The other way, pressing channel
number goes to desired channel by alphanumeric keypad�

PAGE 6
Emergency Alarm
Press and hold “CALL” and “MON”button assigned to make an emer-
gency alarm�
Turbo /Call Function
Turbo
Push “Turbo” button would allow you to have high power TX at 6�5W
immediately for VHF, and 5W for UHF�
HIGH POWER OR CALL FUNCTION MAY BE PROGRAMED BY YOUR
DEALER�
CALL
Push the“CALL” button for seconds to call your partner� “ “ will ap-
pear on LCD of recipient�
Keypad Lock
In Channel/Frequency mode, press and hold button for seconds,
the keypad will be locked� “ ” will appear on LCD� Press and hold
button for seconds again to unlock the keypad�
Setting Reverse Frequency Function
In Channel/Frequency mode, press and hold button for seconds
till “ ” appears on LCD� To disarm, press for seconds again� When
reverse function is activated, the transmitting frequency and receving
frequency is reversed�
Scan Function
In Channel/Frequency mode, press Mbutton and button, press
button to begin scanning, you will see the channel numbers cycling
continuously� Whenever any activity is detected, the “SCAN” mode will
stop and resume after few seconds� If your radio has scanned a channel

PAGE 7
on which there is a party you want to talk to, you can directly communi-
cate with the party by pressing the PTT button� To stop scanning, press
the button again�
Priority Channel Function
Priority scan allows you to select a channel that will be monitored more
often than the others while scanning� “ ” is ashing when priority scan
is activated�
In Frequency mode, press Mbutton and button, press but-
ton to begin scanning, you will see the frequency range cycling continu-
ously within 1MHz� Whenever any activity is detected, the “SCAN” mode
will stop and resume after few seconds unless you press “PTT” button or
button to end up scanning�
In Channel mode, press Mbutton and button, if there is “ ”
symbol showed on the LCD that means the channel has scanning func-
tion �
You will see the radio scanning like the following :
CH1-->CH2-->CH1-->CH3-->CH1-->CH5
Whenever any activity is detected, the “SCAN” mode will stop and
resume after few seconds unless you press“PTT” button or button
to end up scanning� YOUR DEALER CAN PROGRAM A PRIORITY CHANNEL
AND SCANNING CHANNEL THROUGH PC�
Scan Type Selection
In Channel/Frequency mode, press Mbutton and press Up/Down
button till “SCANS? 13” appears, press button to edit, press Up/Down
button to select TO/CO/SE�
TO: Time-Operated Scan-> After radio is locked in a busy channel for a
period, the radio will begin scanning other channels�
CO: Carrier-Operated Scan-> Radio will be locked in a busy channel till
there isn’t any carrier� Meanwhile, the radio will begin scanning other

PAGE 8
channels�
SE: Search Scan -> Radio will be locked in a busy channel at all time till
you press Up/Down button�
Channel /VFO Mode Selection
Press and hold button, the radio can switch between channel
and frequency mode� YOUR DEALER CAN LIMIT CHANNEL MODE ONLY
THROUGH PC PROGRAMMING SOFTWARE�
VFO Mode With Channel Number
In Frequency mode, press and hold
ESC
button, the radio can switch
between frequency mode and frequency mode with channel number�
Press
ESC
button to return frequency mode�
DTMF Dial String
In Channel/Frequency, when PTT button is pressed, type those number
0-9 , * and # on keypad , Mbutton for A; button for B;
ESC
button
for C; CALL button for D, Those strings will appear on LCD of receipient�
BCLO & BTLO
BCLO (Busy Channel Lock-Out), is to disable the transmission when RX
signal is received�
BTLO (Busy Tone Lock-Out), is to disable the transmission when RX
signal with same tone is received� YOUR DEALER CAN PROGRAM THIS
PARAMETERS THROUGH PC�
Store/Delete a channel
Store a channel
In Channel/Frequency mode, select desired frequency or any other
items like CTCSS, DCS� Press Mbutton, then press
ESC
button� After

PAGE 9
the channel number you wish to store is blinking, press Up/Down button
or input keypad numbers to store channel number� Press
ESC
button to
conrm and exit�
Delete a channel
In Channel/Frequency mode and then turn o radio, Hold down
ESC
button and turn on the radio� “DEL?”and stored channel will display on
LCD� Press Up/Down button to select or input keypad numbers which
need to be deleted, press button till“YES?” appears, and press
button to delete the channel�
Delete all setting of frequency mode
Hold down Mbutton and turn on power till “RESET?” appears on LCD,
press button till “VFO?” is displayed� Press button to conrm
and delete all setting of frequency mode�
Delete all setting
Hold down Mbutton and turn on power till “RESET?” is displayed,
press button till “VFO?” is displayed� Press Up/Down button to select
“FULL?”� Press button to conrm and exit�
Notice: If “delete all setting” is done, all channel tables will be erased�

PAGE 10
Operation
Menu operation
In any menu mode, press Up/Down button to select and press but-
ton to conrm or press
ESC
button to exit�
VOX Sensitivity Level
In Channel / Frequency mode, if you want to open VOX, press Mbut-
ton and button, then press button till display“VOX OFF”, input
the number with keypad (0-9) or press Up/Down button to select the
sensitivity level; 0 means VOX canceling; 1 means the most sensitive (for
quiet environment); 9 means the least (for noisy environment)�
“VOX OFF” is default�
Transmit Power Setting
In Channel / Frequency mode, hold down Mbutton and button,
then press button till “POW L” appears, which means Low Power�
Press Up/Down button till “POW H” appears, it means high power and its
output power would be double of low power� YOU DEALER CAN PRO-
GRAM TX POWER AT CHANNEL MODE THROUGH PC PROGRAMMING
SOFTWARE�
Squelch Level
In Channel / Frequency mode, hold down Mbutton and button
, then press button, so that “SQL 5” appears� Input the number with
keypad (0-9) or press Up/Down button to select squelch level; 0 means
squelch canceling; 9 means tight squelch�

PAGE 11
“SQL 5” is set by default� Setting the radio to the tight squelch level,
you can avoid unwanted signals or noise, but you may not receive a weak
signal� YOU DEALER CAN PROGRAM SQUELCH LEVEL AT CHANNEL MODE
THROUGH PC PROGRAMMING SOFTWARE�
Backlight Setting
To turn backlight on, hold down Mbutton and button, then
press button , so that “ON” appears, press Up/Down button to select
from ON/OFF�
Display Color Setting
Hold down Mbutton and button, then press button, so
that “LIGHT 2” appears, press Up/Down button to select one color� There
are three display colors, light 1 is purple; light 2 is orange and light 3 is
blue�
Beep Setting
To turn beep on, hold down Mbutton and button, then press
button, so that “ON” displays� To close beep, press Up/Down button
till “OFF” appears�
ANI Setting
ANI(Automatic Numbering Identification) , to show caller ID on
the display while the caller push PTT switch, hold down Mbutton and
button, then press button, so that “ON” appears� To close ANI,
please press Up/Down button till “OFF”appears� ANI ID CAN BE SET BY
PC PROGRAMMING SOFTWARE�
+/- Potential Difference.
In Frequency mode, press Mbutton and then press button,

PAGE 12
press button to go in to edit , press Up/Down button to select S-D O
(same), S-D + (plus), S-S – (minus)
TOT (Time-Out Timer)
TOT is the function that prevents from locking up a repeater or frequen-
cy by prolonged keying of PTT�
The time-out timer limits the amount of time you have to transmit your
message� When you reach the time limit , your transmission will be cut
o� Press Mbutton and then press Up/Down button till “TOT ? 12” ap-
pears, press button to edit, press Up/Down to set timer�
Beat Frequency Setting
This function is used to determine the dierence (potential dierence)
between sending frequency and receiving frequency� Press Mbutton
and Up/Down button till “DIFFR?” appears� Press button and input
needed frequency, range from 00�000 to 70�995MHz�
Frequency Step Setting
Press Mbutton and then press Up/Down button till “STEP?” appears,
press button and press Up/Down button to select frequency step-
ping from 5K, 10K, 6�25K, 12�5K, 25K�
CTCSS and DCS Setting
In Frequency mode, press Mbutton, then press and but-
ton, press Up/Down button to select desired CTCSS or DCS�
“ “ shows on LCD which means the channel has DCS code�
“ “ shows on LCD which means the channel has CTCSS code�
(Press button to switch CTCSS and DCS )
CTCSS/DCS CAN BE PROGRAMMED AT CHANNEL MODE BY PC PRO-
GRAMMING SOFTWARE�

PAGE 13
Operation Voice Setting
Press Mbutton and then press Up/Down button till “VOICE? 14” ap-
pears, press button to edit, press Up/Down to select open or close
voice� YOUR DEALER CAN PROGRAM THE VOICE IN ENGLISH OR CHINESE
THROUGH PC SOFTWARE�
Channel Spacing Selection
Press Mbutton and then press Up/Down button till “N/W? 21” ap-
pears on LCD, press button to edit, press Up/Down to select WIDE
(25KHz)or NARROW(12�5KHz)� CHANNEL SPACING CAN BE PROGRAMMED
AT CHANNEL MODE BY PC PROGRAMMING SOFTWARE�

PAGE 14
Quick index of menu
In Channel/VFO mode, press Mbutton to go in to the menu� Press
Up/Down button to select, press button to enter the mode� Press
Up/Down button to select parameters, press button to conrm
or press
ESC
button to exit� “Both“ mode is available in VFO & Channel
mode�
SCAN ?
PRI ?
VOX ?
POW?
SQL?
LED?
LIGHT ?
Scan entire channels
Priority channel scan
Set VOX level
Set transmitting power
Set squelch level
Set LED
Set display color
BEEP ? Set keypad beep
Function descriptionMenu List
1~9 & OFF
H/L
0~9
ON/OFF/AUTO
(1)Purple
(2)Orange
(3)Blue
ON/OFF
Parameters Mode
01
02
03
04
05
07
08
09
Both
Both
Both
Both
Both
Both
Both
Both

PAGE 15
ANI ?
KEYBO?
TOT ?
SCRMS?
VOICE?
Turn ANI
Switch to
Set time out timer
Set scan type
Set voice notice
ON/OFF
Manual / Auto
OFF~270 Sec
TO/CO/SE
ON/OFF
Channel name tag ON/OFF
N/W ? Set channel spacing WIDE/NARROW
C-CDC?
R-CDC?
Set CTCSS frequency
Set receiving code
T-CDE? Set transmitting code
Ref page 17
S-D ? Set potential dierence
STEP ? Set frequency step
+/-/0
5/10/25 KHz
6�25/12�5 KHz
Ref page 17
Ref page 17
10
11
12
13
14
15
15
16
17
18
19
20
21
Both
Both
Both
Both
Both
DIFFR?
NAME?
Set potential
frequency
0~70�995
MHz
VFO
CH
VFO
VFO
VFO
VFO
VFO
VFO

PAGE 16
Self-Programming
Press and hold MON+ Mbuttons by turn on the radio, “SELF” will
appear on LCD, press button to start editing in accord with follow-
ing step to“self-programming” per channel setting�Press button
the next function and press Up/Down button to select parameters�
CH-001
������
67�0
146�000
67�0
OFF
Add
H
Channel numbers
Receving frequency
Receving frequency code
Transmitting frequency
code
Busy channel lockedout
Add/Del priority channel
scan
Output power
N�W Channel spacing
Function description
Lists
1~128
Unit: MHz
Ref page 17
Unit: MHz
Ref page 17
OFF/Carrier
TCSS(DCS)
Add/Del
N / W
Parameters
H / L
1
2
3
4
5
6
7
8
9

PAGE 17
REXONT 10 Channel Name Tag Press button
to next word �
Press
ESC
button
to previous word�
67�0 85�4 107�2 136�5 165�5 186�2 210�7 254�1
69�3 88�5 110�9 141�3 167�9 189�9 218�1
71�9 91�5 114�8 146�2 171�3 192�8 225�7
74�4 94�8 118�8 151�4 173�8 196�6 229�1
77�0 97�4 123�0 156�7 177�3 199�5 233�6
79�7 100�0 127�3 159�8 179�9 203�5 241�8
82�5 103�5 131�8 162�2 183�5 206�5 250�3
023 065 132 205 255 331 413 465 612 723
025 071 134 212 261 332 423 466 624 731
026 072 143 223 263 343 431 503 627 732
031 073 145 225 265 346 432 506 631 734
032 074 152 226 266 351 445 516 632 743
036 114 155 243 271 356 446 523 645 754
043 115 156 244 274 364 452 526 654
047 116 162 245 306 365 454 532 662
051 122 165 246 311 371 455 546 664
053 125 172 251 315 411 462 565 703
054 131 174 252 325 412 464 606 712
CTCSS CODE
DCS CODE
CTCSS & DCS Code
Table of contents
Other REXON Transceiver manuals