Page 7
Delete A Nuisance Channel
Allows you to remove temporarily the channels which you don’t want to hear from the scan list.
During scanning, when the radio is locked on a busy channel, press button to remove this
channel from the scan list, and it won’t be scanned until the radio is turned on again. This func-
tion should not be used in systems critical or mission critical communication systems and can be
disabled by your dealer.
Menu Setting
By locking button without user’s access(dealer programmable) in the programming software,
the following settings cannot be changed by end user.
Your dealer is able to setup following menu whether it is available or not by pc
programmer.
Squelch Level
Press button continuously till LCD shows [SQUL-3], and then press or button to in-
crease or decrease squelch level from 0 to 10; 0 means squelch canceling; 10 means tight
squelch.
Setting the radio to the tight squelch level, you can avoid unwanted signals or noise, but you may
not receive a weak signal. Therefore, it will be better for you to select the normal squelch level
(default value: 3). Press button to save the setting and to get back to operation menu or press
again to gain access to other settings.
VOX Sensitivity Level
VOX feature can be programmed at each channel. If this channel is set with VOX feature,
icon will ash. Press button continuously till LCD shows [VXL:3]. Press or button to ad-
just VOX sensitivity from 0 to 10. 0 means VOX canceling; 1 means the most sensitive (for quiet
environment); 5 means the least (for noisy environment). Press button to save the setting and
get back to operation menu or press button again to gain access to other settings.
BEEP
Press button continuously till LCD shows [BEEP-On]. Press or button to turn beep On
or OFF. Press button to save the setting and get back to operation menu or press again
to gain access to other settings.
TX Power Selection
Press button continuously till LCD shows [PWR-H]. Press or to choose TX output
power. H means high power; L means low power. Press button to save the setting and get
back to operation menu or press button again to gain access to other settings.
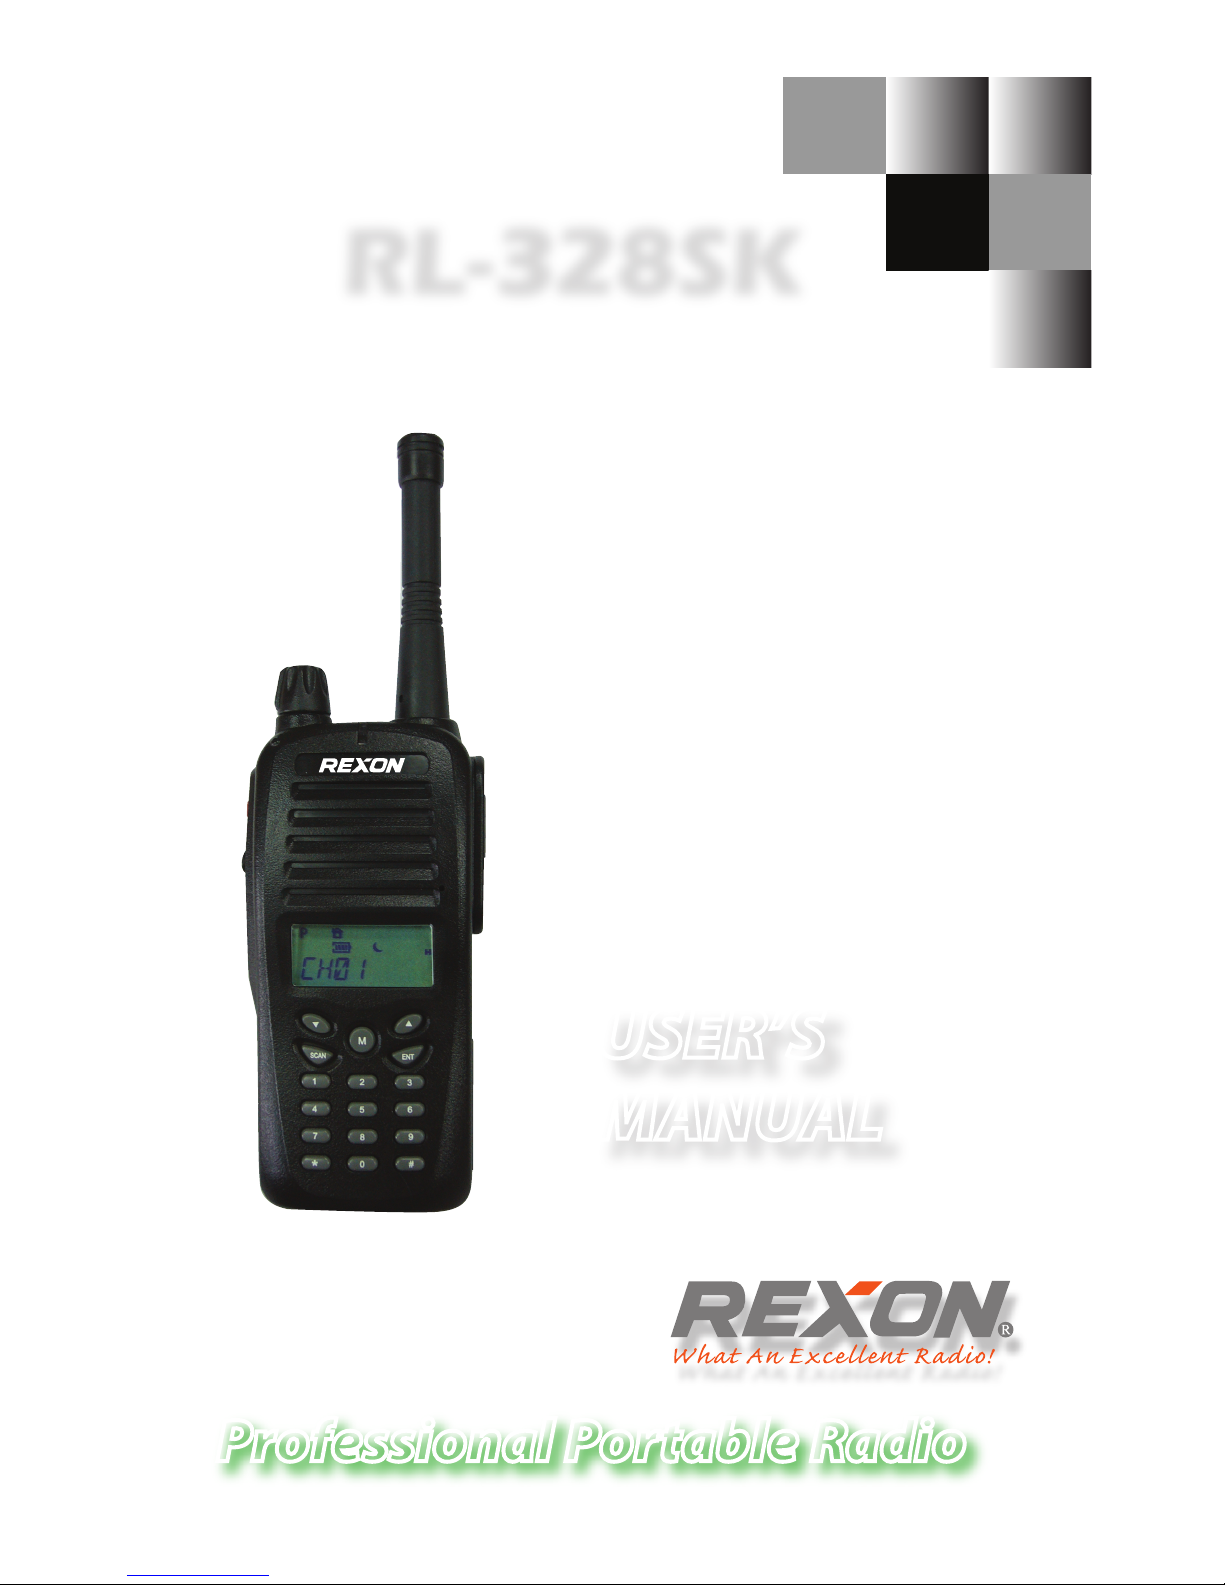
Keypad Lock
There are two kinds of keypad lock/unlock functions: with users access or without users access.
Your dealer can set either key of the front ve buttons to be locked permanently without users
access, or to be temporarily unlocked with users access. Locking the key pad correctly is very
important to ensure that the RL-328S works at its best for the end user, time should be taken to
ensure that the various levels of keypad lock are fully understood.
Press button continuously till LCD shows [KEY.L:OFF]. Press or button to choose
keypad lock: “OFF” means unlock; “On” means lock. When keypad is locked, LCD shows and
only keys on left side is still working. Press button to save the setting and get back to opera-
tion menu or press button again to gain access to other settings.
�
�
�
�
�