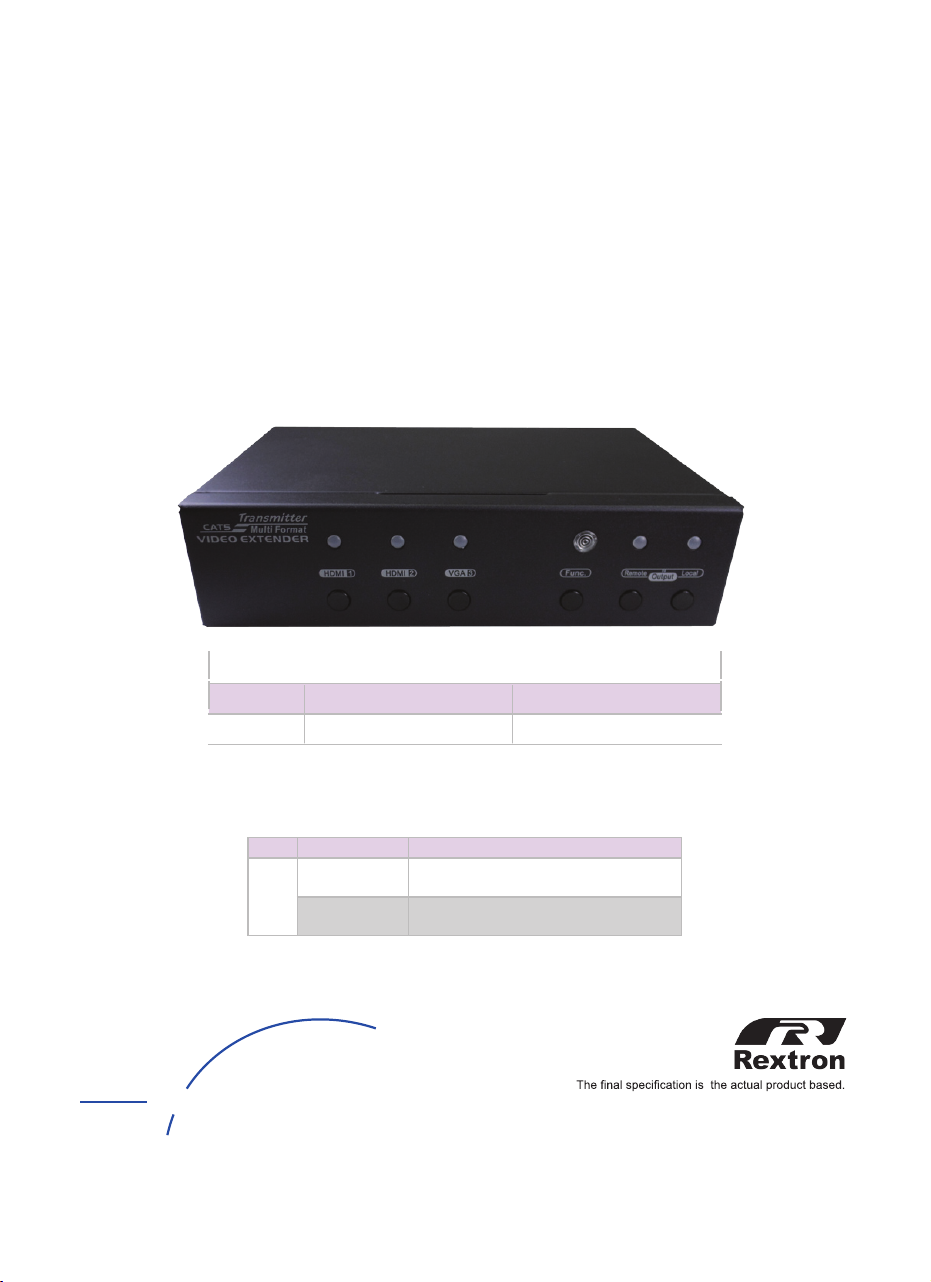
Rextron EVBMV-1371L User manual

4K2K HDMI / VGA HDBaseTTM
Transmitter over CAT5
with GUI, Serial & IR
Type 100M 70M
Tx EVBMV-1391L EVBMV-1371L
Related Products
Type 100M Function
Rx
EVBM-107R
EVBM-110R CATx HDMI Receiver (Max. 4Kx2K)
EVBM-K107R
EVBM-K110R
CATx HDMI Receiver with Scaling
(Max. Full HD 1080p)
E NV
electronic components GmbH
M E D I A T E C H N O L O G Y
Maybachstrasse 39 Tel: +49 7161 60686 0 www.evn-components.de
PP5-RHAA12Z-000
Features and functions may be added or changed
after the manual was written. Please visit our
website to download the latest version of manual
for reference.
◘
◘
User's Manual

Package Contents
● 4K2K HDMI / VGA HDBaseTTM Transmitter x 1
● Power Adaptor Set x 1
● IR Remote Controller x 1
● CD (User’s Manual & GUI app) x 1
● Quick Start Guide x 1
● Foot Pad Set
● CAT5 cable for test x 1
Optional:
● IR Sensor Kit
● RJ12 Cable + RJ12 to RS232 converter
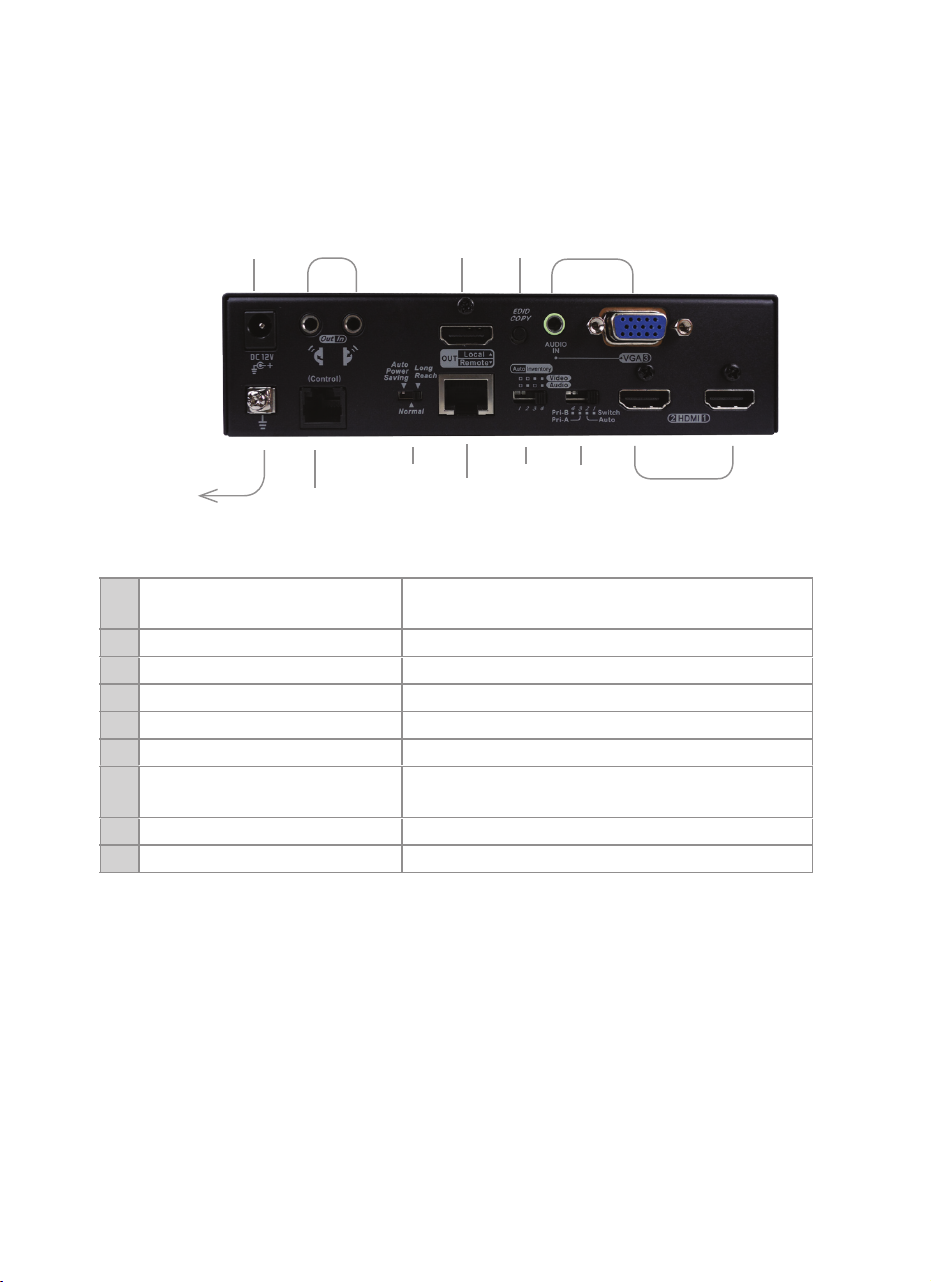
Features
●Transmit HDMI / VGA+audio signal over CATx cable of up to 70/100 meters
● Provide various ways to control via
(1) Front panel push button (2) IR remote controller
(3) Serial control-simple serial connection (4) GUI operation
● Use HDBaseTTM technology
● HDTV, 3D HDTV compatible; HDCP compliant and Blu-ray ready
● Support Deep Color, HD-3D and HD Audio formats
● Support resolution up to Full HD (1920 x 1080) / UHD (3840 x 2160)
● Unique power supply system -- single power supply at Tx while Rx is not
required
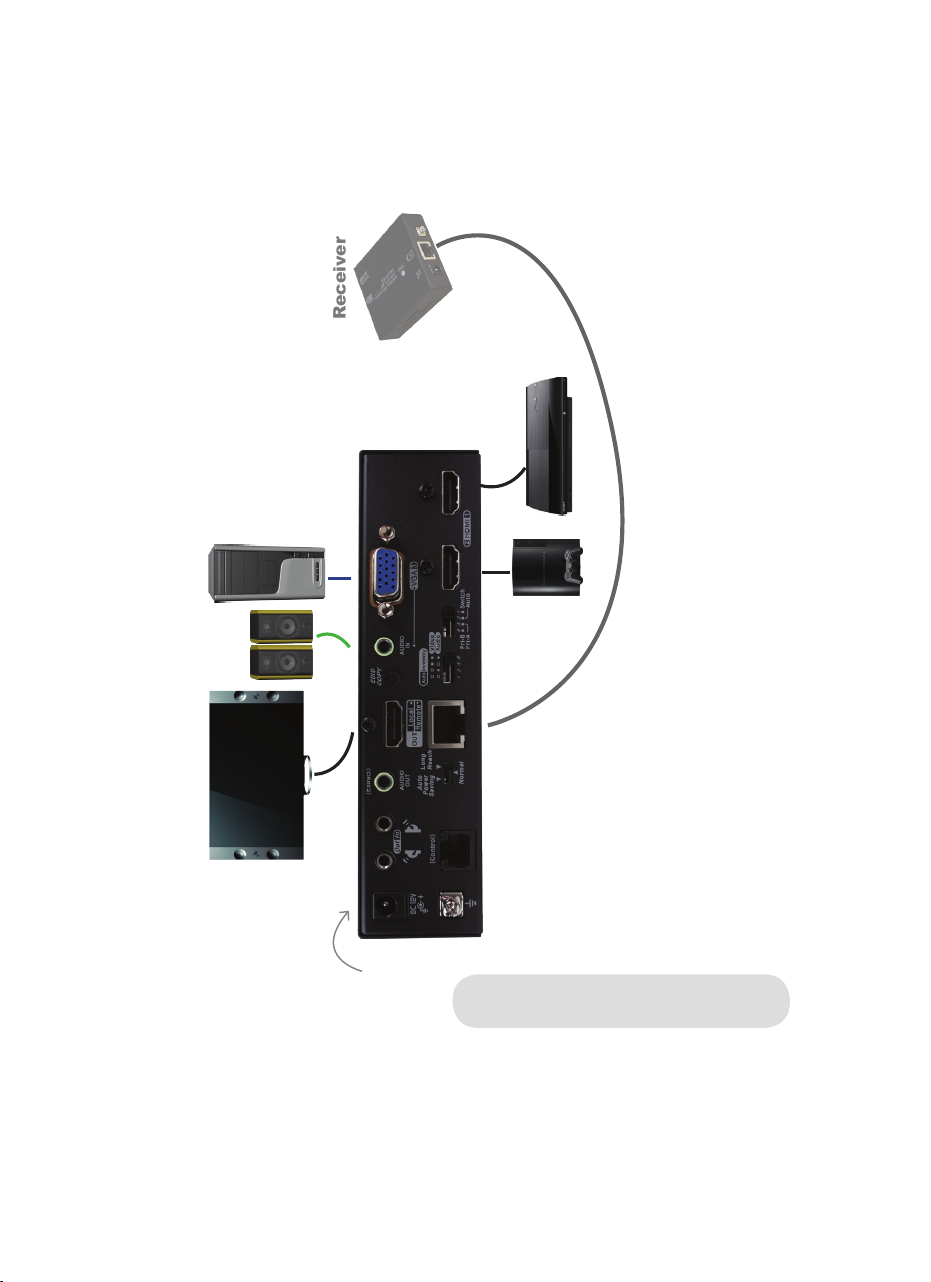
Unique EGO MX Functions
● Versatile port selection functions of Priority, Auto-sensing and Switch modes
● User-friendly port switching via button pressing or priority setting
●Two priority settings to start with VGA / HDMI source for different needs
oedivtsetalehttcelesyllacitaamotuametsysehtselbanenoitcnufgnisnes-otuA●
source
Exclusive EDID Functions
● Multi-functions for EDID setting, like EDID Copy and EDID Pre-setting,
ensuring accurate output display
● Enable separately learn Audio and Video EDID for multimedia/ Home Theater
system integration
● Read and store the EDID from the connecting display to the video extension
Exclusive GUI Operation Functions
● Graphically show connection status
● Most commonly used menu items are duplicated as icons on the top
● Can name and use your own images for every source and display icon
Exclusive Link Port Functions
● Increase the extension distance up to 150 meter for Full HD 1080p
E NV
electronic components GmbH
M E D I A T E C H N O L O G Y
Maybachstrasse 39 Tel: +49 7161 60686 0 www.evn-components.de
73037 Göppingen Fax: +49 7161 60686 29 info@evn-components.de

Rear Panel
I Input Port Connect to VGA + Analog stereo source
Connect to an HDMI source
Ro Remote Output Port Connect to a receiver
Lo Local Output Port Connect to an HDMI display
S1 EDID Setting Switch See the diagram of EDID Setting Switch
S2 EGO Setting Switch See the diagram of EGO Settinng Switch
S3 Link Port Switch See the diagram of Link Port Switch
R IR Connector [In] Connect to IR Receiver
[Out] Connect to IR Transceiver
C Serial Port Connect to a serial console (PC)
P Power Supply Apply power to the unit
Ro
B
S2
S1
C
P
Grounding
Lo I
I
R
S3

Front Panel
1 Input Port Button Source selection
2 Function Button
3 Input Port LED Please see LED Indicator (in User's Manual)
4 Output Port Button Turn ON / OFF Output Signal
5Output Port LED Please see LED Indicator (in User's Manual)
6IR Sensor IR remote controller sensor
12
3
4
5
6

Model Transmitter
EVBMV-1371L EVBMV-1391L
Input HDMI x 2
VGA + Analog Stereo x 1
Output HDMI x 1 + Analog Stereo x 1
Connection RJ-45 x 1
LED Indicator
(Power / Status)
Source x 3
Remote x 1, Local x 1
Push Button
Port Select x 3, Function x 1
Remote x 1, Local x 1
EDID Copy x 1
IR Extension IR Transceiver x 1
IR Receiver x 1
Signal Video Auto / Inventory
Audio
Switch / Auto / Pri-A / Pri-B
Auto Power Saving / Normal / Long Reach
Video Resolution (Max.) UHD (3840 x 2160) for HDMI
Full HD (1920 x 1080) for VGA
Extension Distance*
HDMI
70M @ Full HD
(1920 x 1080)
35M @ UHD
(3840 x 2160)
VGA
70M @ Full HD
(1920 x 1080)
HDMI
100M @ Full HD
(1920 x 1080)
70M @ UHD
(3840 x 2160)
VGA
100M @ Full HD
(1920 x 1080)
Enclosure Metal
Power Supply DC 12V
*Above video resolution and extension distance are based on a single CATx
24AWG solid cable without cascade. STP cabling is recommended for environments
with high EMI or RFI. For the best performance results, using stranded cabling
or other thinner cables, and coiling of excess cable lengths should be avoided.

EDID Setting Switch
EGO Setting Switch
Rear Panel
Mode Video Audio
1Va). Auto Aa). Auto (Min.)
2Va). Auto Ai). Inventory
3Vi). Inventory Aa). Auto (Min.)
4Vi). Inventory Ai). Inventory
Va). Video Auto Mixing: Automatically optimize all valid video outputs for minimum
requirement
Aa). Audio Auto Mixing: Automatically perform the minimum audio format of all
attached displays
Vi). Video Inventory: After copying Video EDID, use the copied Video EDID to the
connected display
Ai). Audio Inventory: After copying Audio EDID, use the copied Audio EDID to the
connected display
Mode Description
Switch Press button-n to select Source-n; all monitors display Source-n
Auto System will automatically select the latest video source for display
Priority-A Priority: HDMI1(High Priority) > VGA > HDMI2
Priority-B Priority: HDMI2(High Priority) > VGA > HDMI1

!
1. Use a CAT5 cable to connect to a receiver. Connect the receiver to an HDMI
display.
2. Use a HDMI cable to connect the source device to the HDMI input port and a
VGA cable to connect the source device to the VGA input port on the Unit.
Connect the stereo audio source to 3.5mm earphone jack ( if necessary)
3. Use an HDMI cable for connection between display and the HDMI output port
on the Unit (if needed).
4. Apply the proper power to the Unit; then power on all the attached sources
and devices.
NOTE: If users encounter no screen display in computer connection
2. Set your display device’s input source as HDMI.
4. Connect your computer tothe HDMI Display DIRECTLY to check if the video
signal gets through.
5. Slide the switches to the correct positions according to your displays.
6. Apply EDID Copy to your display (see EDID Setting section).
Installation
WARNING
● Ensure that all devices are powered off before connecting to the Unit.
● Make sure all devices you will connect are properly grounded.
Link Port Switch
Auto Power Saving: Automatically save energy when source or monitor connected
failure
Normal: Normal operation (up to 4K2K)
Long Reach: Extend distance from 100M to 150M (up to Full HD 1080p)
(EVBMV-1391L only)

For more operations, such as EDID Setting,
please refer to User's Manual (CD).
Connection Pattern
DC12V in
C
A
T
x
C
a
b
l
e
Transmitter
Receiver
This manual suits for next models
5
Table of contents
Popular Transmitter manuals by other brands

FUTABA
FUTABA R3006SB quick start guide

Bellman & Symfon
Bellman & Symfon BE1411 Installer's guide

Emerson
Emerson Rosemount FCL-01 Reference manual

Johnson Controls
Johnson Controls DP0100 installation instructions

MODSTER
MODSTER Vector SR48 user manual

Sperry instruments
Sperry instruments ET65220T operating instructions

Halemeier
Halemeier S-Mitter MultiWhite 2 HA-MW2-E24 manual

GESTRA
GESTRA NRS 2-1 Installation and service instructions

YOKOGAWA
YOKOGAWA Dpharp vigilantplant EJA210A user manual

M-system
M-system W5LCS instruction manual

Crestron
Crestron ST-4T Operation guide

Emerson
Emerson Rosemount Oxymitter 4000 instruction manual