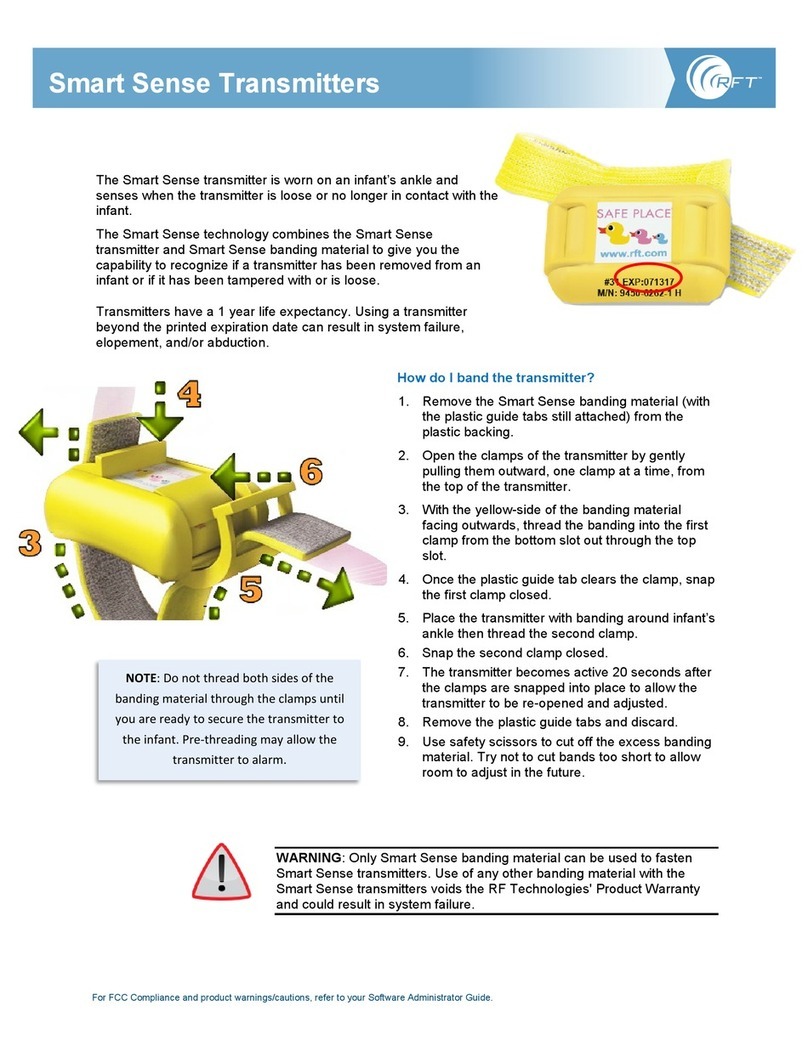
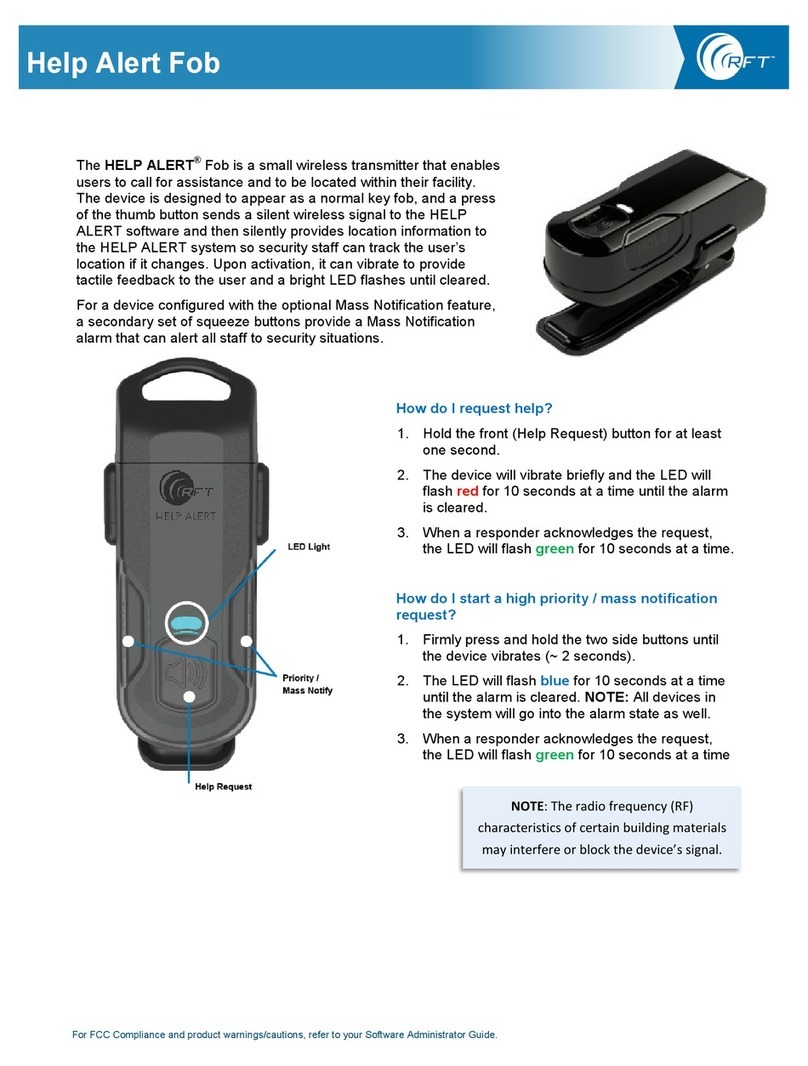
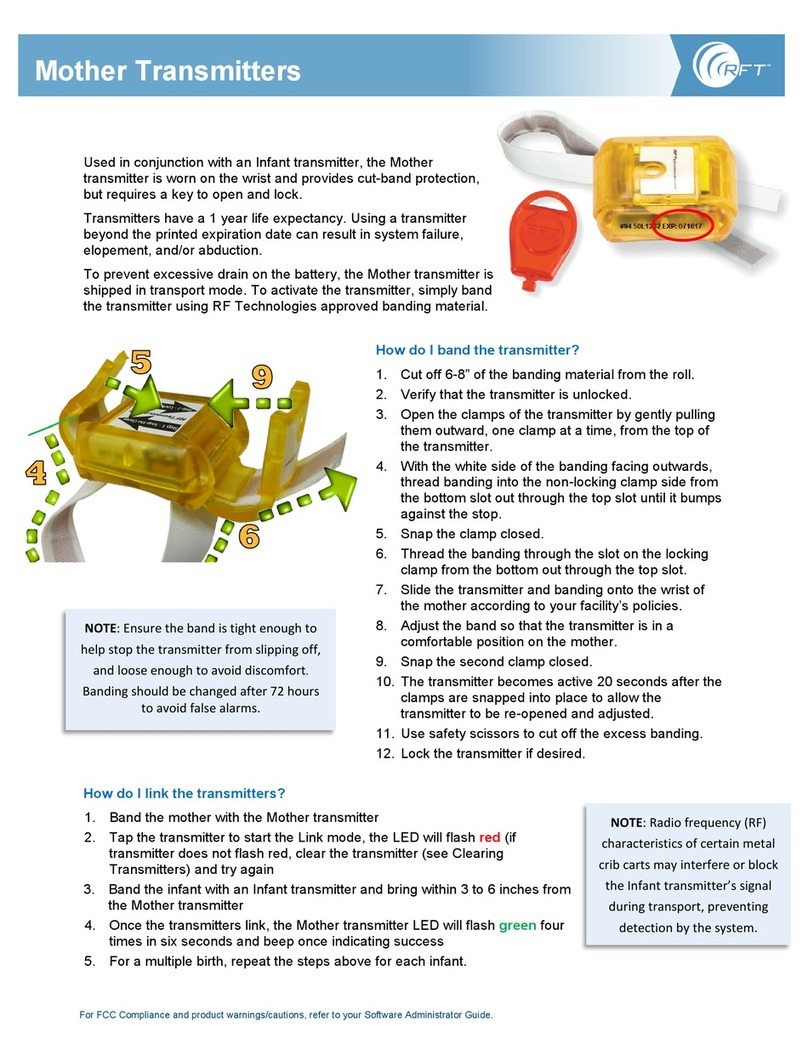
Rf-t Safe Place Baby Check User manual

Baby Check
Transmitters
User Guide

Compliance
This device complies with Part 15 of the FCC rules.
Operation is subject to the following two conditions:
•This device may not cause harmful interference.
•This device must accept any interference
received, including interference that may cause
undesired operation.
Changes or modifications not expressly approved by
the party responsible for compliance can void the user’s
authority to operate the equipment.
The term “IC” before the certification/registration
number only signifies that the Industry Canada
technical specifications were met.
•FCC: KXU-MBTX 2
•IC: 2719A – MBTX 2
© 2018 RF Technologies, Inc. All specifications subject to change without notice.
All Rights Reserved. No Part of this work may be reproduced or copied in any form or by any
means without written permission from RF Technologies, Inc.
® and ™ indicate trademarks owned by RF Technologies, Inc.

Contents
Baby Check Transmitters User Guide Page 1 of 28
0510-1124-I
CONTENTS
CONTENTS ................................................................................. 1
WARNINGS AND CAUTIONS .................................................... 3
Warnings ............................................................................... 3
Bio-Incompatibility Notice...................................................... 5
Cautions ................................................................................ 6
PREFACE.................................................................................... 7
Overview ............................................................................... 7
Intended Audience ................................................................ 7
Contact Information............................................................... 8
Technical Support........................................................... 8
Customer Care ............................................................... 8
Sales............................................................................... 8
Product Warranty .................................................................. 8
GENERAL INFORMATION......................................................... 9
Introduction............................................................................ 9
Baby Check Transmitter........................................................ 9
Warranty Expiration Date .................................................... 10
Mounting.............................................................................. 11
Mounting with Screws................................................... 11
Mounting with Tape ...................................................... 11
Linking ................................................................................. 12
Matching.............................................................................. 13
Discharge ............................................................................ 14
LED Light Guidelines .......................................................... 15
Transmitter Clearing Device................................................ 17
Clearing a Transmitter .................................................. 17
TESTING AND CARE ............................................................... 19

Contents
Page 2 of 28 Baby Check Transmitters User Guide
0510-1124-I
Transmitter Cleaning and Care........................................... 19
Testing................................................................................. 20
Baby Check Transmitter ............................................... 21
Transmitter Clearing Device ......................................... 21
SPECIFICATIONS..................................................................... 23
Baby Check Transmitter...................................................... 23
Transmitter Clearing Device................................................ 24
Transmitter Tester............................................................... 25
REVISION HISTORY................................................................. 27

Warnings and Cautions
Baby Check Transmitters User Guide Page 3 of 28
0510-1124-I
WARNINGS AND
CAUTIONS
It is important for your facility to implement and enforce the
following WARNINGS and CAUTIONS in order to keep all
equipment functioning properly. Disregarding the information and
instructions in this document is considered abnormal use and may
result in injury or system failure.
Warnings
ACCESSORIES (SUPPLIES)—To ensure
resident safety and proper operation of equipment,
use only parts and accessories manufactured or
recommended by RF Technologies, Inc. Parts and
accessories not manufactured or recommended
by RF Technologies, Inc. may not meet the
requirements of the applicable safety and
performance standards.
Failure to use the components and supplies
specified by RF Technologies, Inc. may result
in equipment and/or system failure.
EXPLOSION HAZARD—These devices should
not be used in the presence of flammable gas
mixtures. It should also not be used in oxygen
enriched atmospheres.
STATIC DISCHARGE—Do not touch the
conductor portion of any conductor or port.
Damage to the device may result.
SYSTEM WIRING—All permanent supply
connections must be done in accordance with
National Electric Code, NFPA 70.

Warnings and Cautions
Page 4 of 28 Baby Check Transmitters User Guide
0510-1124-I
INSTALLATION AND CONFIGURATION—It is
the responsibility of the facility to follow the
installation instructions carefully, as outlined in the
applicable system guides, and to use the
components and supplies specified by RF
Technologies, Inc. for all installations.
Failure to use the components and supplies
specified by RF Technologies, Inc. may result
in equipment and/or system failure.
INSTRUCTIONS FOR SET UP AND USE—It is
the responsibility of the facility to follow the
instructions for set up and use carefully, as
outlined in this manual, and to use the
components and supplies specified by RF
Technologies, Inc. for set up and use. Do not
attempt to use extension cords or other equipment
not supplied by RF Technologies, Inc.
Failure to use the components and supplies
specified by RF Technologies, Inc. may result
in equipment and/or system failure.
SYSTEM INSPECTION—It is the responsibility of
the facility to establish and facilitate a regular
inspection schedule for your system. RF
Technologies, Inc. recommends quarterly
inspections of your system for safety and
performance by a qualified RF Technologies, Inc.
representative.
To arrange for a quarterly inspection by RF
Technologies, Inc., call our Technical Support
Department at (800)-669-9946 or (262) 790-1771.
Failure to provide regular inspection of these
products may result in equipment and/or
system failure.

Warnings and Cautions
Baby Check Transmitters User Guide Page 5 of 28
0510-1124-I
SYSTEM MAINTENANCE AND TESTING—It is
the responsibility of the facility to establish and
facilitate a regular maintenance schedule for your
system, as outlined in the applicable system
guides. This includes regular inspection, testing,
and cleaning. RF Technologies, Inc. recommends
monthly maintenance and testing of your system.
It is also recommended that your facility keep
records of maintenance and test completions.
Failure to provide regular maintenance and
testing of these products may result in
equipment and/or system failure.
USER TRAINING—Only users who have received
adequate training on the use of the system, as
outlined in this manual, should use the system. It
is the responsibility of the facility to ensure all
users have been trained.
Failure to adequately train employees may
cause system failure due to user error. In
addition, incorrect use of the equipment may
also result in system failure.
MR UNSAFE
All RF Technologies transmitters, pendants and
banding material “PRODUCT” have been
determined to be MR Unsafe as defined by ASTM
F 2503-05. Use of “PRODUCT” in a Magnetic
Resonance Imaging system will cause injury to
residents and staff, MR system malfunction or
“PRODUCT” malfunction. Do not bring
“PRODUCT” into the MR system area and follow
your facilities policies to classify and label
“PRODUCT” as MR Unsafe.
Bio-Incompatibility Notice
Do not use Pendants with people that have sensitivities or allergies
to device materials. The device materials include Acrylonitrile
butadiene styrene (ABS), Silicon, Rubber, and Neoprene.

Warnings and Cautions
Page 6 of 28 Baby Check Transmitters User Guide
0510-1124-I
Cautions
DISPOSAL—At the end of their service life the
products described in this manual, as well as
accessories (i.e. lithium batteries, banding
material, disposable pads, etc.), must be disposed
of in compliance with all applicable federal, state
and local guidelines regulating the disposal of
products containing potential environmental
contaminants. Dispose of the packaging material
by observing the applicable waste control
regulations
RESIDENT GENERATED ALARMS—Do not rely
exclusively on resident generated alarms for
resident care and safety. The alarm function of
equipment in the possession of residents must be
verified periodically and regular resident
surveillance is recommended.
RESIDENT MONITORING—The most reliable
method of resident monitoring combines close
personal surveillance with correct operation of
monitoring equipment. It is the responsibility of the
facility to periodically check on residents in
possession of RF Technologies, Inc.'s equipment
(i.e. Pendants, Pull Cords, Control Units) to
mitigate risk of inappropriate use of equipment or
strangulation and stumbling hazards from cables
and cords.
PRODUCT WARRANTIES—Failure to follow the
Warnings and Cautions in this guide voids any
and all Product Warranties.
WORN OR DAMAGED PARTS—If the devices or
cables are worn or damaged, you must have the
product serviced. For more information, see the
section entitled “Service and Return.”

Preface
Baby Check Transmitters User Guide Page 7 of 28
0510-1124-I
PREFACE
Overview
The Baby Check transmitter is a component
of the 9450 System which monitors doors,
elevators, hallways, and stairwells to assist
staff in monitoring patients and assets in a
facility.
When used with Safe Place Infant
transmitters, the Baby Check transmitters
reduce the risk of mother-baby mismatches
and provides an extra layer of protection to
ensure the correct baby is taken to the right
room.
WARNING: The 9450 System is designed
and intended to work in conjunction with a
facility’s overall patient security program,
including reasonable operating policies and
procedures. The 9450 System, by itself,
cannot prevent abductions or the elopement
of patients.
Intended
Audience
The Baby Check Transmitters User Guide is
intended for caregivers who use the Baby
Check transmitters. It includes detailed
information about using the transmitters, care
and cleaning, testing the transmitters, and
transmitter specifications.
This guide should only be used by persons
who have read the Software User Guide and
received training on the use of the System. It
is not intended as a substitute for reading the
Software User Guide.

Preface
Page 8 of 28 Baby Check Transmitters User Guide
0510-1124-I
Always refer to the Software User Guide for
complete instructions and warnings.
Contact
Information
For more information about RF Technologies,
Inc. products, go to www.rft.com.
Technical
Support
For technical support, contact the Technical
Support Team at:
(800) 669-9946, option 5 or (262) 790-1771
tech@rft.com
Customer
Care
For questions on part replacement or for
ordering new parts, contact the Customer
Care Team at:
(800) 669-9946, option 2
customercare@rft.com
Sales
For questions regarding system add-ons,
contact your Sales Manager.
Product
Warranty
Product Warranty information can be found
on the system’s CD-ROM or with your
original system proposal and invoice.

General Information
Baby Check Transmitters User Guide Page 9 of 28
0510-1124-I
GENERAL INFORMATION
Introduction
This chapter provides general information
about the transmitters. It includes:
Using the transmitters
Warranty dates
Transmitter testing and care
Baby
Check
Transmitter
The Baby Check transmitter is used in
conjunction with the Infant transmitter (see
Safe Place Transmitter User guide for
additional details).
The transmitter is lightweight and compact
and although portable, is placed in its wall
mount cradle in the hallway just near the
door to the mother's assigned room.
How do the transmitters work?
Whenever someone needs to verify that the
infant is being returned to the correct
mother, one just needs to bring the Baby
Check transmitter in proximity to the Infant
transmitter and a one button push will
indicate a correct match.
RADIO FREQUENCY: The radio frequency
(RF) characteristics of certain metal crib
carts may interfere or block the Infant
transmitter’s signal during transport,
preventing detection by the system’s Exit
Receiver.

General Information
Page 10 of 28 Baby Check Transmitters User Guide
0510-1124-I
WARNING: The Baby Check transmitter
does not link to an Infant transmitter when
the Baby Check transmitter’s battery is low.
To verify low battery, press the button. If the
battery voltage is deemed too low for
reliable operation, the red LED will blink five
times.
The software will notify you of this if and
when the battery voltage drops beneath its
threshold. When this occurs, the red LED on
the front of the Baby Check transmitter
flashes every 32 seconds. Discard the
Baby Check transmitter and replace it with a
new one.
Warranty
Expiration
Date
Each transmitter is stamped with a warranty
expiration date. This date indicates the date
that RF Technologies’ warranty on that
transmitter expires. If the warranty period
has expired, discard the transmitter
immediately.
WARNING: Using a transmitter beyond the
printed expiration date can result in system
failure, mismatch, and/or abduction.
Transmitters have a 2 year, non-replaceable, life expectancy.

General Information
Baby Check Transmitters User Guide Page 11 of 28
0510-1124-I
Mounting
The Baby Check transmitter resides outside
the Mother’s room near the doorway and is
mounted using a wall bracket.
Mounting
with Screws
To mount the transmitter using screws:
1. Determine a desired location near the
doorway. The mounting height should
be no higher than 44 inches from the
floor.
2. Once the location is determined, place
the mounting bracket on the wall and
mark the four mounting holes found on
the mounting bracket.
3. Center punch each hole and install
nylon wall anchors in each hole. If the
mounting bracket is to be attached to a
concrete or masonry wall use the wall
anchors designed for these substrates.
4. Attach the mounting bracket to the wall
with the four screws provided.
Mounting
with Tape
To mount the transmitter using tape:
1. Determine a desired location near the
doorway. The mounting height should
be no higher than 44 inches from the
floor.
2. Once the location is determined place
the mounting tape on the rear side of
the mounting bracket.
3. Attach the mounting bracket to the wall
with the mounting tape.
If a bassinet is to be used, it
is recommended that the
mounting height be no more
than 8
-
12 inches from the top
of the bassinet mattress pad.

General Information
Page 12 of 28 Baby Check Transmitters User Guide
0510-1124-I
Linking
To link a Baby Check transmitter to an
Infant transmitter:
1. When ready to Link the Baby Check
transmitter with the Infant transmitter
bring the Baby Check transmitter 10-12
inches from the Infant transmitter and
press the button on the front of the Baby
Check transmitter.
2. The amber LED on the front of the Baby
Check transmitter will begin flashing as
it attempts to link to the Infant
transmitter. It will attempt to Link for two
minutes.
3. Once the Baby Check transmitter Links
with the Infant transmitter the Green
LED on the front of the Baby Check
transmitter will flash three times.
4. The amber LED on the front of the Baby
Check transmitter will begin flashing
again as it attempts to look for a second
Infant transmitter (a twin).
5. If a twin exists, bring the Baby Check
transmitter 10-12 inches from the
second Infant transmitter. Again, once
the Baby Check transmitter Links with
the Infant transmitter the Green LED on
the front of the Baby Check transmitter
will flash three times.
6. If a twin does not exist, press the button
on the front of the Baby Check
transmitter and it will stop attempting to
link.
7. Repeat the previous steps if a triplet
exists.
8. Return the Baby Check transmitter to its
bracket outside the mother and infant’s
room.
Keep 24 inches of separation
between the Baby Check
transmitter and any infant
transmitter other than the
one that will be linked.

General Information
Baby Check Transmitters User Guide Page 13 of 28
0510-1124-I
Matching
To determine if a Match exists between a
Baby Check transmitter and an Infant
transmitter:
1. When ready to verify a Match between
the Baby Check transmitter and the
Infant transmitter, bring the Baby Check
transmitter 10-12 inches from the Infant
transmitter and press the button on the
front of the Baby Check transmitter.
2. The amber LED on the front of the Baby
Check Transmitter will double flash as it
attempts to determine if it is a Match
with the Infant Transmitter. It will
attempt to match for 15 seconds.
3. Once the Baby Check transmitter
matches with the Infant Transmitter the
green LED on the front of the Baby
Check transmitter will flash three times
and return to idle.
4. If the Baby Check transmitter does not
match the Infant transmitter, the red
LED on the front of the Baby Check
transmitter will flash three times.
NOTE: In the event of a mismatch, follow
your facility’s established procedures.
5. Repeat for twins or triplets.
6. When finished return the Baby Check
transmitter to its bracket outside the
mother and infant’s room.

General Information
Page 14 of 28 Baby Check Transmitters User Guide
0510-1124-I
Discharge
NOTE: A Infant / Baby Check link will be
required if “Confirm Discharge” and “Require
Mom/Infant match before discharge” are
both enabled during configuration (refer to
the Software Administrator Guide for your
system).
To discharge a Baby Check and Infant
transmitter:
1. Discharge the Infant transmitter, the
transmitter is now in a discharge state
but the discharge is not complete until
the banding material is removed.
2. Remove the infant banding material, the
discharge is now complete.
3. Clear the Baby Check transmitter. This
is done by holding the Clearing Device
transmitter (refer to the “Transmitter
Clearing Device” section for more
information) 3 to 6 inches from the Baby
Check transmitter and pressing the
button on the front of the Baby Check
transmitter. The confirmation will be
confirmed by a green, red, green, red,
amber LED sequence on the front of the
Baby Check transmitter.
4. Discharge events should post for both
the Baby Check and the Infant
transmitters.
5. Store the cleared Baby Check
transmitter together with the Transmitter
Clearing Device until the next use.

General Information
Baby Check Transmitters User Guide Page 15 of 28
0510-1124-I
LED Light
Guidelines
The LED lights and audible beeps on the
transmitter signal various meanings. These
meanings are described in detail throughout
this document. The following guidelines
apply to the Baby Check transmitters:
Light Flash
Meaning
How to Respond
1 Amber The button on the
Baby Check
transmitter is pressed
once to verify it is
ready to be linked
The amber light will blink once
every second to signal that Baby
Check Transmitter is searching
for an Infant Transmitter to Link
to
1 Amber The button on the
Baby Check
transmitter is pressed
once to verify it is
linked to an Infant
Transmitter
The amber light will blink twice
rapidly every second to signal
that the Baby Check Transmitter
is linked to an Infant Transmitter
1 Amber
every 30
minutes
Baby Check
transmitter is
operational
Every 30 minutes the LED will
blink amber to indicate that the
transmitter is operational
3 Green Baby Check
transmitter
recognizes an Infant
transmitter and links
to it
Transmitter is successfully
linked so no action required;
operates as designed.
3 Red An Infant transmitter
comes into contact
with a Baby Check
transmitter and they
do not match
Follow your facility’s established
procedures to secure and
separate the infant from the
mismatched Baby Check
transmitter
Clear the alarm at the Client
computer (you must select an
event cause)
Green, Red,
Green, Red,
Amber
With the Transmitter
Clearing Device 10”
to 12” in front of the
Baby Check
transmitter, the button
on the Baby Check
transmitter is pushed
The Baby Check transmitter is
cleared and all linked activity is
removed
Store the cleared Baby Check
transmitter together with the
Transmitter Clearing Device

General Information
Page 16 of 28 Baby Check Transmitters User Guide
0510-1124-I
Light Flash Meaning How to Respond
1 Red every
32 seconds
Baby Check
transmitter
experiencing low
battery voltage
Every 32 seconds the LED will
blink red to indicate the battery
voltage has dropped beneath its
threshold. Transmitter can no
longer function reliably at this
point
Discard transmitter and call RFT
Tech Support for replacement
5 Red Baby Check
Transmitter indicates
low battery
Verify low battery by pressing
button. If battery voltage is
deemed too low for reliable
operation, the LED will blink red
five times
Discard transmitter and call RFT
Tech Support for replacement
No LED
activity
Baby Check
transmitter battery is
expired
When an unexpired Baby Check
transmitter’s button is pressed
and the LED indicator exhibits no
flashes, the battery voltage is too
low for the Baby Check
transmitter to function
Discard transmitter and call RFT
Tech Support for replacement

General Information
Baby Check Transmitters User Guide Page 17 of 28
0510-1124-I
Transmitter
Clearing
Device
The Transmitter Clearing Device is
lightweight and compact. It is water
resistant; however, complete submersion
should be avoided.
SUBMERSION—Prolonged submersion may
result in equipment and/or system failure and
voids any and all Product Warranties.
The Transmitter Clearing Device is available
with a two year life expectancy. Each
Transmitter Clearing Device is stamped with
a warranty expiration date. This date
indicates the date that RF Technologies’
warranty on that Transmitter Clearing
Device expires. If the warranty period has
expired, discard the Transmitter Clearing
Device immediately.
WARNING: Using a transmitter clearing
device beyond the printed expiration date
can result in system failure, mismatch,
and/or abduction.
Clearing a
Transmitter
1. With the Transmitter Clearing Device
within 10-12” in front of the Baby Check
transmitter, push the button on the front.
The LED flashes green, red, green, red,
than amber indicating that the
transmitter is cleared.
2. Store the cleared Baby Check
transmitter together with the Transmitter
Clearing Device until the next use.

General Information
Page 18 of 28 Baby Check Transmitters User Guide
0510-1124-I
This page intentionally left blank.
Table of contents
Other Rf-t Transmitter manuals