manuals.online logo
Brands
  1. Home
  2. •
  3. Brands
  4. •
  5. Ricoh
  6. •
  7. All In One Printer
  8. •
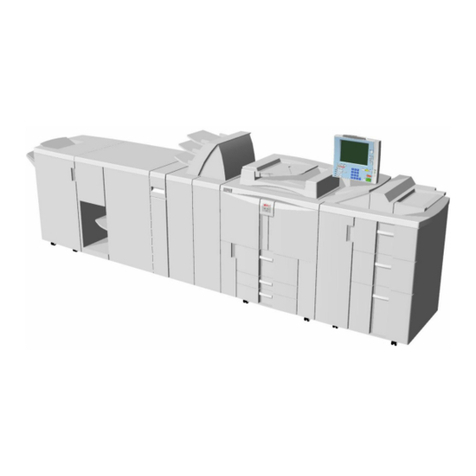
  9. Ricoh PRO C9100 Quick start guide

Ricoh PRO C9100 Quick start guide

Notes for Users
About This Machine
Getting Started > Guide to Names and Functions of Components > Rear and right view
Correction
Error Corrections
2. Earth leakage breaker
Protects users from electric shock. For details
about checking the earth leakage breaker, see
page 155 “Checking the Earth Leakage Breakers”.
2. Earth leakage breaker
Protects users from electric shock. For details
about checking the earth leakage breaker, see page
155 “Checking the Earth Leakage Breakers”.
A plate is usually on the part as shown in the figure.
Do not touch this plate as a customer engineer
removes it.
About This Machine
Getting Started > Guide to Functions of the Machine’s Options
Additional information
To deliver an envelope of 240 × 332 mm
When sending an envelope of 240 × 332 mm to Finisher SR5050 or Booklet Finisher SR5060,
attach the Z-fold support tray to the finisher shift tray.
1.
Attach the Z-fold support tray by inserting the two protrusions on its underside into the
holes on the finisher shift tray.
CWR001
About This Machine
Getting Started > Using the Ring Binder and the High Capacity Stacker > Using the Ring
Binder
Additional information
Be sure not to exit from Energy Saver mode or to switch the machine on when the ring• binder door is
open and the binding unit is disconnected. Doing so will affect initialization, causing the ring binder
function to become unavailable (although other functions will be unaffected).
If you inadvertently do this, connect the ring binder’s binding unit again, close the door, and then turn •
the power off and back on to restore normal operation.
About This Machine
Paper Specifications and Adding Paper > Loading Paper > Loading Paper into Trays 1, 2,
and the Wide Large Capacity Tray
Additional information
When using auto tray switching, covers, or slip sheets, the lamp on the front of the tray being used will•
stay lit until printing is complete. While the lamp is lit, paper cannot be replenished.
About This Machine
Paper Specifications and Adding Paper > Changing the Paper Size > Changing the Paper
Size in Trays 1, 2, and the Wide Large Capacity Tray
Additional information
Do not push in the paper presser on the upper part of the side fence. If it is pushed in, return it to its•
original position by hand.
When using paper between paper weight 1 and paper weight 3 (52.3-105.0 g/m• 2), set paper after
setting the base on the bottom of the tray.
About This Machine
Paper Specifications and Adding Paper > Changing the Paper Size > Changing the Paper
Size in Trays 1, 2, and the Wide Large Capacity Tray
Correction
Topic Error Corrections
Notes When you load paper that is thicker •
than Paper Weight 5, load the paper and
set the auxiliary side fence. Align the
auxiliary side fence against the side of
the paper that is higher than the side
fence extension.
DET052
11
1.Side fence extension
Set paper first, and then set the auxiliary •
side fence. Set the auxiliary side fence so
that it is flush against the side of the paper
on the side fence extension.
DET052
11
1.Side fence extension
About This Machine
Paper Specifications and Adding Paper > Recommended Paper > Recommended Paper
Sizes and Types
User Guide
Adding Paper and Toner > Recommended Paper > Recommended Paper Sizes and Types
Correction
Trays 1, 2, and Wide LCT (Trays 3 to 8)*1, *14
Paper type and weight Paper size Paper capacity
Envelopes *8 *11, *12, *13
240 × 332 mm, 235 × 120 mm,
120 × 235 mm, 105 × 241 mm,
110 × 220 mm
*15
*6 When the banner sheet tray is installed, up to 800 sheets of paper that is 420.0 - 700.0 mm (16.54
- 27.55 inches) long can be fed.
*14 Flattencurlssothattheytwithinthefollowingguidelines.
52.3• - 299.9 g/m
2
paper:Curlheight5mm(0.2inches)orbelow,Rover100mm(3.94inches).
300-400g/m2paper:Curlheight3mm(0.12inches)orbelow,Rover100mm(3.94inches).•
*15 Flattenthecurlontheenvelope,thensetthedifferenceofthestackheightofthebottomofthe
envelopeandthestackheightoftheapportiontobe10mm(0.4inches)orbelow.
About This Machine
Paper Specifications and Adding Paper > Recommended Paper >Recommended Paper
Sizes and Types
User Guide
Adding Paper and Toner > Recommended Paper >Recommended Paper Sizes and Types
Additional information
When loading transparancies•
When outputting to the high capacity stacker, specify the output tray as the stacker upper tray. For•
details, see “General Features”, Connecting the Machine/System Settings.
When setting colored paper•
Depending on the color of the paper, the paper’s position may not be detected correctly, causing •
the paper to jam.
When using light-colored paper, specify the paper type as [Color] in [Paper Setting].•
When using black or dark colored paper, or when specifying the paper type as [Color] in [Paper•
Setting] does not clear paper jams, specify the paper type as [Black].
When specifying the paper type as [Color] or [Black] does not clear paper jams, adjust [Illumi-•
nation Mode for Color Paper Detection] in [Adjustment Settings for Operators]. For details, see
“Adjustment Settings for Operators”, Paper Settings.
To load sheets of paper whose sizes are A5• or 51/2×81/2
When delivering sheets of paper whose sizes are A5• or 51/2×81/2, open the left mainframe front
cover and turn the lever for A5/Half Letter to the right.
 
DFT090DFT090
M2381044A
© 2014, 2015
Printed in France
EN GB
M238-1044A
Connecting the Machine/ System Settings
Connecting the Machine > Connecting to the Interface
Additional information
A plate is usually on the part as shown in the figure. As a customer engineer removes the plate, con-•
tact your service representative when connecting the interface cable.
Troubleshooting
Getting Started > When You Check the Indicator Lamps, Status Icons, and Messages on
the Control Panel > When the Indicator Lamp for the [Check Status] Key Is Lit or Flashing >
The machine is unable to connect to the network.
Correction
Error Corrections
Solution:
Check that the machine is correctly connected •
to the network and that the machine is cor-
rectly set. For details about how to connect the
network, see “Interface Settings”, Connecting
the Machine/ System Settings.
Solution:
Check that the machine is correctly connected •
to the network and that the machine is correctly
set. For details about how to set the machine,
see “Interface Settings”, Connecting the Ma-
chine/ System Settings.
Troubleshooting
When Messages Appear>When Other Messages Appear > When the Home Screen Cannot
Be Edited > ”The image data size is not valid. See the manual for required data.”
Correction
Error Corrections
Solution:
For details about file size for shortcut image,
see “Displaying an Image on the [Home] Screen”,
Convenient Functions.
Solution:
For details about file size for a Home Screen image,
see “Displaying an Image on the [Home] Screen”,
Convenient Functions.
Troubleshooting
When Messages Appear>When Other Messages Appear > When the Home Screen Cannot
Be Edited > ”The format of the image data is not valid. See the manual for required data.
Correction
Error Corrections
Cause:
The file format of the shortcut image to be added is
not supported.
Solution:
The file format of shortcut images to be added
must be PNG. Specify the image again.
Cause:
The file format of the Home Screen image to be
added is not supported.
Solution:
For details about file size for a Home Screen image,
see “Displaying an Image on the [Home] Screen”,
Convenient Functions.
Troubleshooting
When Adjusting the Color Registration Shift
Additional information
Adjusting Image Density
To improve color reproduction and achieve color output with consistent quality, follow this
procedure. You can improve CMYK image reproduction by adjusting image density and
performing calibration.
Also, you can improve mixed color reproduction by adjusting image density and color reg-
istration and performing calibration.
For details about calibration, check the color controller’s manual.
1.
Press the [User Tools] key.
2.
Press [Adjustment Settings for Operators].
3.
Press [Machine: Image Quality].
4.
Press [0207: Adjust Image Density Before Auto Color Calibration].
5.
Press [Image Density Adjustment: Manual Execute].
6.
Press [OK].
7.
When the color density adjustment is completed, press [Exit].
8.
Press [Exit].
Make sure that the transition time to energy saving mode is long enough so that transition to energy•
saving mode does not happen before carrying out tone correction.
During tone correction, do not print or specify settings from the operation panel.•
Complete the tone correction procedure promptly without taking intervals.•
It is recommended to restart the tone correction procedure from the beginning if printing is carried out•
or intervals are taken during the procedure.
Guide to Paper
Handling Paper > Loading Paper
Correction
Error Corrections
For coated paper, label paper, film paper, and •
tick paper of 150.1 g/m2 or heavier, fan the
stack of paper before loading it in the paper
tray.
For coated paper, label paper, film paper, and •
plain paper, fan the stack of paper before loading
it in the paper tray.
If the machine you are using has a function to •
compensate for curled paper, you can specify
curl compensation in the machine’s settings.
See the manuals supplied with the machine for
details about how to configure this setting.
If the machine you are using has a function to •
compensate for curled paper, you can specify
curl compensation in the machine’s settings.
See the manuals supplied with the machine for
details about how to configure this setting. When
there is no function to compensate for curled
paper, either place the curled side facing down
or flatten the curled paper, and then set it in the
tray.
Guide to Paper
Handling Paper > Using Special Types of Paper > Magnet Paper
Correction
Error Corrections
If the last sheet of the magnet paper does not feed
correctly when you print a stack of magnet paper,
place some thick paper under the last sheet of the
magnet paper, and then re-load it.
The last sheet of the magnet paper in the paper tray
may not be fed properly because the magnet sheet
sticks to the metallic parts of the paper tray.
If this is the case, load sheets of magnet paper you
want to print in the paper tray by adding 10 sheets
or more to them.

Other manuals for PRO C9100

6

This manual suits for next models

2

Other Ricoh All In One Printer manuals

Ricoh PE-P4 Quick start guide

Ricoh

Ricoh PE-P4 Quick start guide

Ricoh 5100WD User manual

Ricoh

Ricoh 5100WD User manual

Ricoh Pro C5100S User manual

Ricoh

Ricoh Pro C5100S User manual

Ricoh PRO 907EX User manual

Ricoh

Ricoh PRO 907EX User manual

Ricoh Aficio SP C240SF User manual

Ricoh

Ricoh Aficio SP C240SF User manual

Ricoh Aficio 2022 User manual

Ricoh

Ricoh Aficio 2022 User manual

Ricoh SP 230 SFNw User manual

Ricoh

Ricoh SP 230 SFNw User manual

Ricoh MP 2590 Service manual

Ricoh

Ricoh MP 2590 Service manual

Ricoh Aficio MP C7500 User manual

Ricoh

Ricoh Aficio MP C7500 User manual

Ricoh Aficio MP C2050 User manual

Ricoh

Ricoh Aficio MP C2050 User manual

Ricoh Priport DD 4450 User manual

Ricoh

Ricoh Priport DD 4450 User manual

Ricoh Pro C651EX User manual

Ricoh

Ricoh Pro C651EX User manual

Ricoh Toscana-P1 User manual

Ricoh

Ricoh Toscana-P1 User manual

Ricoh A109 User manual

Ricoh

Ricoh A109 User manual

Ricoh Aficio SP 5210SF User manual

Ricoh

Ricoh Aficio SP 5210SF User manual

Ricoh VB2807800 Operating instructions

Ricoh

Ricoh VB2807800 Operating instructions

Ricoh C222DN - Aficio SP Color Laser Printer Quick start guide

Ricoh

Ricoh C222DN - Aficio SP Color Laser Printer Quick start guide

Ricoh Aficio MP C3501G User manual

Ricoh

Ricoh Aficio MP C3501G User manual

Ricoh D143 Quick start guide

Ricoh

Ricoh D143 Quick start guide

Ricoh D025 User manual

Ricoh

Ricoh D025 User manual

Ricoh Aficio SP C210 User manual

Ricoh

Ricoh Aficio SP C210 User manual

Ricoh Pro C900 User manual

Ricoh

Ricoh Pro C900 User manual

Ricoh Aficio 3224C User manual

Ricoh

Ricoh Aficio 3224C User manual

Ricoh CL1000N User manual

Ricoh

Ricoh CL1000N User manual

Popular All In One Printer manuals by other brands

Sharp MX-M1100 Safety guide

Sharp

Sharp MX-M1100 Safety guide

Oce VarioLink 2222c user manual

Oce

Oce VarioLink 2222c user manual

FujiFilm Frontier DL450 specification

FujiFilm

FujiFilm Frontier DL450 specification

Epson XP-241 user guide

Epson

Epson XP-241 user guide

Fuji Xerox DCC 65501 quick guide

Fuji Xerox

Fuji Xerox DCC 65501 quick guide

Brother MFC-8660DN Quick setup guide

Brother

Brother MFC-8660DN Quick setup guide

Triumph Adler 256i user manual

Triumph Adler

Triumph Adler 256i user manual

Sharp FO-2080 Online manual

Sharp

Sharp FO-2080 Online manual

Olivetti d-Copia 45 Operation guide

Olivetti

Olivetti d-Copia 45 Operation guide

Xerox WorkCentre 6605 Quick use guide

Xerox

Xerox WorkCentre 6605 Quick use guide

Kyocera Ecosys M2235dn Operation guide

Kyocera

Kyocera Ecosys M2235dn Operation guide

Samsung SCX-4720F manual

Samsung

Samsung SCX-4720F manual

Canon MF4870w Starter Guide

Canon

Canon MF4870w Starter Guide

Brother MFC 5490CN - Color Inkjet - All-in-One Guías del usuario

Brother

Brother MFC 5490CN - Color Inkjet - All-in-One Guías del usuario

Brother MFC-8440 Software user's guide

Brother

Brother MFC-8440 Software user's guide

Brother MFC-J4335DW Online user's guide

Brother

Brother MFC-J4335DW Online user's guide

Kyocera ECOSYS PA3500cx First steps

Kyocera

Kyocera ECOSYS PA3500cx First steps

Brother DCP 330C - Color Inkjet - All-in-One user guide

Brother

Brother DCP 330C - Color Inkjet - All-in-One user guide

manuals.online logo
manuals.online logoBrands
  • About & Mission
  • Contact us
  • Privacy Policy
  • Terms and Conditions

Copyright 2025 Manuals.Online. All Rights Reserved.