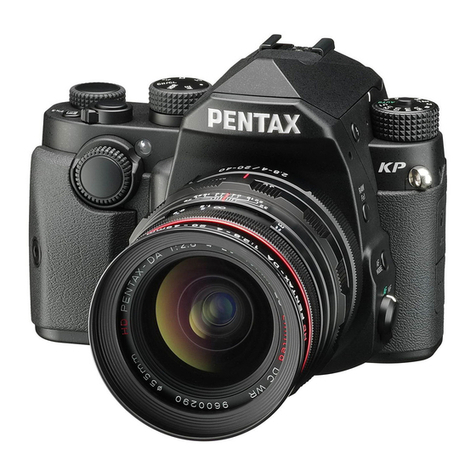
Ricoh Pentax K-3 III Installation guide

FAQ K-3 Mark III
RICOH IMAGING Europe S.A.S.
Parc ICADE Paris Orly-Rungis
7-9 avenue Robert Schuman
94150 Rungis
France
Below is a list of frequently asked questions and corresponding answers for the
PENTAX K-3 Mark III digital cameras.
◆Basic Specifications and Functions
Q: What accessories are provided with this camera?
A: The following accessories are providing with this camera. (P & J for only Japanese market)
-Hot Shoe Cover FK
-Sync. Socket 2P Cap
-Eyecup FU
-ME Viewfinder Cap
-Strap O-ST162
-Triangular rings and Protective covers
-Battery grip terminal cover
-Rechargeable Lithium-ion Battery D-LI90P
-Body Mount Cap KII
*The included body mount cap Kll is not available as an optional accessory.
-USB power adapter AC-U1
-Power plug
-USB cable I-USBCS-166
-Operating manual.
Q: Are there any other necessary items that are not included in the kit?
A: The kit does not come with an SD Memory Card, so please prepare an SD Memory Card with the
necessary capacity and capabilities for camera applications.
Use a commercially available mini HDMI cable (type D) to play back recorded images or movies
on a TV screen or other AV device.
Q: What are the optional accessories for this camera?
A: -Hot Shoe Cover FK
-Sync. Socket 2P Cap
-Eyecup FU
-ME Viewfinder Cap
-Strap O-ST162
-Triangular rings and Protective covers
-Battery grip terminal cover

- 2 -
-Rechargeable Lithium-ion Battery D-LI90P
-Body Mount Cap K
*The included body mount cap Kll is not available as an optional accessory.
-AC adaptor kit K-AC166J (includes the AC Adapter D-AC166 and an AC plug cord)
-Battery charge kit K-BC90PJ (includes the buttery chrger D-BC90P and an AC plug cord)
-Battery charge adaptor kit K-BC177J (includes the buttery chrger D-BC177, AC adaptor D-BC166
and plug cord)
-Battery grip D-BG8
-Strap O-ST1401
-Hand strap O-ST128
-Cable switch CS-205
-Remote control F
-Remote control O-RC1
-Auto Flash AF540FGZ II / AF201FG
Q: What display languages are available for text and messages on the LCD monitor?
A: There are 21 display languages available, Japanese, English, French, German, Spanish, Portuguese,
Italian, Dutch, Danish, Swedish, Finnish, Polish, Czech, Hungarian, Turkish, Greek, Russian, Thai,
Korean, Simplified Chinese and Chinese Traditional.
Q: How many bits for the A/D converter?
A: 14 bits.
Q: How long is the startup time?
A: Approx. 0.6 second.
Q: Can the cable switch be used with this camera?
A: Yes, can use CS-205.
However, please note that the camera will no longer be water-resistant while the cover of the switch
connector being open while the switch is used, requiring extra caution to be taken for use outdoors or
indoors that around water.
Q: Can Refconverter A/M be used with this camera?
A: Yes, it can
Q: Can a battery grip be used with this camera?
A: The optional Battery Grip D-BG8 (sold separately) can be used with K-3Mark III.
If a Lithium-ion Battery D-LI90(P) is inserted into both the camera and the battery grip, the number of
recordable images will be increased.
Q: Can polarizing filters are used with this camera?
A: Circular type polarizing filters (C-PL/Circular PL) can be used. Normal, non-circular polarizing filters may
adversely affect the exposure and AF and thus cannot be used.
Q: Is there a proprietary case available for this camera?
A: No, there is not.

- 3 -
◆Camera Shooting Function
Q: Please tell me about the specifications of the drive mode.
A: The main specifications of drive mode are as follows.
Drive Mode
Single frame, Continuous (H, M, L), Bracketing (2, 3 or 5 frames),
Mirror Lock-up, Multi-exposure, Interval shooting, Interval Composite,
Timer/Remote
Control
Self-timer (12s, 2s), Remote Control (immediately, 3 sec.)
Continuous
Shooting
Max. Approx. 12.0 fps, JPEG (L:
★★★
at Continuous H): up to approx. 37
frames, RAW: up to approx. 32 frames, RAW+: up to approx. 30 frames.
Max. Approx. 7.0 fps, JPEG (L: ★★★ at Continuous M): up to approx.
60 frames, RAW: up to approx. 37 frames,
RAW+: up to approx. 33 frames.
Max. Approx. 2.5 fps, JPEG (L: ★★★ at Continuous L): up to approx.
90 frames, RAW: up to approx. 39 frames,
RAW+: up to approx. 37 frames.
* At ISO100
* When use erectronic shutter and High sensitivity shooting
the continuous shooting speed will be slower.
Q: What kind have the bracketing shooting mode?
A: Bracketing shooting mode has following functions.
Bracketing
You can change the number of shots, bracket width, and exposure compensatio
n value in one release.
Depth of Field
Bracketing
Without changing the exposure, the aperture value is changed step by step to s
hoot 3 shots in a row.
Can be selected only in AV / TAV mode *1
Motion Bracketing
Without changing the exposure, the shutter speed is changed step by step to s
hoot 3 shots in a row.
Can be selected only in AV / TAV mode *1
*1 Cannot be selected when a lens with an “A” position is used with the aperture ring set to a
position other than “A”.
Memo: The bracket value can be set in increments of [1/3 EV Steps] or [1/2 EV Steps] according
to the setting of [EV Steps] in the C5 menu.

- 4 -
Q: What is the Pixel shft Resolution ?
A: The in-body SR (shake reduction) mechanism is used to move the image sensor unit in minute
increments, a single pixel pitch at a time, to capture four shots. Pixel Shift Resolution merges those
shots into a single image to generate an ultra high-definition image. This method differs from the
traditional Bayer method, which acquires only a single element of color information for single pixel, by
acquiring all RGB color information for individual pixel. This difference makes it excellent for detail and
color reproduction, creating super high-definition images. This also prevents false colors from occurring
theoretically, and also has a high-sensitivity noise reduction effect when compared to normal shooting.
Photographed RAW images can be processed on the camera and also developed using the included
utility software as Pixel Shift Resolution.
*Be sure to use a tripod for thorough stabilization when shooting.
*When shooting, use Drive Mode options: Self-timer, Remote Control, or Mirror Lock-up Shooting.
*Effects may not be gained if the subject moves or the camera shakes.
Q: What are the setting modes and functions of Pixel Shift Resolution II System?
A: There are following four capture settings available.
Tripod (Motion
Corr.On)
Reduces mosaic-pattern noise when a moving object is detected.
Tripod (Motion
Corr.Off)
Does not detect moving objects.
Off
Does not use Pixel Shift Resolution.
When shooting is performed, captured four images and then they are merged into a single image.
Memo:
Caution:
*This function cannot be used in the following situations.
・In B or X mode.
・In Movie mode.

- 5 -
When shooting with [Pixel Shift Resolution], use a tripod and mount the camera on it securely.
*This function cannot be used in combination with some other functions. (Below figure)
Pixel Shift Resolution
Flash
X
Drive Mode
Continuous Shooting
X
Bracketing
X
Mirror Lock-up Shooting
O
Multi-exposure
X
Interval Shooting
X
Interval Composite
X
Interval Movie Record
X
Star Stream
X
HDR Capture
X
AA Filter Simulator
X
ASTRO TRACER
X
O: Available X: Not available
Q: What is the AA filter Simulator function?
A: By using the camera’s SR II mechanism to apply microscopic vibrations to the image sensor, the AA
(anti-aliasing) filter simulator effectively minimizes moiré and false color along the image’s edges, which
are common problems when shooting subjects with minute patterns.
Low
Takes images while balancing the resolution and moire reduction.
High Prioritizes the moire reduction.
Bracketing (Off, High)
Takes consecutive two images in order of [Off] and [High].
Bracketing (Off, Lo, High) Takes consecutive two images in order of [Off], [Low] and [High].
Caution
*This function cannot be use in some capture modes or in combination with some other functions.
*[Bracketing] cannot be selected in the following situations.
-In M mode.
-When the drive mode is set to other than [Single Frame Shooting].
-When [HDR Capture] is set.
-When taking pictures with [Pixel Shift Resolution system].
*When the shutter speed is faster than 1/1000 seconds, the full effect of this function cannot be achieved.

- 6 -
Q: What is the Composition Adjustment function?
A: By using the Shake Reduction mechanism, the composition of the image can be adjusted. It is useful
function when using a tripod while shooting with Live View and you like to adjust the composition at the
same time.
Setting procedures
2. Press [MENU] button.
3. Set [LV].
[Adjust the composition of the image] will be displayed.
4. Adjust the composition.
The composition adjustment value will be displayed at the top/right corner of the LCD.
-Composition movement (Up/Down/Right/Left, up to 24 steps)
-The level of the composition (Up to 8 steps. Not available when the amount of composition
adjustment steps are 17 or more)
5. Press [OK] button.
Return to Live View capture mode.
Caution: *You cannot use this function when the ASTRO TRACER function is used.
Memo:
The adjustment composition is saved even if Live View is ended or the camera is turned off. To reset the
saved adjustment value when the camera is turned off, set [Composition Adjustment] to [Off] in [Memory] of
the C5 menu.
If [Composition Adjustment] is registered in [Fx Button] in the C2 menu, you can start the composition
adjustment by pressing the button.
Q: Can a remote control be used with this camera?
A: Yes, it can. The optical remote control waterproof O-RC1 and Remote Control F are available
for use with this camera.
1. Select [Timer/Remote Control] on the [Drive Mode] screen and press right.
4. Point the remote control unit towards the remote control receiver of the camera, and press t
he shutter release button on the remote control unit.
Memo;
mode, make setting in [Remote Control] of the 4 menu.
When shooting with remote control unit is enabled, the lamp of the camera remote control receiver
blinks. You can also make setting so that the lamp does not blink.
The eye sensor is disabled while [Remote Control] is selected.
The maximum operating distance of the remote control unit is about 4 m from the front of the cam
era, and about 2 m from the back of the camera.
To adjust focus while shooting with the remote control unit, set [AF with Remote Control] to [On] in
the C6 menu.

- 7 -
When using the Remote control Water proof O-RC1, the autofocus system can be operated with th
e button on the remote control unit. The Fn button cannot be used.
The [Timer/Remote Control] setting is saved even after the power is turned off. If [Timer/Remote Co
ntrol] is set to [Off] in [Memory] of the C5 menu, the setting returns to [Off] when the power is turn
ed off.
Performs shooting with the remote control unit.
(The shutter is released immediately.)
Performs shooting with the remote control unit.
(The shutter is released after about 3 seconds.)
Q: Can multi-exposure shooting be used with this camera?
A: Yes, it can. You can select from [Average], [Additive] or [Bright]
Composite
Mode
[Average]: Creates a composite image with the average exposure.
[Additive]: Creates a composite image with the cumulatively added exposure.
[Bright]: Compares the captured image with the previous image pixel by pixel and
creates a composite image by replacing only the brightest pixel between the images.
Save Interim
Images
Sets whether to save images in the middle of processing.
Continuous
Shooting
Sets whether to perform continuous shooting.
Caution: [Continuous Shooting] is not available in B mode.
Q: What kinds of capture mode in the Interval shooting?
A: Please show as follows.
Capture mode:
Interval Shooting Takes pictures at set intervals and saves them.
Interval Composite. Takes pictures at set intervals and merges them into a
single image.
*Shooting procedures:
2. Set the shooting conditions.

- 8 -
Shooting condition:
Interval
Select from 1 seconds to 24 hours.
Number of shots
Select from [∞] and 2 to 9999 times
Start Interval
Sets the timing to take the first image.
Start Time
Set the shooting start time when [Start Interval] is set to [Set Time].
Fixed Time
Release
Sets whether to take images at the interval set in [Interval] regardless of the
shutter speed.
AF Operation
Per Shot
Sets whether to lock the focus position used when the first image is taken
or perform autofocus each time the images is taken.
The camera returns to standby mode.
When [Start Interval] is set to [Now], the first image is taken. When [Start Interval] set to [Set Tim
e], shooting starts at the set time.
After the specified number of images are taken, the camera returns to the standby mode.
Memo:
*For each interval shooting, a new folder is created, and the images are saved there.
*The second and later exposures start at the interval set in [Interval]. When the shutter speed is
longer than the interval set in [Interval], the shooting result varies depending on the
[Fixed Time Release] setting.

- 9 -
Fixed Time
Release
When the Shutter Speed Is Longer than the Interval Set in [Interval]
On
Some shutter releases are skipped.
Example) When [Interval] is set to 2 seconds, and the shutter speed is set t
o 3seconds: The first exposure has not yet finished at the time the second
exposure is supposed to be started (2 seconds after shooting has started), a
nd so the second image is not taken. (Shooting ends before the images spe
cified in [Number of Shots] are taken.)
Off No shutter releases are skipped.
Example) When [Interval] is set to 2 seconds, and the shutter speed is set t
o 3seconds: The second exposure does not start even 2 seconds after shoo
ting has started and starts after the first exposure finishes. (Shooting ends af
ter the images specified in [Number of Shots] are taken.)
When [Fixed Time Release] is set to [On], [Minimum] is not available for [Interval]. If [Inter
val] is set to [Minimum], the setting changes to [1 sec.].

- 10 -
Q: What kinds of Operation can be performed by touch panel?
A: You can use the touch panel to select functions, set the AF point for shooting,
and perform other operations.
・When not using the touch panel function, set [Monitor Touch Operation] to [Off] in the C3
menu.
You can directly touch the monitor and scroll the menu up or down to select directly.
Q: What is an Eye sencor?
A: The eye sensor detects whether the user is looking through the viewfinder in the standby mode
while shooting with the viewfinder. When the sensor detects the user’s eye, the monitor backlight
turns off and the metering starts. The eye sensor may operate when an object is brought close to
it or it is exposed to direst sunlight. It is also used for the automatic brightness adjustment of the
monitor.
Note:
If the sensor part is dirty, the following symptoms may occur.
・No auto adjustment of LCD monitor.
・No photometric interlocking when use finder.

- 11 -
You can set the camera operation when the eye sensor detects the user’s eye in [Eye sensor] of
the C4 Menu.
Link Monitor
Display.
Turn off the monitor backlight when the eye sensor detects th
e user’s eye.
AE with Eye
Sensor.
Starts metering when the eye sensor detects the User’s eye.
Detection
Sensitivity
Sets the eye sensor detection sensitivity.

- 12 -
◆Performance for environment
Q: What is the exterior of the camera made of ?
A: A magnesium alloy is used for Front cover, Back cover and Bottom cover.
Q: Is the K-3 Mark III designed to be water-resistant/dust-proof?
A: Yes. There are sealing components used in the dials, buttons, joints of the camera, making it both dust-
proof and water-resistant, and anticipating use in cold locations, PENTAX has subjected the K-3 Mark
III to exacting environmental tests at temperatures as low as –10°C.
*For best protection against water or dust, use the camera with the Hot Shoe Cover FK, the Sync Socket 2P
Cap and the Battery Grip Contact Cover attached.
Q: If the water resists lens set with K-3 Mark III, can it be used in the rain?
A: When an AW- or WR-series lens* is mounted, the K-3 Mark III and its lens forms a remarkable digital
imaging system totally resistant to demanding environmental factors.
However, it is not recommended to use these units in the rain for long time. When you are going to
shoot in the rain continuously, it is recommended to use with rain cover etc.
*AW:All Weather, WR:Water Resistant.
*Seals have been placed around the joints and the operating parts, however when exposed to moisture,
there is a possibility for water to pool. So, if it gets wet wipe up as quickly as possible. About the
lens, it is also recommended especially when zooming etc. to wipe up any moisture immediately.
Q: Is the K-3 Mark III designed to be cold-resistant?
A: Anticipating use in cold locations, PENTAX has subjected the K-1 Mark II to exacting environmental
tests at temperatures as low as –10°C, and gathered a vast array of data on operational precision,
response and stability of mechanisms and circuits, as well as fluctuations in battery voltage* As the
result, the K-1 Mark II assures solid, trouble-free operation even at freezing temperatures.
*Battery performance declines as the temperature goes down. When shooting in cold environments, the user
is advised to carry spare batteries and keep them warm by storing them in an inside pocket

- 13 -
◆Display and Auto focus performance
Q: What are the features of the LCD monitor?
A: The specification of the LCD monitor is as follows.
Type
Wide viewing angle TFT color LCD, Air-gapless glass. Flexible-tilt
Size
3.2 inch (aspect ratio 3:2)
Dots
Approx. 1620K dots.
Adjustment
Brightness, Saturation and Colors adjustment.
Outdoor monitor
±2 steps adjustable.
Night vision display
On / Off
Q: What are the field of view and magnification of the viewfinder?
A: The specifications of the viewfinder are as follows.
Type
Pentaprism Finder.
Coverage (FOV)
Approx. 100%
Magnification
Approx. 1.05x (50mmF1.4
at infinity)
Eye-Relief Length
Approx. 20.5mm (From the view finder frame.)
Approx. 22.3mm (From the center of eyepiece lens.)
Diopter adjustment
Approx. -4 to +1.0m-1
Focusing screen
Fixed Natural- Bright- Matte III focusing screen
View finder indication. AF point, Grid indication, Electronic Level, AF frame, Spot Metering frame
Crop, Smart function icons, and Operation Control Lock icon.
Q: Is the focusing screen changeable?
A: No. It is a fixed type focusing screen.
Q: Specification for Auto Focus System using the viewfinder
A: The specification is as below.
Type
TTL Phase-matching autofocus
Focus Sensor
SAFOX 13, 101 points (25 cross type focus points in the center)
Brightness
range
EV-4 - 18 (ISO100, at normal temperature)
・-4 EV is only available for AF points that support F2.8 light flux when an F2.8-
light-flux compatible lensis attached.
AF mode
Single AF (AF.S), Continuous AF (AF.C)
AF point
selection
Auto Area, Zone select, Select, Expanded Area AF (S, M, L), select (S), Spot.
AF Assist Light
Dedicated LED AF assist light

- 14 -
Kind of Focus Sensor point
There are 101 AF points, and the focusing area uses a focus module that is 1.2 times larger than the KP.
Corresponding to the brightness range of -4EV, the focusing performance in dark places has been
improved.
Q: Can K-3 Mark III select the AF points?
A: Yes. You can select the AF points. The AF points can be selected from 41 points out of 101 points.
Cross type Focus Sensor Point
Selectable Focus Sensor Point
Compatible for F2.8 and -4EV

- 15 -
Auto Area Automatically selects the optimum focusing points out all AF
points.
Zone Select Automatically selects the optimum focusing points out of the
selected 21 AF points.
Select Sets the AF points to the user selected five points.
Expanded Area AF (S)
Sets the AF points to the user selected five points.
When the subject happens to move out of the selected AF points
after being focused, 16 peripheral points are used as back-up points
for autofocus.
This setting is available only with [Continuous AF]
Expanded Area AF (M)
Sets the AF points to the user selected five points.
When the subject happens to move out of the selected AF points
after being focused, 60 peripheral points are used as back-up points
for autofocus.
This setting is available only with [Continuous AF]
Expanded Area AF (F)
Sets the AF points to the user selected five points.
When the subject happens to move out of the selected AF points
after being focused, 96 peripheral points are used as back-up points
for autofocus.
This setting is available only with [Continuous AF]
Select (S) Performs autofocus with fewer AF points than those for [Select].
Spot Sets the AF point to the center point.
Push the lever in to reset the AF points.
Memo:
・The selected AF points can be checked also in the viewfinder.
Caution:
・The selected AF points differ depending on the lens attached.
Restrictions on the Selection of AF Points
When the following lenses, some AF points on the left and right sides cannot be used while shooting with
the viewfinder.
See RICOH IMAGING website for the latest information.

- 16 -

- 17 -
Q: What is the Autofocus specification when shooting in Live View mode?
A: Live View mode specification as follow.
Setting;
Auto Area Automatically selects the optimum focusing points out of all AF points.
Zone Select Performs autofocus in the selected 3x3 areas.
Tracking *1Tracks the subject in focus.
Select (L) Performs autofocus with more areas than those for [Select (M)].
Select (M) Performs autofocus with the selected areas.
Select (S) Performs autofocus with fewer areas than those for [Select (M)].
Spot Sets the AF active area to the center area.
*1 Not select in B mode.
Push the lever in to reset the AF active areas.
Memo:
・When you take an AF area reset, you can set focus poit to reference point.

- 18 -
Live view:
Q: How to set the AF Fine Adjustment?
A: You can set AF Fine Adjustment following the procedure below.
■Setting procedures of AF Fine Adjustment
1. Preparation
Camera, Lens, Object(Chart)*
*As below sample, prepare the flat chart which has a clear contrast of black and white and
place it to parallel with the camera.
Caution: Following object and method of capturing are not suitable for AF Fine Adjustment.
・Objects which have depth. .
・Spherical objects where the focus point can easily change.

- 19 -
2. Setting of the camera
Items
Contents
1 Distance
As a guide, set the chart from camera about 30 to 40 times of
focal length. (Ex.) f=50mm x40 =2m(2000mm)
2
Zoom Position
*in case of Zoom lens
Recommended telephoto end which has narrower depth of field
and easy to find focus point.
3 Focus point
Set the center of SEL with AF.S mode or user’s favorite focus
point.
4 Light source
Outdoor with sunlight or same as actual capture condition.
Observe not to reflect any direct light on the target chart.
5
Condition of the object
Set the target chart to parallel with the camera.
6 Diaphragm
Recommended fully opened aperture which has narrower
depth of field and easy to find focus point.
3. AF fine adjustment procedures
Follow the numbers (1) to (6) below.
(1) Focus with the [Phase Matching AF].
(2) Shoot as it is or set Live View display.
(3) Check the focus on the captured image or Live View mode.
If you have the focus you like, you are done.
If not, go to step (4).
(4) Judge if it is the Front Focus or Back Focus.
There are the following confirmation methods.
1) Focus the subject with Phase-Matching-AF and set the AF-MF switch to MF.
2) Switch the Live View display to ON
3) Make a judgment by slowly moving the focus ring in a certain direction while looking at
the enlarged display of the target subject (focusing point) on the LV screen.
・Move to the infinity index side and when it comes into focus, it tends to be in front focus,
and when it is out of focus, it tends to be in back focus.
・On the contrary, if you move it to the near side from infinity index and it comes into focus,
it tends to be in the in the back focus.
[Remarks] ????
(5) From the result of step (4), set AF fine adjustment by the following steps 1) to 5).
1) At the C7 Function customization menu, select [AF Fine Adjustment] and press the right
of the 4-way key twice to display the setting menu.

- 20 -
2) Select either ‘Common’ or ‘Individual’ settings and press the ‘OK’ button.
The illustration below shows when ‘Common’ is selected.
Common
Apply the same adjustment value for all lenses
Individual
Register the adjustment value only for the lens which is attached body
(Up to 20 models can be registered)
3) Press the bottom of the 4-way key to set the adjustment value to ‘settable’.
4) From the result of step (4) above, increase or decrease the adjustment value as follows.
In the photo above, the adjustment value is ‘+4’.
・In the case of a back focus tendency…Move the index to the + side.
・In the case of a front focus tendency…Move the index to the - side.
5) After entering the adjustment value, press the MENU button to return to the shooting
screen.
‘Individual’ setting can be selected only when a compatible lens is attached to the body,
And the adjustment value will be enabled for the attached lens model.
(6) Return to step (1) and check the adjustment result.
By repeating step (1) to (6) above, you can adjust the focus position to your favorite lenses.
Other manuals for Pentax K-3 III
2
Table of contents
Other Ricoh Digital Camera manuals

Ricoh
Ricoh RDC-I700 User manual

Ricoh
Ricoh R10 Programming manual

Ricoh
Ricoh Caplio RR-1 Installation manual

Ricoh
Ricoh SLX 500 User manual

Ricoh
Ricoh gr digital III User manual

Ricoh
Ricoh Caplio R6 User manual

Ricoh
Ricoh R4 User manual

Ricoh
Ricoh Caplio RR-120 User manual

Ricoh
Ricoh PENTAX WG-10 User manual

Ricoh
Ricoh WG-60 User manual

Ricoh
Ricoh WG-30W User manual

Ricoh
Ricoh RDC-2 User manual

Ricoh
Ricoh Aficio G700 User manual

Ricoh
Ricoh PENTAX K-1 II User manual

Ricoh
Ricoh Singlex User manual

Ricoh
Ricoh THETA S User manual

Ricoh
Ricoh RDC-7 Specification sheet

Ricoh
Ricoh RDC-6000 User manual

Ricoh
Ricoh G900 User manual

Ricoh
Ricoh Caplio RR530 User manual