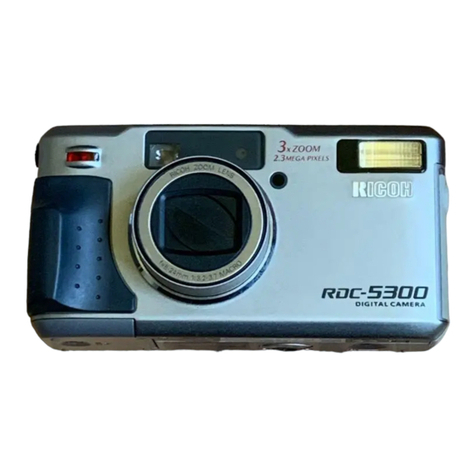
Ricoh RDC-5300 User manual

Before Using the Camera ..................................... 26
Checking the Package Contents ................... 26
Attaching the Wrist Strap ............................... 26
Powering the Camera ........................................... 27
Loading the AA Batteries ............................... 27
Using an AC Adapter ...................................... 29
SmartMedia Memory Cards ................................. 31
What is a SmartMedia Memory Card? .......... 31
Inserting a SmartMedia Memory Card .......... 32
Formatting a SmartMedia Memory Card....... 33
Before You Start Recording ................................ 35
Setting the Date and Time .............................. 35
Adjusting the LCD Monitor Brightness ........ 37
How to Hold the Camera................................. 37
ChapterGETTING STARTED
1

26
Before Using the Camera
Checking the Package Contents
Check that your digital camera comes complete with all the accessories listed below.
Read the warranty card and keep it in a safe place.
• Digital camera: .................................................. 1
• Video interface cable:........................................ 1
• Soft case: .......................................................... 1
• AA alkaline batteries: ........................................ 4
• Wrist strap: ........................................................ 1
• Operation manual (this manual): ....................... 1
• Warranty card:................................................... 1
• PC connection cable (RS-232C) ....................... 1
• Macintosh cable (AUX) ..................................... 1
• USB cable ......................................................... 1
• Software CD-ROM ............................................ 1
Attaching the Wrist Strap
Attach the wrist strap provided to prevent the camera from being dropped during use.
qPass the small loop of the strap through the wrist
strap eyelet and pass the other end through the
loop as illustrated.
Important
Note
• Do not swing the camera around by its
strap.

27
Getting Started
1
Powering the Camera
This section explains how to load the batteries (AA alkaline batteries) into the camera
and how to connect the AC adapter to power the camera from a household electrical
outlet.
Loading the AA Batteries
Mount AA batteries and operate the camera.
• If you use commercial batteries, use of rechargeable AA batteries (nickel-
cadmium or nickel-metal-hydride batteries) is recommended.
Rechargeable Batteries
• Before using commercially available rechargeable AA Ni-Cd or AA Ni-MH batteries,
read the safety precautions in the accompanying manual.
• Use only the specified AA batteries.
• Never use batteries of an unrecommended type, such as manganese battery,
as this could damage the camera or LCD monitor and cause them to fail.
• Certain types of batteries may become hot after an extended period of use.
Allow them to cool before unloading them.
• Do not use commercially available batteries that are designed for specific
kinds of equipment (such as those marked “For CD players only”) in this
product.
• When purchasing batteries, read the battery instructions carefully to make
sure that they can be used for this product.
• Remove the batteries from the camera if you won’t be using it for an
extended period of time.
Important
Note
Note

28
qCheck that the camera is turned off, and
then open the battery cover by pressing
the catch and sliding it in the direction
shown.
“Turning on the Camera” (p.41)
wLoad the batteries.
• Make sure that the batteries are loaded
with the positive (+) and negative (–)
terminals correctly oriented. Do not bring
metallic objects, such as a needle, into
contact with the battery contact surfaces
or electrical connections. Electrostatic
damage could result.
eClose the battery cover
Close the battery cover until it clicks into position.
■Economizing on Batteries
Use of rechargeable Size AA Ni-Cd or AA Ni-MH batteries is recommended for most
applications.
If a power source is available nearby, you can economize on the batteries by using an
AC adapter (optional).
In shooting pictures, having the LCD monitor display turned off will give your batteries
longer life.
●Shooting and Playback Guidelines
The table below gives the approximate recording and playback times that are available
with Size AA alkaline batteries, as measured under the following test conditions:
[Test conditions]
During shooting: Shoot continuously in a recording mode (shoot at an interval of
30 seconds, without turning off the camera in the middle, with the
flash fired 50%, at a 25°C ambient temperature).
During playback: Leave the camera continuously turned on in a playback mode at
a 25°C room temperature.
See
Important
Note

29
Getting Started
1
Battery type Approximate Approximate
Recording Time Playback Time
Size AA alkaline batteries 60 minutes 90 minutes
Ni-Cd batteries (1000 mAh) 40 minutes 60 minutes
Note
Tips to Extend the Recording and Playback Times
* The battery lives indicated above may decrease depending on the ambient
environment.
* In an extremely cold environment, warming the batteries by hand, for example, could
allow you to take more pictures. Where the ambient temperature is extremely low,
use of rechargeable Ni-Cd batteries is recommend for their cold resistance.
* Choose rechargeable batteries having as high a capacity as possible. (The capacity
rating is marked in the unit mAh.)
* Increased use of the flash or zoom feature or the LCD monitor would speed up the
exhaustion of the batteries. Reduce their usage to a minimum.
* The available picture count tends to increase when they are recorded in the 900 ×
600 recording mode.
* Copying or erasing images repeatedly would also accelerate the exhaustion of the
batteries.
* Wiping the contacts of the battery and camera body with a soft dry cloth can prolong
battery life.
• You are advised to make spare batteries available when powering the camera
from the internal batteries alone.
• The battery symbol ( ), when lit, indicates that the camera's internal batteries
have a diminishing voltage. Be sure to have spare batteries on hand.
Rechargeable Size AA Ni-Cd and Ni-MH batteries have a tendency to shut
off immediately when the battery symbol is lit.
• Do not use weak (exhausted) batteries (when blinks, etc.) because this could
result in camera misoperation (the LCD monitor, AF lamp, flash lamp and self-
timer lamp blink or light).
■ Handling Precautions
• Do not use damaged batteries or batteries at the end of their service lives.
• Do not subject the batteries to strong impacts .
Using an AC Adapter
When using the camera for extended periods of time to shoot or playback images,
connect an AC adapter (optional) to the camera and power the camera from a
household electrical source.
Using the AC Adapter
Before using the AC adapter, be sure to read the safety precautions in the
accompanying manual.
30
qCheck that the camera is turned off, and then open the terminal cover.
“Turning on the Camera” (p.41)
wConnect the AC adapter cable to the power supply terminal (DC input)
on the camera.
eInsert the power plug into the electrical outlet.
• If batteries are loaded in the camera while it is connected to a household
power source, the camera is powered from the AC source and not by the
batteries.
• Insert the power plug and connection cable securely. If the plug or cable
works loose during recording, the data may be lost or damaged.
• If you connect or disconnect the AC adapter while operating the camera
(recording, playback, or erasing), the camera will switch off to determine
the power source. This may cause the data to be lost or damaged. To
avoid this, connect or disconnect the AC adapter while the camera is
turned off.
See
Note
Important
Note

31
Getting Started
1
Note
シールを
貼る
Note
Attach a
write
protect
pad.
SmartMedia Memory Cards
This section explains the types and usage of SmartMedia memory cards.
What is a SmartMedia Memory Card?
Files are recorded as data on the SmartMedia memory card in your camera. The
following types of SmartMedia memory card can be used:
• Capacity:................... 2 MB, 4 MB, 8 MB, 16 MB, 32 MB, 64MB
• Operating voltage: .... 3.3 V
• There are numerous types of SmartMedia memory cards. Before using a
commercially available SmartMedia memory card, check with its
manufacturer to be certain is compatible with your camera.
• By using an optional PC card adapter or floppy disk adapter, you can insert a
SmartMedia memory card directly into the PC card slot or floppy disk drive of
your PC.
■ Protecting Against Accidental Writing
Attaching a write protect pad to a SmartMedia memory
card will prevent accidental erasure or overwriting of
recorded files.
Remove the write protect pad from the SmartMedia
memory card to record or erase data.
If the write protect pad gets dirty, wipe it clean
with a soft, dry cloth.
■ Handling Precautions
●SmartMedia Memory Cards
• Never remove the SmartMedia memory card while data is being recorded or erased.
• Do not bend, subject to strong force or shock, or drop the SmartMedia memory card.
• Avoid using or storing SmartMedia memory cards in environments that are subject to
static electricity or electrical interference.
• Avoid using or storing SmartMedia memory cards in environments that are subject to
high temperature and humidity, where dust accumulates, or in atmospheres where
corrosive substances are present.
• Keep the contact surface of the SmartMedia memory card clean and free from dust
and foreign matter. Should the contact surface get dirty, wipe it clean with a soft, dry
cloth.

32
• Keep the SmartMedia memory card slot free from dust and foreign matter.
• To avoid possible hazards, keep SmartMedia memory cards away from flames and
do not dispose of them in fire.
• SmartMedia memory cards have a limited service life. Cards that have been used
over an extended period of time may fail to record additional files.
●Data
• Data recorded on a SmartMedia memory card may be lost by improper handling by
the customer or a third party, by being subjected to electricity or electrical
interference, or during camera malfunction or repair. Ricoh Co., Ltd. assumes no
liability for damages incurred by such loss of recorded data.
• Do not remove the batteries from the camera, turn off the camera, or connect the AC
adapter while data is being recorded on the SmartMedia memory card. The data
stored on the SmartMedia memory card could be lost or damaged.
• You are advised to copy valuable data from the SmartMedia memory card onto other
media, such as floppy disks or hard disks.
Inserting a SmartMedia Memory Card
Check that the camera is turned off before inserting the SmartMedia memory card.
• Slide the power switch to turn the power off before inserting or ejecting smart
media; otherwise, the contents of the smart media may be destroyed and the
camera may mulfunction.
■ Inserting Card
qCheck that the camera is turned off,
and then open the card door.
“Turning on the Camera” (p.41)
wInsert the SmartMedia memory card
into the card insert slot and close the
card door.
Push the SmartMedia memory card fully into
position, with the contact surface facing up.
Important
Note
See
Contact
surface

33
Getting Started
1
• Insert the SmartMedia memory card in the correct direction. Do not insert it at
an angle.
• The camera will not turn on when the card door is open.
■ Removing Card
qCheck that the camera is turned off, and
then open the card door.
“Turning on the Camera” (p.41)
wPress the button and pull the
SmartMedia memory card straight out of
the slot.
Pressing the button will cause the SmartMedia
memory card to pop out a little. Then, pull it
straight out of position.
eClose the card door.
Important
Note
• Never remove the SmartMedia memory card while data is being recorded
or erased. The data stored on the card could be lost or damaged.
• When the SmartMedia memory card has been removed, place it in the
antistatic case supplied or other protective cover.
Formatting a SmartMedia Memory Card
Before using a new SmartMedia memory card or a SmartMedia memory card that has
been used on another device (such as a PC), you need to format (initialize) it with the
camera.
Important
Note
• Formatting will erase all the files recorded on the SmartMedia memory
card (including protected files).
• Do not format SmartMedia memory cards on a PC.
• The SmartMedia formatted by other devices may not be used.
Note
See

34
qInsert the SmartMedia memory card and
slide the power switch to turn on the
camera.
See
“Inserting a SmartMedia Memory Card” (p.32)
“ Turning On the Camera” (p.41)
wSet the mode dial to [ ].
The setup menu will be displayed.
ePress the ▼or ▲button to select
[FORMAT] and press the ENTER button.
rPress the ▼or ▲button to select
[FORMAT MEMORY CARD] and press the
ENTER button.
tPress the shutter release button.
The “FORMATTING” message is displayed
while the camera is formatting the SmartMedia
memory card.
When formatting is completed, the setup menu
will reappear. Turn the mode dial to choose
another mode.
Note
• A SmartMedia memory card with a write protect pad attached to it cannot
be formatted. Remove the pad to format the SmartMedia memory card.
MENU [FORMAT]
FORMAT MEMORY CARD
FORMAT INTERNAL MEMORY
BACK:MENU SEL.:ENTER
FORMAT MEMORY CARD
START : RELEASE
CANCEL: MENU
MENU [SET UP]
FORMAT
DATE SETTING :1999/1/1
KEEP SETTINGS
BEEP SOUND :ON
AUTO POWER OFF :1 MIN
LANGUAGE :ENGLISH
VIDEO OUT MODE :NTSC
VERSION
SEL.:ENTER

35
Getting Started
1
Before You Start Recording
This section explains the initial camera adjustments and pointers you should know
before starting to record pictures.
Setting the Date and Time
The date and time are recorded when you shoot a picture. You will need to adjust
these settings when you first use the camera and each time you change time zones on
trips.
Note
• Use the yy/mm/dd format to set the date.
• Time is displayed in the 24-hour clock format. Midnight is expressed as
00:00 and noon as 12:00.
qSlide the center button of power switch
to turn on the camera.
See
“Turning On the Camera” (p.41)
wSet the mode dial to [ ].
The setup menu is displayed.
Note
• To cancel the operation, turn the mode
dial to another mode.
ePress the ▼or ▲button to select [DATE
SETTING].
MENU [SET UP]
FORMAT
DATE SETTING :1999/1/1
KEEP SETTINGS
BEEP SOUND :ON
AUTO POWER OFF :1 MIN
LANGUAGE :ENGLISH
VIDEO OUT MODE :NTSC
VERSION
IMPRINTING MODE:DISPLAY
SEL.:ENTER

36
rPress the DISPLAY button to select the
date display method.
There are three methods available to display the
date as follows:
1999/5/15 ➝May 15 1999 ➝15 May 1999
Each time you press the DISPLAY button, the
display method is switched from one position to
the next in the sequence shown above. Press
the DISPLAY button to select the desired date
display method.
tPress the ENTER button.
The date setting menu is displayed.
Note
• To cancel the operation and return to
the setup menu, press the MENU
button.
yPress the ▼and ▲buttons to change
the blinking numeral.
Pressing the up ▲( ) button increments the
numeral; pressing the down ▼( )button
decrements the numeral. Keep pressing the
button changes the digit fast.
uPress the ENTER button to flash the digit
you want changed.
Repeat steps yand uabove to make
necessary corrections.
Note
• Each time you press the ENTER
button, the flashing digit changes, from
year to month, day, hour and minute.
• Press the MENU button to cancel the
operation.
iAfter you have set the number of
minutes, press the ENTER button again.
The clock gets started and the LCD monitor
returns to the SET UP menu. Turn the mode
dial to select another mode.
CANCEL:MENU SEL.:ENTER
DATE SETTING
1999 1 1
00:00
CANCEL:MENU SEL.:ENTER
DATE SETTING
1999 1 1
00:00
CANCEL:MENU SEL.:ENTER
DATE SETTING
1999 1 1
10:12

37
Getting Started
1
Note
• You can set the time correctly by pressing the ENTER button at the same
time as a time signal sounds.
• The date and time settings are reset if the battery has been removed for
about 3 minutes or longer, as at replacement. Set the date and time again.
Adjusting the LCD Monitor Brightness
You can adjust the brightness setting of the LCD monitor.
qTurn the brightness adjustment dial on
the bottom of the camera, left or right to
adjust the LCD monitor brightness to a
favorable setting for viewing.
How To Hold the Camera
Unintentional movement of the camera during shooting will result in blurred images.
To keep the camera steady, hold the camera in the fashion prescribed below. Be
particularly careful to keep the camera steady when taking telephoto zoom shots.
qHold the camera steady with both hands with the elbows lightly
touching your body.
●When viewing through the viewfinder
With the camera lightly pressed against your
head, aim it at your subject and look through the
viewfinder.
Tips
How to Verify the Date and Time
Press the ENTER button to view the date and time settings in
the LCD monitor for verification. See “LCD Monitor Display
Function” (p.51).

38
●When viewing using the LCD monitor
Hold the camera firmly in both hands, and aim it
at your subject and look at the LCD monitor.
wPress the shutter release button lightly
with your fingertip.
Important
Note
• Pressing the shutter release button at once with the finger initially apart
from it could result in a blurred image.
Note
• When an image of a subject that has been shot with the camera held in
vertical position is played, the subject will appear sideways.
Be careful to keep the camera lens, flash, and
the flash sensor reception window from being
covered by your fingers or hair.
Other manuals for RDC-5300
2
Table of contents
Other Ricoh Digital Camera manuals

Ricoh
Ricoh Caplio RR-1 User manual

Ricoh
Ricoh GX200 User manual

Ricoh
Ricoh RDC-5000 User manual

Ricoh
Ricoh CX3 User manual

Ricoh
Ricoh G800 User manual

Ricoh
Ricoh THETA X User manual

Ricoh
Ricoh Caplio RR-10 User manual

Ricoh
Ricoh RDC-6000 User manual

Ricoh
Ricoh Caplio RR-1 Installation manual

Ricoh
Ricoh Caplio R40 User manual