manuals.online logo
Brands
  1. Home
  2. •
  3. Brands
  4. •
  5. Rinnai
  6. •
  7. Grill
  8. •
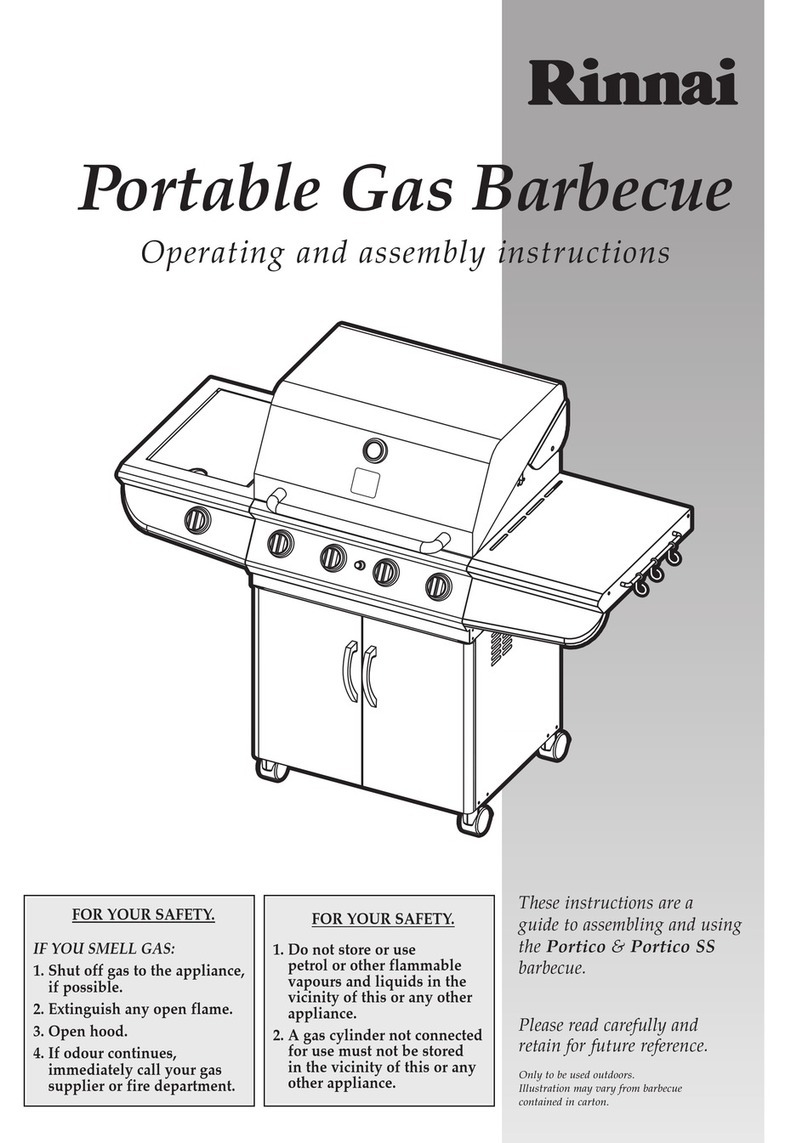
  9. Rinnai FRZ-1PMS User manual

Rinnai FRZ-1PMS User manual

Please read
carefully, and
retain for future
reference.
Model FRZ - 1PMS
Australian Gas Association Certificate No. 6225
FOR YOUR SAFETY.
1. Do not store or use
petrol or other flammable
vapours and liquids in the
vicinity of this or any other
appliance.
2. A gas cylinder not connected
for use shall not be stored
in the vicinity of this or any
other appliance.
FOR YOUR SAFETY.
IF YOU SMELL GAS:
1. Shut off gas to the appliance.
2. Extinguish any open flame.
3. Open hood.
Customers operating & assembly instructions
Sea Breeze Portable Barbecue
Rinnai New Zealand Ltd.
Tel: 0800 74 66 24
SERVICE CONTACT POINT
1. WARRANTY TERM
2 Years – Parts.
1 Year –Labour.
2. WARRANTY CONDITIONS
2.1 Satisfactory proof of the purchase date must be
furnished at the time of notification of the defect
for any claim under the warranty to be enforceable.
2.2 This warranty covers all parts found to be defective
in workmanship and/or materials during the
warranty period and will be repaired or replaced at
the discretion of the manufacturer at no cost to the
original purchaser.
2.3 This warranty will be void and accordingly no
claim of any nature whatsoever will be enforceable
if the product has not been assembled, installed
or operated according to the instructions, subjected
to abuse, improperly treated, neglected, rusted by
exposure to the elements, misused and/or if any
repairs, maintenance or service has been done by
an unauthorised person.
2.4 To obtain service under this warranty, please
return the product to the place of purchase or
nominated service agent. Repairs outside warranty
will be charged at a nominated rate.
2.5 Each of the manufacturer, distributor and retailer
will not be liable for any incidental or consequential
loss or damage arising from the installation or
operation of the product and/or the failure of any
part for any reason whatsoever.
2.6 There are no warranties, express or implied, except
for those stipulated herein. This warranty gives
specific rights and the original purchaser may have
additional rights and remedies in law.
2.7
None of the above warranty is covered for commercial
use.
2.8 Fat fires are not covered by warranty.
LIMITED WARRANTY
Warranty 2
General Information 3
Safety Instructions 4
Assembly Instructions / Parts List 5
Assembly Instructions 6
Operation / Lighting Instructions 7
Cleaning and Maintenance Instructions 8
Warranty Registration Form 11
TABLE OF CONTENTS
CONTENTS & WARRANTY
22
Purchased from
Date purchased
Serial No.
NOTE: Sales docket must be kept as proof of purchase date.
Please complete the information at the back of this
booklet and mail it to us.
CUSTOMER REFERENCE
(Record and keep the following information in a safe place)
GENERAL INFORMATION
33
NOTE: The appliance must be positively fixed to a secure
non-combustible mounting at all times during use.
Minimum clearances from combustible materials must be:
Rear and sides –200 mm (8").
Below –200 mm (8").
Above –1000 mm (36").
CLEARANCES
Height –Hood closed 330 mm.
Hood open 595 mm.
Width –670 mm
Depth –Hood closed 430 mm.
–Hood open 490 mm.
OVERALL DIMENSIONS
Appliance specifications can be found on the data
label attached to the right side of the appliance.
SPECIFICATIONS
Barbecues must be used in accordance with the
installation requirements of your local gas supply
authority, and the appropriate installation code issued
by the Australian Gas Association and the Australian
Liquified Petroleum Gas Association.
(Refer AS5601 / AG601).
The above standard should be read in conjunction
with the ‘Uniform Shipping Laws Code’which details
additional requirements for the installation of gas
cylinder systems in marine craft.
This barbecue for use with cylinder gas only.
Check the gas type sticker attached to the barbecue.
Check that the label matches the gas type for which it is
to be installed.
GAS INSTALLATION CODES
HOSE AND REGULATOR SAFETY
NEVER OPERATE THIS BARBECUE
WITHOUT A REGULATOR.
!
FAILURE TO COMPLY WITH THESE
INSTRUCTIONS COULD RESULT IN A
FIRE OR EXPLOSION WHICH COULD
CAUSE SERIOUS BODILY INJURY,
DEATH OR PROPERTY DAMAGE.
!
ACCESSIBLE PARTS MAY BE VERY HOT.
KEEP YOUNG CHILDREN AWAY.
ANY MODIFICATION OF THIS
APPLIANCE MAY BE DANGEROUS.
DO NOT MOVE THIS APPLIANCE
DURING USE.
TURN OFF THE GAS SUPPLY AT THE
GAS CYLINDER AFTER USE.
READ THE INSTRUCTIONS BEFORE
USING THE APPLIANCE.
PARTS SEALED BY THE
MANUFACTURER OR THEIR AGENT
MUST NOT BE MANIPULATED BY
THE USER.
THIS BARBECUE IS ONLY TO BE USED
AND STORED OUTDOORS.
!
IF THIS INFORMATION IS NOT
FOLLOWED EXACTLY, A FIRE
CAUSING SERIOUS INJURY OR DEATH
MAY OCCUR!
DO NOT STORE A SPARE LPG
CYLINDER UNDER OR NEAR THIS
APPLIANCE.
NEVER FILL THE CYLINDER BEYOND
80% FULL.
THIS BARBECUE IS ONLY TO BE USED
OUTDOORS.
!
The regulator and hose assembly supplied with the
barbecue is suitable for Universal Liquified Petroleum
Gas (Universal LPG).
A gas regulator adjusted to have an outlet pressure
of 2.75 kPa is supplied for connection to the gas cylinder.
The regulator and hose assembly supplied with the
appliance must be used. Replacement regulators and hose
assemblies must be those specified by the appliance
manufacturer.
When connecting the hose and regulator assembly to
the gas cylinder, take care to avoid unnecessary twisting of
the flexible hose and ensure the restraint chain is attached
to the secured gas cylinder.
After the assembly has been secured, turn on the gas
and check for leaks by brushing a soap and water solution
over all connections. The presence of bubbles will indicate
a gas escape. DO NOT TEST FOR GAS ESCAPES WITH
AN OPEN FLAME.
If you are unable to correct the leak by tightening the
connections, turn off the gas and contact your place of
purchase immediately.
Always ensure the appliance is kept away from
flammable materials and the gas cylinder clear of any
heat source.
When changing over from an empty gas cylinder to
a full one, make sure this procedure is carried out in a
flame-free atmosphere.
Inspect the gas hose when replacing the gas cylinder
or once a year whichever is more frequent. If the hose is
cracked, cut, abraded or damaged in any way, the
appliance must not be operated. The hose must be
replaced if damaged or when statutory conditions require
it. Contact your place of purchase if uncertain.
The hose and regulator should be disconnected from
the cylinder when the outdoor appliance is not in use.
SAFETY
44
FOR YOUR SAFETY:
DO NOT STORE OR USE PETROL OR
OTHER FLAMMABLE VAPOURS AND
LIQUIDS IN THE VICINITY OF THIS OR
ANY OTHER APPLIANCE.
DO NOT STORE EMPTY OR FULL SPARE
GAS CYLINDERS UNDER OR NEAR THIS
OR ANY OTHER APPLIANCE.
KEEP THE GAS HOSE AND ANY
ELECTRICAL CORD AWAY FROM HOT
SURFACES. PROTECT GAS HOSE FROM
DRIPPING GREASE. AVOID
UNNECESSARY TWISTING OF HOSE.
VISUALLY INSPECT HOSE PRIOR TO
EACH USE FOR CUTS, CRACKS,
EXCESSIVE WEAR OR OTHER DAMAGE.
REPLACE HOSE, IF NECESSARY.
NEVER TEST FOR GAS LEAKS WITH A LIT
MATCH OR OPEN FLAME.
NEVER LIGHT BARBECUE WITH HOOD
CLOSED OR BEFORE CHECKING TO
ENSURE BURNER TUBES ARE FULLY
SEATED OVER GAS VALVE ORIFICES.
NEVER LEAN OVER COOKING
SURFACE WHILE LIGHTING BARBECUE.
USE GOOD QUALITY INSULATED OVEN
MITTS WHEN OPERATING BARBECUE.
NEVER ALTER OR MODIFY THE
REGULATOR OR GAS SUPPLY ASSEMBLY.
THIS BARBECUE MUST NOT BE USED
INDOORS.
!
DANGER – IF YOU SMELL OR HEAR
HISS OF ESCAPING GAS FROM THE GAS
CYLINDER:
SHUT OFF GAS TO THE APPLIANCE AT
ITS SOURCE, IF POSSIBLE.
KEEP CLEAR OF THE GAS CYLINDER.
DO NOT ATTEMPT TO CORRECT THE
PROBLEM YOURSELF.
CALL YOUR FIRE DEPARTMENT
(DO NOT MAKE THE CALL FROM
ANYWHERE NEAR THE GAS CYLINDER -
YOUR TELEPHONE IS AN ELECTRICAL
DEVICE, AND COULD
PRODUCE A SPARK).
YOUR BARBECUE IS PRESET AT THE
FACTORY TO OPERATE ON LPG ONLY.
!
READ CAREFULLY BEFORE
ASSEMBLING AND OPERATING
YOUR BARBECUE.
!
NEVER CONNECT AN UNREGULATED
GAS CYLINDER TO YOUR BARBECUE.
!
NEVER STORE YOUR GAS CYLINDER
INDOORS
!
DO NOT use your barbecue in garages, porches, breeze-
ways, sheds or other enclosed areas. Your barbecue is to be
used OUTDOORS ONLY. It should not be placed under
any surface that will burn. Do not obstruct the flow of
combustion and ventilation air around the barbecue
housing.
LOCATION OF YOUR BARBECUE
Keep children away from barbecue during use and
until barbecue has cooled after you are finished. Do not
allow children to operate barbecue.
PROTECT CHILDREN
NEVER TEST FOR LEAKS WITH AN OPEN FLAME.
Prior to first use, and at the beginning of each new
season or whenever the gas cylinder is changed, it is
essential to check for gas leaks. Follow these steps:
1. Make soap solution by mixing one part liquid detergent
and one part water.
2. Turn burner control(s) to ‘OFF’, then turn on gas at
source.
3. Apply the soap solution to all gas connections.
Bubbles will appear in the soap solution if connections
are not properly sealed. Tighten or rectify as necessary.
4. If you have a gas leak you cannot repair, turn off the
gas at the source, disconnect hose from barbecue and
immediately call your barbecue supplier for profes-
sional assistance.
CHECKING FOR GAS LEAKS
The gas cylinder should be filled by a reputable
gas dealer, and visually inspected and requalified at each
filling.
Always keep cylinder in an upright position. Always
close the cylinder valve when the barbecue is not in use.
Do not subject gas cylinder to excessive heat.
If you store your barbecue inside your marine craft,
ALWAYS disconnect gas cylinder FIRST, and store gas
cylinder safely in accordance with the ‘Uniform Shipping
Laws Codes’and AS5601/AG601.
This is a low pressure barbecue and must only be used
with the hose and regulator supplied.
Your barbecue is designed for use with 4.5 kg or 9 kg
gas cylinder.
DO NOT CONNECT YOUR BARBECUE TO A GAS
CYLINDER EXCEEDING THIS CAPACITY.
GAS CYLINDER USE & SAFETY
IF YOU SMELL GAS:
1. SHUT OFF GAS TO THE APPLIANCE AT
ITS SOURCE, IF POSSIBLE.
2. EXTINGUISH ANY OPEN FLAME.
3. OPEN HOOD.
!
Before attempting to assemble or use your barbecue,
it is advisable to check that all the necessary parts have
been included using the parts list opposite. Inspect
barbecue and all parts as you proceed.
Contact your place of purchase for assistance
regarding replacement of any damaged or missing
parts.
Do not assemble or operate a barbecue that
appears damaged.
This barbecue for use with bottled gas only. Check
the gas type sticker attached to the barbecue. Check
that the label matches the gas type for which it is to be
installed.
CHECK BARBECUE FOR ANY DAMAGE
BARBECUE COMPONENTS:
1 Barbecue body with burner and hood attached
1 Regulator with hose assembly.
1 Fat/grease receptacle.
1 Operating & assembly instructions.
1 Flametamer.
1 Stainless steel cooking grill.
ASSEMBLY
55
PARTS SUPPLIED SEALED IN THE
CARTON, OR BY YOUR PLACE OF
PURCHASE, MUST NOT BE ALTERED IN
ANY WAY.
!
Adjustable spanner (open end shifter).
TOOLS YOU WILL NEED
CARTON CONTENTS
This diagram is provided to assist you identify parts if
replacement is necessary. Please contact your place of
purchase to enquire about parts and availability.
3
6
1
2
4
5
8
16
7
9
18
17
11
13
10
12
19
20
14
31
1.
2.
3.
4.
5.
6.
7.
8.
9.
10.
11.
12.
13.
14.
16.
17.
18.
19.
20.
Ref. Description Part# Qty
Hood assembly
Handle bracket
Round hood handle
Heat-insulating spacer
Cooking grill
Flametamer
W-shape burner
Burner bracket – upper
Electrode assembly
Grill bowl assembly
Wire handle for grill bowl
Bushing for wire handle
Wire leg for grill bowl
Grease receptacle
Gas valve for main burner
Cover for valve
Control knob
Regulator with hose
Gas cylinder restraint chain
P0139A
P0315A
P0263A
P55J1B
P1659A
P1747A
P2055A
P2240A
P2647A
P0795A
P0264A
P55J5A
P0944A
P2750A
P3206A
P55J2A
P3427A
P3627D
P55L5A
1
2
1
2
1
1
1
2
1
1
2
4
2
1
1
1
1
1
1
1. The flametamer is designed to reduce flaring.
Locate the flametamer into the base of the barbecue
body. Ensure it is secured in the location points
provided.
2. Position the cooking grill above the flametamer.
3. Slide grease receptacle under barbecue body as
shown in diagram.
ASSEMBLY
66
INSTALLING COOKING COMPONENTS
Grease receptacle
Cooking grill
Flametamer
TEST FOR LEAKS WITH A
SOAP SOLUTION,
NEVER WITH AN OPEN FLAME.
!
IMPORTANT: Before connecting and disconnecting
barbecue to gas source, make sure the burner control is
in the ‘OFF’position. Ensure that the gas cylinder
restraint chain has been attached to the gas cylinder.
CAUTION: When the appliance is not in use, the gas
must be turned off at the gas cylinder.
Familiarise yourself with the general information
and safety guidelines located at the front of this
manual. Check to see that gas cylinder is filled. Set
burner control to ‘OFF’position.
CONNECTING AND DISCONNECTING
TO GAS SOURCE - ULPG installation
Before first use and at the beginning of each barbecue
season:
1. Please read Safety, Lighting and Operating
Instructions carefully.
2. Check gas valve orifice, burner tube and burner
port for any obstructions eg. spiders, webs, insects.
3. Check and ensure the gas cylinder is full.
4. Ensure all connections are securely tightened.
Check for gas leaks. See page 4.
IF NO GAS LEAKS ARE DETECTED
YOUR BARBECUE IS READY TO USE
CONNECTING TO GAS SOURCE
1. Locate and secure the
gas cylinder in an
appropriate position.
Refer Gas Installation
Codes, page 3.
2. Attach the regulator to
cylinder valve outlet.
3. Open the gas cylinder
valve fully to allow gas
to flow.
4. Leak test all connections thoroughly with a soapy
water solution prior to lighting the barbecue.
(See Safety, page 4).
5. If a leak is found, turn gas cylinder valve off and do
not use barbecue until repairs or replacement can
be made by the gas supplier.
DISCONNECTING FROM GAS SOURCE
1. Turn the burner control ‘OFF’.
2. Turn the gas cylinder valve off fully.
3. Detach the regulator assembly from gas cylinder
valve by turning the quick coupling nut.
IMPORTANT: The gas cylinder must be attached to the
barbecue body with the ‘gas cylinder restraint chain’at
all times when the hose and regulator is connected.
The gas cylinder restraint chain must be secured to
the gas cylinder before connecting the gas hose and
regulator.
Loop the end of the chain
with the clip attached,
through the hand hole in
the top of the cylinder.
Clip the clip onto the
chain.
GAS CYLINDER RESTRAINT
Chain secured to
body.
Chain
looped and
secured
though gas
cylinder
hand hole.
Hood must be open before
lighting. For easy ignition, push
the burner control knob in
fully and turn until a click is
heard, this will trigger the
piezo, producing a spark to
light the burner.
If the burner does not light,
immediately return the burner
control to the ‘OFF’position and
repeat the process.
Turn burner control to ‘HI’
following lighting procedure
until flame appears on the burner.
CAUTION: IF BURNERS GO OUT
DURING OPERATION, CLOSE GAS
SUPPLY AT SOURCE, AND TURN
BURNER CONTROL OFF.
WAIT 5 MINUTES BEFORE
RE-ATTEMPTING TO LIGHT (THIS
ALLOWS ACCUMULATED GAS FUMES
TO CLEAR).
CAUTION: SHOULD A GREASE FIRE
OCCUR, CLOSE GAS SUPPLY AT
SOURCE, TURN OFF BURNER AND
REMOVE FOOD UNTIL FIRE IS OUT.
KEEP THE VENTILATION OPENINGS
OF THE CYLINDER ENCLOSURE FREE
AND CLEAR FROM DEBRIS.
!
OPERATION
77
BURN-OFF
Before cooking on your barbecue for the first time,
burn-off any residual oils or foreign. ENSURE THE HOOD
IS OPEN. Operate at ‘HI’setting for approximately 10
minutes. Wipe with cloth to remove all residue. Allow to
cool before washing grill thoroughly with soap suds and
warm water. Wipe clean with cloth. Your grill is ready to
use.
PREHEATING
It is necessary to preheat the barbecue for a short time
before cooking certain foods, depending on the type of
food and the cooking temperature. Food that requires a
high cooking temperature needs only a period of 2 - 3
minutes barbecue preheating with the burner set to ‘HI’.
OPERATING PROCEDURE
‘HI’setting –Use this setting only for fast warm up,
for searing steaks and chops, and for burning food residue
from the grill after the cooking is over. Rarely, if ever, do
you use the ‘HI’setting for extended cooking.
‘MED’setting (mid-way between ‘HI’and ‘LO’). Use this
setting for most grilling, and for cooking hamburgers and
vegetables.
‘LO’setting –Use this setting when cooking very lean
cuts such as fish.
These temperatures vary with outside temperature
and the amount of wind.
COOKING TEMPERATURES
THE HOOD MUST BE IN THE OPEN
POSITION, FOR LIGHTING.
DO NOT SMOKE AT ALL TIMES WHEN
ATTEMPTING TO IGNITE BARBECUE.
CAUTION: DO NOT MOVE BARBECUE
WHILE IN OPERATION
!
CAUTION: DO NOT LEAVE THE
BARBECUE UNATTENDED WHEN
BURNER IS ALIGHT.
DO NOT MOVE BARBECUE
WHILE IN OPERATION.
!
WARNING: THIS APPLIANCE MUST BE
POSITIVELY FIXED TO A SECURE
NON-COMBUSTIBLE MOUNTING AT
ALL TIMES DURING USE.
HOOD MAY BECOME HOT WHEN
COOKING WITH THE HOOD CLOSED.
!
BARBECUE LIGHTING INSTRUCTIONS
NOTE: IF FOR SOME REASON, IGNITER
FAILS TO PRODUCE A SPARK AT THE
ELECTRODE, BARBECUE CAN BE LIT
CAREFULLY WITH A MATCH.
TO LIGHT BARBECUE WITH A MATCH,
REFER PREVIOUS STEPS.
THEN, INSERT LIT MATCH THROUGH
LIGHTING HOLE LOCATED AT THE
FRONT OF THE BARBECUE.
CLOSE THE LIGHTING COVER AFTER
LIGHTING.
!
Lighting hole
The fats and juices that drip from the meat may cause
flare-ups. Since flare-ups impart the distinctive taste and
colour for food cooked over an open flame, they should be
expected and encouraged within reason. Nevertheless,
uncontrolled flaring can result in a ruined meal.
FLARE-UPS
If fire occurs in and around the burner tube, imme-
diately turn off gas at its source and turn the burner
control to ‘OFF’. Wait until the barbecue has cooled,
then clean the burner tube and burner ports as
described on page 9.
FLASH-BACK
As with all appliances, proper care and maintenance
will keep them in top operating condition and prolong
their life. Your new gas barbecue is no exception. By
following these cleaning procedures on a timely basis,
your barbecue will be kept clean and working properly
with minimum effort.
CARE AND MAINTENANCE
After cooking, turn burner controls to ‘OFF’and let
barbecue cool before attempting to clean the cooking
grill.
Before first use and periodically it is suggested that
you wash the cooking grill in a mild soap and warm
water solution. You can use a wash cloth, a vegetable
brush, or steel wool to clean your barbecue grill if you
desire.
CLEANING THE COOKING GRILL
Washing the flametamer after every use is not
necessary but periodically it is suggested you wash the
flametamer in a soap and warm water solution. Use a
wire brush to remove stubborn burnt on cooking
residue. Dry the flametamer thoroughly before you
re-install it in the barbecue body.
CLEANING THE FLAMETAMER
MAINTENANCE
88
BEWARE OF SPIDERS.
THE BURNER TUBE SHOULD BE
INSPECTED AND CLEANED
PERIODICALLY.
SPIDERS AND SMALL INSECTS CAN
OCCASIONALLY SPIN WEBS OR MAKE
NESTS IN THE BURNER TUBE.
THESE WEBS CAN LEAD TO A GAS
FLOW OBSTRUCTION WHICH COULD
RESULT IN A FIRE IN AND AROUND
THE BURNER TUBE.
THIS TYPE OF FIRE IS KNOWN AS
‘FLASH-BACK’AND CAN CAUSE
SERIOUS DAMAGE TO YOUR
BARBECUE AND CREATE AN UNSAFE
OPERATING CONDITION.
ALTHOUGH AN OBSTRUCTED BURNER
TUBE IS NOT THE ONLY CAUSE OF
‘FLASH-BACK’IT IS THE MOST
COMMON CAUSE AND FREQUENT
INSPECTION AND CLEANING OF THE
BURNER TUBE IS NECESSARY.
!
1. Turn off gas at source, turn burner control to ‘OFF’.
2. Wait five minutes before trying again.
3. Check gas supply/connections.
4. Repeat lighting procedure and, if barbecue still
fails to operate properly, TURN OFF GAS AT
SOURCE, TURN BURNER CONTROLS TO ‘OFF’,
wait for barbecue to cool and check the following:
a) Obstruction in gas line
CORRECTION: Remove hose from barbecue.
DO NOT SMOKE! Open gas supply for one second
to blow any obstruction from fuel hose. Close off
gas supply at source and reconnect hose to barbecue.
b) Blocked orifice
CORRECTION: Remove grillplate and flametamer.
Remove the burner by unscrewing the 2 upper
burner brackets (refer page 5, part 8). Carefully lift the
burner up and away from gas valve orifice. Gently
clear any obstruction with a fine wire. Reinstall
burner over the orifice and secure the 2 upper
burner brackets. Replace cooking components.
c) Misalignment of igniter on burner
CORRECTION: Check for proper position of
electrode tip. The tip of the electrode should be
pointing toward burner. The gap between the spark
electrode (refer page 5, part 9) and the burner should
be 3 mm. Adjust if necessary by carefully pressing
the gas collector closer to the spark electrode.
If re-ignition is necessary while the barbecue is still
hot, you must wait for a minimum of five minutes
before commencing to re-ignite (This allows accumulated
gas to clear).
If all check/corrections have been made and
barbecue still fails to operate properly, consult your
place of purchase.
IF BARBECUE FAILS TO OPERATE PROPERLY
Burning-off the barbecue after cooking will keep it
ready for instant use, however, once a year you should
give the entire barbecue a thorough cleaning to keep it
in top operating condition.
INTERIOR:
1. Turn the burner controls to ‘OFF’position.
2. Turn the cylinder valve off fully.
3. Detach the regulator assembly from cylinder valve
by turning the quick coupling nut.
4. Remove and clean the cooking grill, flametamer
and burner.
5.
Cover the gas valve orifice with a piece of aluminium
foil.
6. Brush the inside and bottom of the barbecue with a
stiff wire brush, and wash down with a mild soap
and warm water solution. Rinse thoroughly and
let dry.
7. Remove aluminium foil and check orifice for any
obstruction. Reinstall the burner.
8. Check spark electrode, adjusting as instructed the
electrode tip approximately 5 mm from the lighting
holes in the side of the burner.
9. Reconnect to gas and observe burner flame for
correct operation.
10. Replace flametamer and grillplate.
As with all appliances, proper care and mainte-
nance will keep them in a top operating condition and
prolong their life. Your barbecue is no exception. By
following these cleaning procedures on a timely basis,
your barbecue will be kept clean and working properly
with minimum effort.
EXTERIOR:
Your gas barbecue is made of stainless steel and
should provide you with years of trouble-free service.
Keep clean by wiping with warm soapy water.
ANNUAL CLEANING OF BARBECUE HOUSING
The fat/grease draining tray should be emptied
and wiped down periodically and washed in a mild
detergent and warm water solution.
CLEANING THE FAT/GREASE RECEPTACLE
MAINTENANCE
99
To reduce the chance of flash-back, the procedure
below should be followed at least once a month in late
summer or early autumn when spiders are most active,
or when your barbecue has not been used for an
extended period of time.
1. Remove grill and flametamer from barbecue.
2. Remove burner from the barbecue body by
removing the two stainless steel upper burner
brackets.
3. Carefully lift the burner up and away from gas
valve orifice.
We suggest several different ways of cleaning the
burner tubes. Use the procedure most convenient for
you:
1. Bend a stiff wire (a light weight coat hanger works
well) into a small hook. Run the hook through the
burner venturi tube several times.
CLEANING THE BURNER TUBE AND
BURNER PORTS (TO PREVENT FLASH-BACK)
OR Using a narrow bottle brush with a flexible handle,
brush the inside of the burner venturi tube (do not
use a brass wire brush), run the brush through the
burner tube and into the burner several times.
OR Use an air hose to force air through the burner tube
and out through the burner ports. Observe each
port and make sure air comes out every hole. Wear
eye protection.
Regardless of which burner cleaning procedure
you use, we recommend that you complete the following
steps to help prolong burner life.
1. Wire brush entire outer surface of burner to
remove food residue and dirt.
2. Clean any blocked ports with a stiff wire such as an
open paper clip.
3. Inspect the burner for damage (cracks or holes) and
if such damage is found, order and install a new
burner. After installation, check to ensure the gas
valve orifice is correctly placed inside the end of
the burner tube. Also check position of spark
electrode.
WARRANTY REGISTRATION FORM
11 11
✁
Thank you for purchasing the Sea Breeze Barbecue. To make sure we have warranty details of your
barbecue please complete this Warranty Card and mail to our head office address listed at the front of
this instruction manual:
Your input will also assist us to improve our product and services.
Product name:
Serial number on carton:
How many burners does your barbecue have?
(a) 1 Burner (b) 2 Burners (c) 3 Burners (d) 4 Burners (e) 5 Burners (f) 6 Burners
Gas type: (a) Gas cylinder (b) Natural gas (Piped gas)
Owner’s name Mr/Mrs/Ms/Dr:
Address:
Postcode Telephone ( )
Date purchased Purchase price $
From (Store) Suburb
1. Is this your first barbecue purchase? (a) Yes (b) No
If No, what other barbecue have you owned?
2. How would you rate our in store service? (a) Excellent (b) Good (c) Average (d) Poor
How can we improve our service? Comments:
3. Did you purchase a trolley for your barbecue? (a) Yes (b) No
If Yes, type of trolley (a) Metal (b) Metal/Timber (c) Timber
4. Did you purchase a gas cylinder for your barbecue? (a) Yes (b) No
If Yes, size of gas cylinder (a) 4 kg (b) 9 kg
Registration Number B
PART NO. P80141037A Issued 7/2002
WARRANTY REGISTRATION FORM
12 12
5. Are you interested in:
(a) Barbecue accessories (b) Cooking classes (c) Camping
(d) Heating (e) Covered cooking (f) Cookbooks/recipes
(g) Outdoor furniture (h) Other (specify)
6. Your age (optional):
(a) Under 18 (b) 18-24 (c) 25-34 (d) 35-44 (e) 45-54 (f) 55-64 (g) 65+
7. Reason for purchase?
(a) First time purchase (b) Replace an existing charcoal BBQ
(c) Replace an existing gas BBQ (d) Purchase in addition to existing charcoal BBQ
(f)
Purchased in addition to existing gas BBQ
(g) Other (specify)
8. Brand of previously owned barbecue?
Charcoal (a) Brand Gas (b) Brand
9. Which brand did you seriously consider before deciding to purchase this barbecue?
Brand:
10. Which stores did you visit when considering your barbecue purchase?
11 Why was this product chosen? (Tick all that apply)
(a) Quality (b) Recommendation (c) Appearance
(d) Received gift (e) Money back guarantee (f) Warranty
(g) Good value (h) Desired features (i) Previous experience with brand
(j) Salesperson (k) Price (l) Other (specify)
12. How did you first come to know of the barbecue you have just purchased?
(a) Friend/relative (b) Letterbox catalogue (c) TV
(d) Magazine (e) Newspaper (f) In-store demonstration
(g) In-store brochure (h) Salesperson (i) Other (specify)
13. Do you have any other comments?
Thank you for helping us with the above information which will assist us in developing new products that best meet your
interests and needs. We look forward to being of service to you.
Return to: Rinnai New Zealand Ltd
PO Box 24068
Royal Oak, Auckland

Other Rinnai Grill manuals

Rinnai Coastal Product guide

Rinnai

Rinnai Coastal Product guide

Rinnai GT104BHB Operation and maintenance manual

Rinnai

Rinnai GT104BHB Operation and maintenance manual

Rinnai Alfresco SS Product guide

Rinnai

Rinnai Alfresco SS Product guide

Rinnai R-92WSV User manual

Rinnai

Rinnai R-92WSV User manual

Rinnai Impressor 8 Product guide

Rinnai

Rinnai Impressor 8 Product guide

Rinnai Alfresco Product guide

Rinnai

Rinnai Alfresco Product guide

Rinnai Outdoor Kitchen Series User manual

Rinnai

Rinnai Outdoor Kitchen Series User manual

Rinnai 4 burner Gourmet Product guide

Rinnai

Rinnai 4 burner Gourmet Product guide

Rinnai RGK-61D User manual

Rinnai

Rinnai RGK-61D User manual

Rinnai Gourmet 3 IB User manual

Rinnai

Rinnai Gourmet 3 IB User manual

Rinnai GT3-V Product guide

Rinnai

Rinnai GT3-V Product guide

Rinnai Maxim X4S Product guide

Rinnai

Rinnai Maxim X4S Product guide

Rinnai GT114PHB Operation and maintenance manual

Rinnai

Rinnai GT114PHB Operation and maintenance manual

Rinnai Maxim X4 Product guide

Rinnai

Rinnai Maxim X4 Product guide

Rinnai RGA-404B RGA-406BRGA-408B User manual

Rinnai

Rinnai RGA-404B RGA-406BRGA-408B User manual

Rinnai RGP-43SV User manual

Rinnai

Rinnai RGP-43SV User manual

Rinnai GT4SFD Product guide

Rinnai

Rinnai GT4SFD Product guide

Rinnai Gourmet 4 Instructions for use

Rinnai

Rinnai Gourmet 4 Instructions for use

Rinnai 2002 Series Product guide

Rinnai

Rinnai 2002 Series Product guide

Rinnai Portico Product guide

Rinnai

Rinnai Portico Product guide

Rinnai Maxim X6SSII Product guide

Rinnai

Rinnai Maxim X6SSII Product guide

Rinnai Galley series Product guide

Rinnai

Rinnai Galley series Product guide

Popular Grill manuals by other brands

Coyote C1EL120SM Use & care manual

Coyote

Coyote C1EL120SM Use & care manual

Napoleon LD485 manual

Napoleon

Napoleon LD485 manual

Aspire GABR Series Use & care manual

Aspire

Aspire GABR Series Use & care manual

CookMax PE25/RN Use and maintenance

CookMax

CookMax PE25/RN Use and maintenance

Broil King 7123-64H Assembly manual & parts list

Broil King

Broil King 7123-64H Assembly manual & parts list

Weber GENESIS 55826 owner's guide

Weber

Weber GENESIS 55826 owner's guide

SEVERIN RG 2371 Instructions for use

SEVERIN

SEVERIN RG 2371 Instructions for use

TEFAL TG3800 manual

TEFAL

TEFAL TG3800 manual

Char-Broil 468963021 operating instructions

Char-Broil

Char-Broil 468963021 operating instructions

Barbeques Galore Grand Turbo B3810ALP manual

Barbeques Galore

Barbeques Galore Grand Turbo B3810ALP manual

Napoleon PRESTIGE V 450 product manual

Napoleon

Napoleon PRESTIGE V 450 product manual

Electri-Chef 4400-EC-448-IM-D-32 Features

Electri-Chef

Electri-Chef 4400-EC-448-IM-D-32 Features

UKIAH Drifter manual

UKIAH

UKIAH Drifter manual

CB E-6P Instructions for installation, use and maintenance

CB

CB E-6P Instructions for installation, use and maintenance

Mustang PENNY quick start guide

Mustang

Mustang PENNY quick start guide

Naterial Kenton 4B Assembly, Use, Maintenance Manual

Naterial

Naterial Kenton 4B Assembly, Use, Maintenance Manual

Livington LOW FAT GRILL Instructions for use

Livington

Livington LOW FAT GRILL Instructions for use

Weber PERFORMER PREMIUM Assembly guide

Weber

Weber PERFORMER PREMIUM Assembly guide

manuals.online logo
manuals.online logoBrands
  • About & Mission
  • Contact us
  • Privacy Policy
  • Terms and Conditions

Copyright 2025 Manuals.Online. All Rights Reserved.