RIP TUNES MP1898 User manual

Digital Music
Player (MP3/MP4)
User Manuel
Manuel d’usario
Mode d’emploi
Model: MP1898
Music

EN
ES
FR
2
INTRODUCTION
Thank you for purchasing this quality RipTunes digital music player. Please
read all the operating instructions before operating the unit and keep this
manual in a safe place for later consultation.
UNIT SPECIFICATIONS
• 1.8" 128x160 color screen
• 8GB internal storage capacity
• MicroSD card expansion slot
• MP3/WMA/WAV audio format support
• AMV video format support
• ID3 tag support
• Lyric le support
• FM radio built-in
• EQ modes and repeat functions
• Integrated microphone for audio recordings
• TXT le reader
• Digital photo album
• Multi-lingual menus

EN
ES
FR
3
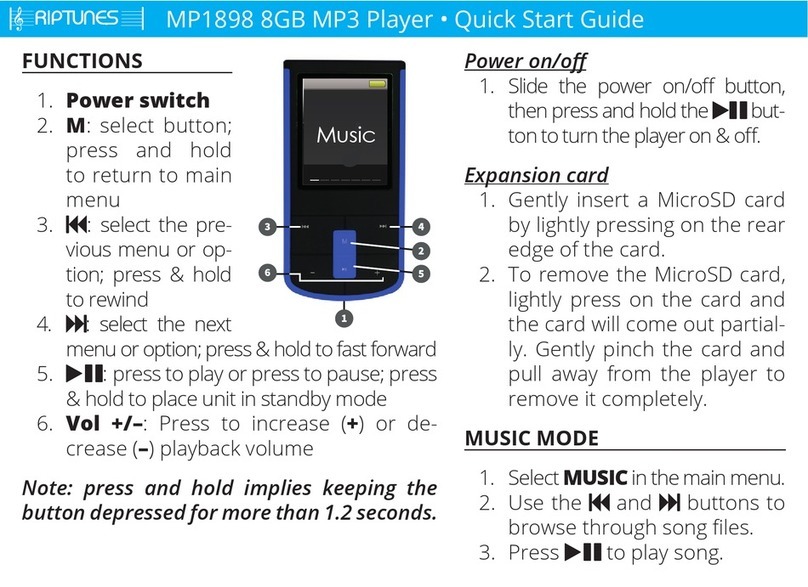
UNIT OVERVIEW
1. Power switch
2. M: select button; press and hold to return to
main menu
3. : select the previous menu or option; press & hold
to rewind
4. : select the next menu or option; press & hold
to fast forward
5. : press to play or press to pause; press & hold
to place unit in standby mode
6. Vol +/–: Press to increase (+) or decrease (–) play-
back volume
Note: press and hold implies keeping the button depressed for more than
1.2 seconds.
Music
1
2
5
6
3 4

EN
ES
FR
4
BASIC OPERATION
Power on/o
1. Slide the power on/o button or press and hold the button to turn
the player on or o.
Note: The player standby time setting will automatically turn o your player
after a certain lapse of inactivity. You can modify this setting. While the music
player is connected to a computer, the standby function is temporarily disabled.
Low battery
1. The player display will show a low battery alert.
2. Plug in your player to recharge as soon as possible.
Note: If your digital music player has insucient power it will automatically
turn o to prevent damage to the electronics.
Expansion card
1. Gently insert a MicroSD card by lightly pressing on the rear edge of the
card.
2. To remove the MicroSD card, lightly press on the card and the card will
come out partially. Gently pinch the card and pull away from the player
to remove it completely.

EN
ES
FR
5
PLAYER FUNCTIONS
Main menu
1. Press and hold the Mbutton to access the main menu.
2. Use the & buttons to select between the following functions:
• Music
• Videos
• Recordings
• Voice recorder
• FM radio
• Photos
• Settings
• Reader
MUSIC MODE
1. Select MUSIC in the main menu.
2. Use the and buttons to browse through song les.
3. Use the Mbutton to select a folder.
4. Press the button to begin or pause music playback with the select-
ed song.

EN
ES
FR
6
Playback settings
During music playback, press the Mbutton to adjust the following playback
settings:
• Repeat modes: Choose normal playback, repeating a single track, folder
playback, repeat all songs in a folder, repeat all songs, shue, and intro
(plays the rst several seconds of every song). The chosen mode will be
indicated on the top of the screen in a red icon during play.
• Equalizer: Choose between Natural, Rock, Pop, Classic, Soft, Jazz, & DBB
(Dynamic Bass Boost) equalizer settings. You can hear the changes to
the music as you scroll through the selections.
• Variable play speed: “0” is normal. You can slow the song down (up to
“–8”) or speed it up (up to “+8”)
• Replay mode: This feature allows you to play just part of a song (from
“point A” to “point B”) in a loop. Begin by selecting the replay options,
before you select the part of the song you want to replay. Select “Replay
Times” to choose how many times you want that section of the song re-
peated (from 1 to 10). Select “Replay gap” to choose how many seconds
to pause between each replay (from 1 to 10). Select “Replay.” The letter
“A” will begin ashing in the upper-left-hand corner of the screen. When
you reach the point in the song that you want to begin from, press the
button. The letter “B” will begin ashing in the upper-left-hand corner of
EN
ES
FR
7
the screen. When you reach the point in the song that you want to end
with, press the button.
• Exit: Exit the playback setting sub-menus
Lyric les
Your music player can display lyrics during MP3 playback. Ensure that the
LRC lyric le and the MP3 le have the exact same name and are in the same
folder. Example: "My Moon My Man.mp3" and "My Moon My Man.lrc".
To display the lyrics during playback, press and hold the Mbutton.
Managing music les
While music playback is stopped, press the M button to manage your music les.
• Local folder: Displays the current music playback folder name & location.
Use the , , and Mbuttons to navigate through the directory struc-
ture on the unit. This works in a similar manner
• Delete le/delete all: Delete one or all songs from the music directory
• Repeat modes: Choose normal playback, repeating a single track, folder
playback, repeat all songs in a folder, repeat all songs, shue, and intro
(plays the rst several seconds of every song).
• Exit: Exit the le management sub-menu

EN
ES
FR
8
VIDEO MODE
1. Select VIDEOS in the main menu.
2. Use the and buttons to browse through .AMV video les.
3. Use the Mbutton to change folders.
4. Press the button to begin or pause video playback with the selected
video.
Managing video les
While video playback is stopped, press the Mbutton to manage your videos.
• Local folder: Displays the current video playback folder name & location.
• Delete le: Delete one video from the video directory
• Delete all: Delete all videos
• Repeat modes: Choose normal playback, repeating a single video, folder
playback, repeat all videos in a folder, repeat all videos, shue, and intro
(plays the rst several seconds of every video). The chosen mode will be
indicated on the top of the screen in a red icon during play.
• Exit: Exit the le management sub-menu

EN
ES
FR
9
VOICE RECORDER
1. Select recorder in the main menu.
2. Press to begin recording.
3. To stop recording & save the recording le, press & hold the Mbutton.
Recording options
Before recording, press the M button to enter the voice recorder congura-
tion sub-menu.
• Local folder: Choose the folder where your recording will be stored.
• REC type: Choose the quality of the recording; higher bitrate numbers
are better for music recordings while lower numbers are acceptable for
voice recordings.
• Exit: Exit the voice recorder conguration sub-menu.
RECORDINGS
1. Select recordings in the main menu to listen to your saved voice recordings.
2. Use the & buttons to browse through the saved voice recordings.
3. Press the button to begin or pause audio playback of the selected re-
cording.

EN
ES
FR
10
Managing recording les
While recording playback is stopped, press the Mbutton to manage your
recordings.
• Local folder: Displays the current recording playback folder name and
location.
• Delete le: Delete one recording from the directory of les
• Delete all: Delete all voice recordings
• Exit: Exit the le management sub-menu
FM RADIO
1. Start the FM tuner by selecting FM RADIO in the main menu.
2. Tune between stations either manually or automatically:
• Manual tuning: use the or button to scan frequencies one by one.
• Automatic tuning: press and hold the or button; the tuner will
automatically scan frequencies, decreasing or increasing based on the
button used. Once a station is detected, the tuner stops scanning.

EN
ES
FR
11
Radio settings
Press the Mbutton while in the FM Radio mode to access the following set-
tings:
• Save: Save the current frequency for quick access
• Record: Record the current radio broadcast; press the red dot to start
and stop recording. To stop recording and save the recording le, press
and hold the Mbutton.
• Delete: Delete the current frequency preset
• Delete all: Delete all saved frequencies
• Auto search: Scans all frequencies to detect broadcasts
• Normal band: Scans FM frequencies from 87.5 to 108.0 MHz
• Japan band: Scans FM frequencies from 76.0 to 90.0 MHz
• Exit: Exit the FM radio settings sub-menu
PHOTOS
1. Select PHOTOS in the main menu.
2. Use the and buttons to browse through your photos.
3. Use the M button to select a le or folder.
4. Press the button to begin or pause slideshow playback starting with
the selected photo.

EN
ES
FR
12
Managing photos
Press the Mbutton to manage your photos.
• Local folder: Displays the current photo folder name and location
• Playback set(tings): Choose between manual playback (use the and
buttons to browse through your photos) and automatic slideshow
playback (1 to 10 second interval).
• Delete le: Delete one photo from the directory of photos
• Delete all: Delete all photos
• Exit: Exit the le management sub-menu
SETTINGS
1. Select SETTINGS in the main menu.
• LCD set: Adjust the length of time before the unit enters “dark mode”,
where the backlight turns o, from 0 to 30 seconds. 0 second timeout
means the screen will remain backlit constantly.
• Language: Choose between English, Spanish, and French
• Power o: Set the player to automatically power-o after a certain period
of inactivity in seconds, from 0 to 200. 0 second timeout means that the
until will stay on indenitely (not recommended).

EN
ES
FR
13
• Memory info: Display the player memory storage size and available space.
Note: it is normal to have less than 8000 MB due to overhead of the operating system.
• Firmware version: Display player rmware version
• Firmware upgrade: Only use this option if asked by RipTunes technical
support to perform a rmware upgrade
READER
1. Select the READER in the main menu.
2. Browse plain text les (.txt)
3. Press to open a selected text le, use the and buttons to scroll
through the pages.
CONNECTING YOUR PLAYER TO A COMPUTER
1. Using the included mini-USB cable, plug the mini-USB end into the play-
er and the standard (A) USB end into your computer.
2. Use a le browser (Windows Explorer, Mac OS Finder) to move les to
and from your portable music player.
Note: only supported le formats can be read by the portable music player,
but you may copy any le to and from the device, if you wish to use your player
as a storage device. Consult the technical specications for readable formats.

EN
ES
FR
14
TECHNICAL SPECIFICATIONS
Supported le formats: Music: MP3, WMA, WAV • Video: AMV
Device connectivity: USB 2.0
PC compatibility: Windows 2000, XP, Vista, 7, 8, Mac OS X
FM tuner range: 87MHz - 108MHz
Signal-to-noise ratio: 85dB
Max output power: 10mW + (R) 10mW (32 Ω)
Internal storage capacity: 8GB
Battery rating: 3.7 volts/180 mAh
Operating temperature: -5°C to 40°C
Included accessories: User manual, earbuds, mini USB cable

EN
ES
FR
15
TROUBLESHOOTING
The player does not work
• Check if the battery is charged
• Check that the power button is on
• Check the volume and that your headphones are properly connected
• Check the music le format
• Check the disk format (should be FAT32)
I can't transfer les to/from the player
• Check the USB cable connection
The player does not make voice recordings
• Check the available memory space
• Check if the battery is charged
Strange characters appear on the screen
• Check the display language in the device settings
FM radio plays static or distortion
• Adjust the position of the headphones; they are the antenna
CONTACT TECHNICAL SUPPORT
Phone: +1 888-217-7688
Email: [email protected]

EN
ES
FR
16
INTRODUCCIÓN
Gracias por comprar este Reproductor de Música portátil RipTunes de cali-
dad. Lea todas las instrucciones de operación antes de comenzar a utilizarlo
y mantenga estas instrucciones en un lugar seguro para poder consultarlas
más adelante.
UNIT SPECIFICATIONS
• Pantalla a color 128x160 de 1.8 pulgadas
• Capacidad de almacenamiento interna: 8GB
• Compatible con tarjeta Micro-SD
• Compatible con Formatos de Audio MP3/WMA/WAV
• Compatible con Formato de Video AMV
• Compatible con ID3
• Soporta los archivos líricos
• Radio FM integrado
• Modos múltiples de ecualización y modos de repetición
• Micrófono integrado para grabación de audio
• Lector de archivos TXT
• Álbum fotográco digital
• Menú multi-idiomas

EN
ES
FR
17
DESCRIPCIÓN DE LA UNIDAD
1. Interruptor de encendido y apagado
2. M: botón de selección; presione y sostenga para
regresar al menú principal
3. : selecciona el menú previo o última opción,
presione y sostenga para retroceder.
4. : selecciona el siguiente menú u opción, presio-
ne y sostenga para adelantar
5. : presione para reproducir o pausar, presio-
ne y sostenga para colocar la unidad en modo
de espera
6. Vol +/–: Presione para aumentar (+) o disminuir
(–) el volumen de reproducción
Nota: ‘presione y sostenga’ signica que debe mantener presionado el bo-
tón por más de 1.2 segundos
Music
1
2
5
6
3 4

EN
ES
FR
18
OPERACIÓN BÁSICA
Encendido y Apagado (on/o)
1. Deslice el botón de encendido/apagado o presione y sostenga el botón
para apagar el reproductor
Nota: El ajuste del tiempo en espera apagará el reproductor después de cierto
tiempo de inactividad. Puede modicar este ajuste. Mientras el reproductor está
conectado a la PC la función de espera está temporalmente deshabilitada.
Batería baja
1. El reproductor mostrará un mensaje con la alerta de batería baja
2. Conecte el reproductor para recargarlo tan pronto como sea posible
Nota: Si su reproductor digital de música no tiene energía suciente se apa-
gará automáticamente para evitar daños en sus circuitos
Tarjeta de expansión
1. Suavemente inserte la tarjeta MicroSD al presionar ligeramente en la
orilla de la tarjeta
2. Para retirar la tarjeta MicroSD, empuje la tarjeta con suavidad hacia
adentro y esto hará que sea expulsada. Tome la tarjeta con la punta de
los dedos y retírela completamente del reproductor.

EN
ES
FR
19
FUNCIONES DEL REPRODUCTOR
Menú principal
1. Presione y sostenga el botón Mpara acceder al Menú Principal
2. Utilice los botones y para seleccionar las siguientes funciones:
• Música
• Videos
• Grabaciones
• Grabadora de voz
• Radio FM
• Fotos
• Ajustes
• Lector
MODO MÚSICA
1. Seleccione MÚSICA del Menú Principal
2. Utilice los botones y para navegar por los archivos de canciones
3. Utilice el botón Mpara seleccionar un archivo
4. Presione el botón para comenzar con la reproducción o pausar la
reproducción de la canción elegida
Ajustes de la reproducción
Mientras la música se esté reproduciendo, presione el botón M para modi-
car los siguientes ajustes del reproductor:
• Modos de repetición: Elija reproducción normal, repetir una sola pista,
repetir la carpeta; repetir todas las canciones; repetir en forma aleatoria

EN
ES
FR
20
e introducción (repite los primeros segundos de cada canción). El modo
elegido se indicará en la parte superior de la pantalla en un icono de
color rojo durante el juego.
• Ecualizador: Elija entre las opciones del ecualizador: Natural, Rock, Pop,
Classic, Soft, Jazz, y DBB. Usted puede escuchar los cambios en la músi-
ca mientras se desplaza por las selecciones.
• Velocidad de reproducción variable: “0” es normal. Puede ralentizar la can-
ción hacia abajo (hasta “-8”) o acelerarlo (hasta “+8”)
• Modo de repetición de reproducción : Seleccione un punto A y un punto B de
una canción especíca; la pista se reproducirá del punto A al B. Empiece por
seleccionar las opciones de reproducción, antes de seleccionar la parte de la
canción que desea reproducir. Seleccione “Replay Times” para elegir el número
de veces que desea que la sección de la canción repetida (de 1 a 10). Seleccione
“brecha de Replay” para elegir el número de segundos para hacer una pausa
entre cada repetición (de 1 a 10). Seleccione “Repetición”. La letra “A” comenzará
a parpadear en la esquina superior izquierda de la pantalla. Cuando llegue al
punto de la canción que desea iniciar desde, pulse el botón . La letra “B” co-
menzará a parpadear en la esquina superior izquierda de la pantalla. Cuando
llegue al punto de la canción que desea terminar, pulse el botón .
• Salir: Sale del submenú de ajustes de reproducción
Other manuals for MP1898
1
Table of contents
Languages:
Other RIP TUNES MP3 Player manuals

RIP TUNES
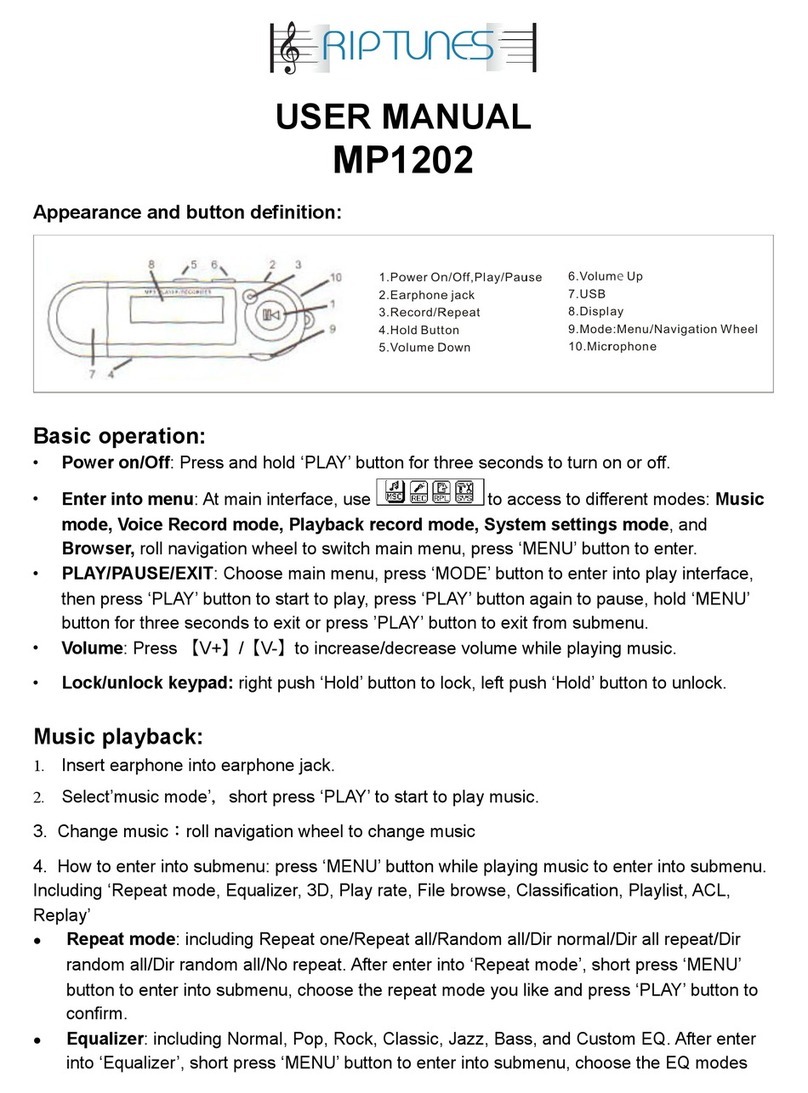
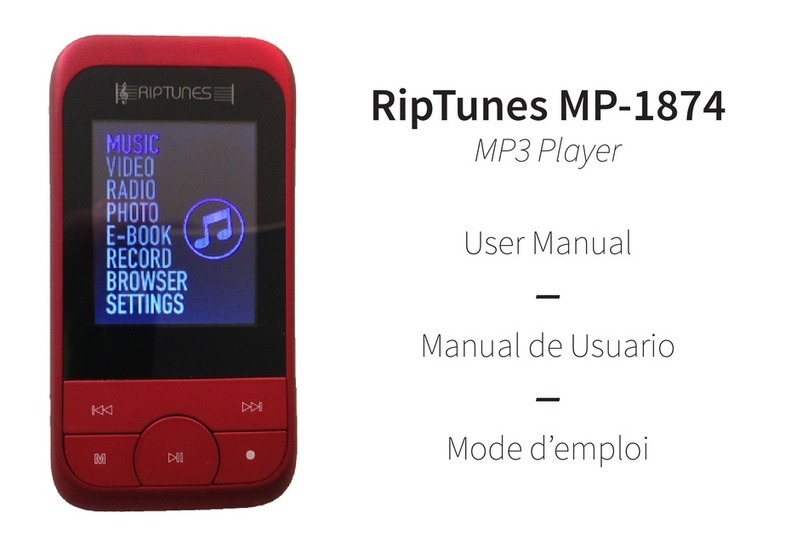
RIP TUNES MP1874 User manual

RIP TUNES
RIP TUNES MP1202 User manual

RIP TUNES
RIP TUNES MP 1857 User manual

RIP TUNES
RIP TUNES MP1872 User manual

RIP TUNES
RIP TUNES MP2868BT 8GB User manual

RIP TUNES
RIP TUNES MP 1587 User manual

RIP TUNES
RIP TUNES MP2868BTB User manual

RIP TUNES
RIP TUNES MP1898 User manual