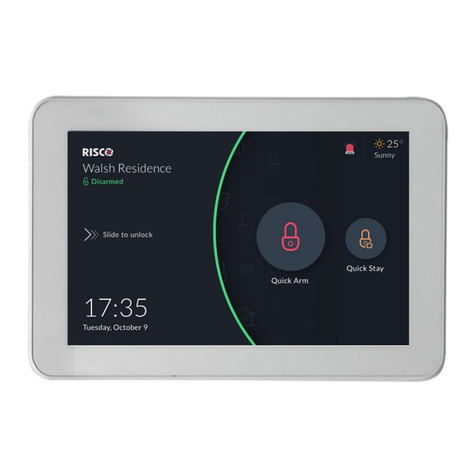
Risco RisControl User manual

RisControl
User Manual
Model: RP432KPT

2
Contents
INTRODUCTION...........................................................................................................5
INSTALLING THE RISCONTROL .....................................................................................6
Mounting the RisControl..............................................................................................6
RisControl Setup ........................................................................................................10
Step 1: Selecting the language for the RisControl.................................................10
Step 2: Setting the Bus Address (Virtual DIP Switch) ............................................11
Step 3: Setting the Wi-Fi Connection (optional) ...................................................12
Step 4: Synchronizing the RisControl with the Security Setup..............................14
OPERATING THE RISCONTROL ...................................................................................15
Entering RisControl ....................................................................................................15
RisControl Session......................................................................................................15
RisControl Main Menu ...............................................................................................15
RisControl Top Bar .....................................................................................................16
Troubles Management...............................................................................................19
Communication troubles ...........................................................................................19
Confirm Troubles .......................................................................................................21
Notifications Management ........................................................................................21
Software Update Notification ....................................................................................22
Confirm Alarms ..........................................................................................................22
SCREEN SAVER ..........................................................................................................24
Exit/Entry Screen Saver Mode ...................................................................................24
Screen Saver During Alarm ........................................................................................24
LOCK SCREEN ............................................................................................................25
About the Lock Screen ...............................................................................................25
Lock Screen with Quick Arm and/or Quick Stay.........................................................26
Lock Screen with Undefined Quick Buttons...............................................................27
The Lock Screen during Incoming Alarm....................................................................28
Blank Display Mode ...................................................................................................29
OVERVIEW SCREEN ...................................................................................................30
Using the Overview Screen ........................................................................................30
Empty Overview Screen.............................................................................................31
Editing the Overview Screen......................................................................................31
Adding Shortcut Buttons to the Overview Screen ................................................32
Removing Shortcut Buttons from the Overview Screen .......................................34

3
Using the Shortcut Buttons from the Overview Screen ............................................ 34
Incoming Alarm on the Overview Screen.................................................................. 35
SECURITY...................................................................................................................36
Partitions ................................................................................................................... 36
Arming and Disarming .......................................................................................... 37
Exit/Entry Delay.................................................................................................... 38
Final Exit Zone ...................................................................................................... 38
One Click Activation of all Partitions .................................................................... 39
Arming/Disarming Selected or All Partitions........................................................ 40
Groups....................................................................................................................... 40
Detectors................................................................................................................... 42
Utility Outputs........................................................................................................... 44
CAMERAS ..................................................................................................................45
Cameras Screen......................................................................................................... 45
PIR CAM..................................................................................................................... 46
Video Cameras .......................................................................................................... 47
The Cameras Screen ............................................................................................. 48
Quick Buttons............................................................................................................ 49
Using Quick Buttons ............................................................................................. 49
Quick Buttons Tray ............................................................................................... 49
Editing the Quick Buttons Tray............................................................................. 49
Adding/Removing Quick Buttons from the Tray .................................................. 50
Adding/Removing Multiple Quick Buttons to/from the Quick Buttons Tray ....... 50
VIDEO RECORDER......................................................................................................52
Video Recorder Live Gallery ...................................................................................... 52
Camera Video Playback ............................................................................................. 53
Time Slider................................................................................................................. 54
Playback Controls ...................................................................................................... 55
Date Selection ........................................................................................................... 55
Switch back to Live .................................................................................................... 55
SMART HOME............................................................................................................56
HISTORY ....................................................................................................................57
Searching Events ....................................................................................................... 57
Media Events............................................................................................................. 58
SETTINGS...................................................................................................................59
General...................................................................................................................... 60

4
Wi-Fi Connection........................................................................................................60
Screen Brightness.......................................................................................................60
Session Timeout.........................................................................................................61
Screen Saver...............................................................................................................61
Language....................................................................................................................62
System Information ...................................................................................................62
Software Update ...................................................................................................62
Software Version...................................................................................................62
IP Address & MAC .................................................................................................64
Security System SW Version..................................................................................64
Security System IP Address ...................................................................................64
Users and Permission Settings...................................................................................64
Add a User.............................................................................................................65
Edit or Delete a User .............................................................................................66
Edit a User’s Own Details ......................................................................................66
Login to the RISCO Cloud ......................................................................................67
Date & Time ...............................................................................................................68
Date & Time Settings.............................................................................................69
Maintenance..............................................................................................................69
The Maintenance Menu........................................................................................69
Walk Test...............................................................................................................70
Sounder Test .........................................................................................................71
Service Mode ........................................................................................................71
Anti-Code ..............................................................................................................72
Sounds........................................................................................................................73
Follow Me ..................................................................................................................74
Adding a Follow Me Recipient ..............................................................................74
Test or Edit a Follow Me .......................................................................................75
Service Info ................................................................................................................75
EMERGENCY..............................................................................................................77
Emergency Button Position in Lock Screen/Main Menu ...........................................77
Emergency Type Selection .........................................................................................77
SPECIFICATIONS ........................................................................................................78
RED Compliance Statement: ......................................................................................78
FCC ID:JE4RP432KPT ..................................................................................................79
FCC Note ....................................................................................................................79

5
INTRODUCTION
RisControl is a high-resolution Smart Touchscreen Keypad with an intuitive,
easy to navigate user interface. RisControl combines standard keypad functionality
with the ability to operate RISCO’s cloud-based solutions and products, such as
alarm, video and Smart Home devices, from one customizable screen.
Figure 1: RisControl

6
INSTALLING THE RISCONTROL
Note: This chapter is intended for the installer.
Mounting the RisControl
1. Remove the RS 485 connector.
2. Insert the wires into the RS 485
connector and secure with
screws.
Wall Installation

7
3 Gang Flush Mounting Box Installation
3. Remove screw to separate the
bracket from the RisControl.

8
4. Push down and then outward
to remove the bracket.
5. Position the bracket on the
wall / Flush Mounting Box
and secure with 5 screws
including tamper (Wall
installation) / 3 screws
including tamper
(Flush Mounting Box
installation).
Wall Installation

9
3 Gang Flush Mounting Box Installation
6. Insert the RS 485 connector into
its location in the rear side of
the RisControl.
7. Position the 4 grooves of the
RisControl over the bracket’s 4
pins and slide downward to
secure.

10
RisControl Setup
After wiring the RS-485 bus of the Security System successfully, the powerup
procedure will begin automatically and shortly after the installer will be able to
perform the RisControl setup.
The following workflow illustrates the recommended method for setting up the
RisControl.
•Step 1: Selecting the language for the RisControl
•Step 2: Setting the Bus Address (Virtual DIP Switch)
•Step 3: Setting the Wi-Fi connection –for connecting the RisControl to the RISCO
Cloud (optional)
•Step 4: Synchronizing the RisControl with the Security Setup
Step 1: Selecting the language for the RisControl
When the "Welcome" screen is displayed, select the preferred language that will be
used in the RisControl screens.

11
Figure 2: Welcome Screen
Step 2: Setting the Bus Address (Virtual DIP Switch)
1. Set the virtual toggle switches on the screen below to indicate the BUS address
of the RisControl. For detailed instructions, refer to your receiver’s installation
manual, Setting BUS Accessories ID Numbers section.
Note: The RisControl will not communicate by BUS until prompted by the
panel following the "Scan for devices" procedure that the installer initiates
from the panel.
2. Following address setup of the RisControl, click "Next".
Note: The setup procedure will continue in parallel with the time it takes for
the RisControl to be added to the Security System (that has not yet
“discovered”the other RisControl on the bus).

12
Figure 3: Bus Address Setting
Step 3: Setting the Wi-Fi Connection (optional)
The RisControl can be connected to the RISCO Cloud via Wi-Fi.
Note: The connection to the Wi-Fi can also be performed by the end-user at a later
time.
1. From the screen that appears, select a Wi-Fi network from the list.
Note: If RISCO Cloud connection is not required, click the "Skip" button.

13
Figure 4: Selecting a Wi-Fi Network
2. Enter a password, to ensure Wi-Fi security
Figure 5: Enter Password
After the RisControl is connected to the router successfully and with the router
connected to the Internet, the RisControl will be now connected to the
RISCO Cloud.

14
Step 4: Synchronizing the RisControl with the Security Setup
Following setup of the Bus Address (Step 2) and before the setup procedure is
completed successfully, the installer must use the Configuration Software (CS) or a
regular keypad to command the Security System to scan the RS-485 bus for new
devices to allow the RisControl to connect to the Security System and begin
synchronization.
During synchronization of the RisControl and the Security System, the Security
System downloads to the RisControl all pertinent information (such as Users,
Permissions, Partitions). RisControl will display the following screen.
Figure 6: RisControl synchronizing with the Security System

15
OPERATING THE RISCONTROL
Entering RisControl
The RisControl operates most of the time in “Screen Saver” mode (see SCREEN
SAVER, page 24). When the user can clicks anywhere on the screen, the RisControl
will exit the Screen Saver mode and switch to the “Lock Screen” (page 25).
To unlock the “Lock Screen”, the user must type a valid PIN Code. Once the lock
screen is unlocked, the “Overview Screen” (page 30) will be displayed allowing the
user to access all the information within the defined permissions for that user, and
to perform all the activities that the user level allows.
Figure 7: Various RisControl Screens
RisControl Session
The “RisControl Session” is the period of time that the RisControl remains in the
unlocked mode. It starts after a user enters a valid PIN Code, and it ends
automatically following a predefined “idle” time (Session Timeout) during which
the screen has not been touched. “Session Timeout” is defined in “Settings”
(page 59).
The RisControl will automatically lock following the Session Timeout, during
which the screen has not been touched.
RisControl Main Menu
The RisControl main menu, on the left side of the screen, allows the user to
navigate the various menus, as required.
The main menu is always displayed on the screen and the user can decide to use
the expanded mode, where the text description of each menu appears next to the
menu icon, or, in its collapsed mode, where only the icons of the menus appear.

16
Figure 8: Main Menu (expanded mode)
The user can use the button, at the top left corner of the screen, to change the
menu mode of display. Here is how it looks when the display is collapsed:
Figure 9: Main Menu (collapsed mode)
RisControl Top Bar
The “RisControl Top Bar” appears at the top of numerous RisControl Screens with
slight variations from screen to screen but with common elements in many of
them.
Figure 10: Top Bar of the Opening Screen

18
Add a User” section (page 65).
Manual termination of the RisControl Session - If the End-User wishes to
manually lock his open RISCO Cloud Session (to prevent the open screen of the
RisControl from being used by an unauthorized user) the user can click the avatar
and then click “Lock Screen”.
Figure 11: Manual Locking of the RisControl Session
- Arm/Partial Arm/Disarm buttons
These buttons appear both in the “Overview” and in the “Security” Top Bar. When
clicked, they will Arm, Partial Arm or Disarm all the partitions that are associated
with the user that is currently logged in.
- Trouble and Notifications icons
These icons will appear whenever there are one or more troubles or Notifications
in the RisControl. Once displayed, they will appear in any of the menu screens.

19
Troubles Management
Click the Trouble icon in the Top Bar of the RISCO Cloud to open a list of all
the Troubles that exist in the system, as show in the example below.
Note: The Trouble icon will appear only when there are Trouble messages.
Figure 12: Troubles List
Communication troubles
The communication Troubles are applicable to the following connections:
•RisControl to RISCO Cloud
•RisControl to Security Panel
•Security Panel to RISCO Cloud

20
Figure 13: Communication Troubles Flow
Troubles related to communication failure will be listed first and pinned to the top
of the list.
Click the “See connection status” button in the Troubles List; a popup is displayed,
indicating the status of each of the connections.
Figure 14: Communication Troubles Screen
Other manuals for RisControl
3
This manual suits for next models
1
Table of contents
Other Risco Touch Panel manuals

