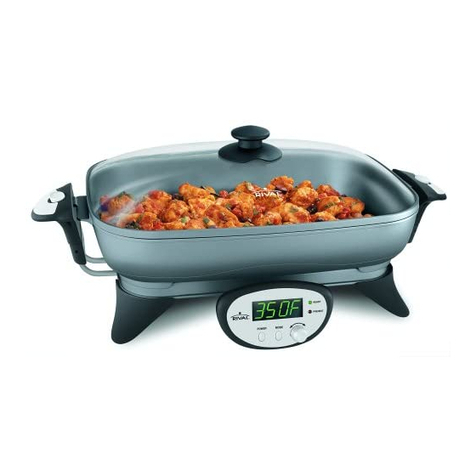
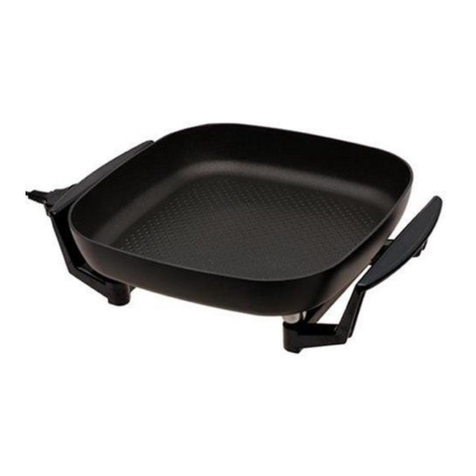
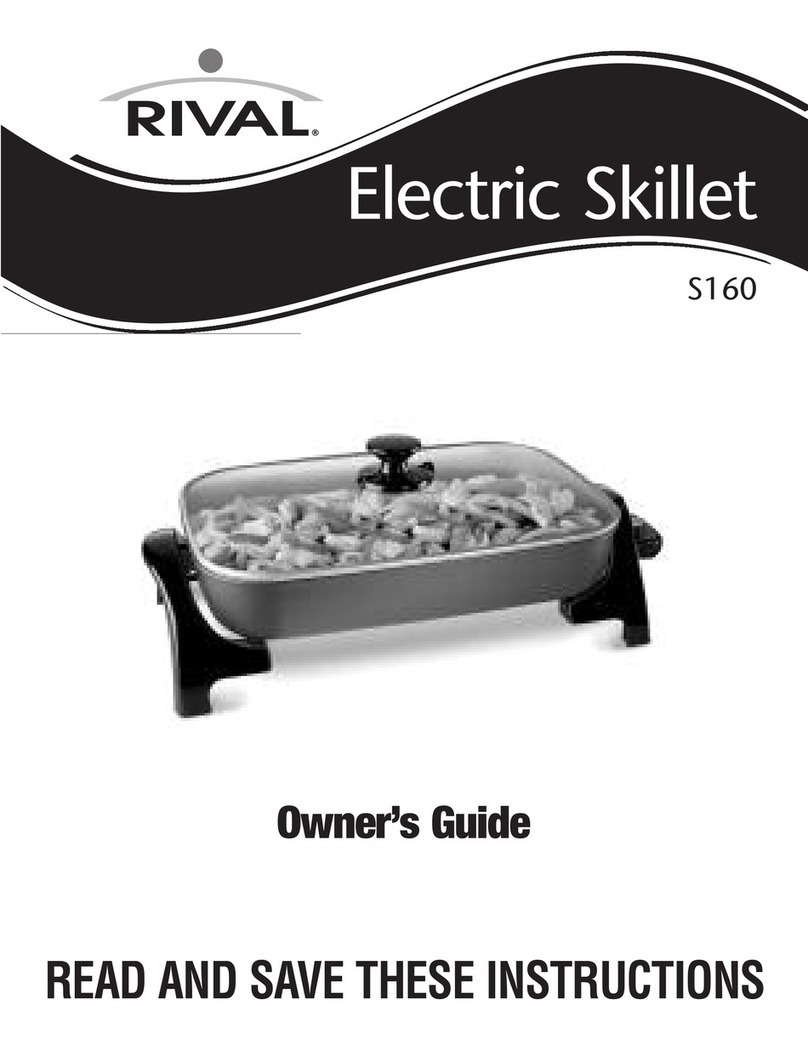
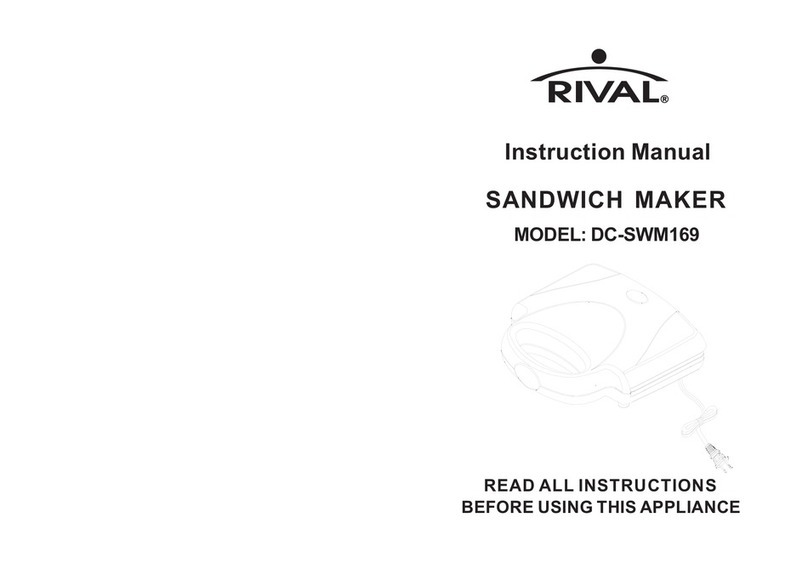
Rival ELECTRIC SKILLET S16SG-CN User manual
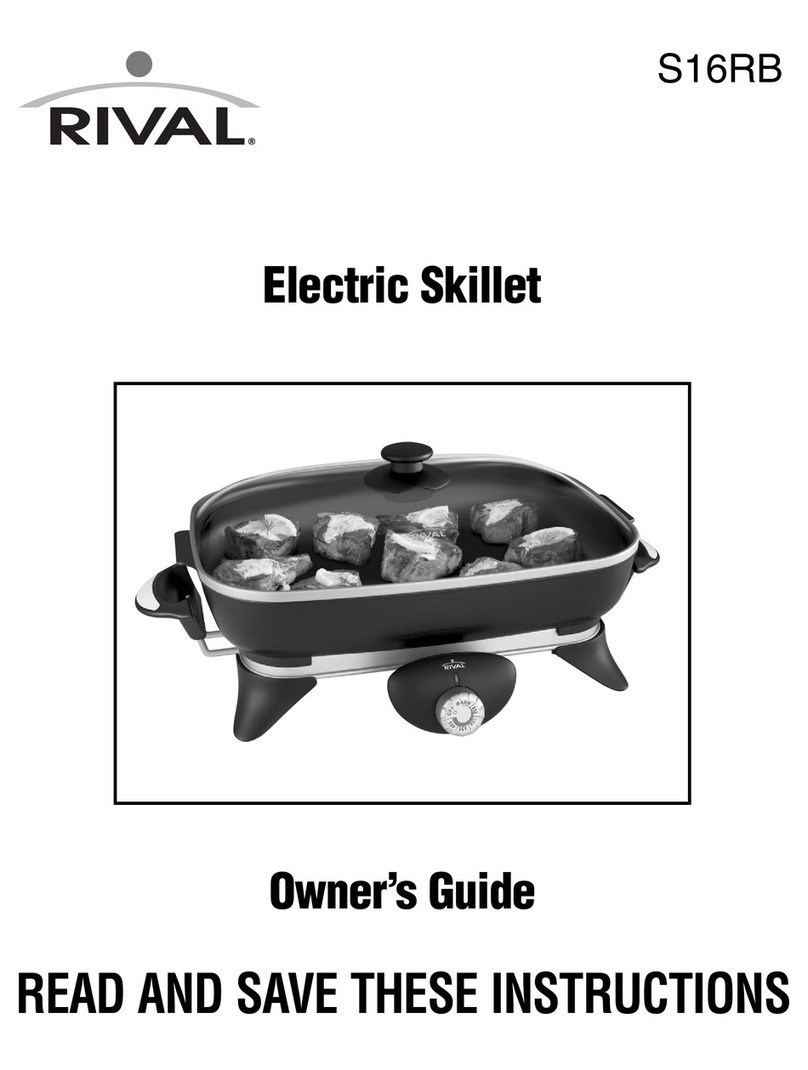
S16SG-CN
Electric Skillet
Owner’s Guide
READ AND SAVE THESE INSTRUCTIONS

-E2-
When using electrical appliances, basic safety precautions should always
be followed, including the following:
1. Read all instructions before using.
2. Do not touch hot surfaces. Use handles or knobs.
3. To protect against electrical shock, do not immerse HEATING BASE and cord
in water or other liquids.
4. Close supervision is necessary when any appliance is used near children. This
appliance is not to be used by children.
5. Unplug from outlet when not in use and before cleaning. Allow to cool
before putting on or taking off parts, and before cleaning the appliance.
6. Do not operate any appliance with a damaged cord or plug or after the
appliance malfunctions or has been damaged in any manner. Call Customer
Service (see warranty) to return for examination, repair, or adjustment.
7. The use of accessory attachments not recommended by manufacturer may
cause injuries.
8. Do not use outdoors.
9. Do not let cord hang over edge of table or counter, or touch heated surfaces.
10. Do not place the assembled appliance or SKILLET PAN on or near a hot gas or
electric burner. Do not place the assembled appliance in a heated oven.
However, the SKILLET PAN without the LID can be removed from the HEATING
BASE and placed in the oven.
11. Extreme caution must be used when moving appliance containing hot oil or
other hot liquids.
12.Do not operate the skillet unless fully assembled. Place SKILLET PAN on
HEATING BASE first, then plug cord into wall outlet.
13.Do not use appliance for other than intended use.
14.To disconnect and prior to removing SKILLET PAN from HEATING BASE,
press POWER BUTTON to shut-off skillet and remove plug from wall outlet.
15.Steam escaping from under the LID or the STEAM VENT is hot. Use caution
when removing the LID.
16.Oven mitts are required when removing a hot LID or SKILLET PAN or to
remove cooked food from the SKILLET PAN.
IMPORTANT SAFEGUARDS

-E3-
This appliance is for HOUSEHOLD USE ONLY.
No user-serviceable parts inside. Do not attempt to service this product.
A short power-supply cord is provided to reduce the hazards resulting from
entanglement or tripping over a longer cord. AN EXTENSION CORD MAY BE
USED WITH CARE; HOWEVER, THE MARKEDELECTRICAL RATING
SHOULD BE AT LEAST AS GREAT AS THE ELECTRICALRATING OF THE
SKILLET.
The extension cord should not be allowed to drape over the counter or tabletop
where it can be pulled on by children or unintentionally tripped over.
SAVE THESE INSTRUCTIONS
POLARIZED PLUG
This appliance has a polarized plug (one blade is wider
than the other). To reduce the risk of electric shock,
this plug will fit into a polarized outlet only one way.
If the plug does not fit fully into the outlet, reverse the
plug. If it still does not fit, contact a qualified electrician.
Do not attempt to modify the plug in any way. If the plug fits loosely
into the AC outlet or if the AC outlet feels warm do not use that outlet.
CAUTION: Some countertops are more sensitive to heat, use care not to place
SKILLET or SKILLET PAN on surfaces where heat may cause damage.
ELECTRIC POWER: If electric circuit is overloaded with other appliances, skillet
may not operate properly. Skillet must be operated on a separate circuit from other
operating appliances.

Before use, wash the SKILLET PAN and LID in warm soapy water or in the dish-
washer and dry completely.
CAUTION: Do not immerse HEATING BASE in water or other liquids.
1. Set the skillet on a flat, dry, heat resistant surface.
2. Make sure that the SKILLET PAN is sitting securely on the HEATING
BASE. If the SKILLET PAN is not secure on the HEATING BASE, the
product may not function properly. Make sure that the locking
handles are locked securely to the SKILLET PAN HANDLES.
3. Plug skillet into standard 120 V AC outlet. Press POWER BUTTON.
The display will show 350°F/180°C.
-E4-
HOW TO USE YOUR ELECTRIC SKILLET
KNOW YOUR ELECTRIC SKILLET
POWERMODE
READY
PREHEAT
Glass Lid
Locking Lid Handles
Steam Vent
Lid Handle
Skillet Pan
Heating Base
Skillet Pan
Handles
PPower
TTemp//
TTimer
RReady
Reheat
Temperature
Control Panel
Fahrenheit / Celsius
Hole
Control Knob

-E5-
4.To change the temperature, turn CONTROL KNOB to desired
setting. Turning the CONTROL KNOB clockwise will increase the
temperature. Turning the CONTROL KNOB counter-clockwise will
decrease the temperature. Temperature can be adjusted from
150°F/70°C - 425°F/220°C in 25° increments.
5.As the skillet heats up, the display will show the actual temperature
of the skillet as it climbs to reach the set temperature.
6.When the desired temperature has been reached, the PREHEAT
LIGHT will turn off, the READY LIGHT will turn on and the skillet will
beep three times.
NOTE: If you adjust the temperature during cooking, the PREHEAT
LIGHT will turn on. When the new temperature is reached, the
PREHEAT LIGHT will turn off and the READY LIGHT will turn on
again and the unit will beep three times.
7.Your skillet is equipped with a digital countdown timer. To switch
the display into timer mode, press the TEMP/TIMER button once. The
display will show 00:00 as the default countdown time.
8.Turn the CONTROL KNOB clockwise to select the desired time.
Turning the CONTROL KNOB counterclockwise will decrease the
time. The timer can be adjusted from zero to sixty minutes in 1
minute increments.
9.The countdown timer will start counting down 3 seconds after the
timer has been set. The timer will count down in one second
increments.
10. When the timer counts down to 00:00, the unit will beep three
times, but will continue to operate at the current temperature.
You may adjust the countdown timer during cooking in 1
minute increments. For example, if the timer reads 23:24 and
you turn the CONTROL KNOB one click clockwise, it will move
up to 24:00. It will decrease in 1 minute intervals if you turn the
knob counter-clockwise.
11. When the TIMER is used, the TIMER will be the default display. If
you wish to switch back to the temperature display, press the
TEMP/TIMER button once. To switch back to the timer display,
press the TEMP/TIMER button again.
12. To change the temperature scale from Fahrenheit and Celsius,
simply insert a pen or paper clip in the hole located on the upper
HOW TO USE YOUR ELECTRIC SKILLET (CONT.)

HELPFUL HINTS
• Before using the skillet for the first time, lightly brush cooking
surface with vegetable oil. Heat, uncovered, to 300°F/150°C. Turn
“OFF” and cool completely. Wipe away excess oil.
• Use only nylon or heat-proof plastic cooking utensils. Metal utensils
may scratch the non-stick surface.
• This skillet is not designed to deep fry. To pan-fry, do not use more
than 1 cup of oil. Select a vegetable oil or peanut oil for frying,
Butter and olive oil should only be used to sauté foods on a lower
temperature setting.
HOW TO CLEAN YOUR SKILLET
CAUTION: Skillet is hot: handle carefully.
1. When cooking is complete, press the Power button to shut off the
skillet. Unplug the cord from the outlet and allow unit to cool
before cleaning.
2. The skillet pan and lid can be washed in the dishwasher or in warm
soapy water with a soft cloth.
CAUTION: The HEATING BASE is not immersible.
3. With a damp cloth, clean the HEATING BASE and CONTROL PANEL.
-E6-
HOW TO USE YOUR ELECTRIC SKILLET (CONT.)
left of the control panel and press the button once. To change back
to Fahrenheit, press the button once.
13. The steam vent allows steam to escape while cooking with the LID
in place.
CAUTION: Escaping steam is HOT! Be careful when removing or
lifting LID. Oven mitts are required when handling the LID and
SKILLET PAN.
14. The SKILLET PAN can be removed from
the HEATING BASE and placed in the oven
for baking or roasting. The LID must be
removed when using the SKILLET PAN in
the oven.
15. The SKILLET PAN can be used as a serving
piece. When placing the SKILLET PAN on a countertop, kitchen
table or other surface, place a hot plate or trivet that measures at
least 3/8" high under the pan to prevent burning or discoloration
of the surface.
S16RV skillet 12/04

-E7-
TEMPERATURE GUIDE
BURGERS 1⁄4lb patties. 5 to 9 minutes/per side (med.) 350°F - 400°F(180°C- 200°C)
STEAK 1" thi k, boneless 9 to 12 minutes/per side 350°F - 400°F(180°C- 200°C)
CHICKEN boneless breasts 6 to 7 minutes/per side 350°F - 400°F(180°C- 200°C)
FRENCH TOAST 3 to 5 minutes/per side 350°F - 400°F(180°C- 200°C)
PANCAKES 1 to 3 minutes/per side 350°F - 400°F(180°C- 200°C)
EGGS
Fried 2 to 3 minutes/first side 300°F/150°C
1 to 2 minutes/se ond side
Melt 1 to 2 tsp. butter or
margarine in skillet
Poa hed 1 to 6 eggs 2 to 3 minutes 250°F/120°C or
300°F/150°C
Pour 2 ups water and 1 tsp.
ider vinegar in skillet. Heat to
boiling. Break ea h egg
into a bowl; slip into water.
Cover and ook 2 to 3 minutes.
S rambled 3 to 4 minutes 300°F/150°C
Melt 1 to 2 tbs.
butter or margarine in skillet.
Add eggs, ook, stir gently,
until set and ooked.
BACON 5 minutes/first side 350°F - 400°F(180°C- 200°C)
1 to 3 minutes/se ond side
SAUSAGE LINKS 8 to 10 minutes 350°F - 400°F(180°C- 200°C)
SAUSAGE 6 minutes/first side 350°F - 400°F(180°C- 200°C)
PATTIES 5 to 6 minutes/se ond side
FOOD AMOUNT TIME/DIRECTIONS SKILLET TEMP.

-E8-
RECOMMENDED INTERNAL TEMPERATURE FOR MEAT
STEAK 145°F / 60 °C (medium rare)
160°F / 70 °C (medium)
170°F / 80 °C ( well done)
BURGERS(Ground Bee ) 160°F / 70 °C
CHICKEN BREAST 170°F / 80 °C
PORK CHOPS 160°F / 70 °C (medium)
170°F / 80 °C (well down)
HAM 160°F / 70 °C
FOOD MININUM INTERNAL TEMPERATURE
NOTE: Use this guide along with an "instant-read" meat thermometer to check
internal food temperature. The thermometer should penetrate the thickest part of
the food.
NOTE: The cooking temperatures and times listed in this user manual are esti-
mates. Adjust the cooking temperature and time slightly up or down to achieve
the results you prefer.

-E9-
RECIPES
APPLE NUT PANCAKES
2 tablespoons butter or margarine Dash nutmeg
1⁄2cup plus 2 tablespoons all-purpose flour 2⁄3cup milk
11⁄2teaspoons sugar 1 egg
2 teaspoons baking powder 1⁄2cup peeled and finely chopped apple
1⁄2teaspoon vanilla 2 tablespoons chopped pecans or walnuts
1⁄4teaspoon cinnamon egetable oil
Melt butter. Set aside to cool slightly. Combine flour, sugar, baking powder, salt and
spices in a small bowl. Combine melted butter and milk in mixing bowl. Add egg
and beat lightly to combine. Blend in flour mixture, stirring just until combined.
Fold in apple and nuts. Preheat skillet to 350°F/180°C. Brush lightly with oil. Pour
about 1⁄4cup batter for each pancake. Cook until bubbles come to the surface and
the bottom is golden brown, about 2 minutes. Serve 3 warm with maple syrup for
breakfast or brunch or top with ice cream, additional nuts and caramel syrup for
dessert.
CLASSIC FRENCH TOAST
1 egg, slightly beaten 1 tablespoon butter or margarine
1⁄3cup milk 2 slices French bread, sliced 1-inch thick
1⁄4teaspoon vanilla extract Confectioner’s sugar
Dash nutmeg or cinnamon Maple syrup
1⁄2teaspoon vanilla
Combine egg, milk, spice and sugar in shallow pan. Preheat skillet to 350°F/180°C
. Add butter to skillet. Dip both sides of bread quickly into egg mixture then place
in skillet. Cook 2 to 3 minutes per side or until bread is golden brown. Dust each
piece lightly with confectioner’s sugar and serve with maple syrup.

-E10-
DENVER OMELET
1⁄2cup diced, cooked ham 3 eggs
1⁄4cup chopped green bell pepper 2 tablespoons water
1⁄4cup sliced fresh mushrooms 1⁄8teaspoon salt
1 green onion, sliced Dash cayenne pepper
1 tablespoon butter or margarine 1⁄3cup (1-ounce) cheddar cheese, shredded
Set skillet temperature to 300°F/150°C. Add ham, green bell pepper, mushrooms,
onions and butter. Sauté 2 minutes, stirring frequently. Arrange vegetables in an
even layer. Lightly beat eggs with water, salt and cayenne pepper; pour egg mixture
over ham and vegetables. Cover and cook 4 minutes or until eggs are set. Sprinkle
with cheese, cover and cook additional 2 minutes. To serve, slice omelet in half then
gently fold each part in half. Lift omelets from skillet with a wide spatula.
HAM AND EGG FAVORITE
1 tablespoon butter or margarine 2 eggs
1⁄4cup chopped onion 1⁄2cup chopped cooked ham
2 tablespoons all-purpose flour 1⁄2cup chopped fresh spinach
1⁄4cup milk 3⁄4cup (3-ounces) Swiss cheese, shredded
Set skillet temperature to 300°F/150°C. Add butter and melt. Add onions and sauté
until onions are tender, about 2 minutes, remove onion from skillet and set aside.
Combine flour, milk and eggs; beat lightly to blend. Pour egg mixture into pan.
Cover and cook 2 minutes. Arrange ham, spinach and cooked onions evenly over
eggs. Sprinkle cheese evenly over top. Cover and cook additional 2 minutes. Gently
cut into four pie-shaped wedges. Lift each wedge onto serving plate.
CHEESE AND BACON POTATOES
6 slices bacon 1⁄4cup onion, finely chopped
4 large potatoes, thinly sliced with skins on 11⁄2cup (6-ounces) cheddar cheese, shredded
1 can (4-ounces) chopped green chilies
Place bacon in cold skillet. Set skillet temperature to 350°F/180°C. Fry bacon until crisp,
remove and drain. Carefully remove grease, reserving 2 tablespoons bacon grease in
skillet. Add potatoes to skillet; cover and cook 10 minutes. Turn potatoes and cook an
additional 5 minutes. Crumble bacon and combine with green chilies and onion. Sprinkle
over potatoes. Top with cheese; cover and cook 5 more minutes.
RECIPES
RECIPES

-E11 -
PASTA WITH PEPPERS AND CHICKEN
1 clove garlic, minced Pinch ground red pepper
1 tablespoon olive oil Salt and ground black pepper to taste
1 whole boneless, skinless chicken breast, 11⁄2teaspoons cornstarch
cut into 1⁄2-inch x 2-inch strips 3⁄4cup chicken broth
1 cup sliced red, green or yellow bell pepper 4-ounces linguine or fettuccine, cooked
(or combination) and drained
1⁄2teaspoon basil
Set skillet temperature to 350°F/180°C. Add garlic and oil and sauté 2 minutes. Add
chicken; cook and stir for 5 minutes. Stir in bell peppers and allow to cook addi-
tional 2 minutes or until vegetables are crisp tender and chicken is done. Reduce
temperature to 250°F. Blend seasonings and cornstarch into chicken broth, stirring
until well blended. Pour broth mixture into skillet. Heat, stirring gently, 1 minute or
until mixture is hot and thickened. Serve over pasta. Makes 2 servings.
EASY BEEF FA ITAS
Juice of 2 limes 1⁄2green or red bell pepper, thinly sliced
2 tablespoons olive oil 4 flour tortillas
1⁄2teaspoons ground cumin 1⁄2cup (2-ounces) monterey jack
1⁄4teaspoon salt or cheddar cheese, shredded
1 clove garlic, minced guacamole, optional
1⁄8teaspoon red pepper flakes Salsa, optional
Freshly ground black pepper, to taste Sour cream, optional
3⁄4-lb. top round steak, thinly sliced Chopped tomatoes, optional
1 small onion, thinly sliced
Combine lime juice, 1 tablespoon olive oil, cumin, salt, garlic, red pepper and black
pepper in bowl. Add beef and allow to stand, at room temperature, for 30 minutes.
Set skillet temperature to 350°F/180°C. Add remaining 1 tablespoon olive oil, onion
and pepper and stir gently. Cover and cook 1 to 2 minutes or until vegetables are
tender. Remove vegetables and keep warm. Drain meat, discard marinade and place
meat in skillet, Sauté meat 7 to 9 minutes or until done. Meanwhile, wrap tortillas
in aluminum foil and heat in oven for 5 minutes. To assemble, spoon about 1⁄4of
meat and vegetables into center of each warmed tortilla. Sprinkle with 2 tablespoons
cheese. Roll tortilla and place on serving plate. Garnish, as desired, with guacamole, salsa,
sour cream and/or chopped tomatoes.
RECIPES

-E12-
SHRIMP AND VEGETABLE STIR-FRY
3⁄4-lb. raw, shrimp, shelled and deveined 2 stalks celery, sliced
2 tablespoons light soy sauce 1 small sweet red bell pepper, in thin strips
2 tablespoons dry sherry 1 cup broccoli flowerettes
2 teaspoons cornstarch 1⁄2medium onion, thinly sliced
1 teaspoon grated gingerroot 5 large fresh mushrooms, sliced
1 tablespoon vegetable oil 1⁄2package (3-ounces) frozen snow peas, thawed
Place cleaned shrimp in bowl. Combine soy sauce, sherry, cornstarch, and ginger-
root; pour over shrimp. Preheat skillet to 400°F/200°C. Add oil to skillet. Stir-fry
celery, red bell pepper, broccoli and onions for 2 minutes. Add shrimp with mari-
nade and stir-fry additional 2 minutes or until shrimp turn pink. Add mushrooms
and snow peas. Stir-fry until heated through.
PORK CHOPS WITH SPANISH RICE
2 to 4 center cut pork chops, about 1⁄2-inch thick 1⁄3cup raw long grain rice
1⁄3cup chopped onion 1⁄2teaspoon chili powder
1⁄4cup chopped green bell pepper 1 can (141⁄2-ounces) whole tomatoes
Set skillet temperature to 350°F/180°C. Add chops and cook on first side 5 minutes.
Turn chops; add onion and green bell pepper. Cook, stirring vegetables occasion-
ally, 2 minutes. Reduce temperature to 175°F/80°F. Add rice, chili powder and
tomatoes and stir to blend into vegetables. Cover and cook 25 to 30 minutes, stir-
ring occasionally.
RECIPES

-E13 -
FISH FILLETS WITH LEMON DILL SAUCE
1/4-lb. fresh mushrooms, sliced 1 tablespoon lemon juice
2 green onions, sliced 1/3teaspoon dill weed
2 tablespoons butter or margarine 1/4teaspoon salt
11/2teaspoons all-purpose flour Dash ground black pepper
1/4cup milk 1 to 2 orange roughy or other firm fish fillets,
2 tablespoons water (about 8-ounces each)
1 tablespoon white wine 1/4cup cream, optional
Set skillet temperature to 300°F/150°C . Add mushrooms, onions and butter. Sauté,
stirring frequently, 2 minutes. Add flour; cook, stirring constantly, 1 minutes.
Combine milk and water.
Reduce temperature to 175°F/80°F. Add milk mixture to skillet and cook, stirring
constantly, 1 minute. Blend in wine, lemon juice and seasonings. Arrange fish fillets
in sauce, spooning sauce over fish. Cover and cook 8 to 10 minutes or until fish
flakes easily with a fork. Lift fish from sauce with a wide spatula.
If not using cream, spoon sauce over fish and serve. If desired, remove fish from
serving platter and keep warm. Blend cream into sauce in skillet. Heat uncovered 1
to 2 minutes. Spoon sauce over fish.
CHICKEN CACCIATORE
2 tablespoons vegetable oil 1⁄3cup chopped green bell pepper
3 to 4 pieces chicken (thighs, legs, of halved breasts) 1 can (4-ounces) sliced mushrooms, drained
1⁄3cup chopped onion 1 bay leaf
1 clove garlic, minced 1 teaspoon Italian seasoning
1 can (141⁄2-ounces) peeled, diced tomatoes Salt and ground black pepper to taste
Hot cooked spaghetti or other pasta
Set skillet temperature to 350°F/180°C. Add oil. Arrange chicken pieces, skin side-
down in skillet. Cook chicken until well browned on first side, about 5 minutes. Turn
chicken. Add onion and garlic around chicken. Cook 3 minutes, or until onion is
cooked, but not brown. Reduce temperature to 175°F/80°F. Add remaining ingre-
dients, except spaghetti. Cover and cook 30 to 40 minutes, or until chicken is
cooked. Stir sauce and spoon over chicken occasionally. Serve chicken and sauce
over spaghetti or other pasta.
RECIPES

-E14-
STIR-FRY BEEF AND BROCCOLI
1⁄2to 3⁄4-lb. top round or sirloin 1⁄4teaspoon sugar
1 clove garlic, minced salt to taste
Dash ground ginger 2 tablespoons sesame or peanut oil
2 tablespoons soy sauce, divided 3⁄4cup broccoli flowerettes
2 tablespoons dry sherry, divided 1 to 2 medium carrots, bias sliced
1⁄2cup beef broth 1⁄2onion, sliced in thin wedges
11⁄2teaspoons cornstarch Hot cooked rice
Slice beef into very thin slices and place in glass bowl. (Partially freeze beef for 30
to 60 minutes to make beef easier to slice.) Add garlic, ginger, 1 tablespoon soy
sauce and 1 tablespoon sherry. Toss to coat. Allow beef to stand, at room temper-
ature for 30 minutes.
Combine remaining soy sauce and sherry with broth, cornstarch, sugar and salt; set
aside. Set skillet temperature to 350°F/180°F. Add oil and heat 1 minutes. Drain
meat, discarding marinade and add meat to skillet. Stir fry 7 to 9 minutes or until
beef is done. Remove meat and keep warm. Add vegetables. Cover and cook 3
minutes or until vegetables are crisp tender. Stir mid-way through cooking. Reduce
temperature to 250°F/120°F. Blend meat into vegetables. Stir broth mixture then
pour over meat and vegetables. Heat, stirring, until broth is hot and thickened.
Serve over rice.
STEAK AU POIVRE
2 teaspoons black peppercorns or mixture 1 tablespoon butter or margarine
of black, green and pink peppercorns 1 green onion, sliced
1⁄2to 3⁄4-lb. boneless steak, (1 strip or sirloin steak) 3 tablespoons bourbon or beef broth
3 tablespoons water
Place peppercorns in plastic bag. Crack peppercorns with rolling pin or mallet. Press
cracked peppercorns evenly over both sides of steak. Set aside. Set skillet tempera-
ture to 300°F/150°F. Add steak and cook, 7 minutes per side for medium-rare, or
until desired doneness. Remove steak from skillet and keep warm.
Add butter and green onion. Saute, stirring for 1 minute. Combine bourbon/beef
broth and water; pour over green onions. Allow to cook, stirring constantly, about
2 minutes or until sauce has thickened slightly. Cut steak into serving portions.
Return steak to skillet and spoon sauce over meat. Heat 1 minute. Serve steaks with
sauce spooned over meat.
RECIPES

-E15-
NOTES

S16SG-CN/9100120000041
Printed in China S16SGCN05EFM1
1. Do NOT attempt to repair or adjust any electrical or mechanical functions on this unit. Doing so will void the Warranty.
2. If you need to exchange the unit, please return it in its original carton, with a sales receipt, to the store where you purchased it. If you are
returning the unit more than 30 days after the date of purchase, please see the enclosed Warranty.
3. If you have any questions or comments regarding this unit’s operation or believe any repair is necessary, please write to our Consumer
Service Department or visit our website at www.rivalproducts.com
RIVA
c/o THE HO MES GROUP, INC.
CONSUMER SERVICE DEPARTMENT
13052 JURUPA AVENUE
FONTANA, CA 92337
ONE (1) YEAR LIMITED WARRANTY
SAVE THIS WARRANTY INFORMATION
A. This Warranty applies only to the original purchaser of this product.
B. This Warranty applies ON Y to repair or replacement of any supplied or manufactured parts of this product that, upon inspec-
tion by The Holmes Group, Inc. authorized personnel, is shown to have failed in normal use due to defects in material or work-
manship. The Holmes Group will determine whether to repair or replace the unit. This Warranty does not apply to installation
expenses.
C. Operating this unit under conditions other than those recommended or at voltages other than the voltage indicated on the unit,
or attempting to service or modify the unit, will render this WARRANTY VOID.
D. Unless otherwise proscribed by law, The Holmes Group shall not be liable for any personal injury, property or any incidental or
consequential damage of any kind resulting from malfunctions, defects, misuse, improper installation or alteration of this
product.
E. All parts of this product are guaranteed for a period of 1 year as follows:
1. Within the first 30 days from date of purchase, the store from which you purchased your product should replace this
product if it is defective in material or workmanship (provided the store has in-stock replacement.) * If you intend to assert
any claim in connection with the product, please follow the instructions in paragraph F.
2. Within the first twelve months from date of purchase, The Holmes Group will repair or replace the product if it is defective
in material or workmanship, subject to the conditions in paragraph G.
F. If you have any other problem or claim in connection with this product, please write to our Consumer Service Department.
G. IMPORTANT RETURN INSTRUCTIONS. Your Warranty depends on your following these instructions if you are returning the unit
to The Holmes Group, Inc.:
1. Carefully pack the item in its original carton or other suitable box to avoid damage in shipping.
2. Before packing your unit for return, be sure to enclose:
a) Your name, full address with zip code and telephone number,
b) A dated sales receipt or PROOF OF PURCHASE,
c) A check for return prepaid shipping and handling, and
d) The model number of the unit and the problem you are having. (Enclose in an envelope and tape directly to the unit before the
box is sealed.)
3. The Holmes Group recommends you ship the package U.P.S ground service for tracking purposes.
4. All shipping charges must be prepaid by you.
5. Mark the outside of your package:
RIVA
c/o THE HO MES GROUP, INC.
13052 JURUPA AVENUE
FONTANA, CA 92337
This Warranty gives you specific legal rights, and you may have other rights which vary from state to state. The provisions of this
Warranty are in addition to, and not a modification of, or subtraction from, the statutory warranties and other rights and remedies
contained in any applicable legislation. To the extent that any provision of this Warranty is inconsistent with any applicable law, such
provision shall be deemed voided or amended, as necessary, to comply with such law.
SERVICE INSTRUCTIONS

S16SG-CN
Po le à frire électrique
Notice D’emploi
ISEZ ET GARDEZ CES INSTRUCTIONS

-F2-
L’emploi de tout appareil électroménager exige l’observation de certaines
précautions fondamentales, y compris des suivantes:
1. Lisez attentivement toutes les directives avant l’utilisation.
2. Ne touchez pas aux surfaces chaudes. Utilisez les poignées et les boutons.
3. Pour vous protéger des chocs électriques, n’immergez jamais la BASE CHAUF-
FANTE et le cordon dans l’eau ou dans tout autre liquide.
4. Redoublez de vigilance si l’appareil fonctionne à proximité d’enfants. Cet
appareil ne devrait pas être employé par des enfants.
5. Débranchez la poêle entre utilisations et avant son nettoyage. Laissez-la refroidir
avant de monter ou de démonter toute pièce et avant de la nettoyer.
6. Ne vous servez pas d’un appareil dont le cordon ou la fiche est abîmé, qui a mal
fonctionné ou a été endommagé de quelque façon. Entrez en rapport avec le
service à la clientèle (voyez la garantie) pour le renvoyer afin de lui faire subir les
vérifications, mises au point ou réparations nécessaires.
7. L’utilisation d’accessoires n’étant pas formellement conseillés par le fabricant
peut entraîner des blessures.
8. Ne vous servez pas de cet appareil à l’air libre.
9. Veillez à ce que le cordon ne pende pas et ne touche pas à une surface chaude.
10. Ne placez l’appareil assemblé ou le PLAT AMOVIBLE
ni sur ni près d’un foyer à
gaz ou électrique chaud
. Ne placez pas l’appareil assemblé
dans un four chaud
.
Le PLAT peut toutefois être séparé de la BASE CHAUFFANTE et enfourné, à condi-
tion d’enlever son COUVERCLE.
11. Agissez prudemment lorsque vous déplacez un appareil contenant de l’huile ou
tout autre liquide chaud.
12.N’utilisez la poêle que lorsqu’elle est entièrement assemblée. Posez le PLAT sur
la BASE CHAUFFANTE avant de brancher le cordon sur la prise de courant.
13.N’employez cet appareil qu’aux fins auxquelles il est destiné.
14.Avant de débrancher la poêle et de séparer le PLAT de la BASE CHAUFFANTE,
appuyez sur le BOUTON DE SOUS TENSION pour éteindre la poêle puis tirez
la fiche hors de la prise de courant.
15.La vapeur qui s’échappe de dessous le COUVERCLE ou de l’ÉVENT À VAPEUR
étant très chaude, retirez prudemment le COUVERCLE.
16.Portez toujours des gants de cuisinier pour enlever le COUVERCLE chaud ou le
PLAT CHAUD ainsi que pour retirer les aliments cuits du PLAT.
CONSIGNES IMPORTANTES

-F3-
Cet appareil n’est destiné qu’à l’EMPLOI DOMESTIQUE.
Ne contient pas de pièces que puisse réparer l’utilisateur. N’essayez en aucune circon-
stance de réparer cet appareil.
Cet appareil est pourvu d’un cordon électrique court qui ne devrait ni s’emmêler ni
faire trébucher, comme pourrait le faire un cordon plus long. L’UTILISATION D’UN
CORDON PROLONGATEUR EST PERMISE À CONDITION QUE SA TENSION ASSIGNÉE
SOIT AU MOINS ÉGALE À CELLE DE LA POÊLE.
Cette rallonge ne doit pas pendre du plan de travail ou du plateau de table, pour éviter
que les enfants ne puissent la tirer ou qu’elle risque de faire trébucher.
GARDEZ CES INSTRUCTIONS
FICHE POLARISÉE
Cet appareil est équipé d’une fiche polarisée (ayant une
broche plus large que l’autre). Pour réduire le risque de
choc électrique, elle ne peut être insérée dans les prises
de courant polarisées que d’une façon. Si la fiche ne rentre
pas bien dans la prise, inversez-la. Si vous ne réussissez
toujours pas, faites changer la prise par un électricien qualifié
.
Ne tentez pas de la modifier. Si la fiche rentre dans la prise mais qu’il y a
du jeu ou bien si la prise de courant alternatif vous semble chaude, utilisez une
autre prise de courant
.
ATTENTION: Certains plans de travail sont plus sensibles à la chaleur que d’autres.
Veillez à toujours poser la POÊLE ou son PLAT sur une surface que la chaleur ne
risque pas d’abîmer.
COURANT ÉLECTRIQUE: Si d’autres électroménagers sont branchés sur le même
circuit, la poêle risque de ne pas fonctionner convenablement. Il est essentiel que la
poêle soit branchée sur un circuit distinct.

MODE D’EMPLOI DE LA POÊLE ÉLECTRIQUE
FAMILIARISEZ-VOUS AVEC LA POÊLE À FRIRE ÉLECTRIQUE
POWERMODE
READY
PREHEAT
S16SG skillet 1/05
Couvercle
de verre
Poignées de blocage
du plat amovible
Évent à vapeur
Poignée du couvercle
Plat amovible
Base chauf-
fante
Oreilles
du plat
S16-SG controls 5/05
Mise sous et
hors tension
TTempérature//
minuterie
Po le pr te
Préchauffage
Tableau de la
commande de
température
Trou
Fahrenheit / Celsius
Bouton de
commande
Avant la toute première utilisation, lavez le PLAT et le COUVERCLE de la poêle à
l’eau savonneuse chaude ou au lave-vaisselle; asséchez-les totalement.
ATTENTION: Ne plongez la BASE CHAUFFANTE dans aucun liquide.
1. Posez la poêle sur une surface plane, sèche et insensible à la chaleur.
2. Assurez-vous que le PLAT repose solidement sur la BASE CHAUFFANTE, sans
quoi la poêle risque de ne pas fonctionner convenablement. Assurez-vous que
les poignées de blocage immobilisent sûrement les OREILLES DU PLAT.
3. Branchez la poêle sur courant alternatif de 120 volts. Appuyez sur le BOUTON
DE MISE SOUS TENSION: l’afficheur indiquera 350 °F (180 °C).
-F4-
Other manuals for ELECTRIC SKILLET S16SG-CN
1
Table of contents
Languages:
Other Rival Kitchen Appliance manuals

Rival
Rival RV-932 User manual

Rival
Rival S12 G User manual

Rival
Rival P2008 User manual

Rival
Rival 1101E User manual

Rival
Rival 1060-C User manual

Rival
Rival S16G User manual

Rival
Rival S11P User manual

Rival
Rival Mini Donut Maker User manual

Rival
Rival CFF4 User manual

Rival
Rival Whoopie Pie Maker User manual

Rival
Rival ELECTRIC SKILLET S16SG-CN User manual

Rival
Rival S12P User manual
Rival
Rival Snow Cone Maker User manual

Rival
Rival IS450 User manual

Rival
Rival Crock Pot User manual

Rival
Rival FRRVMN01 User manual

Rival
Rival RV-954 User manual
Rival
Rival Mini Cupcake maker User manual

Rival
Rival 11570 User manual
Rival
Rival DC-SWM169 User manual