RoadRunner D4+ 4.0 User manual

1
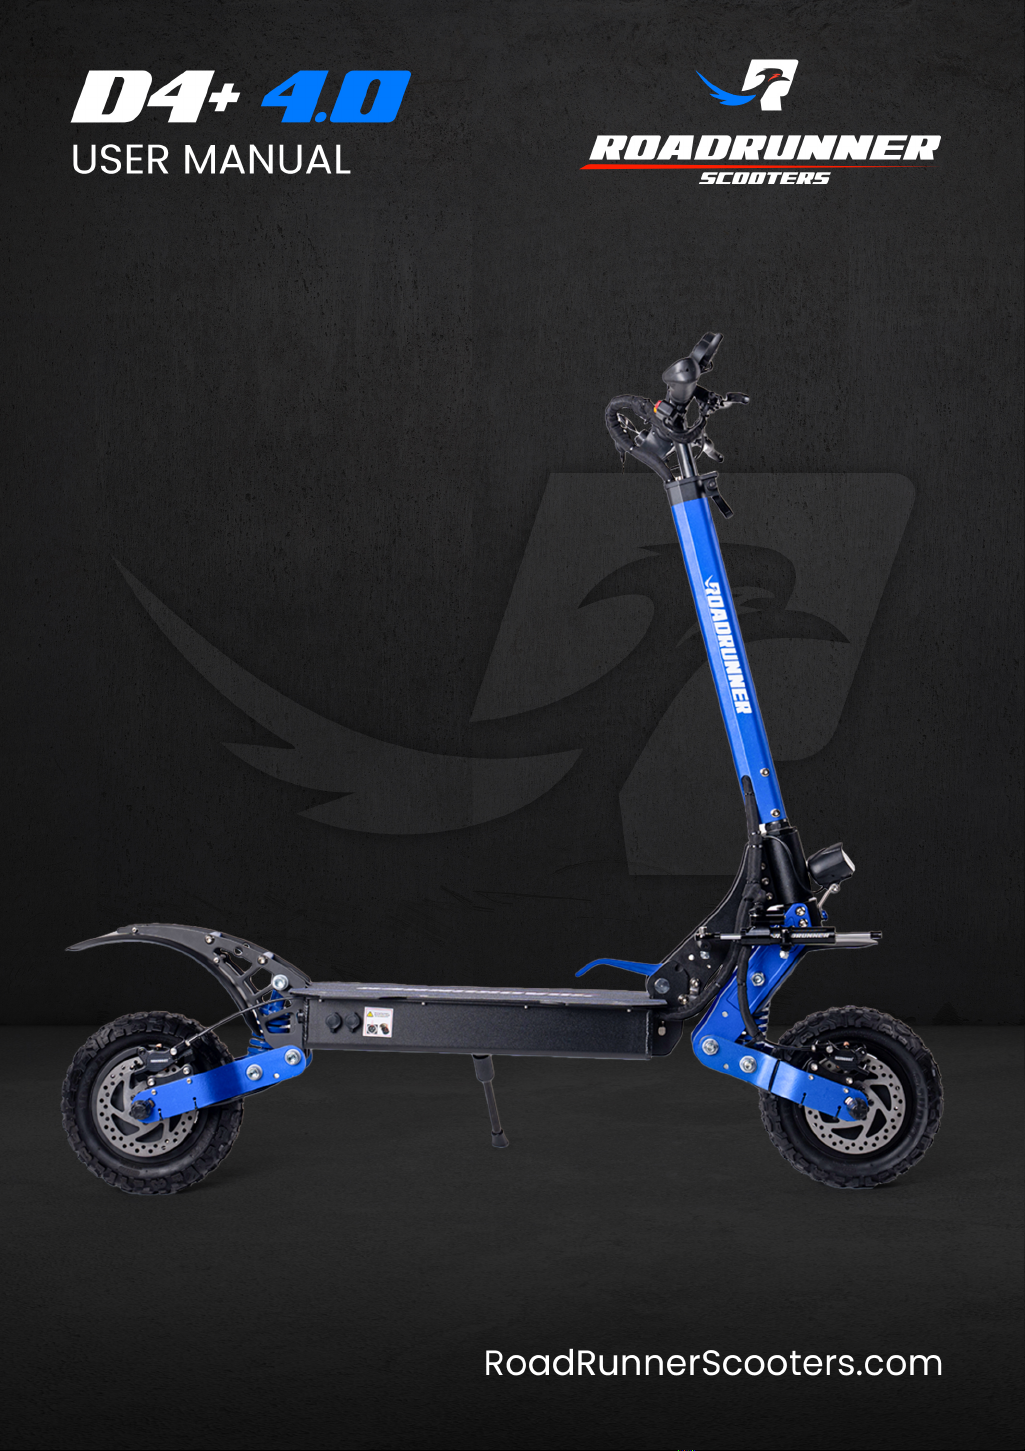
RoadRunner D4+ 4.0 Electric Scooter
For instructional videos on how to: get your scooter ready to ride, maintain your
scooter, and repair your scooter, scan this QR code with your camera phone and
browse dozens of videos.

2
Table of Contents
Scooter and Accessories
D4+ 4.0 Electric Scooter
Accessories
Scooter Specs
Charging the Scooter
Battery and Charger Information
Handlebar Controls and Instruments
Parameter Settings (P-Settings)
Operating instructions
Safety Instructions
Maintenance
Adjusting the Stem Height
Troubleshooting common errors
Folding the Scooter
Unfolding the Scooter
Installing Steering Damper
How to Carry Your Scooter
Warranty Policy
3
3
3
4
5
6
7
9
10
11
12
12
13
14
15
16
22
22
3
Scooter and Accessories
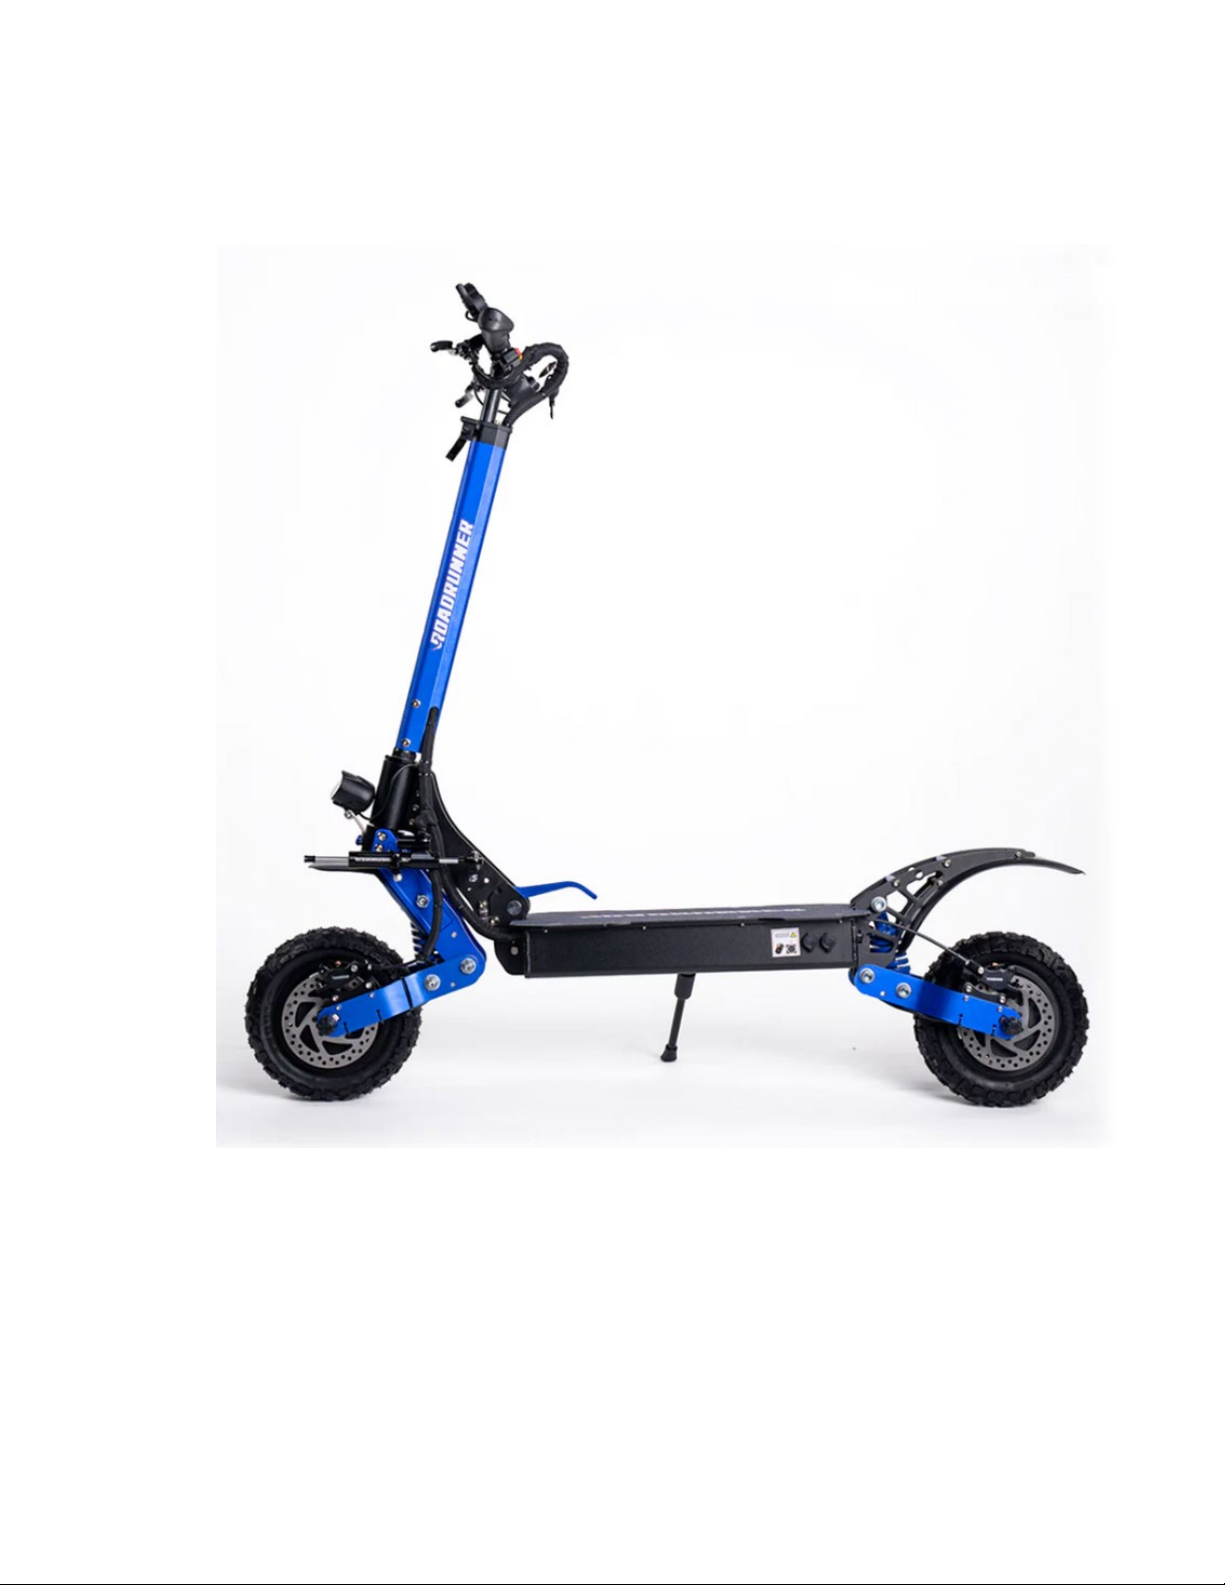
D4+ 4.0 Electric Scooter
Accessories Included:
1. Owner’s Manual
2. Steering Damper
3. Charger
4. Multi-tool

4
Scooter Specs
Product name
RoadRunner D4+ 4.0 Electric Scooter
Product model
D4+ 4.0
Folded Dimensions
49" (l) x 9" (w) x 21" (h)
Unfolded Dimensions
49" (l) x 9" (w) x 50" (h)
Net weight
70 lbs
Max load
330 lbs
Max speed
40 MPH (depending on environment, incline, weight
and driving habits)
Range:
40 miles (depending on environment, incline, weight
and driving habits)
Max climb
28° incline
Suspension
C-Type with Front & Rear Spring Shock
Absorbers
Tire
10" Pneumatic Hybrid Air Tires
IP Rating
IP53
Brake system
Front and Rear EBS Hydraulic Disc Brake
System
Light system
LED Headlight; LED Taillight and LED Brake light
Lithium battery
52V 23.4Ah Lithium-Ion
Charging time
2A battery charger 9-10 hours, (2) 2A chargers 4-5
hours

5
Charging the Scooter
1. Plug the charger into a power supply (wall outlet, power strip, etc.)
2. Open the waterproof cover on the charging port, then plug the charger into
the charging port.
3. A red light means the scooter is charging; green means it is fully charged.
4. Cover the charging port once the charger is removed.
Note: If the scooter is known to not be fully charged when plugging charger in,
and the light turns green, the charger is likely faulty.
Please contact service at suppot@roadrunnerscooters.com

6
Battery and Charger Information
Every RoadRunner D4+ 4.0 Scooter is equipped with a dedicated lithium-ion
battery and a dedicated smart charger. Please do not use any other charger
or battery with your scooter, and do not use your dedicated charger with any
other product. We are not responsible for any damage incurred due to misuse
of your charger.
1. Battery: The lithium-ion battery provided by RoadRunner Scooters can be
charged up to 600 times with no change in capacity.
•Over 600 uses, the battery’s capacity will drop to 80%.
•Over 1000 uses, the battery may need replacing if it doesn’t hold a full
charge.
Maximum Voltage for full battery charge: 58.8 V
Minimum Voltage before battery dies: 42.0 V
WARNING: NEVER LEAVE THE SCOOTER UNATTENDED WHILE
BATTERY IS CHARGING!
2. Charger: The smart charger included with your D4+ 4.0 scooter
automatically stops charging and the light turns green when your scooter
reaches 100%, which means it is fully charged. The battery should be fully
charged in 9-10 hours with a single charger (4-5 hours with 2 chargers). If
your battery will not charge, please contact RoadRunner Scooters for help.
If your battery is damaged due to water, storing in extreme temperatures,
or human mishandling, it is not covered under the new scooter or extended
warranty.
7
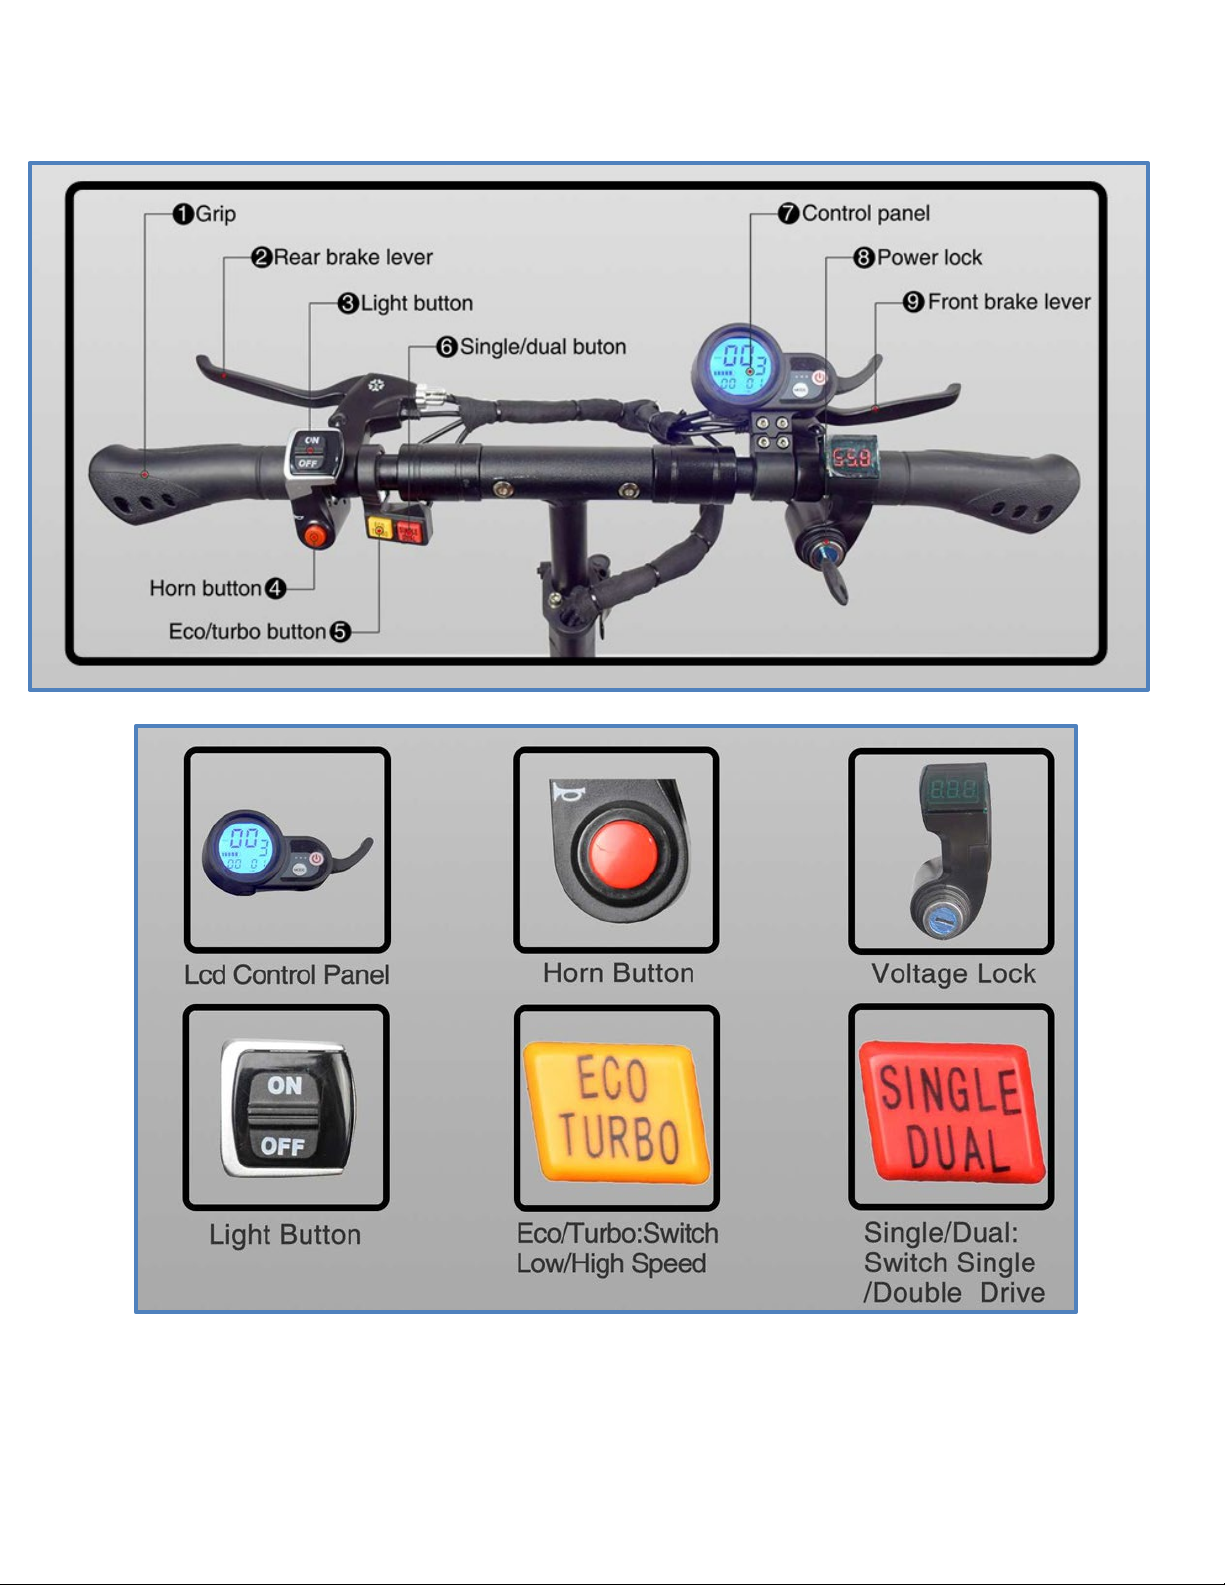
Handlebar Controls and Instruments

8
LCD Display
Power: power button (hold down for 3 seconds)
Gear: current gear speed: Gear 1 (low), Gear 2 (medium), Gear 3 (fastest)
To switch to different modes, hit the mode button to get to Gear 2, hit the mode
button again to get to Gear 3, and once more to return to Gear 1.
Speed: Current Speed
Battery Voltage: Current Battery level
Riding Time: Remaining Riding time left on battery.
Mode: Switches to each Parameter Setting (P-setting).
Accelerator: Powers the scooter acceleration.

9
Parameter Settings (P-Settings)
To make changes to any P-settings, press the power and mode buttons
simultaneously until the P-settings appear. Once the selected settings appear,
quickly press the power button once to proceed to the next P-setting. Press the
power button to exit the current P-settings or to advance to the next P-setting. P-
settings will automatically exit if there is no activity for 8 seconds.
Example: to modify KM vs. miles, press the power and mode buttons
simultaneously until the P-settings appear to enter P1. Once the selection
flashes, press the power button once to select 0 (KM) and once more to select 1
(miles). Once you’ve made your selection, press the power button to proceed to
the P2 setting.
P01
Headlight Brightness 1-3 3= brightest default is 3
P02
Range units: 0= Km, 1 = mile Default is Km
P03
Voltage: 24V,36V, 48V, 52V Default is 52V
P04
Automatic Display Shutoff Default is 5 minutes
P06
Wheel Diameter: 10.0 inches Do not change
P07
Magnetic Poles in hum motor: 30. Do not change
P08
Max output (max speed): 1 – 100% (example: 80 = 80% top
speed.
P09
0 = non-kickstart; 1 = kickstart. With kickstart setting on, the
scooter must be moving at 2mph for it to accelerate
P11
EBS Brake Settings: 0= EBS off 1= weakest EBS 5 = strongest
EBS (most sensitive). Default: 3
P12
Start Settings: 1 – 5; 1 = slow start 5 = fastest start
P15
Voltage cut off. When voltage drops below 42V, the scooter will
power off automatically to protect the lithium-ion battery.
Do not change
P17
Cruise control: 0= Non-Cruise 1 = Cruise
P20
Default = 4 Do not change

10
Operating instructions
Power on/off: Power on/off
a. Turn your key to the right to turn on, turn your key to the left to turn
off.
b. Long press the power button to turn the LCD display on/off.
c. Press power button once quickly to switch gears (default is gear 1).
Gear setting: Press the button located on the throttle to switch gears.
First gear
Second gear
Third gear
Slow Speed (1)
Medium Speed (2)
Fast Speed (3)
Kick Start Mode: The throttle system will work once the scooter reaches 2
MPH. Press the throttle smoothly to accelerate. Refer to P-settings on how to
change.
Brake control: Left-hand brake = rear brake and right-hand brake = front
brake. Use both brakes simultaneously to stop quickly.
Headlights: When the scooter is powered on, push the headlight button
downward to turn on all lights. Push the light button upward to turn all lights
off.
Cruise control: When cruise control is turned on, it will automatically be
activated when you reach a consistent speed. Release the thumb accelerator
and the scooter will automatically move to the set speed. To cancel the cruise
control, pull either brake lever, and cruise control will turn off.

11
Safety Instructions
Please read the following carefully before use.
●This scooter is for use by one adult rider at a time.
●When riding, please wear safety gear including a helmet.
●Always keep both hands and both feet on your scooter while riding.
●Do not ride your scooter anywhere unsafe or illegal.
●Practice riding in an open space first, and only ride on the road once you’re
comfortable.
●If you ride at night, turn on your lights.
●Do not ride on a slippery surface (i.e., ice, rain, and oil)
●Do not exceed the weight limit of 330 lbs.
●Avoid using your scooter in extremely high or low temperatures.
●Do not store the scooter near flammable items.
●Do not immerse your scooter in water higher than 1/2” to avoid electrical
damage.
●Avoid riding in extreme weather conditions such as rain, snow, and high
winds.
●Avoid potholes.
●Always ride in accordance with local traffic laws and regulations.
●Recommended age is 16 years or older to ride.
12
Maintenance
Always check your scooter regularly to ensure all screws are tight. Screws can
become loose over time with vibration and movement. Tighten them as needed.
1. Battery
a. Be sure to fully charge your scooter’s battery before your first ride.
b. When storing scooter during cold months, store a climate controlled
environment to avoid battery damage.
2. Storage and daily care
a. Do not store your scooter in direct sun or in a damp area.
b. Keep your scooter clean of dirt and debris build-up, especially in
brake and motor areas.
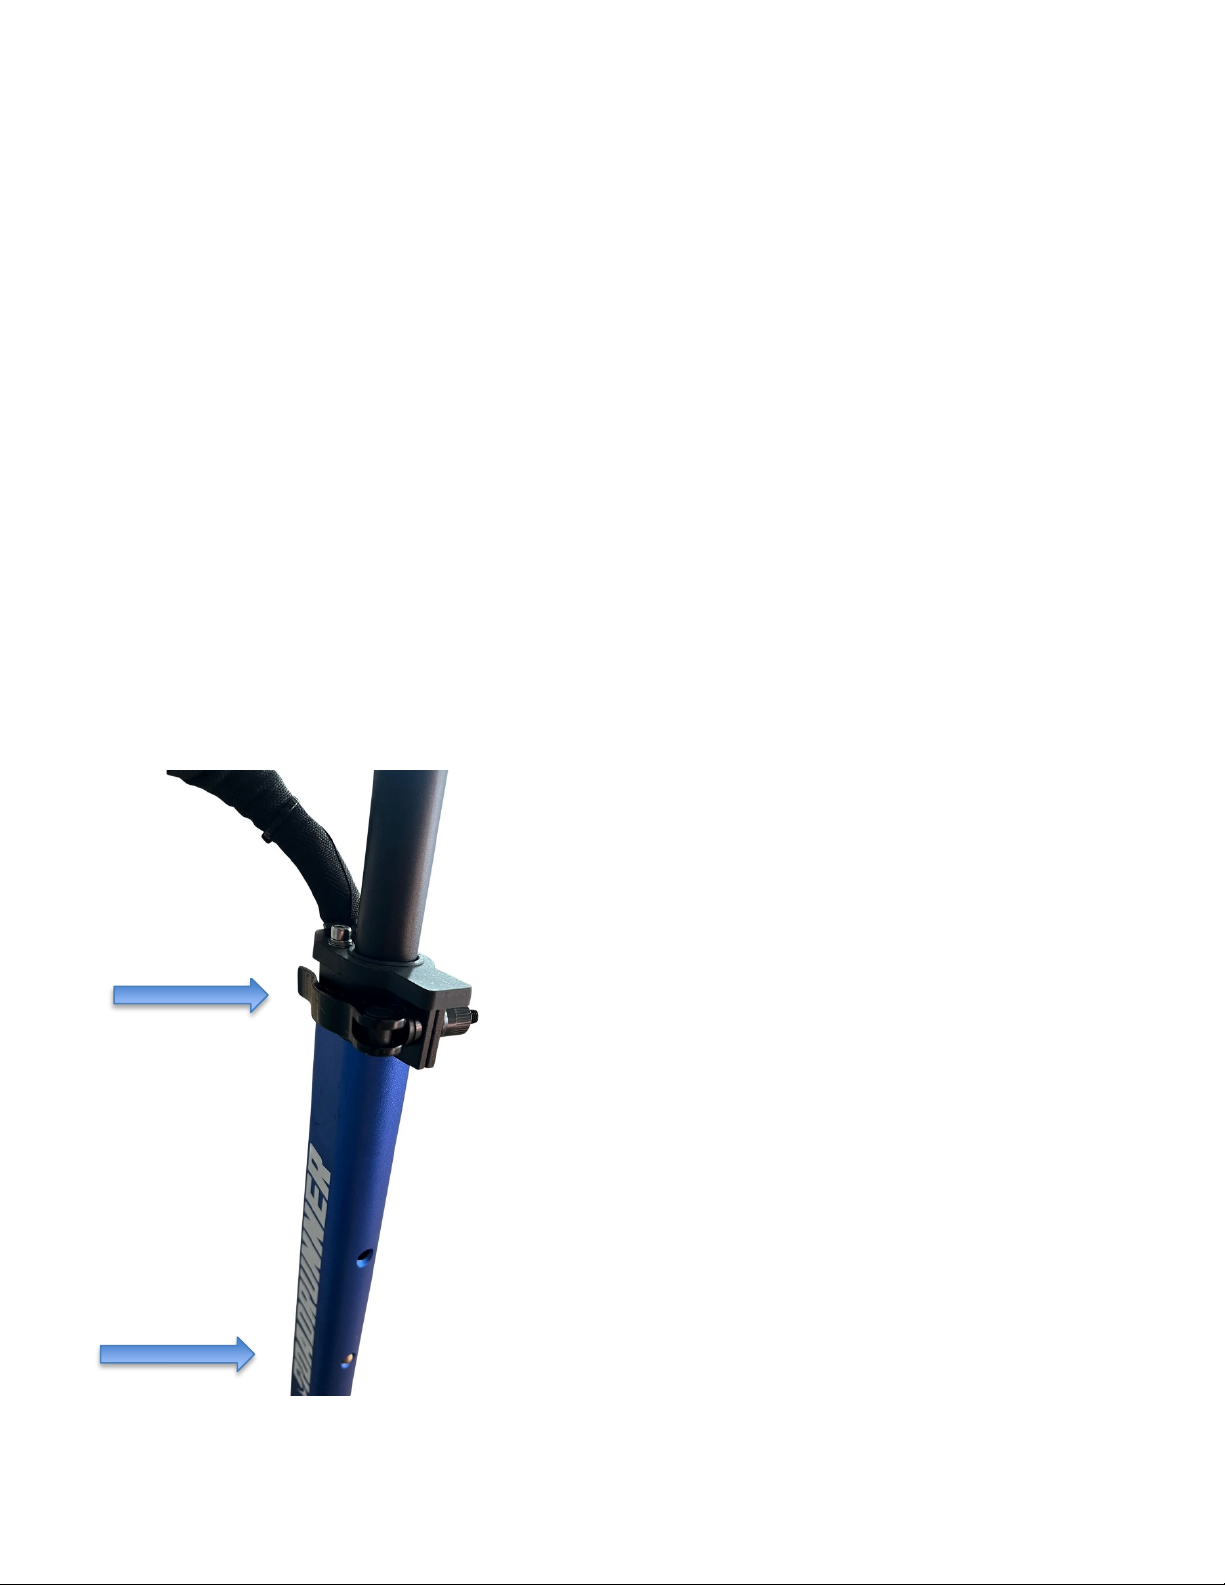
Adjusting the Stem Height
It is extremely important to make sure the fastening clasp is extremely tight before riding
the D4+ 4.0 Electric Scooter.
To adjust the stem height:
1. Pull the fastening clasp outwards
so the clasp is open.
2. Loosen the fastening clasp
counterclockwise.
3. Gently press the silver button to
adjust the stem up or down as
desired. (There are 3 heights to
choose from).
4. Once adjusted to desired height,
tighten the fastening clasp
clockwise and push back into the
stem so it is snug and tight.
Fastening Clasp
Silver button

13
Troubleshooting common errors
1. Display appears black.
a. The display may overheat from direct sunlight.
b. Place the scooter in the dark for a while and try again in 30 minutes.
2. Display does not show an accurate reading.
a. Parameters may be set incorrectly.
b. Try resetting options.
3. Display appears opaque or shows discontinuous values.
a. Maybe due to a poor contact connection or low battery.
b. Restart your scooter or contact RoadRunner Support.
Please contact RoadRunner Support at support@roadrunnerscooters.com if you
need further assistance.

14
Folding the Scooter
Lower the stem towards
the scooter deck.
Pull the blue safety lever down
to the deck. Press the silver
snap back so that the stem
completely folds down as
shown in picture.
When you hear a click, the stem is
locked, and folding is complete.
15
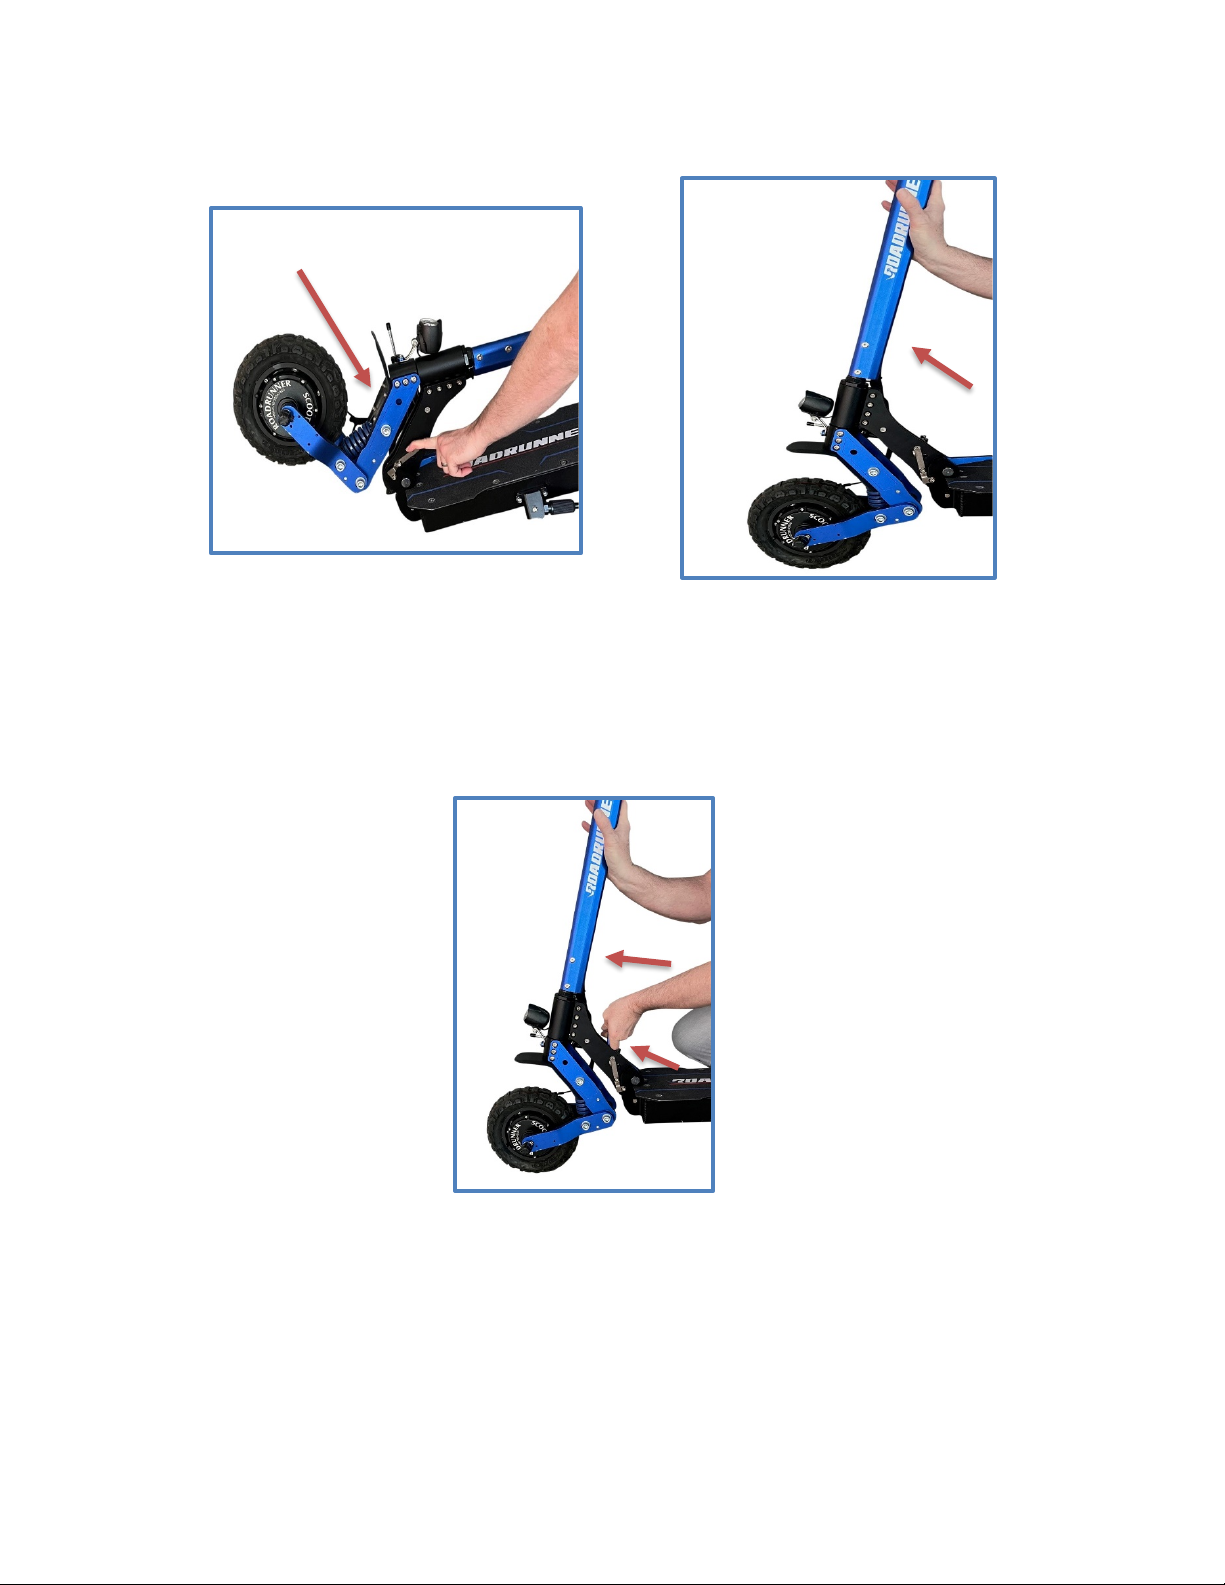
Unfolding the Scooter
After the stem is locked in an upright
position
, push the stem forward to remove
pressure from the safety lever while
simultaneously pushing the blue safety lever
with opposite hand up towards the stem
until lever is locked in place.
Press the silver snap back
towards deck of scooter to
completely
remove the black
post from the upper slot.
Keep pressing the silver snap
and push the stem vertical to
ground.
16
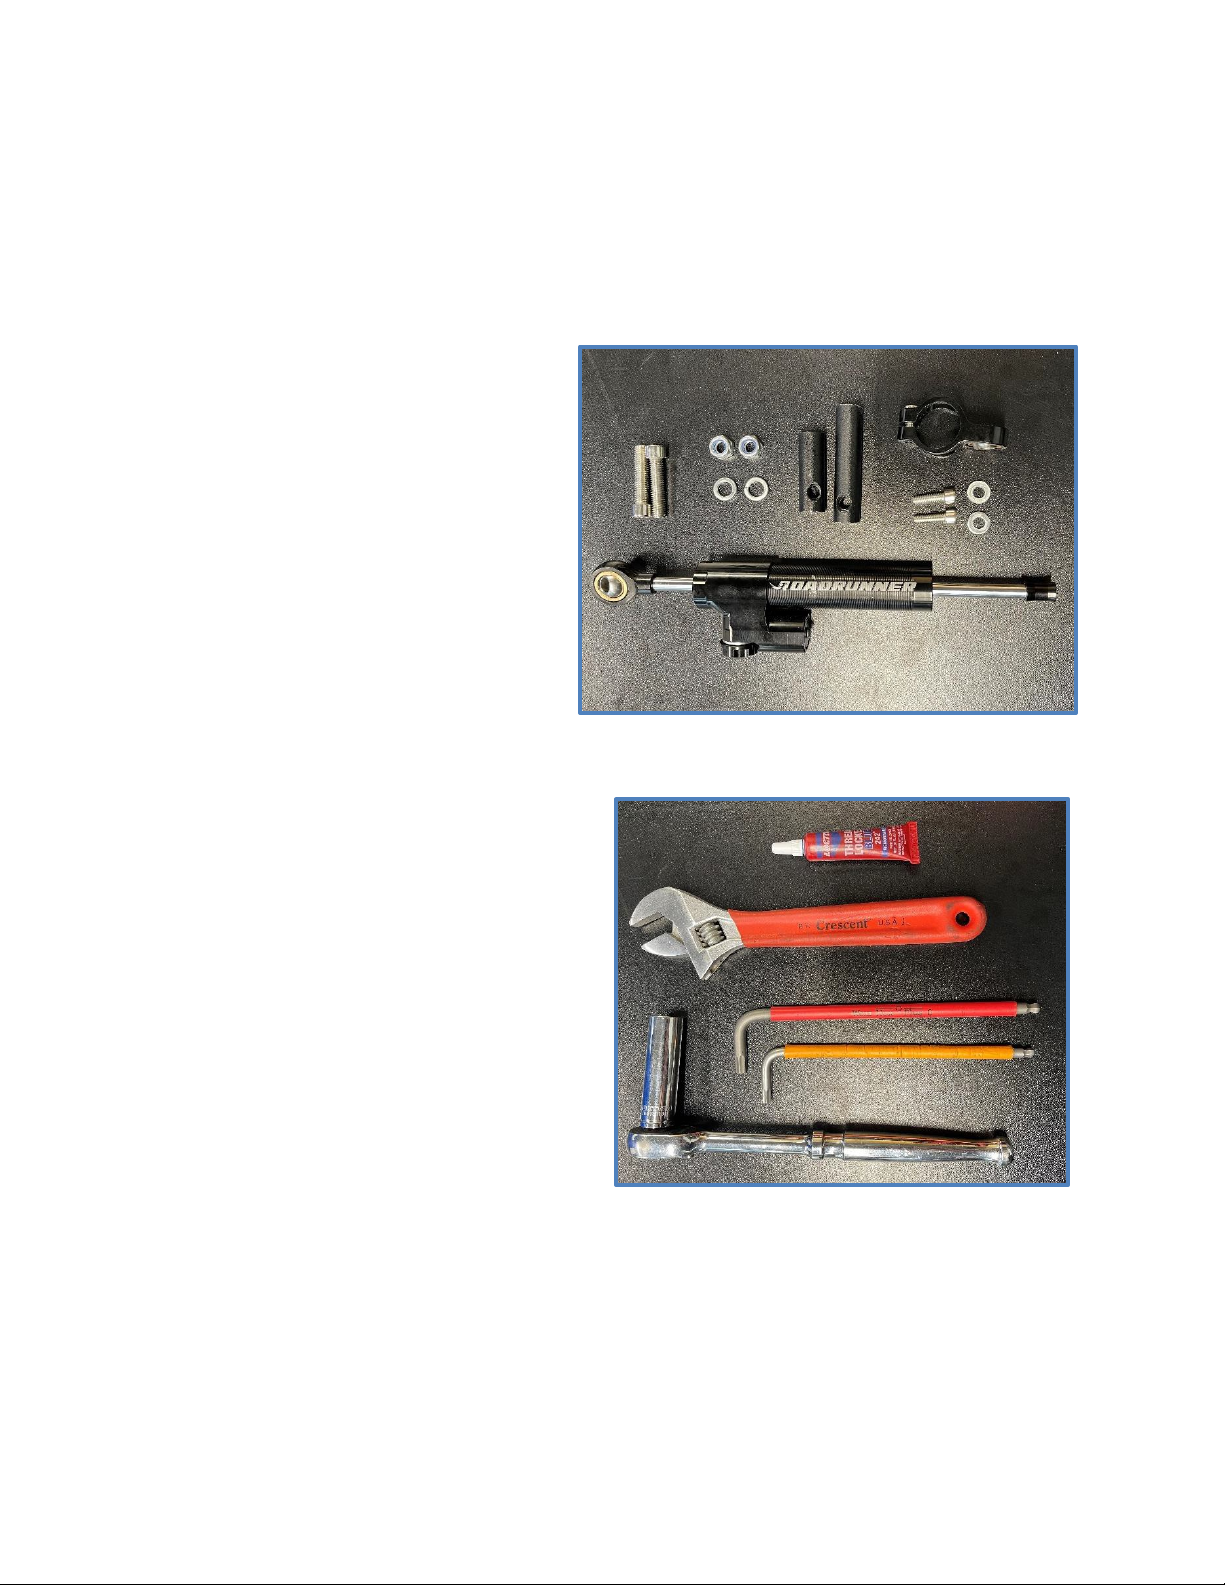
Installing Steering Damper
Before you begin installing the Steering Damper, make sure we have all the
necessary tools and hardware. The hardware includes the following (all included
in box);
-2x M6x1.0, 18mm long
bolts
-2x M8x1.25, 35mm long
bolts
-2x M8 spring washers
-2x M6 washers
-2x M8x1.25 locking nuts
-1x long threaded dowel
-1x shorter threaded dowel
-1x steering damper
-1x steering damper clamp
For tools, you will need the following:
-1x 5mm allen wrench
-1x 6mm allen wrench
-1x 13mm socket wrench (adjustable
spanner works too, it is just more time
consuming)
-Blue Thread Locker (optional)
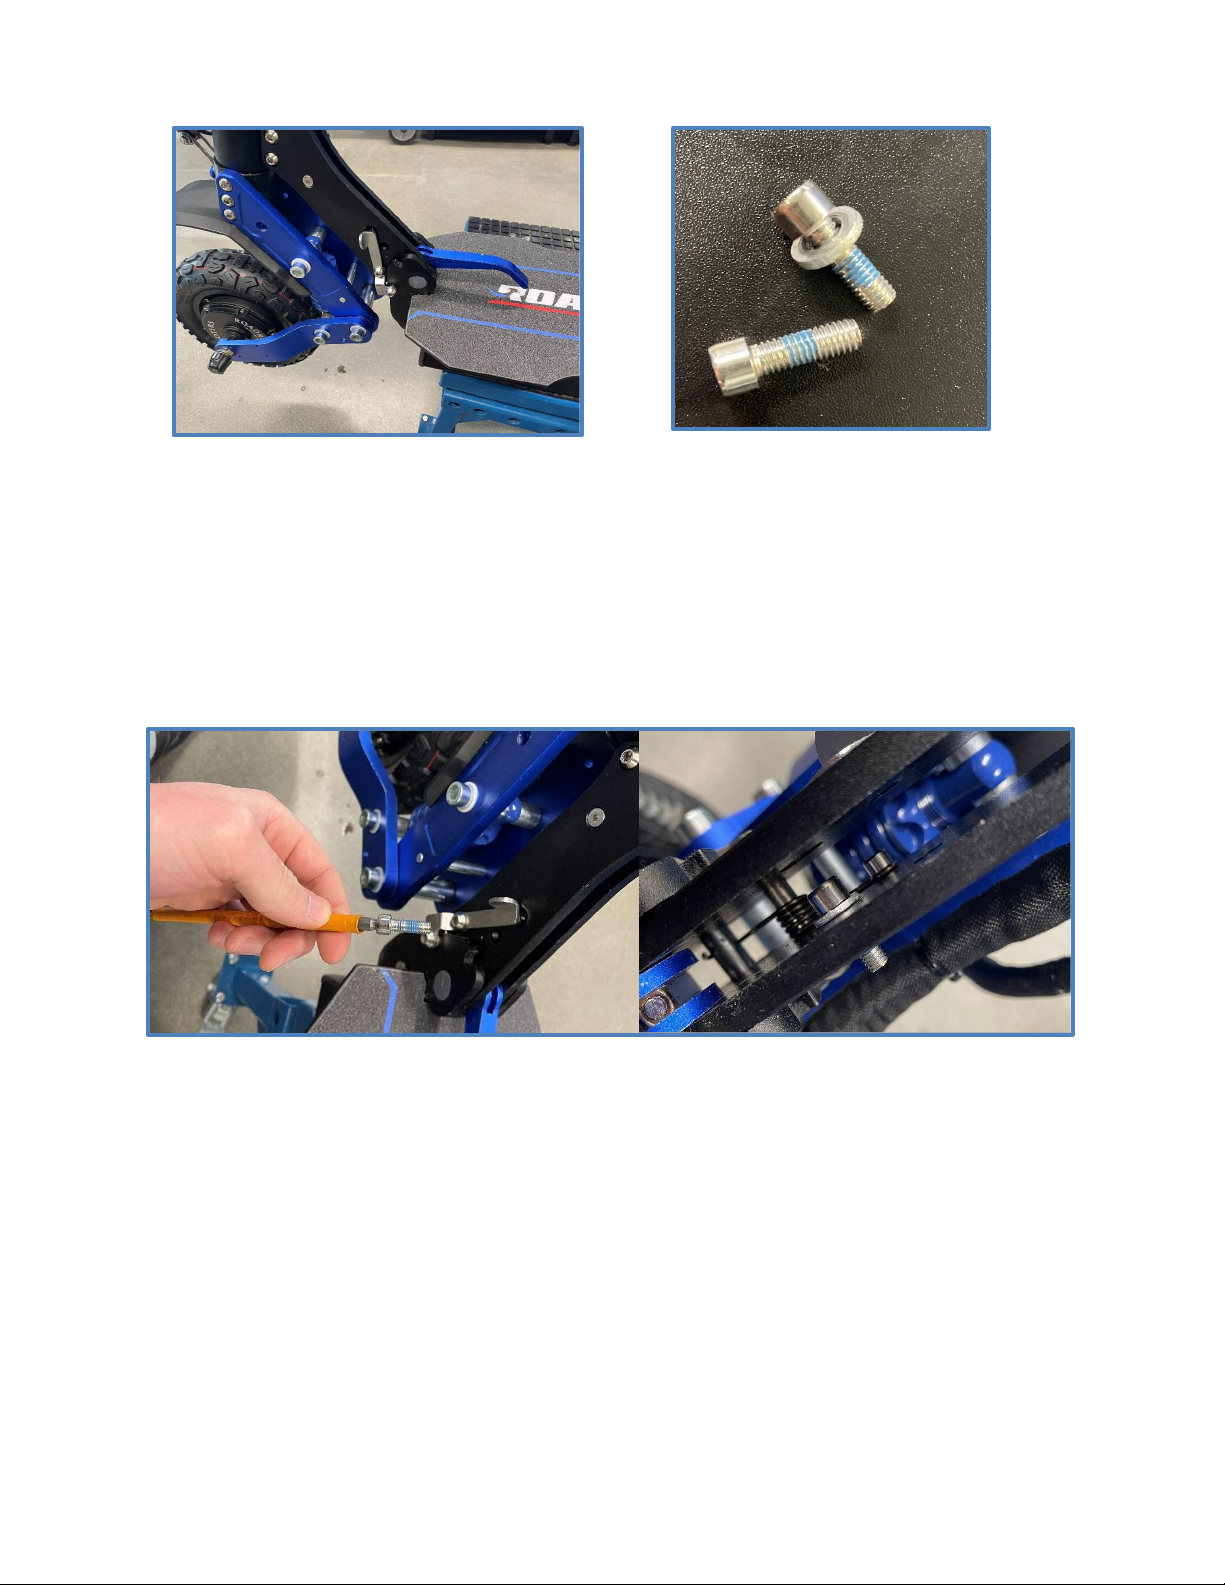
17
1. Begin by moving the safety lever
into its lowered position.
2. If you are using thread locker,
apply now to the 2x M5 bolts. You
will only need a little bit to get the
job done.
3. Use the 5mm allen to hold the M5 bolt and put it through the lefthand hold on the
neck of the scooter. At the same time, use your fingers on your right hand to place
the washer on the other side of the lefthand side of the neck.

18
4. Use your fingers to thread the larger dowel onto the end of the bolt. You will want
to leave it slightly loose. It may help to use the 5mm allen as a counter- torque for
the bolt.
5. Now do the front dowel. The process is very similar, and should be a bit easier.
Start by placing the washer onto the M5 bolt, and place it through the hole on the
righthand side of the blue arm. Then hand tighten the dowel onto the other end of the
M5 bolt. Remember: do not tighten all the way yet.

19
6. It is best to have both holes facing vertically as seen above.
7. Now slide the clamp onto the
steering damper. Don’t tighten the
clamp down just yet. The damper is
oriented in the below photo exactly how
we want it on the scooter (lefthand side
is the front, righthand side is the rear)
.
8. Place the eyelet above the rear (larger)
dowel hole and start threading the M8 bolt
through the eyelet in the damper and into the
dowel. Once you can no longer tighten it with
your fingers, use the 6mm allen to tighten
down the rest of the way.
Table of contents
Other RoadRunner Scooter manuals


