RoadRunner R4 User manual
RoadRunner R4 Scooter
Pictures in this manual are for reference only. Please read the full instruction manual before
using your Scooter.
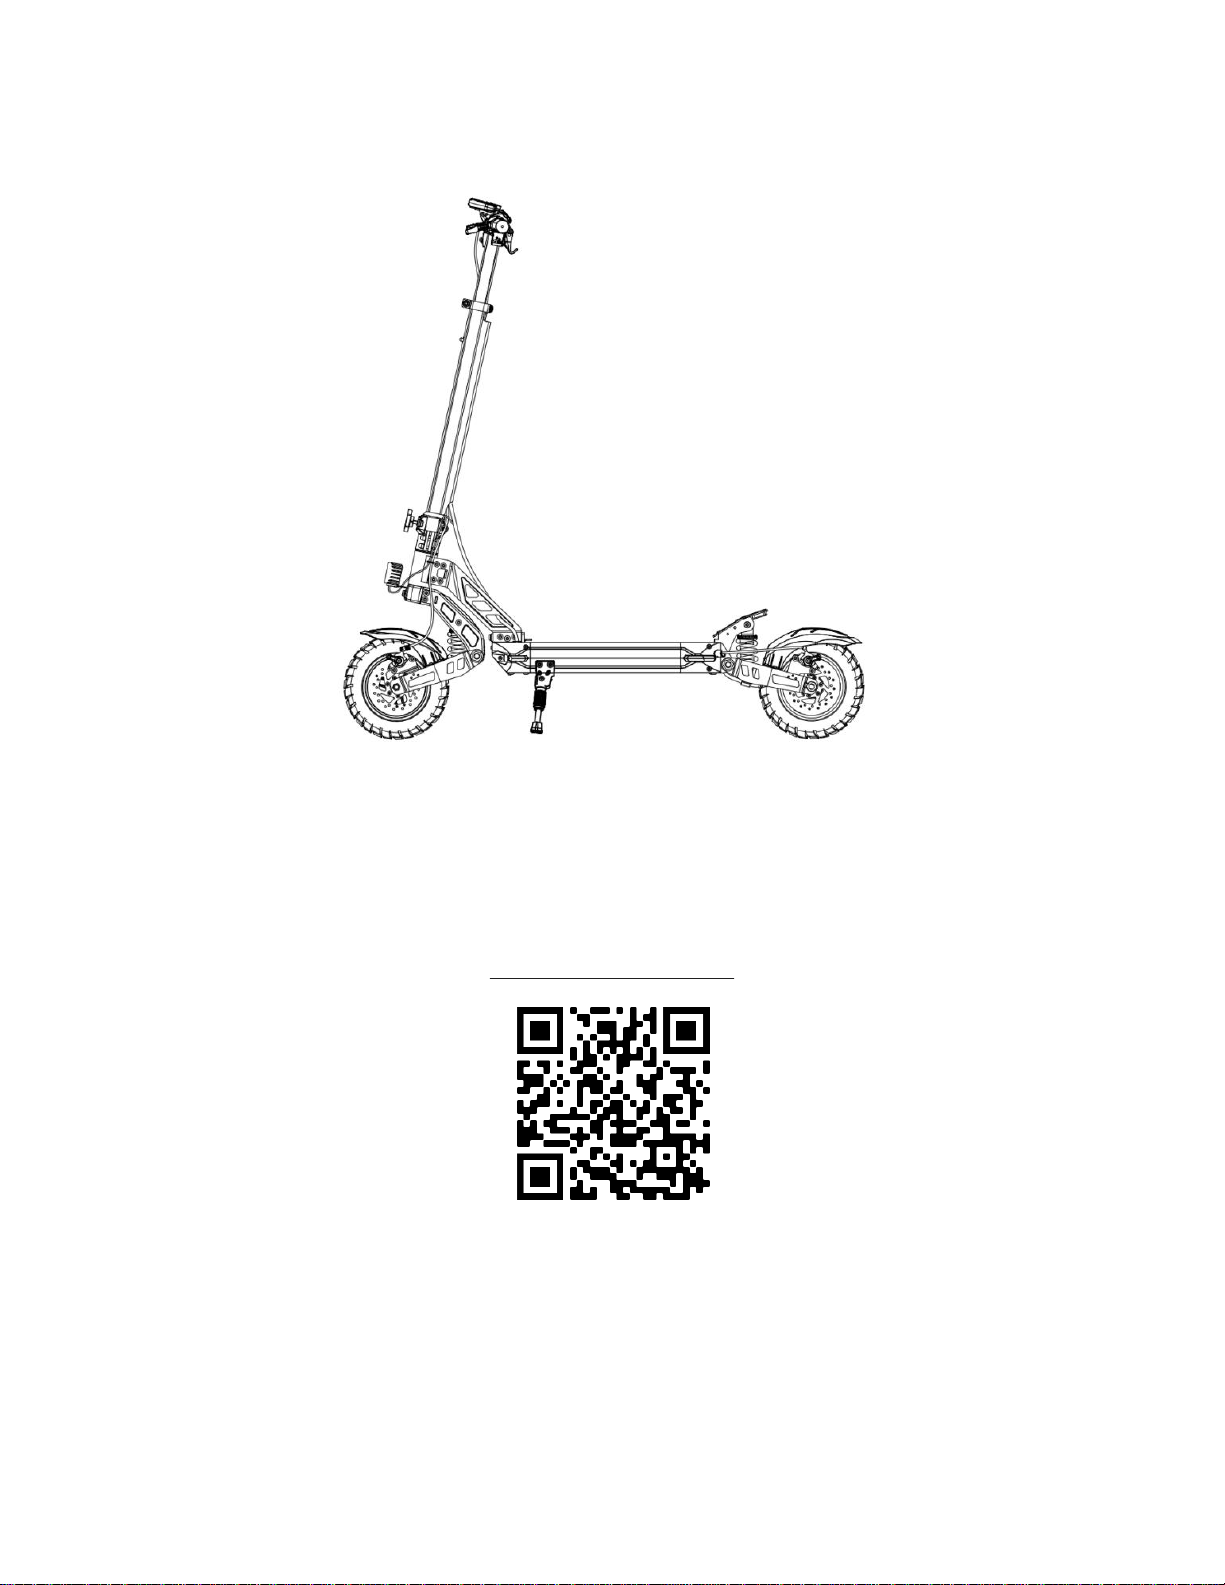
For instructional videos on how to: get your scooter ready to ride, maintain your scooter, and
repair your scooter, scan this QR code with your camera phone and browse dozens of videos.

2
1.Scooter and Accessories 3
2. Scooter Components 4
3. Scooter Specs 5
4. Product Display 6
5. Charging the Scooter 6
6. Battery and Charger Information 7
7. Handlebar Controls and Instruments 8
8. LCD Display 9
9. Parameter Settings (P Settings) 10
10. Riding Instructions 11
11. Operating instructions 12
12. Safety Instructions 13
13. Stem Height Adjustment 14
14. Maintenance 14
15. Error codes 15
16. Troubleshooting common errors 16
17. Unfolding the Scooter 17
18. Folding the Scooter 18
19. How to carry your scooter 19
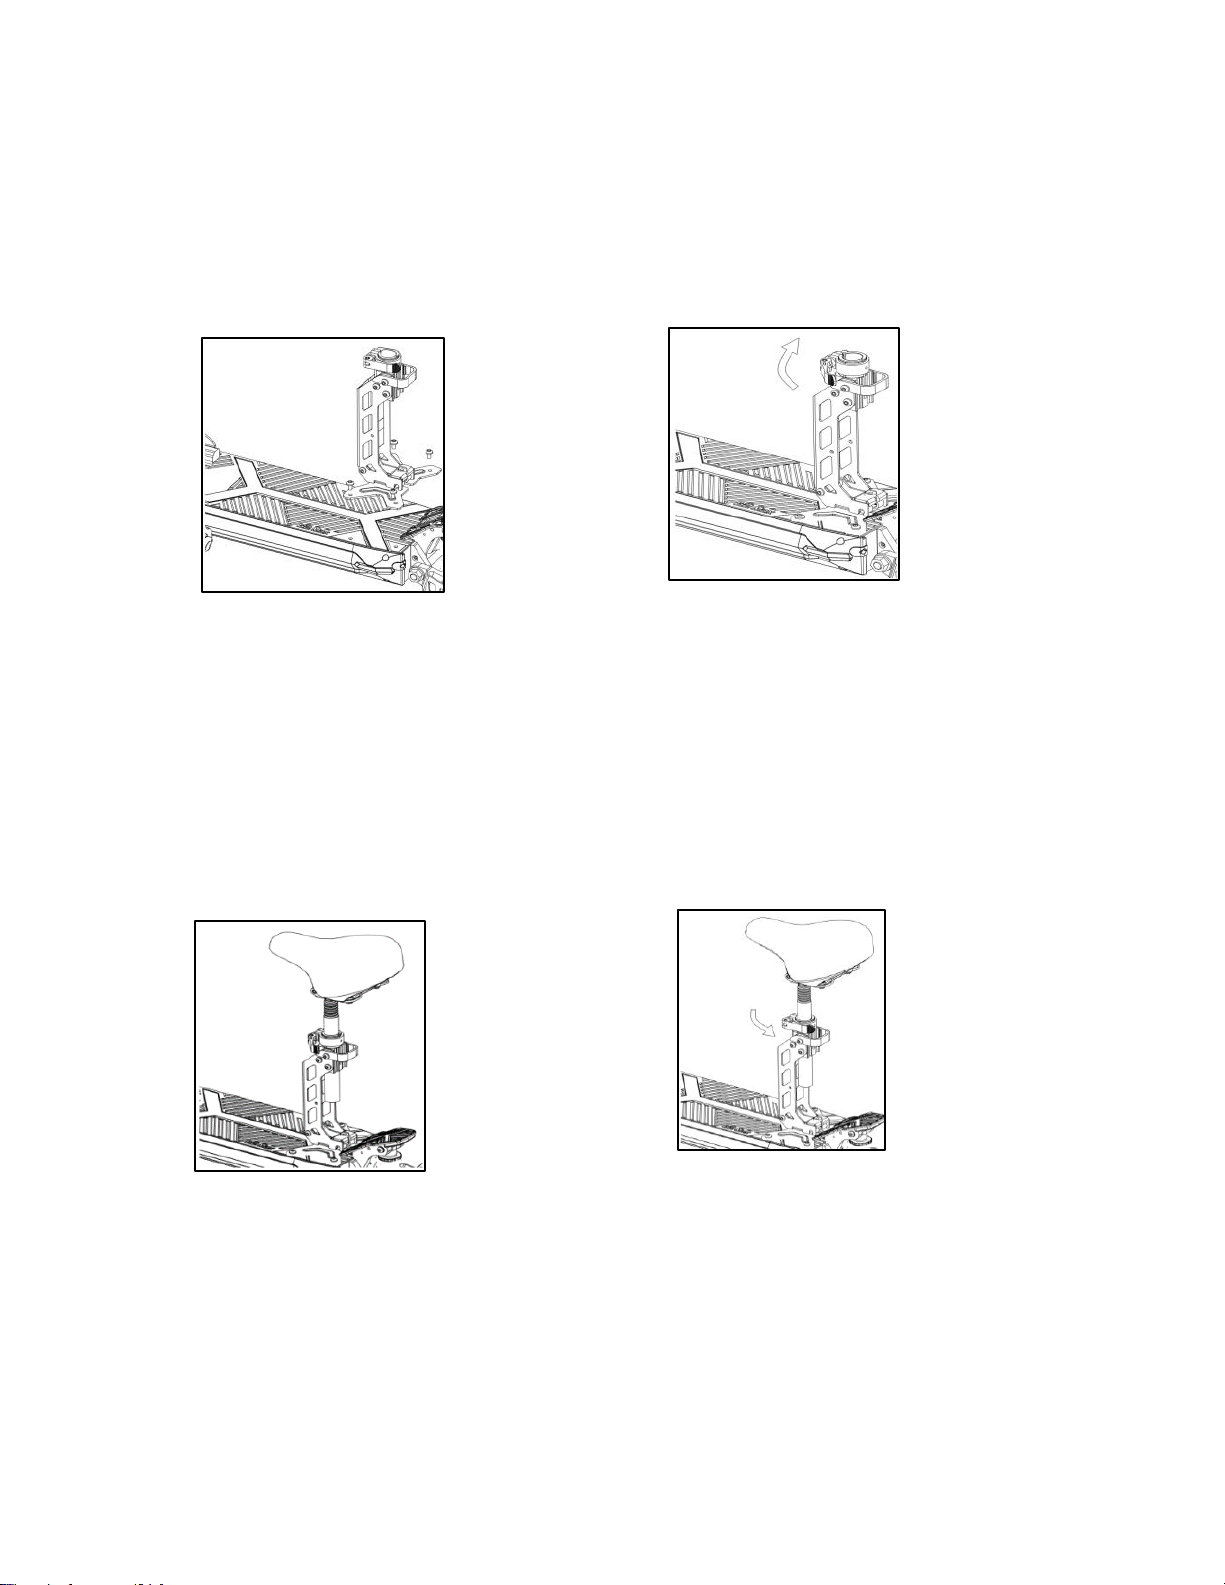
20. Optional Seat Assembly 20
21. Seat Folding 21
22. Seat Raising 22
23. Warranty Policy 23

3
1. Scooter and Accessories
Scooter
Accessories
1. Owner’s Manual
2. Charger
3. Multi-tool
4
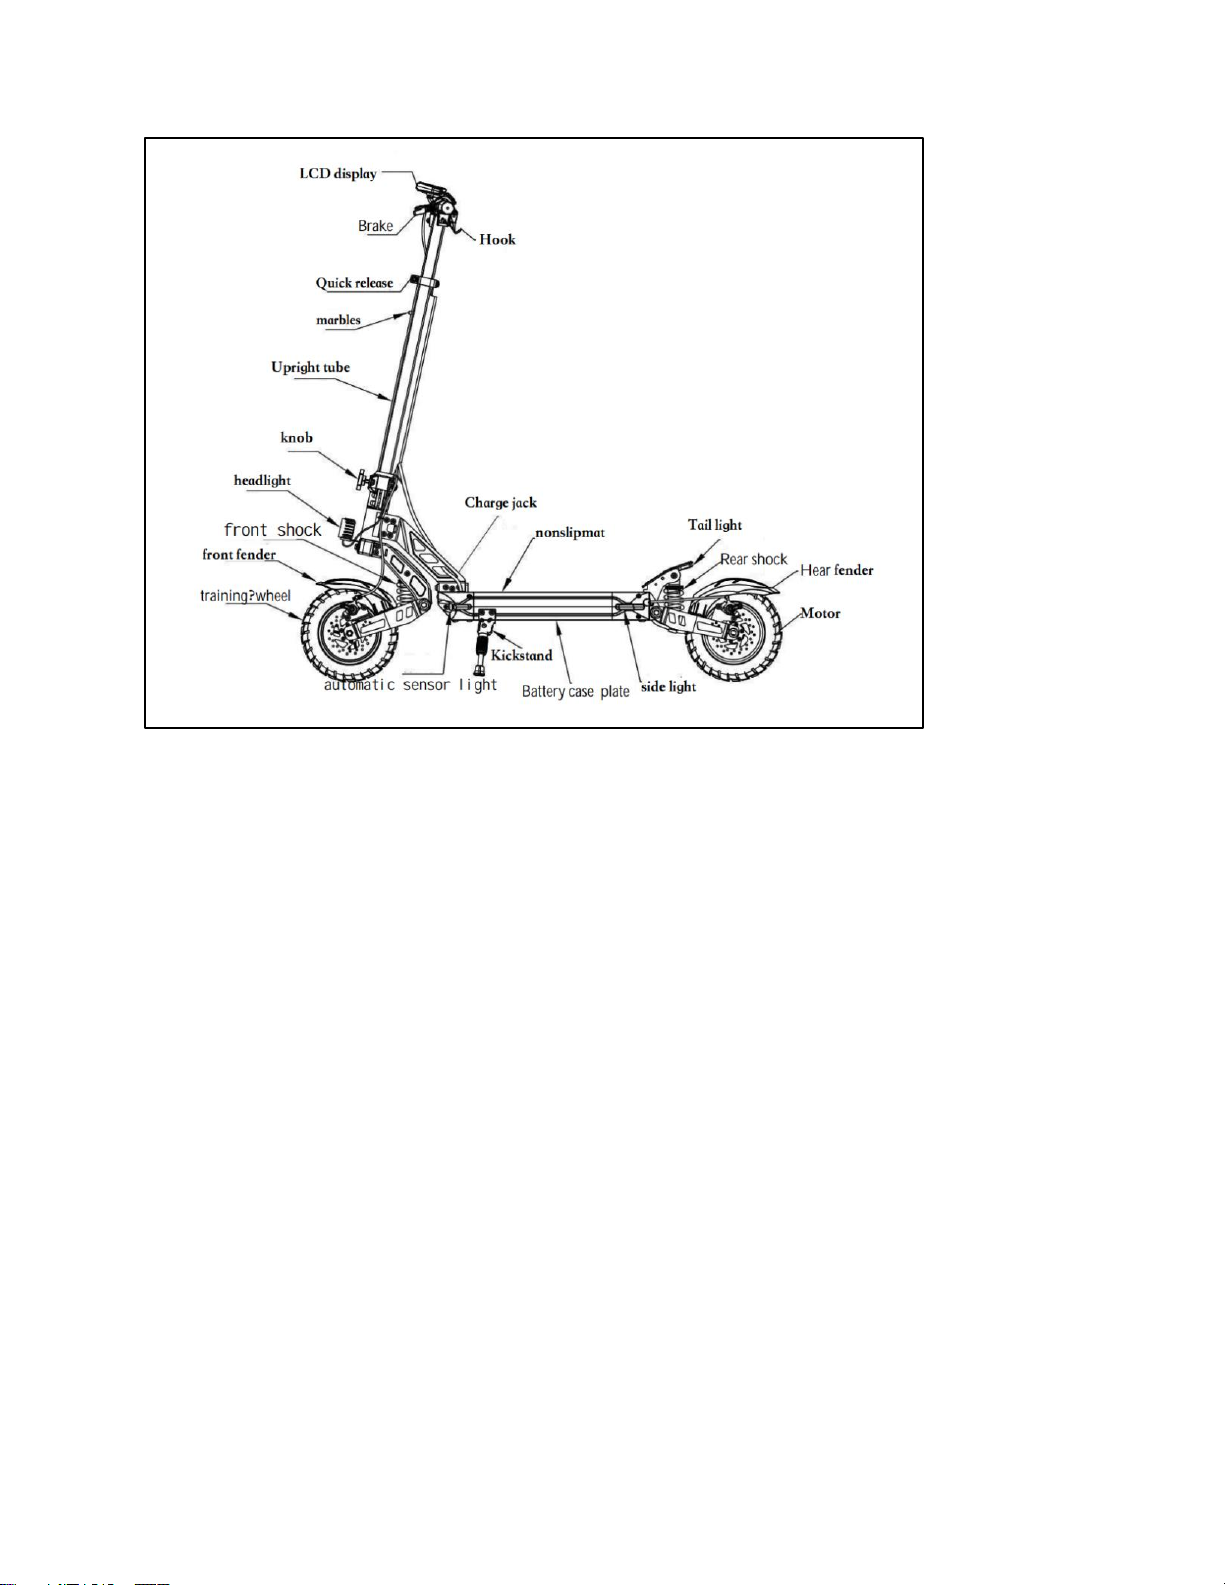
2. Scooter Components

5
3. Scooter Specs
Product name
RoadRunner R4 Electric Scooter
Product model
R4
Folded Dimensions
50” (l) x 24” (w) x 23” (h)
Unfolded Dimensions
51” (l) x 24” (w) x 51” (h)
Net weight
62 lbs
Max load
265 lbs
Max speed
31 MPH (depending on environment, climb,
weight and driving habits)
Range
35 miles (depending on environment, climb,
speed, weight, driving habits)
Max climb
20° incline
Suspension
Front and rear spring shocks
Tire
10” pneumatic tubeless air
IP Rating
IP54
Brake system
Electric & hydraulic disc brake
LED display
Headlights, cruise, brake, gear, and range
indicator
Light system
LED high headlight
Lithium battery
48V 17.5AH
Charging time
2A battery charger 7-8 hours
6
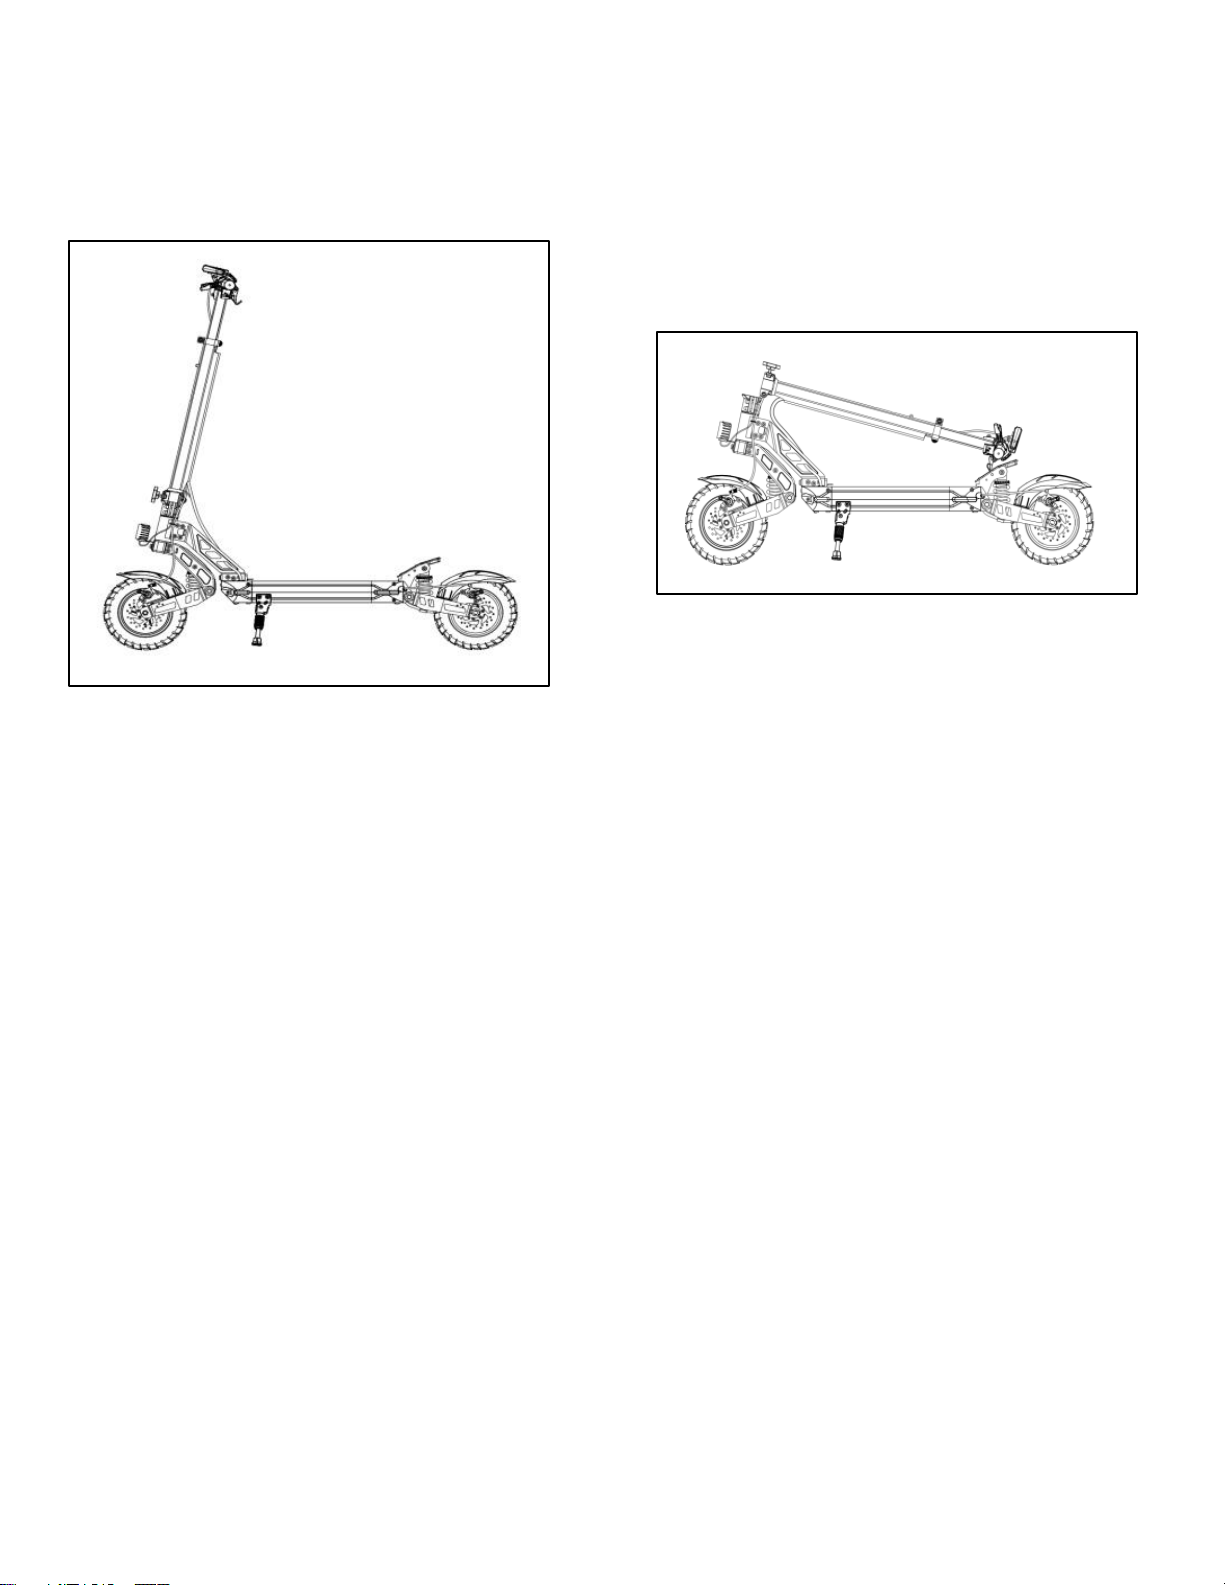
4. Product Display
Scooter unfolded Scooter folded

7
5. Charging the Scooter
1. Plug the charger into a power supply (wall outlet, power strip, etc.).
2. Open the waterproof cover on the charging port, then plug the charger into the charging
port.
3. A red light means the Scooter is charging; green means it is fully charged.
4. Cover the charging port once the charger is removed.
6. Battery and Charger Information
Every RoadRunner R4 Scooter is equipped with a dedicated lithium battery and a
dedicated smart charger. Please do not use any other charger or battery with your scooter,
and do not use your dedicated charger with any other product. We are not responsible for
any damage incurred due to misuse of your charger.
1. Battery: The lithium battery provided by RoadRunner Scooters can be charged up to
600 times with no change in capacity; over 600 uses the battery’s capacity will drop to
80%. Over 1000 uses, the battery may be unsafe to use.
Maximum Voltage for full battery charge: 58.8 V
Minimum Voltage before battery dies: 42.0 V
WARNING: NEVER LEAVE SCOOTER UNATTENDED WHILE BATTERY IS
CHARGING!
2. Charger: The smart charger included with your R4 scooter automatically stops
charging and the light turns green when your scooter reaches 100%, which means it is
fully charged. The battery should be fully charged in 7-8 hours. If your battery will not
charge, please contact RoadRunner Scooters for help. If your battery is damaged due
to weather or human interaction, it is not covered under our warranty.

8
7. Handlebar Controls and Instruments
1. Handlebar
2. Left Brake Handle
3. T-bar
4. LCD Display
5. Right Brake Handle
6. Headlight
7. Electric Lock
8. Power (on/off) Button /
Gear Switch Button

9
8. LCD Display

10
9. Parameter Settings (P Settings)
To make changes to any P-settings, press the power button quickly three times in row. Once
the selected values begin flashing, quickly press the power button just once to cycle through
the options. Press the power button to exit the current P settings or to advance to the next P-
setting. P-settings will automatically exit if there is no activity for 8 seconds.
Example: to modify KM vs. miles, press the power button quickly three times in row to enter
P1. Once the selection flashes, press the power button once to select 0 (KM) and once more
to select 1 (miles). Once you’ve made your selection, press the power button to proceed to
the P2 setting.
P2
Voltage level setting (36V, 48V, 52V, 60V, 72V); default 48V
P3
Wheel diameter, in inches default 10”
P4
# of magnetic poles for speed measurement, 1-100 default is 30
P5
Cruise selection (0 means no cruise, 1 means cruising
default 0
P1
KM/Miles setting default is miles
P6
Zero startup (0) vs. non-zero startup (1) settings. When powering
on, no icon will be displayed if zero startup; the display will show
“NON” if zero startup. In non-zero startup mode, you will need to
manually bring the scooter to 3 MPH and press the accelerator to
start. default 0
P7
Speed limit setting, 1-100% default 100
P8
Sleep time setting, 1-60 minutes default 5
PA
Start strength setting, 1-5 default 2
PB
Brake strength setting, 1-5 (1 least stopping power, 5 strongest)
default 1

11
10. Riding Instructions
1. Choose an open space without obstacles or uneven surfaces.
2. Unfold your scooter according to section 7 and wear protective gear.
3. Turn your key to the right to turn on the scooter.
4. Begin with one foot on the deck and one foot on the road.
5. Once you’re riding comfortably, put both feet on the deck. Apply more pressure to the
throttle to increase your speed.
In case of an emergency, use both brake handles to brake quickly.

12
11. Operating instructions
Power on/off:
a. Turn your key to the right to turn on, to the left to turn off.
b. Long press the power button to turn the LCD display on/off.
c. Press once quickly to switch gears (default is gear 1).
Gear setting: Press the button located on the throttle to switch gears. 1st gear: ECO, 2nd
gear: D, 3rd gear: S
First gear
Second gear
Third gear
Slow Speed (ECO)
Medium Speed (D)
Fast Speed (S)
Kick Start Mode: The throttle system will work once the scooter reaches 3 MPH. Press
the throttle smoothly to accelerate. Refer to P-settings on how to engage.
Brake control: Press the brake using your left hand to stop. A firmer grip will lead to
faster braking; for the fastest braking, use both hands to brake at the same time.
Headlights: When the scooter is powered on, push the headlight button forward to turn
on headlights, taillights, and sidelights. Push the light button back to turn off the lights.
Cruise control: When cruise control is turned on, it will automatically be activated when
you reach the set speed. Release the thumb accelerator and the scooter will automatically
move at the set speed. To cancel the cruise control, pull either brake lever and cruise
control will automatically turn off.
Take off on Scooter: With one foot on the scooter and one foot on the road, slowly press
the throttle to accelerate. Once you’ve ridden a short distance, put both feet on the deck to
continue riding.

13
12. Safety Instructions
Please read the following carefully before use.
●This scooter is for use by one adult rider at a time.
●When riding, please wear safety gear including a helmet.
●Always keep both hands and both feet on your scooter while riding.
●Do not ride your scooter anywhere unsafe or illegal.
●Practice riding in an open space first, and only ride on the road once you’re comfortable
and competent.
●If you ride at night, please turn on your lights.
●Do not use your scooter in temperatures below 0 degrees Fahrenheit.
●Please ride slowly if you encounter an uneven surface or poor road conditions.
●Do not ride on a slippery surface (i.e., rain, ice, oil).
●Do not exceed the weight limit that the scooter can bear.
●Avoid using your scooter in extremely high or low temperatures, and do not store it near
flammable items.
●Do not immerse your scooter in water higher than 1/2” to avoid electrical damage.
●Avoid riding in extreme weather conditions such as rain, snow, and high winds.
●Take care to avoid potholes.
●Always ride in accordance with local traffic laws and regulations.
●Recommended age is 16 years or older to ride.

14
13. Stem Height
Adjustment
The stem is divided into three telescopic
positions: low, middle, and high. To adjust,
loosen the quick release. Gently press in
the ball bearing and raise or lower the stem.
Once you’re done adjusting, tighten the
quick release.
14. Maintenance
1. Lubricant
a. Every six months, add a small amount of white grease or lubricant to the main
joint.
b. You should regularly check your scooter for loose screws and tighten them.
2. Battery
a. Be sure to fully charge your scooter’s battery before your first ride.
b. Make sure you charge your battery every three months at minimum to avoid
damage.
3. Storage and daily care
a. Do not store your scooter in direct hot sun or in a damp area.
b. Keep your scooter clean to avoid damage.

15
15. Error codes
E-001
Rear motor haul error - swap front and rear motor heads. If
code still appears, replace the controller. If it does not
appear, replace the motor.
E-003
Controller error - change the controller and try again
E-005
Voltage error - battery is low; charge the battery and try again
E-006
Receiver error - replace instrument/controller and try again
E-007
Sending error - replace instrument/controller and try again
E-009
Controller temperature error - Controller’s temperature is too
high
E-011
Front motor haul error - swap front and rear motor heads. If
code still appears, replace the controller. If it does not
appear, replace the motor.
E-013
Secondary controller failure - Change the controller and try
again
E-017
Sub-controller receiving failure - replace instrument/controller
and try again

16
16. Troubleshooting common errors
1. Display appears black
a. The display may overheat from direct sunlight.
b. Place the scooter in the dark for a while and try again in 30 minutes
2. Display does not show an accurate reading
a. Parameters may be set incorrectly.
b. Try resetting options.
3. Display appears opaque or shows discontinuous values
a. Maybe due to a poor contact connection or low battery.
b. Restart your scooter or contact RoadRunner Support.
4. Complete diagnosis
a. Power on
b. Check power on the display screen
c. Ensure brakes are in place
d. Ensure all jacks and connectors are connected properly
Please contact RoadRunner Support at support@roadrunnerscooters.com if you need further
assistance.

17
17. Unfolding the Scooter
1. Press the clip with one hand
while pulling up on the upright
tube with the other.
2. Pull the stem upright.
3. Once the stem is up, pull the
folding clip.
4. Lock the folding clip.

18
18. Folding the Scooter
Note: For your safety, be sure your Scooter is powered off before folding.
1. Pull the safety catch upward.
2. Pull the folding buckle outward.
3. Push the stem down toward the
deck.
4. Push the lever hook into the
hook slot.
19
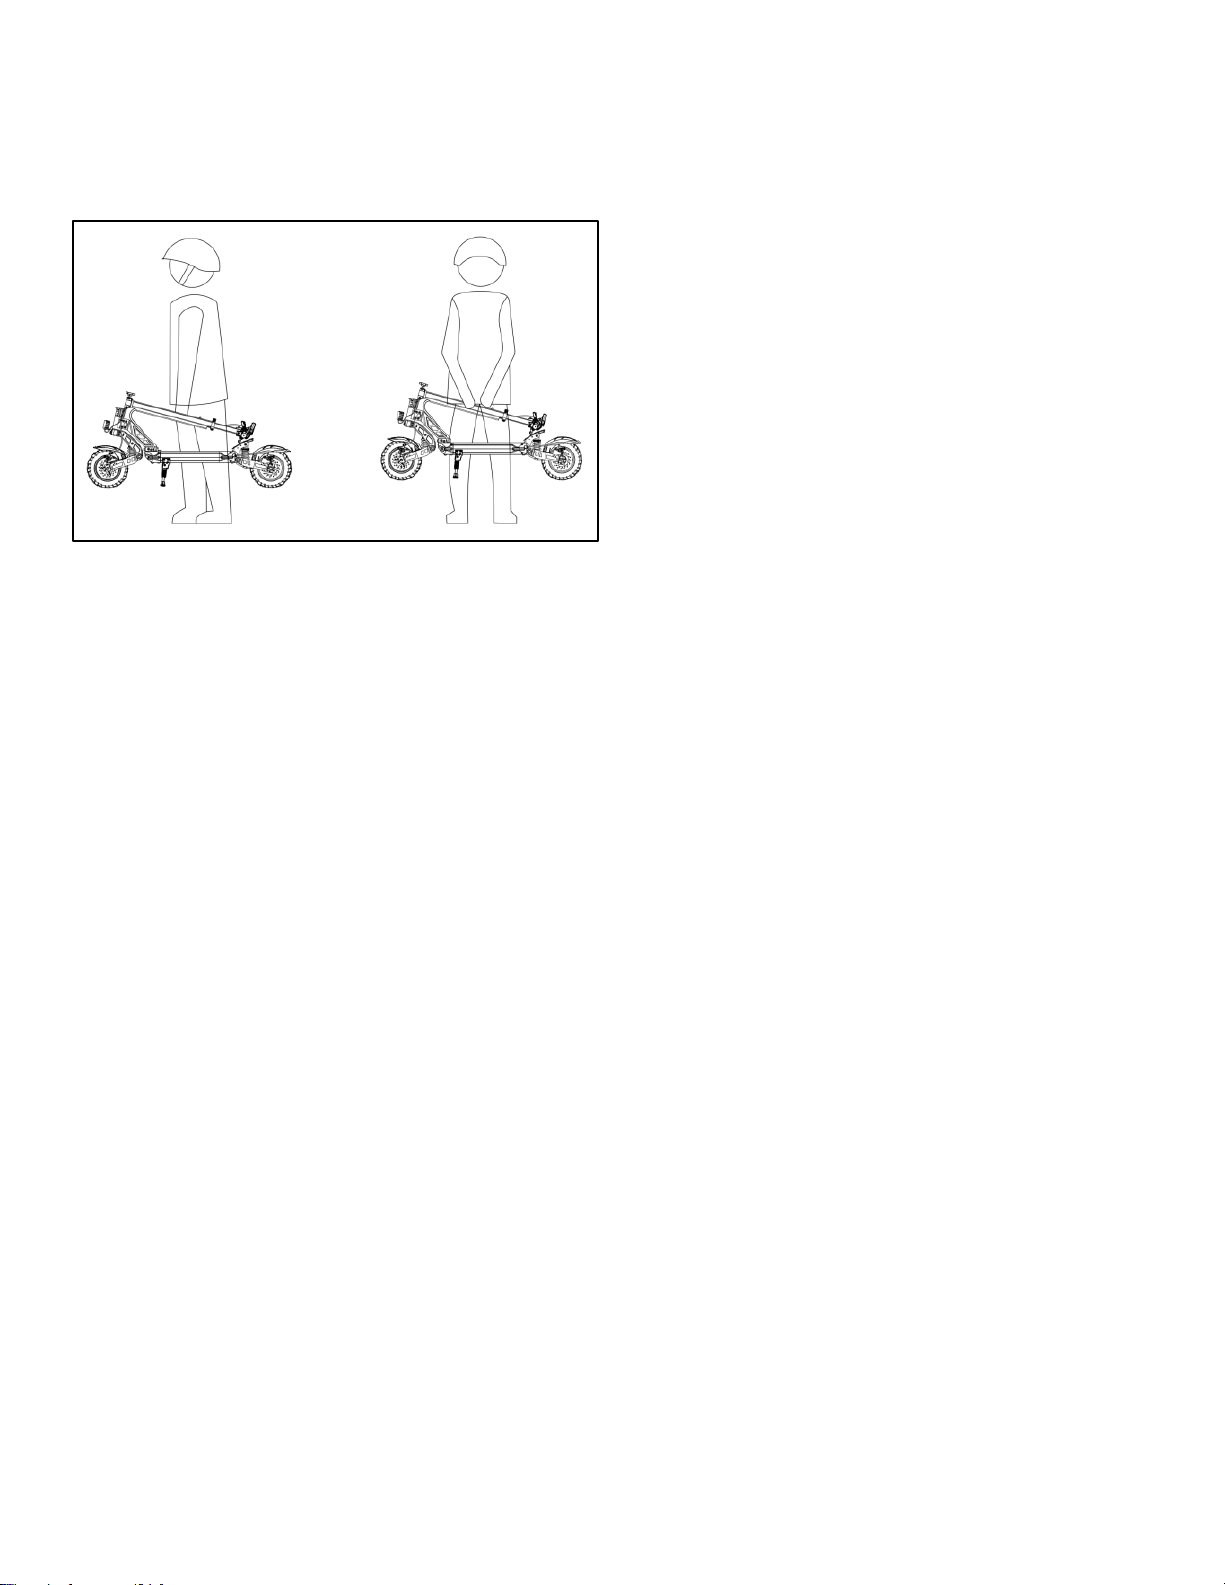
19. How to carry your scooter
When folded up, your scooter can be carried with one or two hands.
20
20. Optional Seat Assembly
1. Secure the seat bracket to the
battery box pedal using 4 screws.
2. Once screws are tightened, loosen
the seat for quick disassembly.
3. When the seat is ready to be
removed and loosened, insert the seat
into the corresponding slot.
4. Once the seat is in place, turn it to
remove it quickly and lock it.
Table of contents
Other RoadRunner Scooter manuals


