DeutschDeutsch 1516
8. Jede Stufe oben wird annulliert, wenn keine Taste innerhalb 7 Sekunden gedrückt wird.
AKTIVIERUNGDESALARMSAUFWACHENMODUS
1. Drücken Sie mehrmals die Taste ALARM SET, um die Alarmfunktion zu aktivieren und die
Wake-up-Modus.
2. Der Alarm-Modus und das zugehörige Symbol Radio / iPod / Beep erscheinen in der
Reihenfolge auf dem Display.
HINWEIS: Wenn Alarm Weckruf für iPod-Modus ausgewählt ist, und kein iPod / iPhone
ist in der Fitten Docking-oder anerkannt, wenn der Alarm den Summer aktiviert wis kommen
automatisch.
Um den Alarm auszuschalten, drücken Sie eine beliebige Taste auf dem Gerät oder der
Fernbedienung
SNOOZE-FUNKTION
Während des Alarms drücken Sie die Taste SNOOZE/DIMMER wird vorübergehend den
Alarm auszuschalten für 5 Minuten und die Snooze-Symbol wird angezeigt. Dies ist
wiederholbar in der Stunde Alarmdauer.
BASS&TREBLE-EINSTELLUNG(NURVONDERFERNBEDIENUNG)
BASS und TREBLE zeigt die aktuelle Tonalität.
Wenn Sie die Taste Bass & Treble drücken, wird die Tonalität. das Klangbild BASS oder
TREBLE kann durch.
SLEEP-FUNKTION (MITTELSFERNBEDIENUNG)
1. Wenn Sie sich mit der Musik einschläfern wollen, die Taste SLEEP drücken.
2. Sie können zwischen Radio, iPod oder AUX, in der Modalität Funktion Sleep wählen, um
die Musik für 15, 30, 45 bis zu 60 Minuten zu hören, bevor das Gerät sich automatisch
ausschaltet.
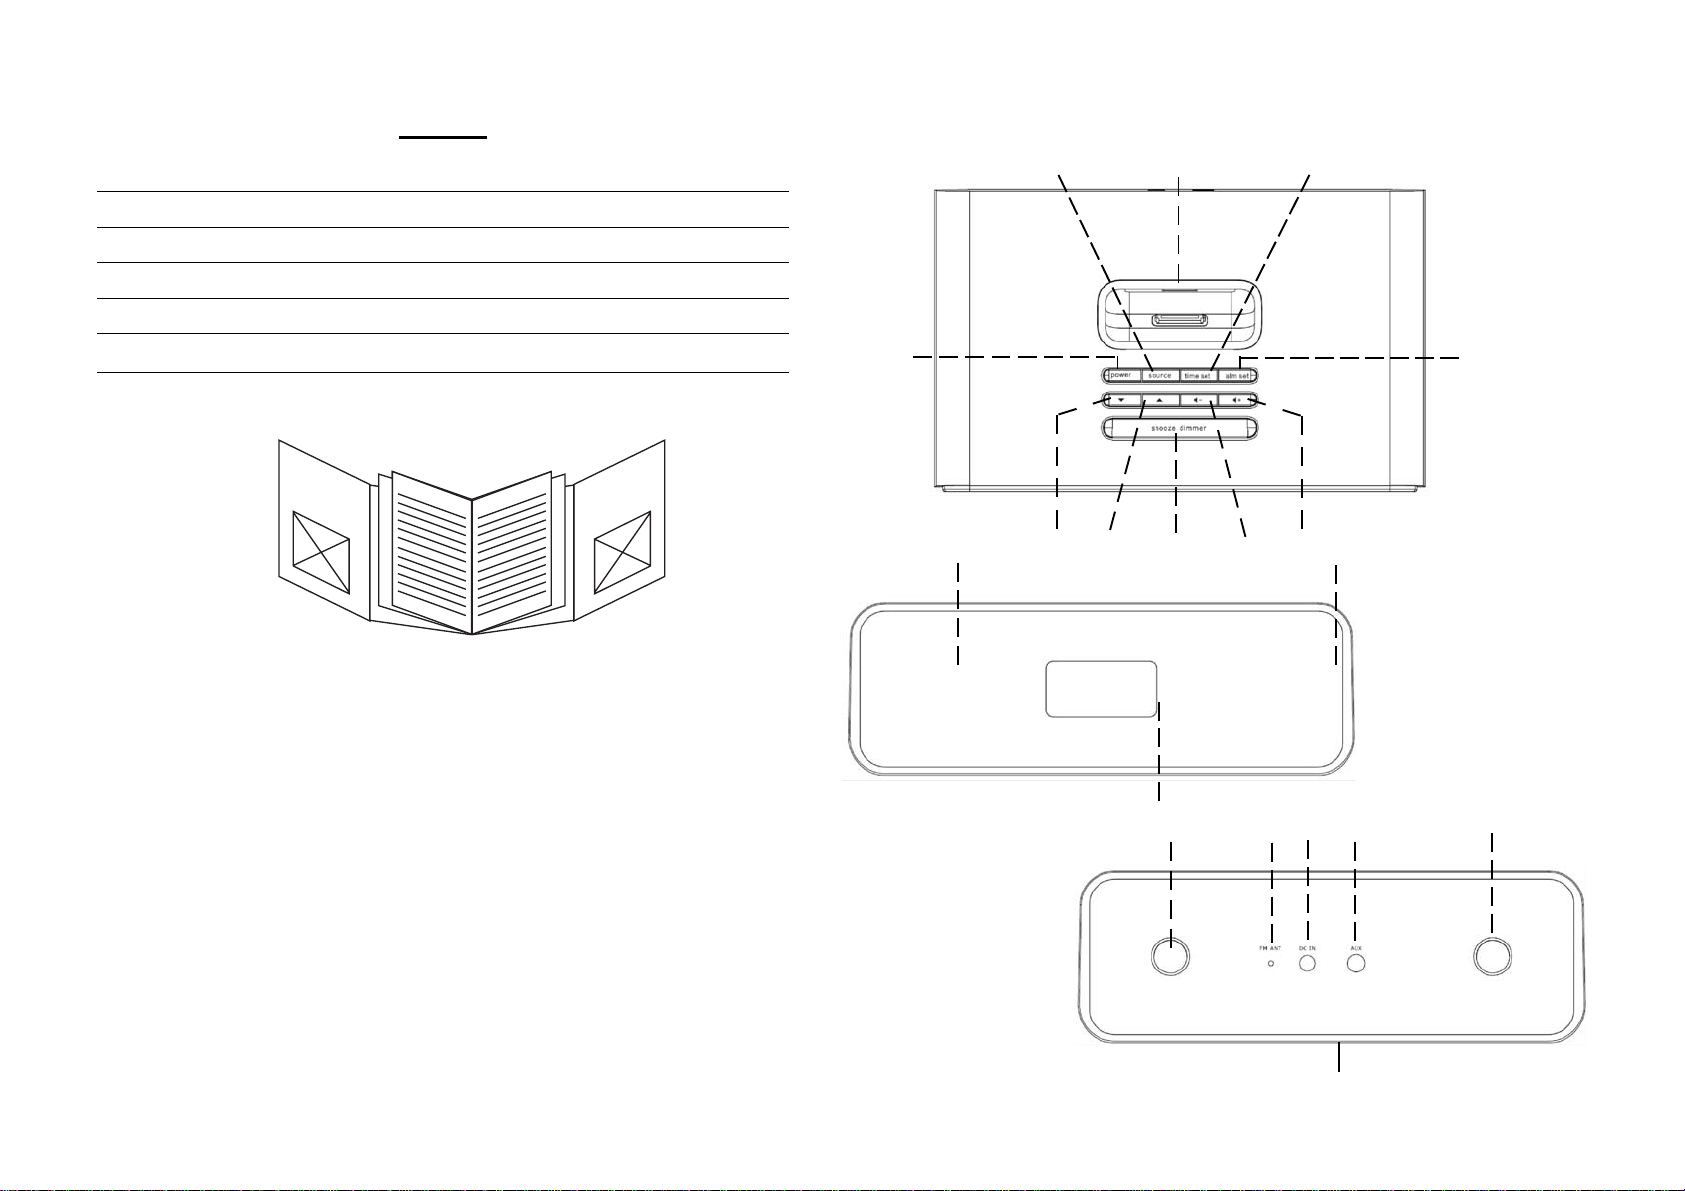
FUNKTIONWAHL
1. Die Taste SOURCE auf dem Gerät (4 ) oder auf der Fernbedienung (9) drücken, um die
gewünschte Funktion zu wählen. Anzeige ändert sich wie iPod UKW Radio oder AUX..
1. Drücken und halten Sie dieTIME SET (5) Taste gedrückt bis die Stunde da blinkt es.
2. Die Ziffer der Stunde wird auf dem Display blinken. Drücken Sie TUNER/CLK+ oder
TUNER CLK- (vorwärts oder rückwärts) (16,14), um die Stunden zu regeln.
3. Drücken Sie die Taste TIMER SET (5) erneut, die Ziffer der Minuten wird auf dem Display
blinken. Drücken Sie TUNER/CLK+ oder TUNER CLK- (vorwärts oder rückwärts) (16,14),
um die Minuten zu regeln.
5. Drücken Sie die Taste TIMER SET (5) nochmals, um die Zeit zu bestätigen.
6. Jede Stufe oben wird annulliert, wenn keine Taste innerhalb 10 Sekunden gedrückt wird.
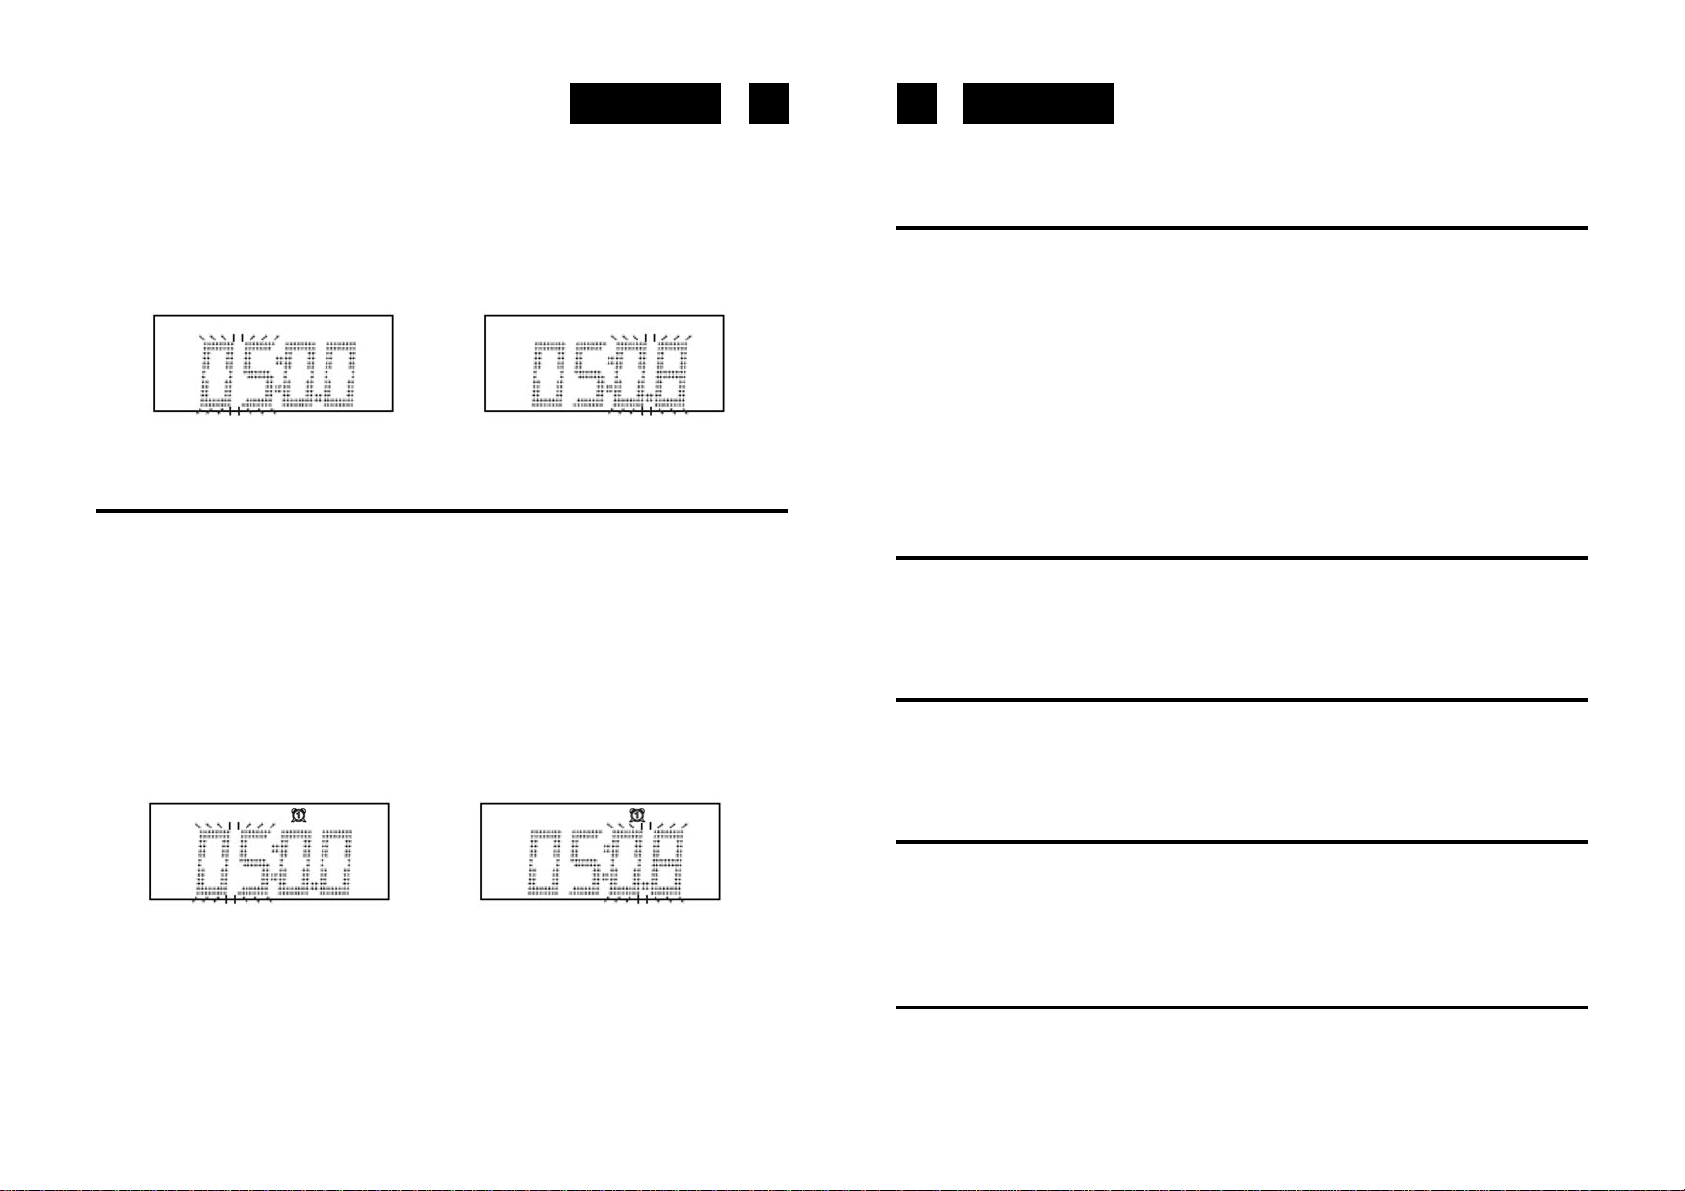
ALARM(TIMER)-EINSTELLUNG
Dieses Gerät verfügt über zwei Alarme setzen, dass die Arbeit unabhängig voneinander, so
dass Sie jedes einzelne Ihren persönlichen Vorstellungen anpassen. Sie können den Alarm
und die Source für die Alarm.
Im STANDBY-Modus:
1. Drücken und halten Sie die ALARM SET (13) Taste gedrückt bis die Stunde da blinkt es.
2. Die Ziffer der Stunde wird auf dem Display blinken. Drücken Sie TUNER/CLK+ oder
TUNER CLK- (vorwärts oder rückwärts) (16,14), um die Stunden zu regeln.
3. DrückenSiedieTasteALARMSET(13)erneut,dieZifferderMinutenwirdaufdemDisplay
blinken. Drücken Sie TUNER/CLK+ oder TUNER CLK- (vorwärts oder rückwärts) (16,14),
um die Minuten zu regeln.
7. Nochmals die Taste ALARM SET (13) drücken, die Anzeige "VOL" des Butter blinkt auf dem
Display. Die Lautstärke des Timer regeln (hoch oder niedrig) mit der Tasten TUNER/CLK+
oder TUNER CLK- (vorwärts oder rückwärts) (16,14). Wenn der Wecker aktiviert, wird die
Lautstärke allmählich von 0 auf den Lautstärkepegel Sie zu erhöhen.
8. Drücken Sie die Alarm-Set wieder und Sie können die Wake up-Modus wählen Sie aus
iPod, Radio , Beep.