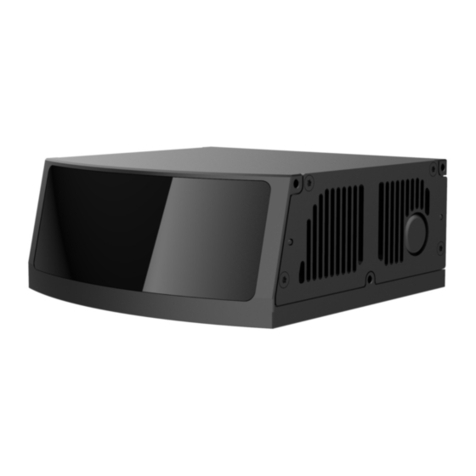
RoboSense RS-Box User manual

RS-Box User Manual

RS-Box User Manual
Contents
Document Update History.............................................................................................................................. 2
1. Safety Tips.................................................................................................................................................. 1
2. Product Introduction................................................................................................................................... 1
3. Electric Interface.........................................................................................................................................2
3.1 Power Supply............................................................................................................................................2
4. Guidelines................................................................................................................................................... 3
5. Output docking........................................................................................................................................... 9
6. WEB console............................................................................................................................................ 12
7. Run Perception Algorithms at the RS-Box.............................................................................................. 14
8. Appendix A Mechanical Dimensions....................................................................................................... 16
Thank you for purchasing the RS-Box. Please read this Manual carefully
before use and wish you a pleasurable experience with the product.

RS-Box User Manual
Document Update History
Version
Date
Update Description
V2.0
2019.1.5
1. Version updated to 2.0;
2. Added the perceptual receiving packet program Demo under
Windows 7 system;
3. Added the method to run the perception programs at the
RS-box end.
4. Updated the method to obtain materials.
5. Deleted introduction on operations that are no longer to be
used.

RS-Box User Manual
1. Safety Tips
To reduce the risk of damage and to avoid violating the warranty terms, please
do not dismantle or assemble RS-Box, please do not make any change or extra
operation on the pre-installed systems or on the RS-LiDAR-Algorithms related
programs other than what has been described in this Manual.
Reading - Please read the operating instructions and safety tips carefully before using
the product.
Following - Please follow all the operating instructions and safety tips given in this
Manual.
Retaining - Please retain the operating instructions and safety tips for future reference.
Warning- Please observe all safety instructions and warnings attached to avoid
accidents.
Servicing-Please do not attempt to service the product other than what has been
described in this Manual. For servicing, please contact RoboSense.
2. Product Introduction
RS-Box is a plug-and-play LiDAR algorithm hardware platform introduced by
RoboSense. Developed in compliance with mechanisms of RS-LiDAR,
RS-Box has RS-LiDAR-Algorithms which require no complicated
configuration processes. Coordinating with RS-LiDAR, users can in no speed,
seamlessly integrate LiDAR perception modules to their autonomous driving
architecture, realizing the dream of attaining autonomous driving LiDAR
environment perception capability with just a push of a button.
Activated by with single key on Web, the RS-Box will then transmit perception
data on obstacles identification, classification and moving objects tracking
through LAN. RS-Box is embedded with RS-LiDAR data receiving,
translating, and processing algorithms, thus users can easily integrate the data
into their autonomous driving system without concerns on the perception data
processing. (To have good test results, please test RS-Box in an outdoor
environment. Recommended installation height of RS-LiDAR is 1.2-2m).

RS-Box User Manual
3. Electric Interface
3.1 Power Supply
RS-Box requires to work with a power supply of 19V-4.74A, 90WMAX.
Please use the original power adapter coming with the RS-Box.
3.2 Electric Interfaces
Figure 1 RS-Box Electrical Interface

RS-Box User Manual
Notes:
1. LAN:With switch which is connected to the RS-LiDAR and the user receivers connected
to the network, the LAN port can receive the RS-LiDAR-16 point cloud data and send the
RS-LiDAR-Algorithms perception results.
2. DC: The input voltage. Please use the original power adapter.
3. Power: RS-Box boot-up button.
4. Guidelines
Note: The configuration of the RS-Box has been set up within the factory, please do
not modify system configuration without technicians.
Procedures:
Devices Connection: Use a SWITCH to connect the RS-LiDAR, RS-Box, and the
Receiver computer (Recommend to use Ubuntu computer with ROS system). Boot
up the RS-Box with a push on the Power button. Device connection as follows:
Figure 2 RS-Box Connecting Diagram

RS-Box User Manual
Receiving terminal configuration: the receiver computer IP should be addressed
as :192.168.1.xxx (Please note not to use the IP of 192.168.1.102 which will cause
conflict with the IP of the RS-Box).
Web Browser: open up a web browser on the user terminal computer and input
192.168.1.102 in the address bar, and then open up the console.
Static Parameter Modification: for the first time of using the LiDAR, or changing a
LiDAR, please change the static parameter. The static parameter file can be found under the
configuration_data file. packed in the U-Disk which comes with the LiDAR. Procedures are
as follows:
A. Select “change static parameter” on the left of the Web Console
B. Click “click to choose file” on the right and choose the static parameter file, after
confirmation, the chosen static parameter file will appear under the “upload” button.
C. Click the “upload” button to upload the file.
Change Parameter File. The parameter file is the configuration file for the perception
algorithms RS-LiDAR-Algorithms. If no special requirements are needed, please use the
default parameter file. Procedures to change the parameter file are as follows:
A. Select the change static parameter file on the left of the Web Console.
B. Click “click to choose file”on the right and choose the parameter file, after
confirmation, the chosen parameter file will appear under the “upload”button(Note: the
parameter file name is fixed, please do not try to change the file name).
C. Click the “upload” button to upload the file.
Launch Perception Algorithms:Click the “click to play”button at the left of the Web
console, then click “start 16 channels LiDAR perception”. If the web terminal displaying

RS-Box User Manual
area output data as shown below, it means the algorithm is launched successfully. To
test(we recommend you to test in the outdoor environment, and the recommended
installation height of the RS-LiDAR is 1.2-2m) or use the perception results, please refer to
chapter 5: Output Docking.
View Point Cloud and Real-Time Perception Results at User Terminal Computer
To check the point cloud and perception results, please use the ubuntu16.04+ROS system
and launch the perception algorithm at the web console, the user terminal computer should
be at the same LAN and the same network segment as the RS-Box.
Note: There is no need to configure the RS-BOX to view the point cloud. Please do not
modify RS-Box configuration unless it is necessary)
The steps to view the point cloud and perception results are as follows:
Step 1. Input “sudo gedit /etc/hosts” at the user terminal to open the hosts file, insert the line
“192.168.1.102 tegra-ubuntu” in the middle, save and then
exit.

RS-Box User Manual
Step 2. Configure the .bashrc file, input “sudo gedit ~/.bashrc” at the user terminal, click
“Enter” to open the .bashrcfile, (Note: if the used shell is zsh, please input “sudo gedit
~/.zshrc”). Then add a line at the end of the file:
“export ROS_MASTER_URI=http://tegra-ubuntu:11311/”, save and exit.

RS-Box User Manual
After the configuration is completed, check the point cloud and the real-time perception
results through RVIZ: Input "rviz -d ~/robosense.rviz" at the terminal (Note:
~/robosense.rviz" is the sample path, please modify it according to the actual storage path).
The robosense.rviz file is stored in the attachment of the perception receiving packet(Please
contact Robosense to attain the attachment of the perception receiving a packet).

RS-Box User Manual
If an error is reported, please check if the configuration has a problem, if the network is
connected, and if the perception has been launched normally. In normal cases, you can see
the following messages by entering "rostopic list" at the terminal. Otherwise, please check if
the above steps are correctly followed.

RS-Box User Manual
5. Output docking
After the RS-Box is properly connected and booted up through Web console, it will
send perception results with UDP socket format to the user terminal computer. We provide
perception receiving packet demo under ubuntu16.04 and window7 system for users to test
and port(Please contact RoboSense to get the demo).
(1)Deployment and compiling of the perception receiving packet demo under
ubuntu16.04
The demo node under ubuntu16.04is based on ROS kinetic, please first install the Full ROS
kinetic Desktop version. Create a new workspace directory (example: robosense), then
create a new src directory under this directory, put the decompressed rs_perception_receiver
into src, and see the following example for the file directory of the perception receiving
packet deployment:
Return to the workspace directory, open a terminal, run the "catkin_make" command,
compile the node:

RS-Box User Manual
The version compatibility may cause the protoc related errors during compilation. . First
delete the "perceptron.pb.h" and "perceptron.pb.cc" files under the
robosense/src/rs_perception_receiver/proto directory, then recompile the "perceptron.proto"
file with the local version of protobuf. Steps are as follows:
In the terminal, switch the path to the robosense/src/rs_perception_receiver/proto directory
and execute "protoc perceptron.proto --cpp_out=./", then switch back to the workspace
robosense directory and re-execute the "catkin_make" command to compile the node until
the compiling is successful.

RS-Box User Manual
After the compilation is successfully completed, you can run the node in the current
workspace robosense directory. First, add the environment to the workspace and execute
"source devel/setup.bash". (If the shell is zsh, please execute "source devel/setup.zsh").
Run node: execute "roslaunch rs_perception_receiver receiver.launch" in the current
workspace robosense. A successful start will open the RVIZ (this step is the same as the
above-mentioned of direct launch of robosense.rviz), where you can see the results received.
Different color of boxes represent different object, blue box for big vehicles, red box for
small vehicles, sky blue box for bicyclists, and yellow box for pedestrians.
In addition, the console will print out some of the information received:

RS-Box User Manual
(2)For the description of the receiving packet demo under Windows 7, please refer to the
documentation in the compressed packet.
(3)Porting Description
For the description of the perceptual results, please refer to the attached RoboSense
Perception Results Description.pdf. Later, user can customize development under Windows
7 system or Ubuntu system.
6. WEB console
The web console is designed specifically for the remote control of the RS-Box, it has the
functions such as system activation, debugging perception algorithms and replacing
parameter files , etc. User can customize its RS-Box in accordance with their own
requirements.
Open Web Browser at the receiving terminal computer with IP 192.168.1.xxx, then input
the IP address of the RS-Box (with its own default NIC IP: 192.168.1.102) for visiting the
Console. Six main functions are provided by the RS-Box as follows:
(1) Perception Activation.

RS-Box User Manual
Click on the left to activate with a push of a button or set the home page as the default
interface to launch the perception interface. On the right side, there is a button that can also
be used to activate the 16 channel LiDAR perception. The black square below the button is
the area where the perception information will be printed. When the perception is activated,
the perception operation information will be printed in this area.
(2) Static Parameters Alteration.
For first time using LiDAR or replacing LiDAR, the static parameter file needs to be
replaced. The static parameter file is in the configuration_data folder under the LiDAR
supporting U disk. Steps are as follows:
Step 1. Select the replacement static parameter file among the list on the left of the WEB
console;
Step 2.Click “Click to select file” on the right to select the static parameter file. After
confirmation, the static parameter file to be uploaded will be displayed under the upload
button;
Step 3. Click the“Upload” button to upload the file.
(3) Update SDK
For more and better user experience, this module provides updates below system level. The
replacement steps are as follows:
Step 1. Select the update SDK in the list on the left of the WEB console.
Step 2. Click the "Click to select file" button on the right, select the new SDK compression
package, after confirmation, the compressed package to be updated will be displayed under
the “update” button.
Step 3. Click the “update” button to update.
(4) RS-Box Console.
RS-Box Console is a Web version of remote-control terminal, user can control RS-Box
through the terminal directly.
(5) Parameter File Replacement.

RS-Box User Manual
The parameter file is the configuration file of the perception algorithms
RS-LiDAR-Algorithms. If no special requirement, please use the default parameter file. To
replace, please follow the steps below:
Step 1. Select the static parameter replacement file in the list on the left of the WEB
Console.
Step 2. Click the "Click to select file" button on the right, select the parameter file, and
confirm. After confirmation, the parameter file to be uploaded will be displayed under the
upload button (Note: the parameter file has a fixed file name, please do not try to change the
file name).
Step 3. Click the “upload” button to upload.
(6) Shutdown, Restart, and Connection Restoration. This function can be used to
(7) Shutdown, Restart, and Connection Restoration.
Shutdown: to shut down the RS-Box.
Restart: to restart the RS-Box.
Connection Restoration: to fix and update the broken link.
7. Run Perception Algorithms at the RS-Box.
7.1 Launch Perception Algorithms at the RS-Box WEB Console with a Push of a
Button.
A. Open the console by accessing 127.0.0.1 in the browser of the RS-Box.
B. For the rest of the steps, please refer to the steps describing launching perception
algorithms at the receiving terminal Web Console.
7.2 Launch Script File through Root at the RS-Box
A. Connect the RS-Box to a monitor and a mouse;

RS-Box User Manual
B. Open the terminal, switch to root user: input sudo -s, password is the boot-up
password(ubuntu);
C. Input roslaunch rs_perception 16_test.launch at the terminal(this file might be the
example file, please contact RoboSense if you have any question).
Warning: There exists the safety risk to the system files to use the RS-Box through the
root, please use with caution!

RS-Box User Manual
8. Appendix A Mechanical Dimensions
Figure 3
Table of contents
Other RoboSense Network Hardware manuals