23
INTRODUCTION TO YOUR
NEW R 8 • R 10 • R 15 • R 20
R 8 V.V. • R 10 V.V. • R 15 V.V.
• R 20 V.V. CUTTER MIXER
The Cutter is perfectly geared to professional
requirements. It will perform any number of tasks, as
you will discover with use.
It can be used for processing meat and vegetables,
fine stuffing, mousse, grinding, kneading and
mixing,… all in seconds. Its outstanding results will
soon introduce you to a whole new world of culinary
skills.
Its simple design means that all parts which are
handled frequently can be easily assembled, or
removed for maintenance or cleaning.
To make things easier for you, this instructions manual
has been divided according to the various assembly
operations.
This manual contains vital information designed to
help the user get the most out of his or her cutter
mixer.
Consequently, we strongly advise you to read the
manual carefully before using your machine. We
have also included a few examples to help you get
the feel of your new machine and appreciate its
countless advantages.
SWITCHING ON
THE MACHINE
• ADVICE ON ELECTRICAL CONNECTION
Before plugging in, check that your power supply
corresponds to that indicated on the machine rating
plate.
Three phase R 8 • R 10 • R 15 • R 20 • R 8 V.V.
• R 10 V.V. • R 15 V.V. • R 20 V.V.
Robot-Coupe supplies models adapted to the fol-
lowing types of electrical mains supply::
220V / 60 Hz / 3
230V / 50 Hz / 3
380V / 60 Hz / 3
400V / 50 Hz / 3
The machine is supplied with a cable to which you
simply attach the appropriate electrical plug for your
system or wire to your isolator box, if wiring to an
isolator box this should be undertaken by a qualified
electrician. The cable has four wires, one earth wire,
plus three phase wires.
If you have a 4-pin plug :
1) Connect the green and yellow earth wire to the
earth pin.
2) Connect the three other wires to the remaining
pins.
As ROBOT-COUPE doesn’t require a neutral
connection, if you have a five-pin plug, the central
pin will not be used.
Single phase R 8 V.V. • R 10 V.V.
Robot-Coupe supplies models adapted to the
following types of electrical mains supply::
200V /50 Hz / 1
240V /60 Hz / 1
200V - 240V / 50 Hz or 60 Hz / 1
The appliance is supplied with a bare power cord
so that you can fit a plug that corresponds to your
particular mains supply. This cord comprises three
conductors: an earth wire, a neutral wire and a live
wire.
After fitting the plug and before you use your
appliance, switch it on to check that the blade
assembly rotates in an anticlockwise direction.
If this is not the case, contact your technical support
service.
• CONTROL PANEL
R 8 • R 10 • R 15 • R 20 :
Red switch = ”Off” button
Green switch = “On” button 1st speed
(1500 or 1800 rpm)
Green switch = “On” button 2nd speed
(3000 or 3600 rpm)
Black switch = pulse control
Green indicator = safety indicators
R 8 V.V. • R 10 V.V. • R 15 V.V. • R 20 V.V. :
Speed variation from 300 to 3500 rpm.
Red switch = ”Off” button
Green switch = “On” button
Black switch = pulse control
Potentiometer = speed regulation
Green indicator = safety indicators
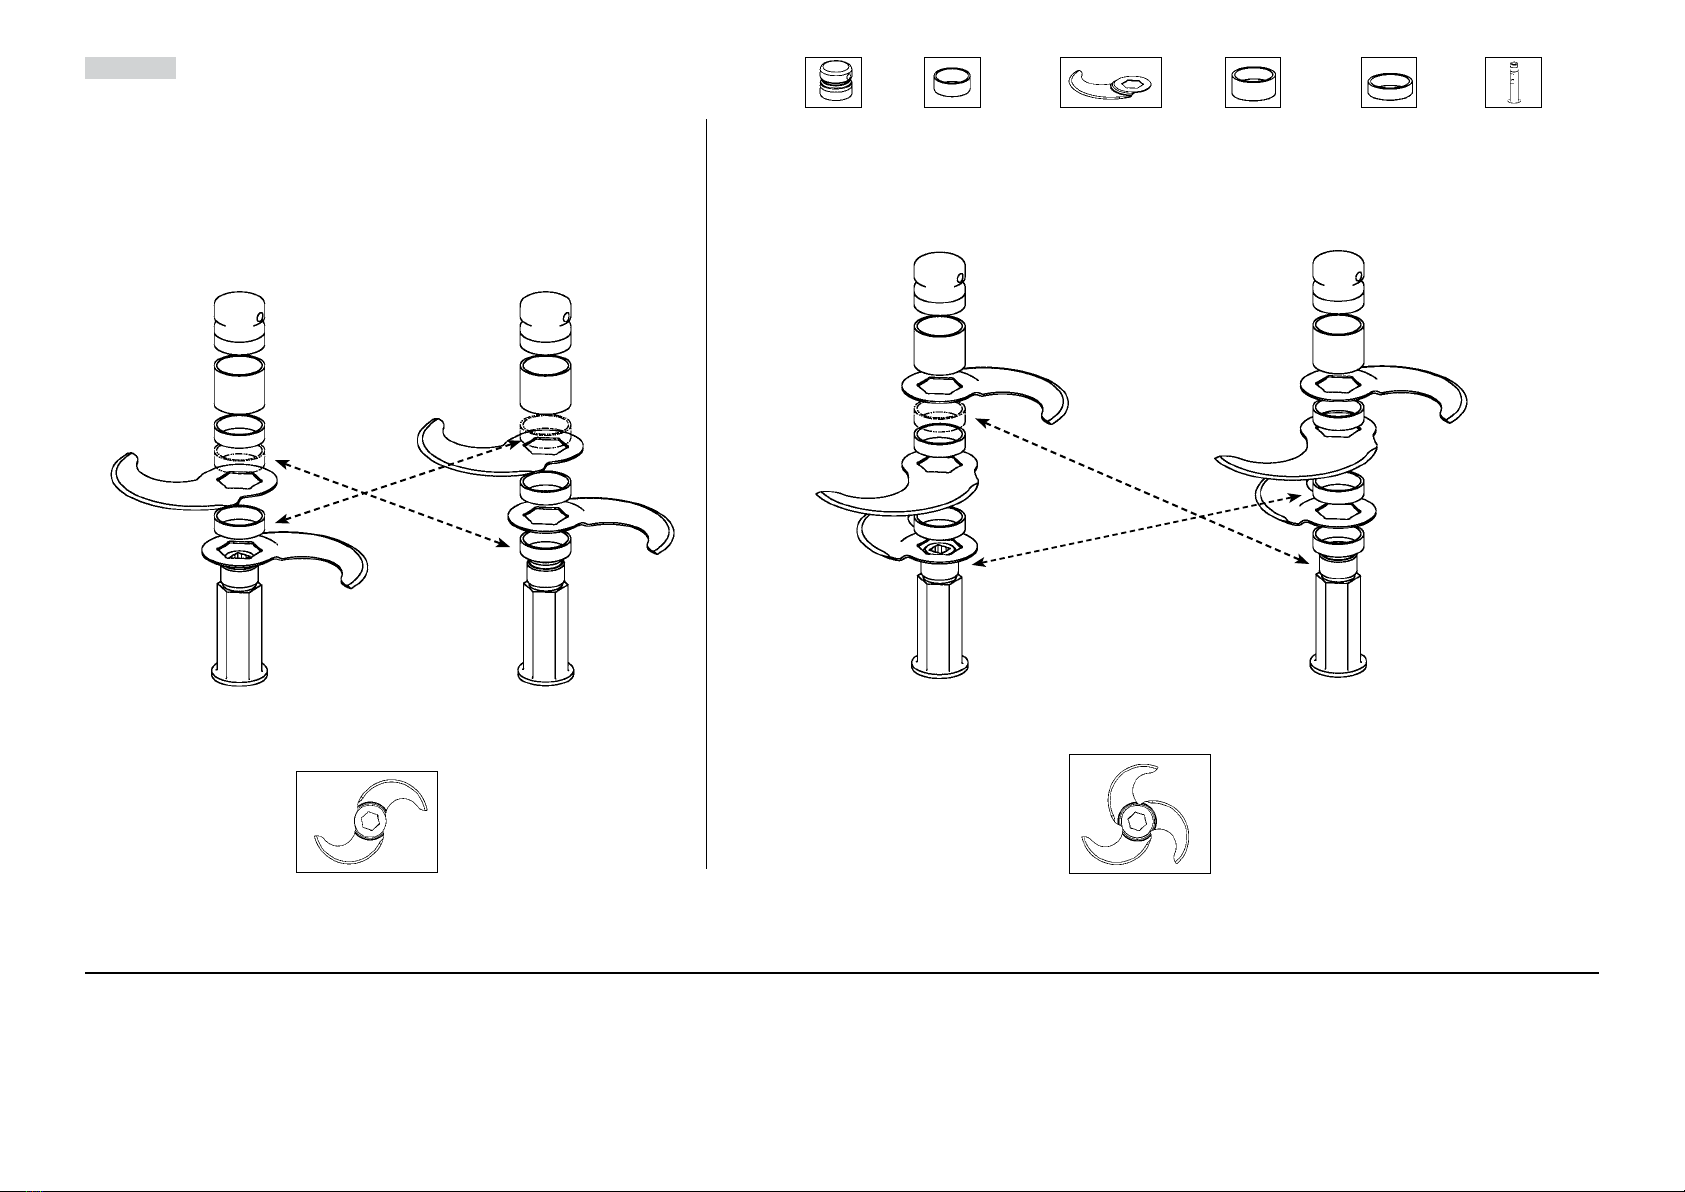
ASSEMBLY
• MACHINE
1) With the motor base
facing you, position the
bowl on the motor shaft
so that the handle on your
left is near the control
panel.
WARNING
THIS APPLIANCE MUST BE PLUGGED INTO AN EARTHED
SOCKET (RISK OF ELECTROCUTION).