For use in food service facility drain lines, professionally serviced residential drain lines, and
other appropriate drain lines.The InVade Power Dose injection system is programmed to inject a
metered dose of highly concentrated microbial solution to provide a continual microbial
presence in treated drain lines.This continuous dosing of the drain line maximizes microbial
effectiveness. Use InVade Power Dose refill cartridges with the Power Dose Dispenser. Dispenser
is 4.65” wide x9” high x3.15” deep and needs 9” clearance for the door to open.
Tools needed: Cordless drill, 3/16”, 1/4” & 3/8”drill bits, open-end wrench, 2C-cell batteries,
11” zip ties, degreasing cleaner
Mounting the dispenser (1) It is recommended when installing the dispenser to
use the adhesive pad as well as screws when mounting the dispenser to the wall. If
unable to screw the dispenser to the wall, installation may be accomplished using the
adhesive pad only.
1. Clean the wall with a degreasing cleaner then wipe with the alcohol prep pad (7).
2. Use the key (6) to open the dispenser. Key is attached to the back of the dispenser.
3. Remove the paper attached to one side of adhesive pad (A7). Stick the pad on the
back of the dispenser.
4. Remove paper from second side of pad, and mount dispenser to wall.
Optional Screw Mounting
1. Drill a 1/4” hole using appropriate type drill bit.
2. Insert a large wall anchor (5) into hole and hammer it flush to wall.
3. Insert a large mounting screw (5) into the wall anchor leaving 1/4” exposed.
4. Remove the paper attached to one side of adhesive pad (A7). Stick the pad
on the back of the dispenser. Remove paper from second side of pad.
5. Mount dispenser to wall by poking the screw in the wall through the
adhesive pad.
6. Tighten the screw to secure dispenser to wall.
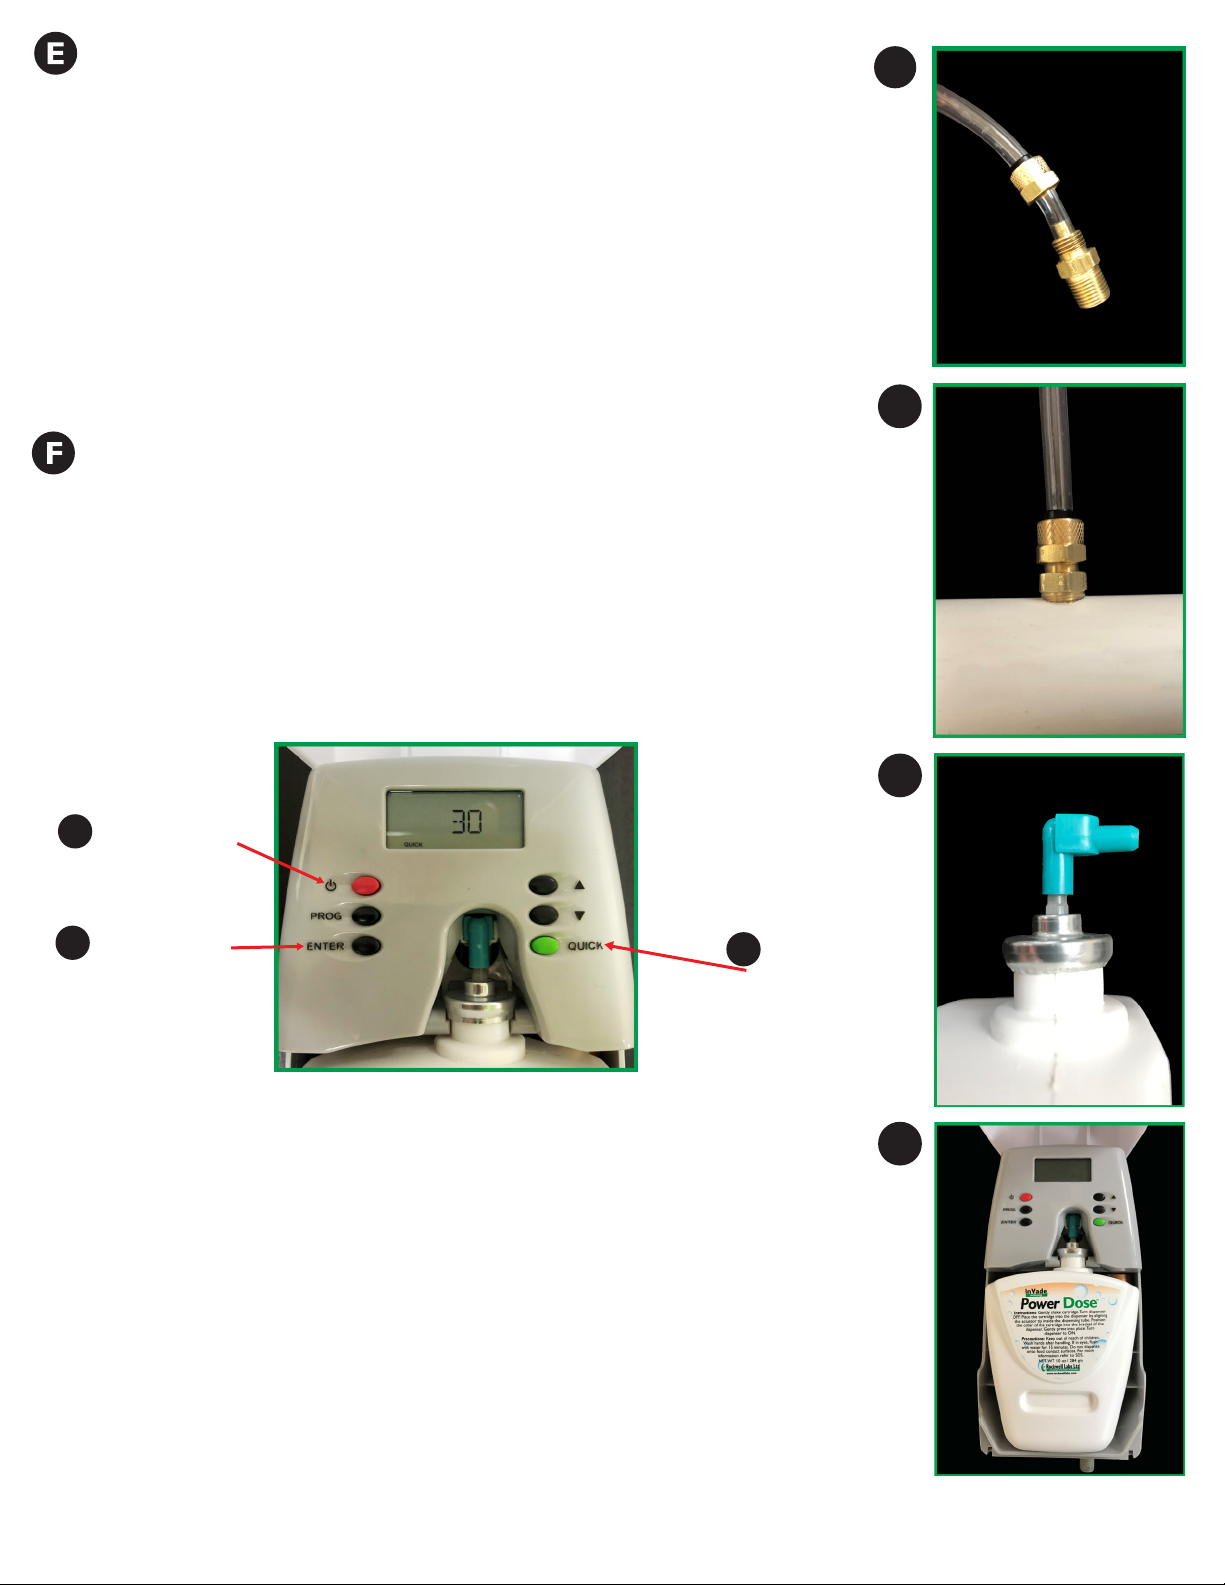
Install the drip tube (2)
1. Remove the tape from the end of the tubing that has the brass nut and O-ring.
2. Using the end of the tubing that has the brass nut and O-ring attached, insert
approximately 1” of the tubing into the bottom of the dispenser. As you press the
tubing into the dispenser, slightly rotate the tubing back and forth. Firmly press the
tubing until it does not move any further into the dispenser.
3. Slide the O-ring flush against the bottom of the dispenser, followed by the nut.
Tighten the nut finger tight and give the tube a slight pull to ensure it is secure.
Optional
To further secure the tube, attach it to the wall near the dispenser using the P
clips (3). Drill holes using the 3/16” drill bit and secure the P clips using the
small mounting screws (4) and small wall anchors (4).
Open Air Gap Drain installation
1. Extend the drip tube about 1” past the bottom of the drain pipe it is secured to
(ensure the solution will enter directly into the drain when it exits the drip tube).
2. Secure the drip tube to the pipe at several locations with zip ties to ensure the
tubing does not come loose. Do not tighten the zip ties to the point where the
tubing begins to collapse.
Closed Drain installations – (picture on page 2)
1. Identify an injection point into the drain pipe that is as close to the dispenser as
feasible.
2. Drill a 3/8” hole into the top of the drain line. (Do not drill into cast iron, it will
crack)
3. Screw the base of the compression fitting (8) into the hole using an open-end
wrench.
4. Cut any excess drip tubing off, leaving sufficient length to span from the dispenser
to the injection point.
5. Remove the compression end off the fitting by unscrewing it.
6. Slide the end of the drip tube through the black compression fitting base and over
the compression nipple at the base and hand tighten.
7. Use zip ties to secure the drip tube to the drain pipe at several points if necessary.
Do not tighten the zip ties to the point where the tubing begins to collapse.
A7
B
C
Open Air Gap Installation
1
TM Dispenser Instructions