NOTE: Before raising the legs to the storage position, bolt and nut must be inserted into the base support and tightened each time. If this procedure is not followed the unit
may fall over.
When moving loads with the crane, make sure that:
• The floor is stable, i.e. the bearing capacity of the floor is larger than the total weight of the load to be transported and the crane’s own weight.
• The floor is even. Unevenness can destabilize the crane, even leading to loss of the load.
• The floor is horizontal. Never try to move a load on a leaning surface.This could lead to a shift of the center of gravity and, thus, to a toppling-over of the
crane.
• Always lower the load to be transported to its lowest point when moving the crane. WARNING! Never set the load onto the chassis.
• When transporting heavy loads, the operation must be carried out by two people.
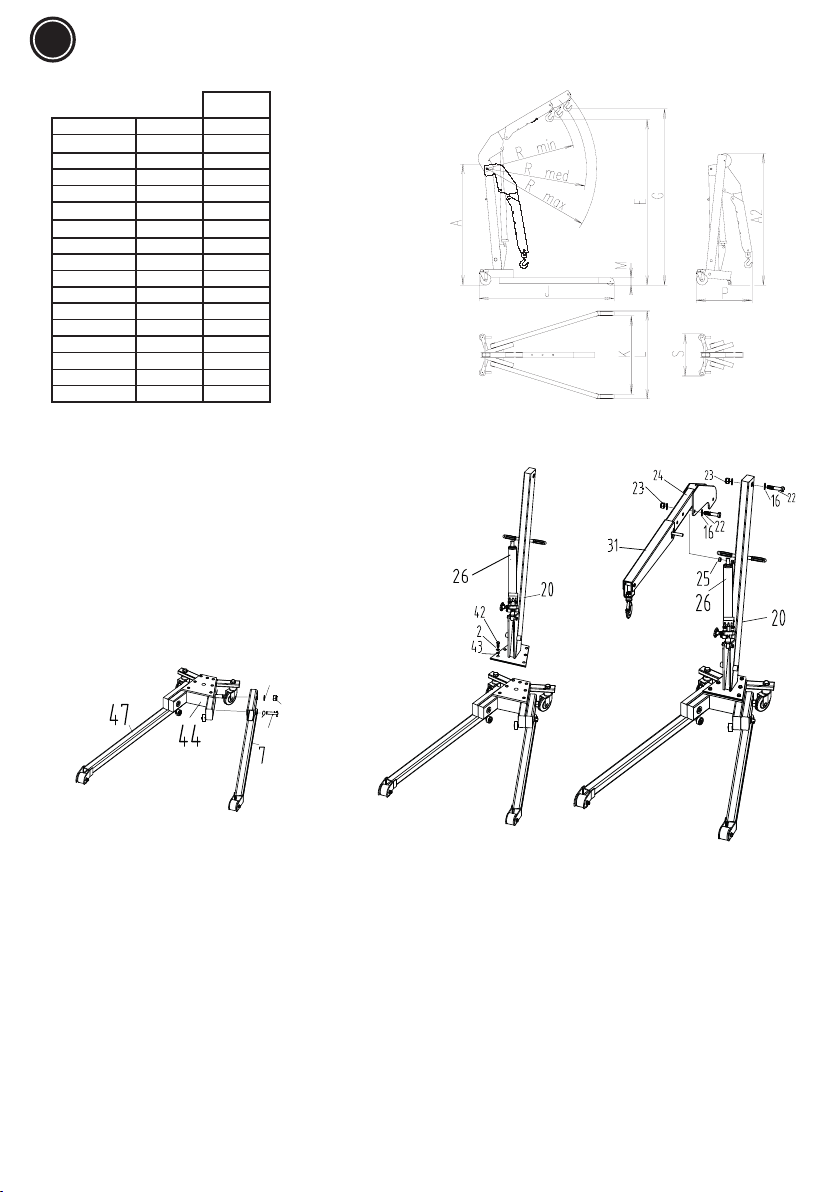
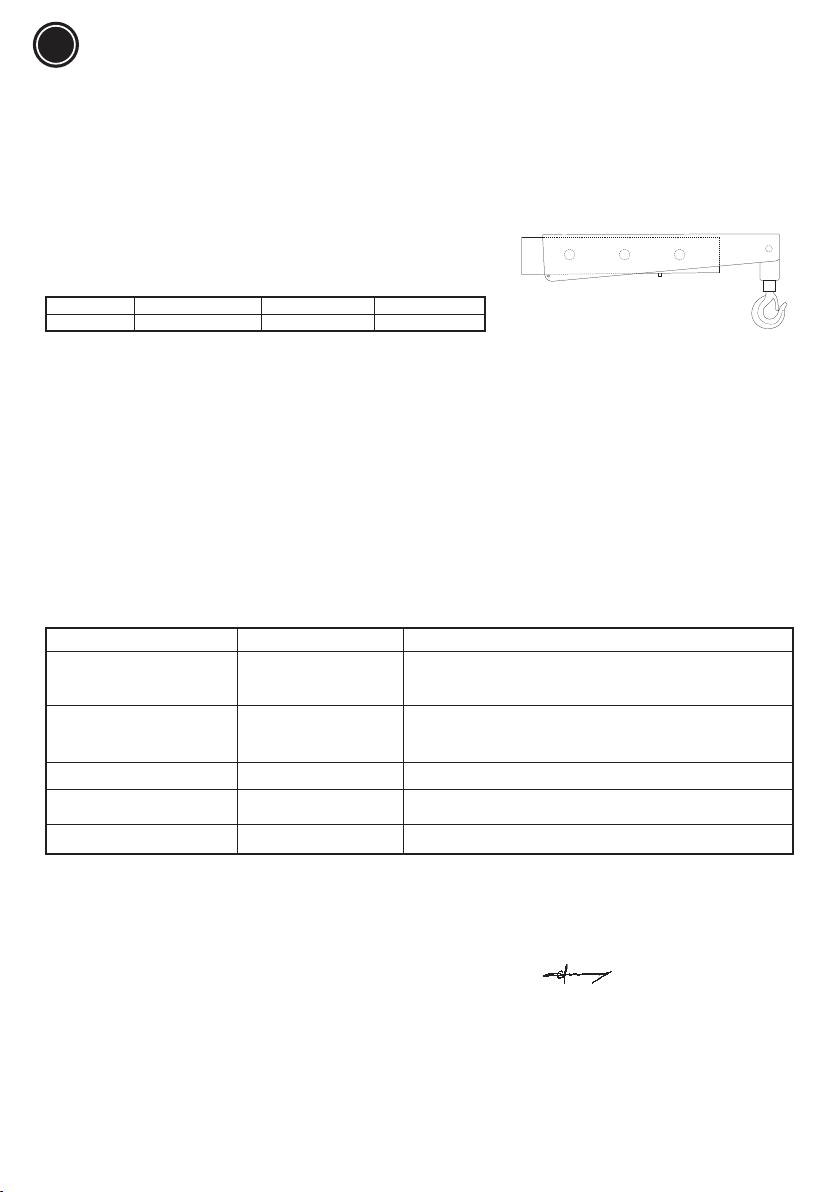
Setting the arm length
• Move the boom in a position that you can reach (lifting/ lowering).
• Remove the spring cotter pin and pull the bolt out of the boom .
• Set the boom to the desired position.
• Insert the bolt into the boom again, and secure it with the spring cotter pin.
Position 1 2 3
Capacity 1000 kg 750 kg 500 kg
Maintenance instruction
• Lubricate all moving parts at regular intervals.
• Always keep the crane clean and protected from aggressive conditions.
• Check the oil level of the hydraulic unit with the piston fully retracted. Top up if necessary.
IMPORTANT: An excess of oil will render the crane inoperative. Use only hydraulic oil with an ISO VG 15.
VERY IMPORTANT: never use brake fluid.
• Make sure the Hook are clean of dirt, grease, or debris.
• To clean, use a damp cloth and a mild detergent. Do not use solvents or other flammable agents.
• If lifting performance of the Foldable Shop Crane begins to diminish, check the hydraulic oil level in the Oil Tank. If necessary, top off the Oil Tank with
hydraulic oil.
Important : When adding or replacing oil, always use good grade hydraulic jack oil such as international VG 15
• Avoid mixing different grades/types of oil. DO NOT use brake fluid, alcohol, glycerine,, detergent motor oil or dirty oil. Improper fluid can cause serious
internal damage to long ram.
• When adding oil, be VERY CAREFUL to avoid dirt or foreign matter to get into the system. Check ram and plunger every 3 months for any signs of rust or
corrosion. Clean as needed and wipe with an oily cloth.
• When not using the long ram, always leave the jib in the fully lowered position.
Trouble Shooting
Fault Cause Remedy
Crane doesn't hold load Dirt on valves seals
1. Lower lifting boom. Close the release valve and remove oil ller plug.
2. Place one foot on the leg and pull up the lifting boom to its full height by hand.
3. Open the release valve to lower the lifting boom.
4. Worn seals.
Crane doesn't lift load.
Crane doesn't lift to its full height.
Pump feels unsteady under load.
Pump doesn't lower completely.
Air block. 1. Open the release valve and remove oil ller plug.
2. Pump handle a couple of full strokes and close the release valve.
Pump doesn't lift to its full height.
Pump feels unsteady under load.
The reservoir could be overlled.
Low hydraulic oil level.
Check the oil level. Remove the ller plug.
Top up oil to correct level.
Pump feels unsteady under load. The pump cup seal could be worn out Replace cup seal with a new one
Crane doesn't lower completely Air block.
Unit requires lubrication.
Release air from hydraulic pump by removing ller plug.
Oil the external moving parts.
EN English WK1000
Crane
EU Declaration of conformity
We : Desoutter GmbH - Edmund-Seng-Str. 3-5, 63477 Maintal, Germany
Declare under our sole responsability that the product(s): WK1000 Serial Number: 00001 - 99999
Machine type(s): Crane Origin of the product : China
is in conformity with the requirements of the council Directives on the approximation of the laws of the Member States relating : to “Machinery“
2006/42/EC (17/05/2006)
applicable harmonised standard(s) : EN1494:2000+A1:2008
Name and position of issuer: PASCAL ROUSSY ( R&D Manager)
Place & Date: Saint-Herblain, 05/05/2020
Technical file available from EU headquarter. Pascal Roussy, R&D manager, CP Technocenter 38, rue Bobby Sands - BP10273 44800 Saint Herblain
- France
Copyright 2020, RODCRAFT
All rights reserved. Any unauthorized use or copying of the contents or part thereof is prohibited. This applies in particular to trademarks, model
denominations, part numbers and drawings. Use only authorized parts. Any damage or malfunction caused by the use of unauthorized parts is not
covered by Warranty or Product Liability.
Original Instructions
The design has been validated according to: ASME PASE-2014
123