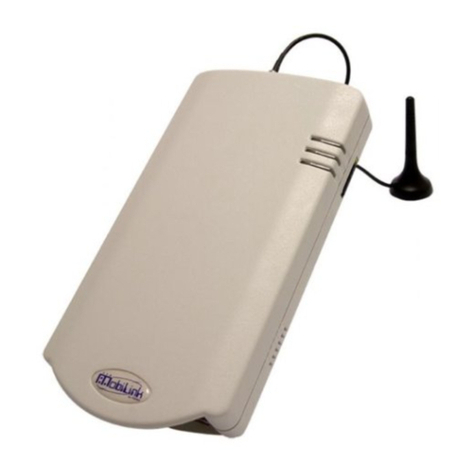
Rohde & Schwarz Topex TOPEX VoiBridge User manual

Voxi Family
(VoIP-to-GSM / HSDPA Gateway)
TOPEX VoiBridge
Installation Manual
2011

VoiBridge
www.topex.ro installation manual page 2
ABOUT US
Rohde & Schwarz Topex first started in 1990 as a Romanian company called TOPEX which offered
integrating telecom solutions and distributed telecom equipment to Romanian and foreign markets,
offering answers that meet telecom network requirement of companies across the globe.
Since the firs of December 2010, Rohde & Schwarz Topex became a two-tier management company.
The objective of this new company is to support sales but also to strengthening market position in the
Europe as well as telecom market segment. In Rohde & Schwarz Topex Company, TOPEX will add
key technology information to the already existing experience of Rohde & Schwarz in order to
diversify and provide many benefits to the customers.
Rohde & Schwarz Topex is among the most innovative, fast growing European manufacturer of
telecommunication equipment, providing a wide range of telecommunication applications. The
company has over 20 years of experience in research, development and manufacture of both civil
and military telecommunication devices.
Our company acts like a bridge between analog, digital, IP telephony systems in wired and wireless
environments.
Rohde & Schwarz Topex philosophy is built around the syntagm "everything connects". This is the
expression of our credence, vehicle for the internal evolution of the company and interface for
external contacts.
Rohde & Schwarz Topex 's leveraged expertise includes: Next Generation Network solutions
{Softswitch, Media Gateways for TDM, VoIP, GSM and CDMA (2G,3G), Signaling Gateways (SS7,
ISDN, R2, SIP, H323)}, Broadband Wi-Fi Mobile Routers, Fixed-Mobile Terminals (2G, 3G) and ATC
Voice Communication Systems.
Rohde & Schwarz Topex products address the needs of business today that demand communication
convergence at lower costs and the ability to exploit the Internet and existing data networks with VoIP
for cheaper cost calling.
All the products are developed by Rohde & Schwarz Topex own Research & Development
Department which has as its main goal the provision of future-ready telecommunications equipments.
Our company offers you profitable and practical solutions: the entire range of equipments is very easy
to customize and enhance (flexible, upgradeable configurations).
In order to achieve effective and flawless manufacturing of its products Rohde & Schwarz Topex has
organized complete production facility in Europe. The company has proven the quality of its
resources being permanently present in the most important markets on Europe. It delivers its
products worldwide through a global distributor network.
The main lines of products of our company are:
Fixed-Mobile Terminals (interfaces from GSM/GPRS/EDGE/UMTS to analog, ISDN BRI and
PRI, or VoIP)
Media Gateways for TDM, VoIP, GSM and CDMA (2G,3G),
softswitches and other Next Generation Network solutions
Signaling Converters and Protocol Translators (SS7, SIP, H323)
Broadband Wi-Fi Mobile Routers
VoIP gateways (miniature, GSM/CDMA, advanced)
ATC Voice Communication Systems (Custom systems for special applications such as (air
traffic control or railway dispatching center)
For more details please visit www.topex.ro

VoiBridge
www.topex.ro installation manual page 3
WEEE Directive Compliance
WEEE Directive
This symbol applied on your product or on its packaging means that this
product fulfils the WEEE Directive. The product shall not be recycled as
household waste; it will be disposed separately as sorted waste.
Regarding to WEEE Directive the recycling EE equipments must be
accomplish separately in purpose of preserving natural resources and to avoid
the occurring negative effects about human health and environment. The
acquired product shall not be treated like household waste and will be given to
a specialized company.
! Please do not dispose your product as unsorted waste (household waste),
recycle it to protect the environment. Separate the packages according to
waste disposal options and sort it for recycling.
For supplementary information contact us to:
Phone: +4021 408.39.00 or www.topex.ro
2006/66/CE Directive Compliance
This symbol applied on your product or on its packaging means that product
includes a battery (CR2032 Lithium type) which is subject to apart collecting
from household and WEEE waste.
The battery will not be recycled as household or WEEE waste; it will be
disposed separately in purpose to protect the human health and environment
and preservation of natural resources.
For this at the end of product life remove the battery from the product
performing the operations described bellow:
1. The battery is comprised
by processor card. For
removal open the product
case or extract the card and
identify the battery and its
placement on PCB.
2. Cut the lamella with a
clipper.
3. Take off the battery from
its holder using a tweezers
or another suited tool.
4. Push the battery till this
leaves the socket.
5. Deliver over the
battery or collect it
with similar waste
and deliver together
to a specialized
company for battery
treatment.
Please do not dispose the battery of your product as common waste (household waste), recycle it to protect
the human health and environment. For supplementary information contact us to:
Phone: +4021 408.39.00 or www.topex.ro

VoiBridge
www.topex.ro installation manual page 4
Table of Contents
Safety information.........................................................................................5
About VoiBridge equipment......................................................................6
VoiBridge INSTALLATION .........................................................................7
2.1 Check the VoiBridge package content ...................................................7
2.2 Mounting (hardware installation) .........................................................8
2.3 Connecting the cables ......................................................................9
2.4 Insert the SIM cards........................................................................ 11
2.5 Connecting the antenna .................................................................. 13
2.6 Power up the equipment ................................................................. 15
VoiBridge CONFIGURATION..................................................................... 16
3.1 Access the web interface................................................................. 16
3.2 Changing the IP Address .................................................................. 17
3.3 Changing the default Password.......................................................... 18
3.4 Configure the equipment................................................................. 18
Status Monitoring ................................................................................ 19
VoiBridge TECHNICAL DESCRIPTION .......................................................... 21
5.1 Equipment versions ................................................................. 21
5.2 System Cards......................................................................... 22
5.2.1 PGVoIP Card.............................................................................. 23
5.2.2 GSM / CDMA / UMTS Card.............................................................. 24
APPLICATIONS .................................................................................... 25
TECHNICAL SPECIFICATIONS ................................................................... 27
OPERATING ENVIRONMENT..................................................................... 28
APPENDIX 1 - Connection Cables ...................................................................... 29
APPENDIX 2 – AT commands............................................................................ 31
APPENDIX 3 – Additional Commands.................................................................. 33
GLOSSARY......................................................................................... 34
This manual is Revision G, December 2011.

VoiBridge
www.topex.ro installation manual page 5
Safety information
Note: When using our device or connected equipment, the following basic safety
precautions should always be followed to reduce risk of fire, electrical shock and other
personal injury.
For a proper installation and functioning of VoiBridge follow the instructions described in this
manual or other documentation.
Always install equipment in a location and environment for which it is designed.
For locally powered ac electrical outlet use: only operate within the specified transformer
power voltage indicated.
For locally powered AC electrical outlet: Avoid placing the device power cable where it can be
exposed to mechanical pressure as this may damage the cable.
Do not insert any object into equipment slots that is not part of the product.
Do not disassemble the product. Contact Rohde& Schwarz Topex service department if
service or repair its is required.
FCC Part 15 EMC recommendation
Note: This equipment has been tested and found comply with the limits for a Class A
digital device, pursuant part 15 of FCC Rules. These limits are designed to provide reasonable
protection against harmful interference when the equipment is operated in a commercial
environment. This equipment generates, uses, and can radiate radio frequency energy and, if not
installed and used in accordance with the instruction manual, may cause harmful interference to
radio communications.
Operation of this equipment in a residential area is likely to cause harmful interference in
which case the user will be required to correct the interference at his own expense.
Modifications not expressly approved by the manufacturer could void the user`s authority
to operated the equipment under FCC rules.

VoiBridge
www.topex.ro installation manual page 6
1 About VoiBridge equipment
TOPEX VoiBridge equipment is a gateway of the Topex family of devices named "Voxi Series".
Currently this family includes VoiBridge, VoxiPlus and VoisTel.
VoiBridge is the junior member of the family, a VoIP GSM / UMTS / CDMA Gateway suitable for
calls termination and origination (VoIP to Mobile Networks and Mobile Networks to VoIP).
Functional features:
- function as a BRIDGE between a voice over IP network and several mobile carriers. The
basic version features GSM channels.
- the GSM board of the equipment can be enabled to make up to four calls simultaneously
from SIP phones to GSM network and from GSM network to IP phones.
- provide direct interconnection of VoIP and GSM networks through SIP signaling protocol. It
enables calls between mobile networks and IP networks. TOPEX VoiBridge allows you to convert
VoIP-to-mobile into mobile-to-mobile traffic in the simplest and most efficient way.
- include SSR (SIM Server Ready) feature, it supports SIM Server capabilities for remote and
central storing of any number of SIM cards. The basic function of the system is the voice capability
but it is equipped with all functions necessary for such use and provides a very high comfort in this
mode. - act as an interface between any IP PBX and different mobile networks (GSM / GPRS,
CDMA, UMTS or HSDPA).
- SMS service (Short text messages) - for remote control purposes, diagnostic SMS can be
sent in regular intervals from the gateway to a selected mobile number. These additional functions
enhance the utility value of the product.
- no extra equipment (an external GSM telephone, etc.) is needed for normal operation. All
programmable parameters are default-preset in such a manner that you can start your telephone
traffic at the moment you connect the Ethernet and supply cables, antenna and SIM card and set the
IP parameters.
- the intelligent routing of incoming calls accelerates the connection of incoming calls and
makes calling more comfortable. Unlike mobile telephones, TOPEX VoiBridge does not expose you
to the RF electromagnetic field while making calls.
- comfortable and advanced configuration by web interface
VoiBridge main features:
4 GSM channels ( Quad Band modules )
VoIP or 2E1 (in & out)
SIP & H.323 protocols
Least Cost Routing mechanism
Direct Inward Dialing (DID)
CDR generation
Web interface operation & administration
Asterisk PBX Server Integration
Support Topex SIMSERVER integration

VoiBridge
www.topex.ro installation manual page 7
2 VoiBridge INSTALLATION
To assure the correct operation of the TOPEX VoiBridge equipment, follow the next stages:
Unpack and Verify the content of the package;
Mount the equipment on the chosen location;
Identify the connectors and connect the cables (Ethernet and serial for the console);
Insert the SIM cards;
Connect the mobile antenna;
Power up the equipment.
Basic configuration
2.1 Check VoiBridge package content
The delivered TOPEX VoiBridge content must comprise the items accounted below. Please,
check if you receive all the items!
Item Pieces
VoiBridge equipment 1
Serial Cable 1
Ethernet Cable 1
Mobile Antenna 1
CD with Manuals
(Installation Manual and Web Interface Manual)
1
Warranty Certificate 1

VoiBridge
www.topex.ro installation manual page 8
2.2 Mounting (hardware installation)
A. Installation conditions:
Topex VoiBridge equipment is conceived to work indoor environmental only (rooms, halls,
offices)
The environmental parameters must be within the range:
Operating temperature: from 5 to 500C;
Relative humidity: from 10 to 85 %, non-condensing;
The dust and the prolonged exposure to sun radiation must be avoided;
Must NOT be used in a flammable or explosive environment, or in locations where toxic or
flammable gases may be accumulated;
The location of the equipment must be airy, open, without obstacles or objects that could
prevent the proper operation of the gateway.
The equipment must be positioned safely as far as possible from the heat sources, direct
sunlight, heavy-duty electric equipments and from equipments which generate radio
interferences.
B. The installation:
place de VoiBridge equipment on a flat surface strong enough to hold the weight of the
equipment together with its cables (power supply, Ethernet, Serial). A good place for equipment
installation is represented by a desk, table or shelf.
After the hardware installation of the equipment, the cables must be connected, and the
equipment powered up.

VoiBridge
www.topex.ro installation manual page 9
2.3 Connecting the cables
To assure an adequate operation of the TOPEX VoiBridge equipment, the cables must be
connected properly, as is described further:
Achieve the serial connection:
Figure 1- Connecting the serial cable
The special serial cable must inserted with its RJ45
end in the serial connector labeled RS232 (RJ45)
located on the front panel of the TOPEX VoiBridge
equipment, and with the other end in the
correspondent connector (DB9) of your PC.
The serial cable is connected to the PC on a RS-232
serial port (DB9 muffle), for instance COM1 or COM2
as shown in the image to the right.
For this type of equipment, the serial connection
cannot be used for the OAM program.
The serial connection of the Topex VoiBRIDGE has the following settings:
Bits per second - 115200;
Data bits – 8;
Parity – None;
Stop bits - 1;
Flow Control – None.
Please make sure that the COM port of your PC is configured accordingly!
Then you may connect the serial cable from the Topex equipment to the COM1 port of your
computer, as shown in figure above.

VoiBridge
www.topex.ro installation manual page 10
Achieve the local network connection (LAN):
The TOPEX VoiBridge equipment is connected on the local network (LAN) or to the Internet
through the standard UTP Ethernet cable (CAT-5). Since the switching system of the equipment is
auto – negotiation (10 / 100) and auto-crossover you can use:
a. a straight cable in case of connecting to a LAN (switch, hub);
b. a crossover cable in case of connecting the equipment directly to the Ethernet port of your
computer.
The b. kind of link is recommended when you connect to the Topex gateway in order to change
its IP address: if you connect directly to it, you can avoid both disruptions to the local network in case
of conflicting IP addresses, as well as loss of connection when you are in the middle of performing
changes.
The network cables are inserted with one end in the RJ45 connector (labeled ETH0 or ETH2)
from the TOPEX VoiBridge equipment, and with the other end into a PC, switch or hub. The Ethernet
connection directly to your PC is used for configuration of the equipment by means of the OAM
program.
Figure 2– LAN connection for Topex VoiBridge

VoiBridge
www.topex.ro installation manual page 11
2.4 Insert the SIM cards
TOPEX VoiBridge equipment features four SIM slots for inserting up to four mobile subscriber
cards. Each SIM card corresponds to a mobile (GSM / UMTS / CDMA) module. The VoiBRIDGE
equipment can use the SIM cards from different mobile operators; the only condition is for the SIM
cards to be activated by them.
The procedure of inserting the SIM cards is detailed in the steps below:
1. Push the little yellow button for
extract the SIM holder from the
VoiBridge equipment.
Note: Because its small dimensions,
you can push the button using an
object with a solid edge such as a
screwdriver.
2. Pull out the holder for the SIM card.
3. Insert the SIM card into the holder,
with the cut (notched) corner orientated
upwards and the side with contacts
toward you.

VoiBridge
www.topex.ro installation manual page 12
4. Insert the holder with the SIM card
back into the slot and push to close. Be
careful not to drop the SIM out of the
tray and to insert the holder properly
into the slot!

VoiBridge
www.topex.ro installation manual page 13
Note: The operation described above must be performed for all SIM card insertion and also when you
want to replace (change) the existing SIM card with a new one.
Warning: When inserting / extracting the SIM card the equipment must be powered off to avoiding
damaging the internal modules.
2.5 Connecting the antenna
Depending on the device type, TOPEX VoiBridge has either one or several connectors for
antenna(s). You should pick the type of antenna that is best for your current location (depending on
the installation site, the current field strength, frequencies used by the mobile carriers you want to
connect to y etc.).
The TOPEX equipment may use different types of individual (discreet) or collective antennas.
The standard issues are stick-type magnetic-base antennas, while upon request, special antennas
are available, such as high-gain, directional Yagi type (see details below).
The antennas have a 2,5 m length connection cable and a base with magnet for fastening to a
ferrous support. The base is heavy, so the antenna will stand upright even if you place it on a flat
surface that is not metallic.
Note: The delivered antenna corresponds to the mobile module type from the equipment. Below is
presented an example of an omni directional magnetic antenna with its respective specifications.
Type: “magnetic base antenna”
Directivity: omni directional
Frequency: Multiple bands ( 890 to 960, 1710 to
1880, 1850 to 1990 MHz and 1920-2170 MHz)
Gain: 2 dbi
Polarization: vertical
Height: 72,5 mm total, 43mm active stick
Cable: RG174, length 2,5m
End connector: SME female
Magnetic base: diameter 2,8 cm

VoiBridge
www.topex.ro installation manual page 14
Mounting the antenna
To ensure a good quality of transmission and reduce radio interference, use the antenna(s)
shipped in the VoiBridge package. During installation, care must be taken that the antenna base
(usually the mounting bracket) is grounded. Grounding of the antenna base improves reception of the
mobile networks.
Connect the antenna for the mobile networks as shown in figure 12 (the RF connector of
antenna cable by screwing at the ANT connector):
Figure 3– Mobile antenna connection
Warning! Don’t use excessive force. Make sure the antennas are securely screwed into the RF
connectors, but do NOT use a spanner or screw key, which could damage the antenna connectors!
Tighten the flange lightly, by hand.
Notice:
1. The VoiBridge equipment unit and its antennas should be placed such as to be as far
as possible from appliances or office equipment that is sensitive to radio interference
(microwave ovens, copiers, TV sets, PC displays, and multimedia systems). For best
results, try to find for the antenna a place of maximum signal reception.
2. In addition, the antenna must NOT be located near heavy-duty equipment that may
generate electromagnetic interferences, such as electric motors or heaters.
3. The antenna must be mounted in such was as the minimum distance to human beings
to be of at least 20 cm, in order to avoid the human exposure to its radiations.
Remember that the equipment transmits for longer periods of time, being used for
multiple voice calls, so the radiation will be accordingly higher than for an ordinary
2G/3G mobile phone that is used only infrequently, by a single person.

VoiBridge
www.topex.ro installation manual page 15
2.6 Power up the equipment
For the equipment power supply, use only the supply cable (standard) that is included in the
TOPEX VoiBridge package.
Before plugging in the outlet, make sure that the mains voltage value meets the specifications
written on the label of the equipment (230VAC).
Furthermore, make sure that the antenna has been connected. If you connect the gateway to
the power supply without an antenna, the GSM module transmitter might get damaged.
The muffle of power supply cable must be inserted into the receptacle placed on rear of
equipment and then inserted into outlet
Figure 4– Supply the equipment
There is a POWER switch on the equipment, press it in order to start the equipment.
Note: The 230 VAC socket-outlet shall be placed near the equipment and must be easily accessible.
Following the power up of the TOPEX VoiBridge, the red LED located on the front panel of the
equipment must be on.

VoiBridge
www.topex.ro installation manual page 16
3 VoiBridge CONFIGURATION
The VoiBridge configuration can be accomplished after all the connections were achieved and the
power up was done. This operation can be performed using the web interface incorporated by
TOPEX VoiBridge equipment.
For basic configuration of the Topex gateway, perform the following steps:
Access the web interface
Change the default IP address
Configure the equipment from the web interface
3.1 Access the web interface
type: http://192.168.110.15 (the default IP address as the URL)
After you access the web browser, the following window will appear and ask you about the user
name and the password:
type user name - “admin “
the password - “99admin11”
Press “LogIn” button

VoiBridge
www.topex.ro installation manual page 17
3.2 Changing the IP Address
Initially the equipment is delivered with a default IP address 192.168.110.15. This must be
changed with an IP address from the IP address range in your LAN network.
Access the System menu
Access the Network option from System menu
Insert your network parameters: IP Address, Netmask, Gateway
Press “Save” button in order to activated the new parameters: IP
Address, Netmask, Gateway and then “Commit”
The equipment will reboot and you will be able to login with http on the address given in
the LAN Network Settings menu.

VoiBridge
www.topex.ro installation manual page 18
3.3 Changing the default Password
Initially the equipment is delivered with a default username: “admin” and
password:”99admin11”. For security reasons we advise you to change the password used for
accessing the web interface.
Access the System menu
Access the “Password” option from System menu
Insert the new password
Press “Save” button in order to activated the new password and
then “Commit”
Use the commit button to make your changes permanent. By using only the Save button,
changes will be available until first reboot.
3.4 Configure the equipment
The VoiBridge configuration is available by using the web interface, the operation instructions
are described in Web Interface Manual which founds out on the TOPEX CD.

VoiBridge
www.topex.ro installation manual page 19
4 Status Monitoring
TOPEX VoiBridge has several optical indicators (LEDs), located on the front panel of the
equipment, that show the status of the device:
a. Three LEDs located on the upper row with the following meanings:
1. The red LED “L1” lights to show the proper supply of the equipment;
2. The green LED “L2” indicates that the Linux kernel is running. It pulses faster or slower,
depending upon the operations performed by the embedded software;
3. The yellow LED “L3” lights up or to show reading from the non-volatile memory
b. Four green LEDs located on the bottom row above the SIM connectors corresponding to the
four GSM / UMTS / CDMA modules. They show info about the respective mobile modules and
SIM card, as detaild in the table below:
Table 1– LEDs (blinking) for the mobile modules
LED status LED significance
On time
(ms) Off time
(ms)
200 200 Mobile module in initialization state
1500 100 Module unregistered to the mobile network, the SIM from the
board is selected
1500 100 Module unregistered to the mobile network, the SIM emulator
is selected
100 100
100 1500 Module registered to the mobile network, the SIM from the
board is selected
100 100 Module registered to the mobile network, the SIM emulator is
selected
100 1500

VoiBridge
www.topex.ro installation manual page 20
Each Ethernet connectors features a pair of LED indicators, with this meaning:
c. The green LED of the LAN connector shows the existence of data traffic in the Ethernet
interface;
d. The yellow LED of the LAN connector shows the Ethernet connection speed. When the LED is
off, the data rate is only 10 Mbps, and when the LED is on the data rate rises to 100 Mbps;
e. Likewise, the green LED of the WAN connector shows the presence of data traffic in the
Ethernet interface;
f. The yellow LED of the WAN connector shows the interface data rate of the Ethernet
connection. When the LED is off, the interface data rate is 10 Mbps, and when the LED is on,
the data rate rises to 100 Mbps.
Table of contents
Other Rohde & Schwarz Topex Gateway manuals
Popular Gateway manuals by other brands

Elpro Technologies
Elpro Technologies 925U-2 installation guide

ActionTec
ActionTec GT724WG user manual

Ursalink
Ursalink UG87-LW user guide

ZyXEL Communications
ZyXEL Communications ADSL 2+ Security Gateway quick start guide

Control Data Systems
Control Data Systems Versa Router 950 user manual

Esse-ti
Esse-ti 4G.VoLTE user manual

SMC Networks
SMC Networks ProtoAir FPA-W34 Startup guide

EnOcean
EnOcean USB 300 installation guide

RTA
RTA 460MCMS-NNA4 Product user guide

KBR
KBR multisys D4-IGW-1 User Manual Technical Parameters

ZyXEL Communications
ZyXEL Communications ADSL2+ 4-port Gateway P-660H-D Series Support notes

ZyXEL Communications
ZyXEL Communications AMG1001-T Series quick start guide