Roku HD1000 - PhotoBridge - Digital AV Player User manual

USER GUIDE
HD1000
For Software Release 1.5.18

1

1
W e l c o m e t o R o k u ™!
Bring your HDTV to life with Roku. For the rst time, you’ll enjoy viewing your favorite digital photos in
high-denition on your HDTV. Simply snap in your digital camera’s memory card or use the easy network
connection between Roku and your home PC. And if you like a more sophisticated atmosphere, choose
from a wide selection of motion and still artwork to turn your at screen or HDTV into beautiful wall art.
Roku offers custom Art Packs on CompactFlash® cards so you can create an inspiring home gallery in your
living room.
Roku even plays digital music les over your home network, so you can enjoy your growing digital music
library on your home stereo system. Any way you use it, Roku is simple and easy. Just connect to your
home network for sharing digital media from your PC, or pop in a variety of memory cards and watch your
HDTV come to life with high-denition digital photos, art and music.
This guide provides the basics for using your new HD1000. For the most up-to-date information about tips
and tricks, networking, troubleshooting and frequently asked questions, please visit www.rokulabs.com.
(And while you’re there, please register your HD1000. Periodically, we release software upgrades that add
new features — and if you don’t register, we can’t let you know about the updates.)
In This Guide . . .
2 The Roku HD1000
4 Roku HD1000 Feature
Summary
7 Connecting the HD1000
13 Using the HD1000
13 Main Menu
14 Viewing Pictures
15 Viewing MPEG Video
15 Playing Music
17 Photo, Video and
Music Sharing from
the Computer
20 Photo Viewing Tips
25 Setup and Preferences
29 Troubleshooting

2
3
T h e R o k u H D 1 0 0 0
Package Contents
• Roku HD1000
• Component Video Cable
• Remote Control
• Two AAA Batteries
• Audio Cable
• Power Cable
Optional Accessories
• Rack Ears
• Wi-Fi Adapter
• Roku Art Packs
• Crestron Driver
Visit www.rokulabs.com for
more information on optional
accessories.
The Roku Remote
Enjoying pictures, art and
music involves just a few
touches of a button.
Make sure you install bat-
teries in the remote before
setting up your HD1000.
Navigating
To get around the screen,
move the yellow highlight
using the four arrow (naviga-
tion) buttons. Press the Select
key to choose an on-screen
item. Press the Menu key to
display the Main Menu, from
which you can access other
media and functions.
Power the HD1000
on and off.
Display the Main Menu.Exit screens and menus.
Navigate on-screen
menus and Pan around
zoomed images.
Select an on-screen item.
Skip to Previous image/track. Skip to Next image/track.
Play/Pause music
or slideshow.
Additional Information
about displayed image.
Rotate images to
desired viewing angle.
Zoom In/Out, t to
screen and multiple
magnication levels.

2
3
* Check www.rokulabs.com for compatible Wi-Fi devices.
SD/MMC, Memory Stick, Memory
Stick PRO, SmartMedia Slots
Receive standard memory cards from
digital cameras and MP3 players.
Select
Choose an
on-screen item.
Menu
Display the HD1000 menu.
Exit
Dismiss screens and menus.
Standby
Put the HD1000 in Standby mode.
Video connected to the HD1000 is
passed through in this state.
CompactFlash Slot
Receive standard CompactFlash cards for
viewing photos, art or MPEG2 video. The
HD1000 can display a 1080i video stream
along with 5.1 audio.
Digital Audio OUT
Connect to compatible S/PDIF audio devices.
RS-232
Control the HD1000
with other devices.
Power
Connect the HD1000 to
an electrical outlet.
Ethernet
Connect to a
10baseT or 100Mbps
home network.
USB
Connect supported
802.11b wireless
adapters.*
VGA
Connect to a display
with a VGA connector.
Video Outputs
Connect to your
monitor, television
or A/V receiver.
Video Inputs
Connect your A/V
receiver to pass video
through the HD1000.
Audio IN
Connect to your A/V
receiver for audio pass-
through or to generate
audio visualizer displays
from your stereo.
Audio OUT
Connect to external
speakers or compatible
audio devices.
Navigation
Navigate up, down, right and left
through the user interface.

4
5
R o k u H D 1 0 0 0 F e a t u r e s u m m a r y
Personal Photos
• The world’s rst high-denition photo viewer.
• View digital photos in beautiful high resolution, with zoom,
rotate, pan, and image data display functions.
• Browse images manually or play an image slideshow, with or
without music.
Inspiring Art
• Roku offers motion and still Art Packs by download or on
CompactFlash memory cards so you can enjoy an inspiring
home gallery in your living room.
• Roku LiveArt™ (available on Nature, Aquarium and Clocks Art
Packs) brings motion to art in the form of HD MPEG2 video clips.
Enjoy a rippling mountain lake, a breezy California poppy eld,
or a lifelike aquarium from the comfort of your living room.
• See www.rokulabs.com/products/artpacks for details about
Gallery Collection and individual Roku Art Packs.

4
5
Digital Music
• Play your PC or Mac library of MP3, WAV, and AIFF audio les
and playlists (M3U and PLS formats) when you connect the
Roku through your home network.
• View an HD photo slideshow accompanied by your favorite
songs.
Video Playback
• Play HD ATSC-compliant MPEG2 transport stream video, which
is the type of signal typically broadcast over the air by a local
digital television station.
• Customers who use tuner cards to record digital broadcast
television to a computer will enjoy viewing these recorded
segments on their HDTV through the Roku HD1000.
• Third-party applications are available to support additional
formats.
Roku Open Platform & SDK
• The Roku HD1000 is based on the
Roku OS, an open-source, Linux-
based platform optimized for
digital media.
• Software Developer Kit (SDK)
enables developers to create
innovative new applications.
• See www.rokulabs.com/developers
for more information.

6
7
Optional Accessories
• Roku Art Packs
• Aquarium
• The Classics
• Clocks
• Nature
• Winter Holiday
(download only)
• Space (download only)
• Rack Ears
• Crestron Driver (third-party accessory)
• Extra Remote Control
• WiFi Network Adapter (third-party
accessory)
Art Packs and other accessories are
available at www.rokulabs.com and in
stores where the Roku HD1000 is sold.
Hardware
• The only digital media player designed specically for your
high-def TV.
• Memory card slots on the front give easy access to digital
media on CompactFlash, SD, MMC, Memory Stick, and
SmartMedia cards. XD cards can also be used with a
simple adapter.
• Network ready with built-in Ethernet or Wi-Fi adapter.
• Supports a broad range of digital and analog AV connectors,
allowing for seamless integration with any home entertainment
system.
• Screen saver and pass-through modes help prevent
burn-in.
• Intuitive user interface controlled via simple, custom remote
control.

6
7
C o n n e c t i n g t h e H D 1 0 0 0
Preparing to Connect
How you connect the HD1000 also depends upon your type of display
and its available inputs. The HD1000 offers four options for connec-
tion to your display: Composite, S-Video, VGA and Component. Only
one type of connector may be connected at a time, or image quality
will be adversely affected. We highly recommend that you use either
Component or VGA for the best image quality. However, we have
provided S-Video and Composite for specialized applications.
From the factory, the HD1000 is set to output Component 480i. This
connection is widely supported by most HDTVs, but the other options
yield superior results and are recommended if your display supports
them (see the chart). We recommend a Component 720p or 1080i
connection for best results, if supported by your display.
Connection Methods
The HD1000 is designed to connect to your AV system in one of two
ways. In the rst method, you connect the HD1000 like you would
a DVD player or any other normal audio-video source. An alternate
method allows you to connect your HD1000 “in-line” as the last
device between an AV source (such as an AV receiver) and your display
device. Both of these options are discussed in more detail below.
Separate AV Source
Connect the appropriate HD1000 audio and video outputs to the cor-
responding inputs on your TV or AV receiver. You will use the HD1000
like you would any other audio-video source by switching to the
appropriate audio-video source on your TV or AV receiver.
In-Line/Video Pass Through
When using the in-line mode, you connect both the Video/Audio
Ins and Outs on your HD1000. The video and audio will be passed
through (using high-quality analog switches) when the HD1000 is in
Standby mode. The HD1000 enters Standby mode when you press
the power button and the power light is off. When in this mode your
HD1000 monitors the incoming video signal and automatically gener-
ates a screen saver when appropriate, decreasing the chance of burn-
in. For more information on this connection method, see “Connecting
Your HD1000 to Use the Video Pass-Through Feature” below.
Mode Connector Format Picture Quality
1 Component 480i Good
2 S-Video 480i Good
3 Composite 480i Good
4 Component 480p Better
5 Component 720p Best
6 Component 1080i Best
7 VGA 480p Better
8 VGA 720p Best
9 VGA 1080i Best
10 VGA 1024x768 *

8
9
*Note: Generally, the Roku HD1000 supports wide-screen resolutions
(1280x720, 1920x1080), but it also supports 1024x768 in standard 4:
3 aspect ratio for certain (primarily commercial) applications. The
HD1000 user interface was designed for use on wide-screen HDTV
monitors. Therefore, when displayed 4:3 in this 1024x768 mode, the
menus and buttons and so forth look slightly stretched vertically.
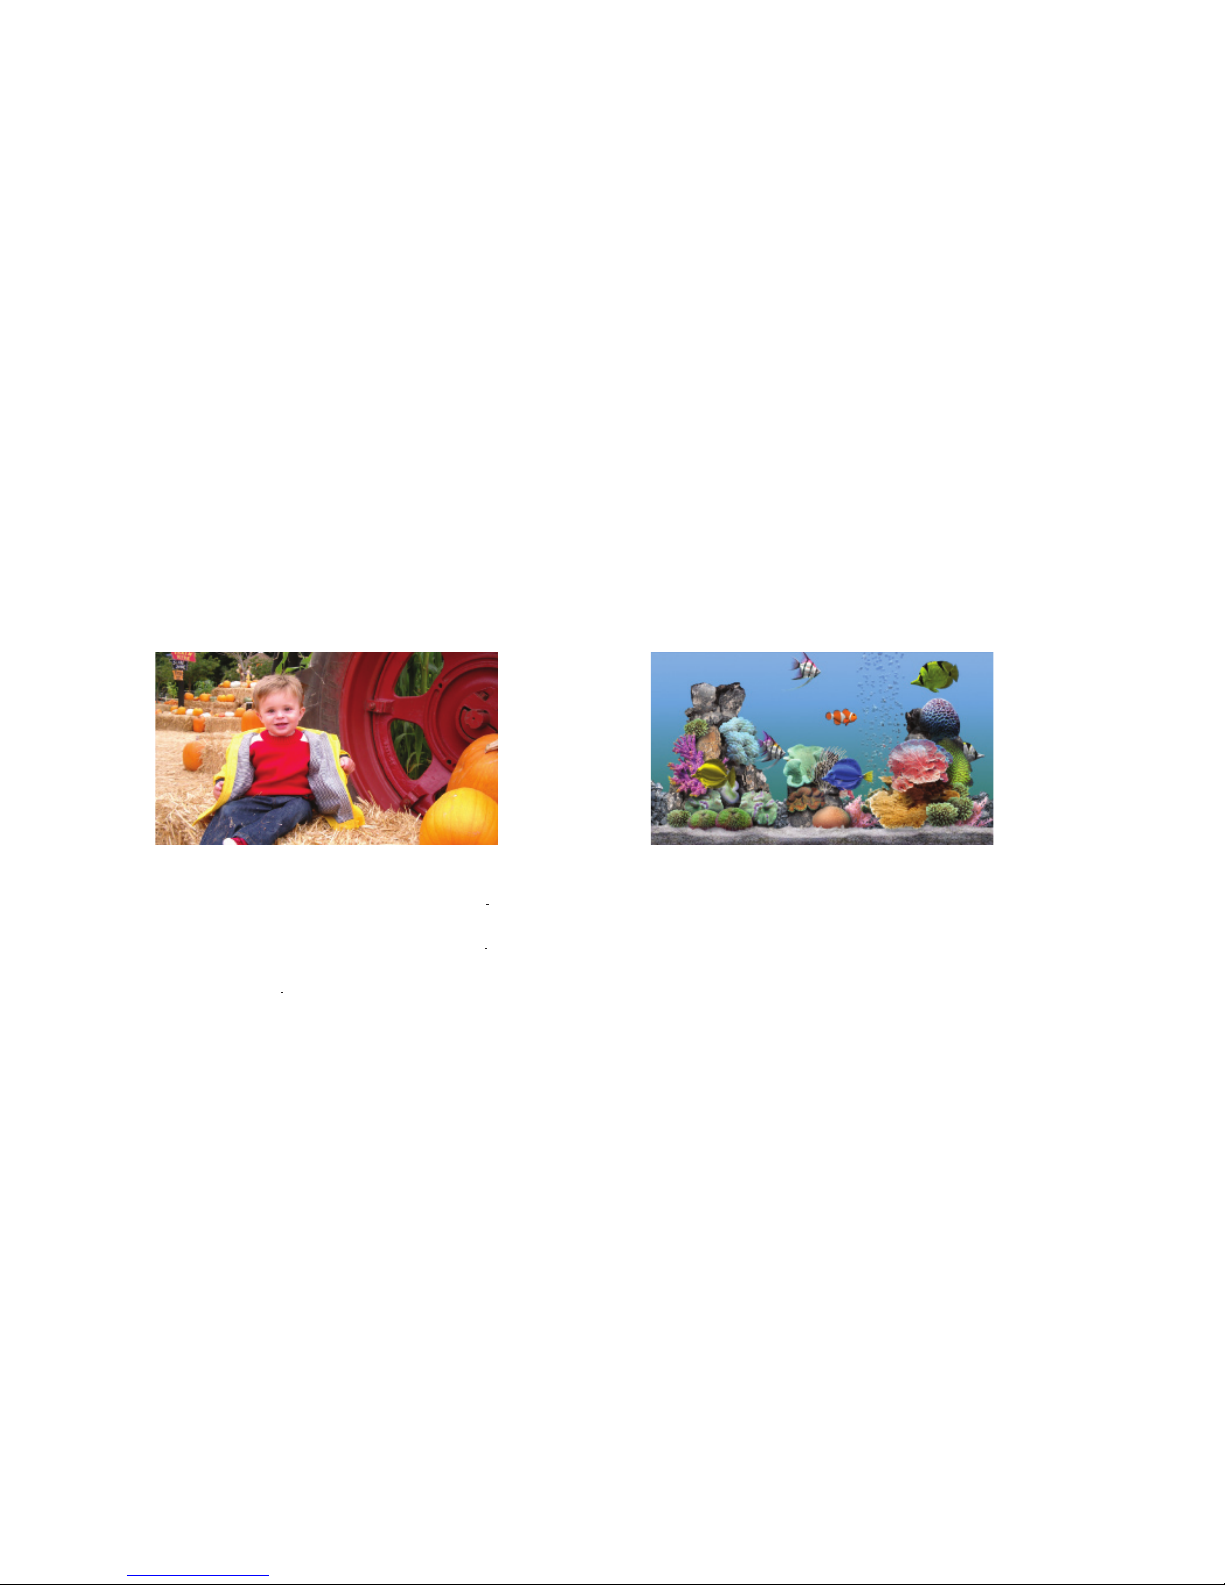
However, images themselves (photos, art) are displayed in their
proper aspect ratio without distortion. Please note that LiveArt™ will
have the same vertical stretching effect as the user interface.
Connecting via Component
Most component-capable displays are able to display the HD1000’s
initial setup screen when connected via the component cables. In the
event you cannot see the initial setup screen, proceed to the “Con-
necting Without On-Screen Display” section.
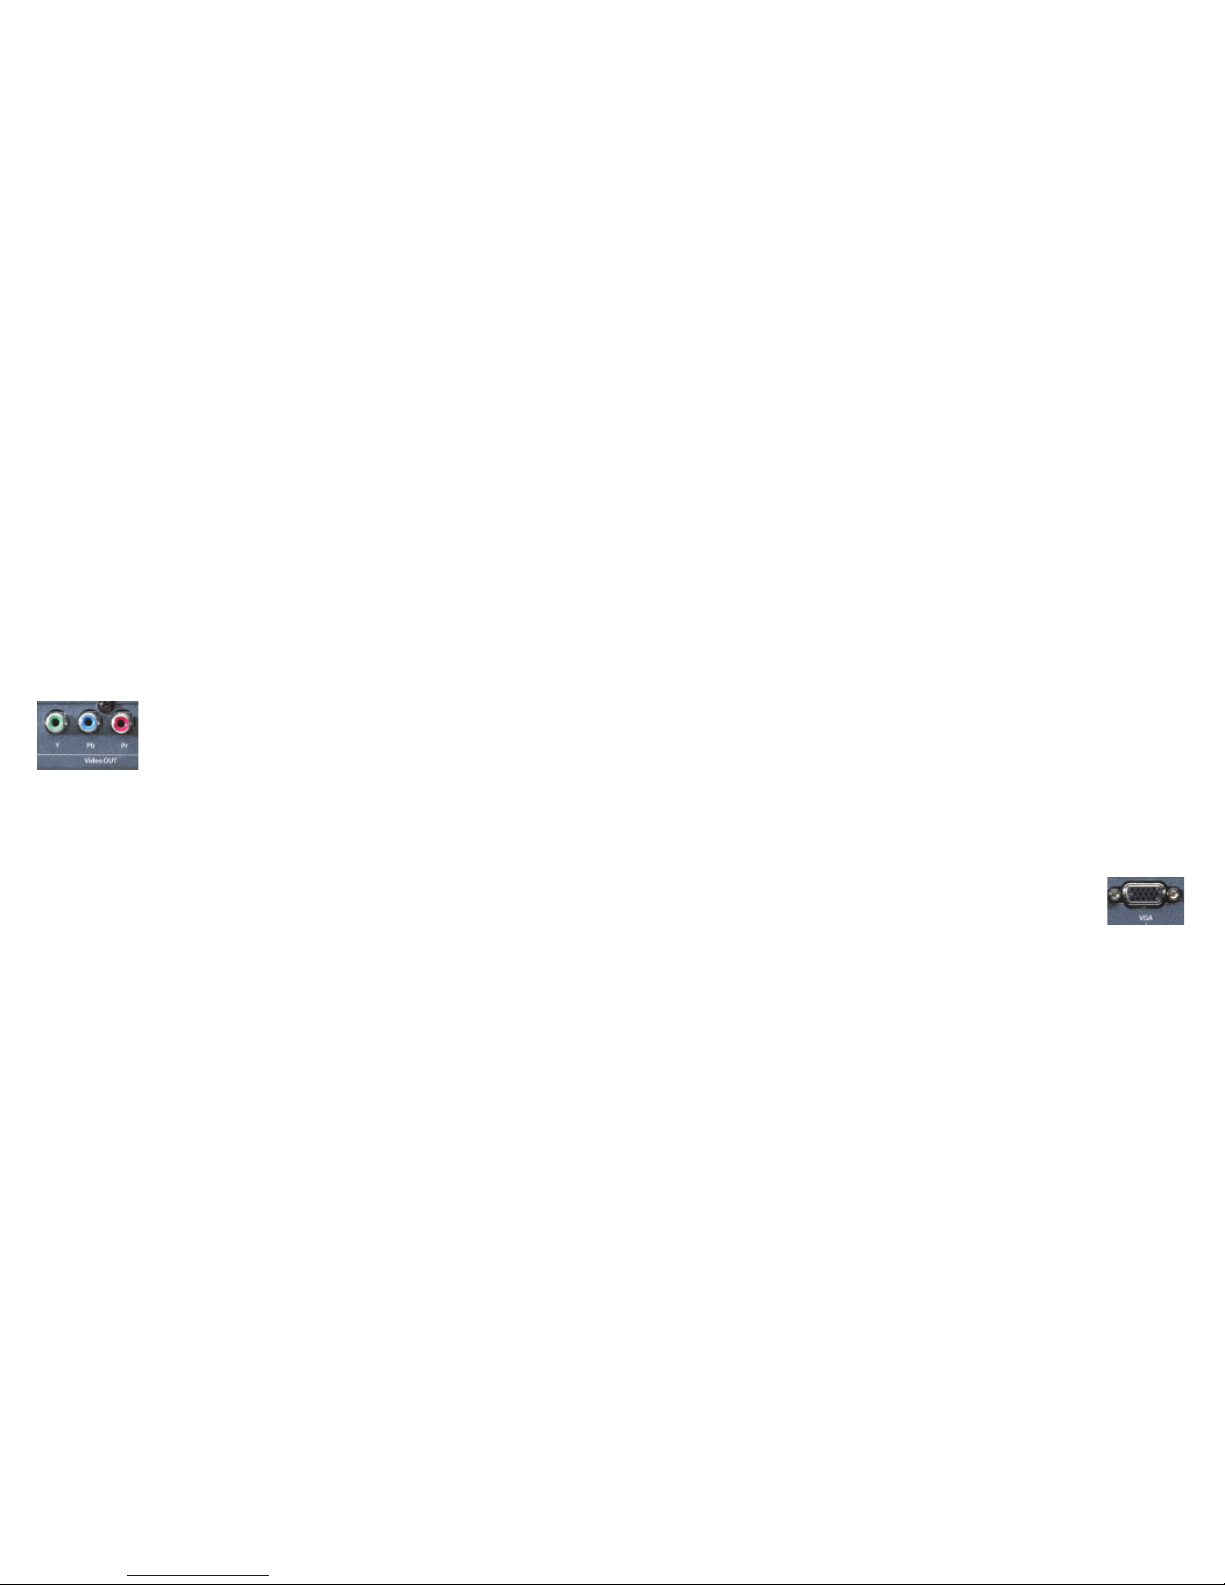
1. Connect the component cables (the three-wire cable with red,
green and blue plugs) to the HD1000, taking care to connect to the
Video Out connectors and being certain to match the colors of the
cables to the colors of the connectors.
2. Connect the other end of the component cables to your display
(or your component AV receiver), again being certain to match the
colors. If your display has both Component and separate HDTV
or HD Component input connectors, connect to the HDTV or HD
Component connectors.
3. Turn on the display and, with the remote for your TV, select the
input to which you have just connected the cable.
4. Connect the power cable to the back of the HD1000 and plug it
into an electrical outlet.
5. You’ll see a Busy light blinking, and a startup graphic will appear on
your screen. Once the HD1000 is fully started up, the Busy light will
stop, the Power light will begin to blink and you will see the initial
setup screen.
6. If you do not see the setup screen, check the input selection on the
display, then re-check the cable connections (being certain that
the colors are matched and that the cables are connected to the
Video Out connection on the HD1000). If there is still no picture,
proceed to “Connecting Without On-Screen Display.”
7. You should see the Display Format setup screen on your display at
this point, and it should read “Component 480i.” The Power LED
will begin blinking with the mode number referenced in the previ-
ous table.
Note: The Power LED will change the number of times it blinks to
correspond to the current mode.
8. Once the proper format has been selected, press Select. Then use
the down arrow to move the yellow highlight to the Accept button,
and press the Select key to conrm your choice.
Connecting via VGA
Most VGA-capable displays are able to display the HD1000’s initial
setup screen when connected via the VGA cable, but the display may
appear in black and white or green because the HD1000 is outputting
a Component Video signal. This is normal. The following steps cover
selecting the correct output signal:
1. Connect a VGA cable to the HD1000, taking care to make sure the
connection is secure.
2. Connect the other end of the VGA cable to your display.

8
9
3. Turn on the display and select the input to which you have just
connected the cable.
4. Connect the power cable to the back of the HD1000 and plug it
into an electrical outlet.
5. You’ll see a Busy light blinking, and a startup graphic will appear on
your screen. Once the HD1000 is fully started up, the Busy light will
stop, the Power light will begin to blink and you will see the initial
setup screen.
6. If you do not see the startup and setup screens, check the input
selection on the display, then re-check the cable connection. If
there is still no picture, proceed to “Connecting Without On-Screen
Display” on page 10.
7. You should see the Video Output Format setup screen on your
display at this point (in black and white or green), and it should
read “Component 480i.” The Power LED will begin blinking with
the mode number referenced in the previous table.
8. Proceed to the VGA resolutions by pressing the right arrow
button on the front panel or remote control. The screen may go
dark when cycling through non-VGA modes.
Note: The Power LED will change the number of times it blinks to
correspond to the current mode.
9. Once the proper format has been selected, press Select. Then use
the down arrow to move the yellow highlight to the Accept button,
and press the Select key to conrm your choice.
Connecting via S-Video
Most S-Video displays are able to display the HD1000’s initial setup
screens when connected via the S-Video cable, but the display will
appear initially in black and white or green because the HD1000 is
outputting a Component compatible signal. This is normal. The fol-
lowing steps cover selecting the correct output signal:
1. Connect an S-Video cable to the Video Out S-Video connector on
the back of the HD1000.
2. Connect the other end of the cable to an S-Video input connector
on your display.
3. Turn on the display and select the input to which you have just
connected the cable.
4. Connect the power cable to the back of the HD1000 and plug it
into an electrical outlet.
5. You’ll see a Busy light blinking, and a startup graphic will appear on
your screen. Once the HD1000 is fully started up, the Busy light will
stop, the Power light will begin to blink and you will see the initial
setup screen.
6. Once the initial setup screen appears, the Power LED will begin
blinking with the mode number referenced in the previous chart.
Press the right arrow button on the front panel or remote control
until you arrive at mode 2: S-Video 480i.
Note: The Power LED should be blinking twice — indicating mode
2 — when you have arrived on S-Video 480i.
7. Once the proper format has been selected, press Select. Then use
the down arrow to move the yellow highlight to the Accept button,
and press the Select key to conrm your choice.
Connecting via Composite
Most Composite capable displays are able to display the HD1000’s
initial setup screen when connected via the Composite cable, but the

10
11
display may appear in black and white or green because the HD1000
is outputting a Component Video signal. This is normal. The following
steps cover selecting the correct output signal. (Composite is normally
a single yellow RCA jack on your TV. On the HD1000, the composite
connector is shared with the “Y” component connector.)
1. Connect a composite video cable to the HD1000, making sure the
cable is connected to the green output jack labeled “Y.”
Note: This is the Y ouput jack for Component video — it is a shared
jack with Composite.
2. Connect the other end of the Composite cable to your display.
3. Turn on the display and select the input to which you have just
connected the cable.
4. Connect the power cable to the back of the HD1000 and plug it
into an electrical outlet.
5. You’ll see a Busy light blinking, and a startup graphic will appear on
your screen. Once the HD1000 is fully started up, the Busy light will
stop, the Power light will begin to blink and you will see the initial
setup screen.
6. If you do not see the startup and setup screens, check the input
selection on the display, then re-check the cable connection. If
there is still no picture, go to “Connecting Without On-Screen
Display” below.
7. You should see the Video Output Format setup screen on your
display at this point (in black and white or green), and it should
read “Component 480i.” The Power LED will begin blinking with
the mode number referenced in the previous table.
8. Proceed to Composite 480i by pressing the right arrow button on
the front panel or remote control until you arrive at that selection.
Note: The Power LED will change the number of times it blinks to
correspond to the current mode as you change selections.
9. Once the proper format has been selected, press Select. Then use
the down arrow to move the yellow highlight to the Accept button
and press the Select key to conrm your choice.
Connecting Without On-Screen Display
Some displays are not able to display the initial picture from the
HD1000. However, once the HD1000 has started up, you can use the
front-panel buttons to step through the HD1000’s supported output
connections and formats until your display shows the correct picture.
1. Ensure that the appropriate cable(s) are connected to the proper
Video Out connector(s) on your HD1000 (matching the cable and
connector colors if using Component) and are connected to the
display.
2. Turn on the display and select the input corresponding to the con-
nection you have just made.
3. Connect the power cable to the back of the HD1000 and plug it
into an electrical outlet.
4. Wait a minute or so for the front-panel Power LED to begin to blink.
It blinks the number of times corresponding to the video mode in
the table on page 4.
5. Press the right arrow button on the front panel of the HD1000 and
check the display for a picture. If no picture appears after about
ve seconds, press the right arrow again. Repeat this process until a
picture appears in color.
Note: Each time you press the right arrow the Power LED changes
the number of times it blinks corresponding to the video mode

10
11
listed in the previous table. If you have pressed the right arrow
button ten times without a picture appearing, check the “Trouble-
shooting” section.
6. Once the proper format has been selected, press Select. Then use
the down arrow to move the yellow highlight to the Accept button,
and press the Select key to conrm your choice.
7. Once the proper format has been selected, use the down arrow to
move the yellow highlight to the OK button, and press the Select
key to conrm your choices.
Audio Connections
You may connect your HD1000 to an amplier, a display with pow-
ered speakers or an external set of powered speakers to enjoy music
playback. The HD1000 supports both analog audio output and digital
(S/PDIF) audio output.
1. Decide which audio output you want to use: analog or digital.
2. If using analog audio, connect a standard stereo audio cable
(supplied) to the red and white Audio Out connectors on the back
of your HD1000. Connect the other end of the cable to the audio
input on your amplier, display or speakers. Be sure to match the
colors of the plugs to the colors of the connectors.
3. If using digital audio, connect a coaxial digital audio cable to the
Digital Audio Out connector on your HD1000. Connect the other
end of the cable to an S/PDIF-compatible audio input on your
amplier, display or speakers.
Your HD1000 can also act as a pass-through for external audio
sources. Connect a standard stereo audio cable to the Audio In jacks
on the back of your HD1000, taking care to match plug and connector
colors. Connect the other end of the cable to the audio output of the
desired audio source. For example, the Monitor connection on your
AV receiver, or the Audio Out connection on your stereo. When the
HD1000 is in Standby, this audio connection is passed through to the
stereo Audio Out connectors.
Connecting Your HD1000 to Your Home Network
Your HD1000 can be used to enjoy your existing collection of pictures,
music and more by connecting to your computer over your home net-
work. A 10/100 Ethernet port is included right on the back of the unit,
and the HD1000 will automatically congure itself via the DHCP proto-
col. Just connect the network cable before plugging the unit into AC
Power. Wireless network adapters are also supported for connection
to an existing Wi-Fi network. See our website at www.rokulabs.com/
support for details on supported wireless adapters, as well as detailed
instructions for accessing your PC or Mac over the network.
Connecting Your HD1000 To Use the Video
Pass-Through Feature
Your HD1000 comes equipped with S-Video and Component video
inputs. This feature allows you to connect the HD1000 between an
existing source component (like a DVD player or AV receiver) and your
display. In this way, you can share an input on your display without
running another cable. And the HD1000 can act as an automatic
Screen Saver, detecting a non-moving picture on the video input and
switching to a display designed to minimize burn-in.
To use your HD1000 in pass-through mode, follow these steps:
1. Decide on the type of input you will use on your display. If that
display input is already connected to an existing source, discon-

12
13
For more information about troubleshooting,
tips & tricks and frequently asked questions,
please visit our Website at www.rokulabs.com.
nect the cable from the existing display device and connect it to
your HD1000 inputs. Otherwise, select your source device and con-
nect it to the appropriate Video-In connector(s) on the back of the
HD1000. This cable/source type must match the cable/type you
will use to connect the HD1000 video output. When the HD1000 is
in Standby mode, this source will be “passed through” the HD1000
“as-is” — no conversion or transformation is applied to the signal.
2. Follow the appropriate steps in the “Connecting the HD1000” sec-
tions above to connect the HD1000 Video-Out to your display.
When your HD1000 is in Standby mode (Power LED not lit), the signal
present on the Video In connector will now be sent to the Video
Out connector. Pressing the Power key for your HD1000 displays the
HD1000’s signal. Use the Setup option on the Main Menu to congure
the screen saver and pass-through modes.
Note: Only one type of output cable may be connected to the HD1000
at a time or the output picture quality will be reduced. The video
input used for pass-through must be the same type of cable (S-Video
or Component). Video pass-through is not available in VGA mode.
For more information about connecting your HD1000, please see the
“Troubleshooting” section on page 29.

12
13
u s i n g t h e H D 1 0 0 0
Music. The Music section will appear in the Main Menu when a
selected media source contains digital music les. The only option
is Listen. Listen will take you to an extensive menu of song titles, as
well as album and artist information.
Roku Applications. The Roku HD1000 uses Roku’s Open OS Plat-
form. Just as Windows is a platform for writing desktop PC appli-
cations, the Roku OS is a platform for creating sophisticated and
easy-to-use digital media applications for the home. Roku writes
applications for this platform, as do several third-party developers.
Roku Applications that are on a selected memory card or network
share will appear here. Select the application icons to run them.
Main Menu
Media Sources. Your various media sources will be displayed
vertically on the left side of the screen. At the top, you’ll see an icon
for Built-In Storage. (This internal memory can be used to store a
limited number of photos or small applications.) Below the Built-
In Storage icon, you’ll see icons representing inserted memory
cards and/or connected network shares containing photos, art,
video, music, or Roku applications. Highlight the source you want,
and then move to the right to choose Slideshow, Browse or Listen.
These options will change depending on the actual content of each
media source. You’ll also notice that the selected media source is
surrounded by a lighter blue tab for easy identication of the active
source.
Setup. Setup, in the bottom left corner, allows you to set the type
of connection used from the HD1000 to your display, the output
resolution and many other options. See the “Setup and Prefer-
ences” section for additional details.
Images. The Images section will appear in the Main Menu when
a selected media source contains photos, art or video. You’ll have
the option to choose to view the images as a Slideshow or Browse
through a series of small, catalogued images called “thumbnails.”

14
15
Viewing Pictures, Art and LiveArt™
Press the Menu button on your remote control to view your media
sources, if you don’t see them already. Your screen should look
similar to the one below.
Slideshow. Select Slideshow to start the Slideshow Viewer and
see each image or MPEG video from the selected media source. If
your HD1000 is currently showing the Main Menu and you insert a
memory card with photos, art or MPEG video, the slideshow begins
automatically, displaying the content from that card.
Images advance every ve seconds. Refer to “The Roku Remote” on
page 2 to learn how to control image viewing. The 5-second delay
can be adjusted in the Photo Options screen (see page 27).
Note: A screen saver will display if an image remains on screen for
an extended period of time. This feature reduces the chance of
screen burn-in.
If you have more than one media source to choose from . . .
1. In the Main Menu, move the yellow highlight into the left-hand
column.
2. Use the up and down arrows to highlight each of the media
sources. Notice that the options shown on the right of the screen
change as you highlight each media source.
3. When the desired media source is highlighted, move the
highlight to the right, and choose Slideshow to begin viewing
the images, or Browse to quickly look through your images in a
thumbnail representation.
Note: In the Browse screen, you can also change the active media
source without returning to the Main Menu.
Browse. Select Browse to see a series of thumbnail images repre-
senting each image or MPEG video from the selected media source.
Move the highlight around the screen and press the Select button
to view an image. Press Exit at any time when viewing pictures to
return to the Browse screen.

14
15
The HD1000 treats MPEG2 video clips in your media folders as
images. If you play a slideshow that contains a supported video clip,
the clip will play with the same timing as the rest of your images
in the slideshow. For example, if your delay time is 5 seconds, and
your clip is 10 seconds long, only the rst 5 seconds will play, and
then the slideshow will advance to the next image or video clip.
(If your clip is shorter than the selected delay time, it will play the
clip all the way through and continue playing the beginning again
until the delay time has been reached.) If you would like to play a
video clip all the way through, navigate to the clip using the Browse
button, highlight the clip, and press Select on your remote. The clip
will play all the way through, then loop to play from the beginning
again. This continuous play will continue until you press Pause or
Exit on the remote.
Playing MPEG2 Video Clips Using Roku’s StreamPlayer Utility
Roku’s StreamPlayer utility, available as a free download from
Roku’s website, allows playback of ATSC MPEG2 transport stream
les, including seamless sequential playback of multile recording.
Visit www.rokulabs.com/support for details.
Playing Music
Select Listen to hear your digital music les. The HD1000 offers
familiar music playing features and controls. To play music, insert a
card from your MP3 player into one of the front slots, then choose
the Listen option; or press Menu to navigate to a shared media
source that contains your music les.
The music player screen shows the songs on the media source
along with the artist and album.
Shortcuts
• Press the Play button to start a slideshow beginning with the
highlighted image.
• If there are more thumbnails than can t on the screen, press
Zoom In to page up; press Zoom Out to page down.
• To rotate an image to the proper orientation before viewing,
highlight the image and press the Rotate button. This is quicker
than rotating in the full-screen view.
• To exit the Image Viewer and return to the Main Menu, press
Menu or Exit on your remote control. Exit takes you to the prior
screen.
Viewing MPEG Video
The HD1000 has the capability of playing ATSC-compliant MPEG2
transport streams. This is the type of signal typically broadcast over
the air by a local digital television station. These streams may be
either standard- or high-denition, and may include multichannel
audio (Dolby Digital 5.1).
There are a number of PC-based products (tuner cards) that allow
the recording of digital broadcast television to a computer hard
disk as a transport stream.
There are also some PC utilities for converting video les of other
types into a transport stream that may be compatible with the
HD1000, although we have not had the opportunity to test these
conversion utilities.

16
17
playlist formats; iTunes playlists are currently not supported.
Playing Music During a Slideshow
It is easy to listen to music during your slideshow. Simply start
playing music as described above. Then press Menu to return to
the Main Menu and navigate to your image les. Press Play inside
the desired folder to begin your slideshow. When the end of the
rst song is reached, the next song will play. To stop or change your
music selection, you must go back to your Music Player. Stop your
slide show by pressing Menu or Exit and select the Listen button
from any media source, or navigate to a folder containing any audio
le. Once in the Listen application, press Play/Pause to pause the
playing music .(There is no stop button; paused music is basically
the same as stopped music.)
Photo, Video and Music Sharing from the Computer
Play, Pause, Next and Previous track controls are available on the
remote. Refer to “The Roku Remote” on page 2 to learn how to
control music playback.
When you play music, you will see a Play icon ( ) inside the Listen
button on the Main Menu. To stop the music, navigate to the Listen
button and press the Pause/Play button on the remote.
To exit the Music Player, press Pause if you want to stop playing
music, then press Menu on your remote control.
Playlists
The Music Player screen also shows playlists that you created on
your computer using third-party software such as Winamp. Your
playlist will appear as a folder named as the playlist. To play that
playlist, highlight the folder and press Play — or press Select to
open and view contents of the playlist, then press Play to play the
contents. (If the HD1000 can’t locate one of the les in your playlist,
it will be omitted.) The HD1000 currently supports .M3U and .PLS
Need help? Go to www.rokulabs.com/support
or contact [email protected].

16
17
Sharing photos, video and music from your PC requires:
• Wired or wireless Ethernet network (Networked HD video
playback requires a wired network; wireless networks require an
optional adapter);
• PC with Microsoft® Windows® 98, Windows 2000, Windows ME,
Windows XP Home Edition or Professional, with Windows File
Sharing enabled; or
• Mac OS X 10.2 or later (10.2.6 or later recommended) is required
for music and photos.
Important: Shared folder names on your PC or Mac must be 12 or
fewer characters in length.
Visit www.rokulabs.com/support for networking setup instruc-
tions specic to each supported platform.
Browsing Directories
Your Roku HD1000 scans each media source and nds all of the
media les it contains. When viewing the contents of your removable
memory card, you will see all les displayed in one list (Roku “at-
tens” directory structures and shows one combined list of les). Press
Select while the memory card Media Source is highlighted, then
navigate to Browse or Listen to see the image and music contents.
When browsing media on your networked computer, you will see
all folders within the shared media source, making it easier to nd
the les you want. After highlighting the media source from the
Main Menu, navigate to Browse or Listen then press Select to see
the image and music contents.
You can press Select to navigate to the next level down in the folder
structure, or press Play on your remote to play all media inside the
active folder (and any of its subfolders).
Notice how your path location is always displayed on the top of the
screen. You can navigate back up a level by highlighting the folder
with a Back arrow inside and pressing Select, or by pressing Exit on
your remote.

18
19
You may notice that once you begin browsing images, you enter
Image Viewer mode (or Music Player mode if you began by brows-
ing music). Any browsing will be conned to that media type until
you exit to the Main Menu by pressing Menu or Exit. From the Main
Menu, you once again have the option to access both image and
music les.
Memory Card Specications
CompactFlash cards must have a sustained read speed of 3 MBps or
more for viewing high-denition MPEG2 video and LiveArt.
™ Only
CompactFlash cards or the network drive connected via 100MBps
wired Ethernet may be used for high-denition video playback.
Need help? Go to www.rokulabs.com/support
or contact [email protected].
Other manuals for HD1000 - PhotoBridge - Digital AV Player
6
Table of contents
Other Roku Receiver manuals