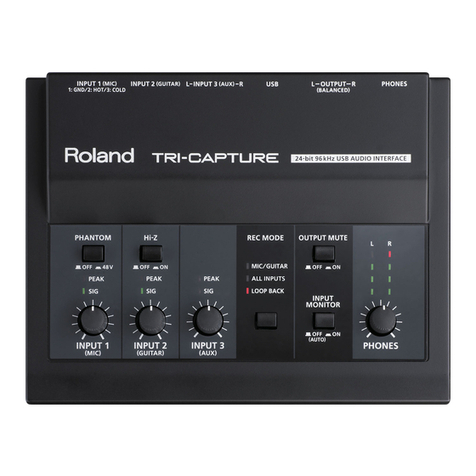
Roland UA-30 User manual

Thank you for purchasing the Roland ED UA-30 USB Audio Interface.
This manual tells how to set up the UA-30, and explains basic operation. To
avoid problems and enjoy optimal performance, please perform the setup
correctly as described in this manual.
Getting Started
Before using this unit, carefully read the sections entitled: “USING
THE UNIT SAFELY” and “IMPORTANT NOTES” ( P.2, P.4).
These
sectionsprovideimportantinformationconcerningtheproperoperationof
the unit. Additionally, in order to feel assured that you have gained a good
grasp of every feature provided by your new unit, Getting Started should
be read in its entirety. The manual should be saved and kept on hand as a
convenient reference.
Copyright © 1999 ROLAND CORPORATION
All rights reserved. No part of this publication may be reproduced in any form
without the written permission of ROLAND CORPORATION.

2
001
• Before using this unit, make sure to read the
instructions below, and the Owner’s Manual.
................................................................................................
002a
• Do not open or perform any internal modifi-
cations on the unit.
................................................................................................
003
• Do not attempt to repair the unit, or replace
parts within it (except when this manual
provides specific instructions directing you
to do so). Refer all servicing to your retailer,
the nearest Roland Service Center, or an
authorized Roland distributor, as listed on
the "Information" page.
................................................................................................
004
• Never use or store the unit in places that are:
* Subject to temperature extremes (e.g.,
direct sunlight in an enclosed vehicle, near
a heating duct, on top of heat-generating
equipment); or are
* Damp (e.g., baths, washrooms, on wet
floors); or are
* Humid; or are
* Exposed to rain; or are
* Dusty; or are
* Subject to high levels of vibration.
................................................................................................
007
• Make sure you always have the unit placed
so it is level and sure to remain stable. Never
place it on stands that could wobble, or on
inclined surfaces.
................................................................................................
009
• Avoid damaging the USB cable. Do not bend
it excessively, step on it, place heavy objects
on it, etc. A damaged cord can easily become
a shock or fire hazard. Never use a USB cable
after it has been damaged.
................................................................................................
010
• This unit, either alone or in combination with
an amplifier and headphones or speakers,
may be capable of producing sound levels
that could cause permanent hearing loss. Do
not operate for a long period of time at a high
volume level, or at a level that is uncom-
fortable. If you experience any hearing loss or
ringing in the ears, you should immediately
stop using the unit, and consult an audiol-
ogist.
................................................................................................
011
• Do not allow any objects (e.g., flammable
material, coins, pins); or liquids of any kind
(water, soft drinks, etc.) to penetrate the unit.
................................................................................................
012d
• Immediately turn the power off, and request
servicing by your retailer, the nearest Roland
Service Center, or an authorized Roland
distributor, as listed on the "Information"
page when:
* Objects have fallen into, or liquid has been
spilled onto the unit; or
* The unit has been exposed to rain (or
otherwise has become wet); or
* The unit does not appear to operate
normally or exhibits a marked change in
performance.
................................................................................................
Used for instructions intended to alert
the user to the risk of injury or material
damage should the unit be used
improperly.
* Material damage refers to damage or
other adverse effects caused with
respect to the home and all its
furnishings, as well to domestic
animals or pets.
Used for instructions intended to alert
the user to the risk of death or severe
injury should the unit be used
improperly.
The ●symbol alerts the user to things that must be
carried out. The specific thing that must be done is
indicated by the design contained within the circle. In
the case of the symbol at left, it means that the power-
cord plug must be unplugged from the outlet.
The symbol alerts the user to important instructions
or warnings.The specific meaning of the symbol is
determined by the design contained within the
triangle. In the case of the symbol at left, it is used for
general cautions, warnings, or alerts to danger.
The symbol alerts the user to items that must never
be carried out (are forbidden). The specific thing that
must not be done is indicated by the design contained
within the circle. In the case of the symbol at left, it
means that the unit must never be disassembled.
3
013
•In households with small children, an adult
should provide supervision until the child is
capable of following all the rules essential for
the safe operation of the unit.
................................................................................................
014
•Protect the unit from strong impact.
(Do not drop it!)
................................................................................................
023
•DO NOT play a CD-ROM disc on a conven-
tional audio CD player. The resulting sound
may be of a level that could cause permanent
hearing loss. Damage to speakers or other
system components may result.
................................................................................................
104
•Try to prevent cords and cables from
becoming entangled. Also, all cords and
cables should be placed so they are out of the
reach of children.
................................................................................................
106
•Never climb on top of, nor place heavy
objects on the unit.
................................................................................................
108c
•Disconnect all cords coming from external
devices before moving the unit.
................................................................................................
118
•Should you remove the optical connector
caps, make sure to put them in a safe place
out of children's reach, so there is no chance
of them being swallowed accidentally.
................................................................................................
205
* Microsoft, Windows are registered trademarks of
Microsoft Corporation.
206c
* Windows®98 is known officially as: “Microsoft®
Windows®98 operating system.”
206e
* Screen shots reprinted with permission from
Microsoft Corporation.
213
* Pentium is a registered trademark of Intel Corpo-
ration.
214
* MMX is a trademark of Intel Corporation.
* Cool Edit™is a trademark of Syntrillium Software
Corporation.
220
* All product names mentioned in this document are
trademarks or registered trademarks of their
respective owners.

4
IMPORTANT NOTES
291a
In addition to the items listed under “USING THE UNIT SAFELY” on page 2, please read and observe the
following:
Power Supply
307
•Before connecting this unit to other devices, turn off
the power to all units. This will help prevent
malfunctions and/or damage to speakers or other
devices.
Placement
351
•Using the unit near power amplifiers (or other
equipment containing large power transformers)
may induce hum. To alleviate the problem, change
the orientation of this unit; or move it farther away
from the source of interference.
352
•This device may interfere with radio and television
reception. Do not use this device in the vicinity of
such receivers.
354a
•Do not expose the unit to direct sunlight, place it
near devices that radiate heat, leave it inside an
enclosed vehicle, or otherwise subject it to temper-
ature extremes. Excessive heat can deform or
discolor the unit.
355
•To avoid possible breakdown, do not use the unit in
a wet area, such as an area exposed to rain or other
moisture.
Maintenance
401a
•For everyday cleaning wipe the unit with a soft, dry
cloth or one that has been slightly dampened with
water. To remove stubborn dirt, use a cloth impreg-
nated with a mild, non-abrasive detergent. After-
wards, be sure to wipe the unit thoroughly with a
soft, dry cloth.
402
•Never use benzine, thinners, alcohol or solvents of
any kind, to avoid the possibility of discoloration
and/or deformation.
Additional Precautions
553
•Use a reasonable amount of care when using the
unit’s buttons, sliders, or other controls; and when
using its jacks and connectors. Rough handling can
lead to malfunctions.
556
•When connecting / disconnecting all cables, grasp
the connector itself—never pull on the cable. This
way you will avoid causing shorts, or damage to the
cable’s internal elements.
558a
•To avoid disturbing your neighbors, try to keep the
unit’s volume at reasonable levels. You may prefer
to use headphones, so you do not need to be
concerned about those around you (especially when
it is late at night).
559
•When you need to transport the unit, package it in
the box (including padding) that it came in, if
possible. Otherwise, you will need to use equivalent
packaging materials.
562
•Use a cable from Roland to make the connection. If
using some other make of connection cable, please
note the following precautions.
•Some connection cables contain resistors. Do not
use cables that incorporate resistors for
connecting to this unit. The use of such cables can
cause the sound level to be extremely low, or
impossible to hear. For information on cable
specifications, contact the manufacturer of the
cable.
add
•This product uses the power of a computer through
a USB cable(AC adaptor is not used).
add
•Before you open the included CD-ROM, you must
read the “license agreement.”Opening the CD-ROM
will be taken to mean your acceptance of the terms
of the license agreement.
Handling CD-ROMs
801
•Avoid touching or scratching the shiny underside
(encoded surface) of the disc. Damaged or dirty CD-
ROM discs may not be read properly. Keep your
discs clean using a commercially available CD
cleaner.

5
Contents
IMPORTANT NOTES................................................................4
Introduction..............................................................................6
Features of the UA-30..........................................................................................................6
Check the contents of the package ....................................................................................8
Parts of the UA-30 and their function.............................................................................10
Connections and driver installation.....................................12
What is a driver? ................................................................................................................12
Making connections and installing the driver...............................................................13
Checking for sound output...............................................................................................19
UA-30 Application Guide.......................................................21
Digitally recording the output of the UA-30 on MD or DAT......................................21
Digital transfer from CD/MD/DAT to your computer (digital recording) .............22
Recording the line inputs (analog recording)................................................................23
Recording a guitar or vocal ..............................................................................................24
Basic operation for Cool Edit Pro LE...................................26
What is Cool Edit Pro LE? ................................................................................................26
Installing Cool Edit Pro LE...............................................................................................27
Starting up Cool Edit Pro LE............................................................................................28
Select the audio device......................................................................................................28
Opening a file .....................................................................................................................29
Playback ..............................................................................................................................29
Recording............................................................................................................................30
Save......................................................................................................................................31
Editing .................................................................................................................................32
Exiting Cool Edit Pro LE...................................................................................................34
Appendices.............................................................................35
Deleting (uninstalling) the included software...............................................................35
Deleting the USB Audio Device driver...........................................................................36
Basic operation of the UA-30 D-Out Smoother .............................................................37
UA-30 Block Diagram........................................................................................................39
Troubleshooting.....................................................................40
Problems when installing the USB driver......................................................................40
Problems when using the UA-30.....................................................................................42
Problems common to software in general......................................................................48
UA-30 Specifications.............................................................49
UA-30 System Requirements................................................50

6
Introduction
Features of the UA-30
Thank you for purchasing the UA-30. The UA-30 is a USB audio interface that
can be connected to your computer via a single USB cable to allow high-
quality digital recording/playback of audio data.
Superb sound quality
Both optical and coaxial type digital input/output connectors are provided.
Sampling rates of 44.1 / 48 kHz are supported, allowing zero-loss signal
transfer with CD, MD (Mini Disc), or DAT.
As analog input/output jacks, the UA-30 provides RCA phono jacks as well
as a phone jack that supports guitar/mic input levels. 20-bit AD/DA
conversion ensures high-quality recording/playback, and sampling rates of
22.05 kHz / 44.1 kHz / 48 kHz are supported.
Easy connection to your computer via USB cable
The UA-30 requires only a single USB cable for connection to your computer.
It uses a bus power supply in which power is supplied from your computer,
so that an AC adaptor is not needed, making the UA-30 ideal for use even
with notebook computers.
Cool Edit Pro LE included for audio editing freedom
Audio data transferred to your computer via the UA-30 can be edited and
processedfreely.Youcanapply numerous effects, including echotomakethe
sound more spacious and flanger to create modulation.
What is USB?
USB stands for Universal Serial Bus, and is a new interface for connecting
various peripheral devices to a personal computer.
USB allows numerous peripherals to be connected by a single USB cable, and
data can be transmitted at a rate much faster than the earlier serial ports.
Peripheral devices can be connected or disconnected while the power of the
computer remains on, and the computer will recognize these devices
automatically. (Some peripherals may require settings.)
About copyright
Unauthorized recording, performing, broadcasting, sale, or
distribution of works whose copyright is owned by a third party
(CD software, video software, broadcasts etc.) is forbidden by law.
Even if you use the UA-30 to violate the rights of a third party,
Roland Corporation shall bear no responsibility for your actions.

7
Introduction
■
You will need to provide these items yourself
External amp, speakers, headphone, and mic are not
included
External amp, speakers, or headphones necessary for listening to the sound
output via the UA-30 are not included. Nor is a mic included for inputting
sound to the UA-30. You will need to provide these items yourself.
Digital input/output cables for connecting the MD or DAT
recorder are not included
Although you can use an MD or DAT digital recorder to perform digital
recording, the cables for connecting the recorder to the UA-30 are not
included. You will need to provide these separately.
About SCMS
SCMS (Serial Copy Management System) is a function providedon
consumer digital audio devices such as DAT and MD recorders to
protect the rights of the copyright owner by prohibiting digital
second-generation recordings from being made via a digital
connection. If you record via a digital connection from a digital
recorder that has SCMS, the SCMS data will be recorded together
with the digital audio data. Digital audio data that contains SCMS
data cannot be recorded again via a digital connection.
On the UA-30
When data containing the SCMS flag (such as data from an MD that was
digitally copied from a commercial music CD) is input, the UA-30 will
function as follows.
If input from the UA-30’s digital input connector:
•The UA-30 cannot record this data to your computer
•The audio will be output from the analog outputs (line output jacks,
headphone jack)
If input from the UA-30’s analog inputs (line input jacks):
•Recording can occur normally
Regardless of the
presence or absence of the
SCMS flag, data that is
received at the digital
input connector of the
UA-30 will not be output
directly from the digital
output connector.

8
Introduction
Check the contents of the package
The UA-30 includes the following items. When you open the package, first
make sure that all items are included. If any are missing, contact the dealer
where you purchased the UA-30.
❏
UA-30
fig.01-01
❏
USB cable
fig.01-02
Use this to connect the UA-30 to the USB connector of your computer. For
details on connections, refer to
“Making connections”
(p. 13).
❏
UA Software CD-ROM
fig.01-03
This contains various software that you will need in order to use the UA-30.
* Be sure to read the Readme_E.txt file found in the UA Software CD-ROM. Any
updated information will be provided in the Readme_E.txt file.
Do not play back the CD-ROM on a conventional audio CD player.
Doing so will produce a high volume that may damage your ears or
speakers.
Use only the included
USB cable.
00000000
Cool Edit Pro LE
Demo Song
for UA-100
Roland UA-100 USB Driver
UA-100 Controller
UA-100 Refarence
for UA-30
D-out Smoother
Before opening the
included CD-ROM, you
must read the separate
license agreement.
Do not touch the silver
recording surface of the
disc, or scratch it. Doing
so may make it impossible
for data to be read
correctly. If the disc
b
ecomes soiled, use a
commercially available
CD cleaner to clean it.

9
Introduction
■
Getting Started
fig.01-05.e
This is the document you are reading. Keep it at hand for reference when
needed.
❏
License agreement
fig.01-06.e
This contract describes the terms under which Roland Corporation allows
you to use the software. You must read this before opening the CD-ROM
package.

10
Introduction
Parts of the UA-30 and their function
fig.01-08
Line input jacks
Connect these jacks when you wish to record audio signals from an audio
device or MIDI sound module.
Line output jacks
Connect these jacks to the AUX IN or LINE IN of your audio system (amp or stereo).
Digital input connector (optical)
When inputting a digital audio signal from an audio device such as a CD/
MD/DAT, use an optical cable to make connections here.
Digital output connector (optical)
When outputting a digital audio signal to a digital recorder such as an MD/
DAT, use an optical cable to make connections here.
Digital input connector (coaxial)
When inputting a digital audio signal from an audio device such as a CD/
MD/DAT, use a coaxial cable to make connections here.
Digital output connector (coaxial)
When outputting a digital audio signal to a digital recorder such as an MD/
DAT, use a coaxial cable to make connections here.
USB connector
Use a USB cable to connect this to your computer so that audio data can be
transferred.
Sample rate select switch
This switches the sampling frequency of the
Digital input/output
connectors
–
1234567
12
13
14
201918171615
8
9
10
11
1
2
3
Optical
These are digital I/O
connectors for connecting
optical cables. The digital
I/O connectors for
connecting coaxial cables
are marked COAXIAL.
4
5
6
7
8
3
6
Before changing the
position of the Sample
rate select switch or the
Recording input select
switch, you must exit all
applications including the
UA-30 D-Out Smoother
(p. 37). You should also
turn down the volume of
any audio amp system
that is connected.
Sample rate
When audio is recorded
digitally, the level of the
sound is measured at
fixed intervals of time,
and the level is converted
into digital data. The
sample rate (sampling
frequency) is what
determines this time
interval. CD and MD use
a sampling frequency of
44.1 kHz, and DAT can
also use a sampling
frequency of 48 kHz. By
setting this switch to
match the sampling rate
of the connected device,
you can digitally record
without diminishing the
audio quality.

11
Introduction
Digital input select switch
This selects the digital input connector that will be used.
•
Digital input connector (optical)
➝
“OPT”
•
Digital input connector (coaxial)
➝
“COAX”
Recording input select switch
This selects the input that will be used for recording.
•
Digital input/output connectors
–
➝
“DIGITAL”
•
Line input jacks
+
Guitar/Mic input jack
➝
“LINE + G/M”
•
Guitar/Mic input jack
➝
“G/M”
Guitar/Mic input select switch
Set this switch according to the device that is connected to the
Guitar/Mic
input jack
.
•When connecting a guitar
➝
“GUITAR”
•When connecting a mic
➝
“MIC”
USB indicator
This will light when USB is connected.
Output level indicator
The number of LED’s that light will depend on the output level from the
Headphone jack
and the
Line output jacks
. If the red LED lights, use
the
Line output volume
to lower the volume.
Line output volume
This adjusts the volume that is output from the
Headphone jack
and the
Line output jacks
.
Line input peak indicator
This will light green when there is an input signal from the
Line input
jacks
. If the input level is excessive, it will light red. If it lights red, use the
Line input adjustment slider
to lower the input level.
Line input adjustment slider
This slider adjusts the input level of the
Line input jacks
.
Guitar/Mic input jack
A guitar or mic can be connected to this jack.
Guitar/Mic input adjustment slider
This slider adjusts the input level of the
Guitar/Mic input jack
.
Guitar/Mic input peak indicator
This will light green when there is an input signal from the
Guitar/Mic input
jack
. If the input level is excessive, it will light red. If it lights red, use the
Guitar/Mic input adjustment slider
to lower the input level.
Headphone jack
A set of headphones can be connected here. Even if headphones are
connected, sound will still be output from the
Line output jacks
.
For details on how each control and connector are actually used,
refer to “UA-30 Application Guide”(p. 21).
9
3
5
10
3
6
1
17
17
11
17
If you are recording only
from the line inputs,
disconnect the cable from
the Guitar/Mic input jack.
12
13
20 2
14
14
20
2
15
1
16
16
1
17
18
17
The UA-30 does not
support the miniature
microphone (condenser
mic) that may have been
included with your
computer or sound card.
19
17
18
20
2

12
Connections and driver installation
In order to use the UA-30, you must first install the USB Composite Device
driver and the USB Audio Device driver. These drivers are included with
Windows98, and are provided in the Microsoft Windows 98 CD-ROM, so
you will need to have the Microsoft Windows 98 CD-ROM ready.
* If you have updated your system with the Microsoft Windows 98 Second Edition, use
the Windows 98 Second Edition CD-ROM.
What is a driver?
A driver is software that allows an application program running on your
computer to transfer data to and from the UA-30 when it is connected to your
computer via a USB cable. The driver passes data from the application to the
UA-30, and passes data from the UA-30 to the application.
fig.02-00.e
Application
USB
Driver
Computer
USB cable
USB port
UA-30
Before installing the driver
The UA-30 cannot be used with Windows 95 or Windows NT.
If other Windows programs are running, exit all of them before you
continue.
If you will be simultaneously connecting multiple Roland USB
devices (such as the UA-30 and UA-100) to your computer,
disconnect the UA-100 or other device from the USB connector before
installing the driver. If you install the driver when the UA-100 or
other device is connected, installation may not occur correctly.

13
Connections and driver installation
Making connections and installing
the driver
■Making connections
@P921 To prevent malfunction and/or damage to speakers or other devices, always
turn down the volume, and turn off the power of all devices before making
any connections.
It is not necessary to turn off the power of your computer. Use a USB cable to
connect the UA-30 to your computer before turning on the power of your
audio equipment.
(942)
fig.02-12.e Before disconnecting the
USB cable or restarting
Windows, please close all
applications. You should
also turn down the
volume of any audio or
amp system that is
connected.
This unit is equipped with
a protection circuit. A
b
rief interval (a few
seconds) after power up is
required before the unit
will operate normally.
Stereo set
Powered Speaker etc.
Computer
UA-30
USB cable
LINE IN、AUX IN
USB
Port
USB
Port
LINE OUT
Stereo
Headphones
Audio
cable

14
Connections and driver installation
■Installing the driver
Installation must be performed in the order of the USB Composite Device
driver and then the USB Audio Device driver. Use the following procedure
to perform the installation.
1Turn on the power of your computer and start up Windows. Insert the
Microsoft Windows 98 CD-ROM into your CD-ROM drive, and use a USB
cable to connect the UA-30 to your computer. (p. 13)
The UA-30’s USB indicator will light. A USB Composite Device will be
detected automatically, and the Add New Hardware Wizard dialog box will
appear. Click [Next].
fig.02-01.e
2
When the display asks “What do you want Windows to do?”, select
“Search for the best driver for your device. (Recommended).”and click
[Next].
Since some computers are sold with the contents of the Microsoft
Windows 98 CD-ROM already in the hard disk, a Microsoft
Windows 98 CD-ROM may not have been included. If this is the
case, you will be able to install the driver without the Microsoft
Windows 98 CD-ROM.
If you are using Windows 98 Second Edition, use the Windows 98
Second Edition CD-ROM.
If this dialog box does not
appear, refer to
“Problems when
installing the USB
driver”(p. 40).

15
Connections and driver installation
fig.02-02.e

16
Connections and driver installation
3The following dialog box will appear. Check CD-ROM drive, and click
[Next].
fig.02-03.e
4The following dialog box will appear. Click [Next].
fig.02-04.e
* Depending on your system, the Location of drivermay differ from the illustration,
but this is not a problem.
5Copying of the file (Driver) will begin.
If the Microsoft Windows 98 CD-ROM is not inserted in the CD-
ROM drive, the following dialog box may appear. If this occurs,
insert the Microsoft Windows 98 CD-ROM into the CD-ROM
drive, and click [OK].
fig.02-05.e

17
Connections and driver installation
6When installation of the USB Composite Device driver is finished, the
following dialog box will appear. Click [Finish].
fig.02-06.e
7Next, a USB Audio Device will be detected automatically, and the Add
New Hardware Wizard dialog box will appear. Click [Next], and continue
the installation using the very same procedure as in steps 2–5(p. 15–16).
fig.02-07.e
8When installation of the USB Audio Device driver is finished, the following
dialog box will appear. Click [Finish].
fig.02-08.e
This completes installation of the USB Composite Device driver and the
USB Audio Device driver. Restart the Windows.
In step 4, the screen will
indicate “This wizard
searches for new drivers
for USB Audio Device.”
Depending on your
system, the cursor may
change to an hourglass
symbol for several
seconds after you click
[Finish]. Please wait.

18
Connections and driver installation
■Specifying the audio input/output device
1Click the Windows [Start] button. From the menu that appears, select
Settings, and then select Control Panel. In Control Panel, double-click the
Multimedia icon to open the Multimedia Properties dialog box.
2Click the Audio tab.
3For the Playback item Preferred device, click . In the list that appears,
click “USB Audio Device (1)”to select it.
4For the Recording item Preferred device, click . In the list that appears,
click “USB Audio Device (1)”to select it.
fig.02-09.e
5Click [OK] to complete the settings.
Depending on your
system, USB audio
devices (1) may not have a
number, or may be other
than 1.
It will not be possible to
press the "Advanced
Properties" button for
"Recording."

19
Connections and driver installation
Volume Control settings
The output volume of the UA-30 can be controlled by the Windows Volume
Control.
1From the Windows [Start] menu, select Programs-Accessories-
Entertainment-Volume Control to start it up.
* Before changing the position of the UA-30’s “Sample rate select switch” or
“Recording input select switch”, you must exit “Volume Control”. Then
restart.
fig.02-091a.e_50
2You can raise or lower the slider to adjust the volume of the UA-30. The
following items can be set.
*1 Depending on the version of Windows 98, this may be displayed as “Analog
connector”, “Desktop”.
Speaker(*1) Adjust the volume of the analog outputs (line
output and headphone output). The digital
output will not change.
CD Player Adjust the “CD Music”volume for the CD-
ROM drive of your computer.
WAVE Adjust the volume that is output from the
audio output device “USB Audio Device.”The
digital output and analog output will change.
SW Synth Adjust the volume of the software synthesizer
built into Windows 98.
If Volume Control is not
installed on your
computer, use Add/
Remove Applications in
the Control Panel to
install it. For details on
installation, refer to the
Windowsowner’smanual
or Help.
The audio quality of the
UA-30 will be better if
you raise the Volume
Control levels.
When playing an audio
CD on the CD-ROM
driver of your computer,
or when using the UA-30
to play background music
for a game, select Control
Panel-Multimedia, click
the “CD Music”tab, and
check “Enable digital CD
audio for this CD-ROM
device.”Depending on
your system, playback
may still be impossible.
For details refer to the
manufacturer of your
computer.
If Mute is checked, or if
the slider is in the lowest
position, no sound will be
output from the UA-30.

20
Connections and driver installation
Checking for sound output
After the connections have been made correctly, you can play back the
sample data to check your setup.
■Playing the sample data
Here we will use standard Windows functionality to play the sample data.
The sample data is found in the UA Software CD-ROM. Insert the UA
Software CD-ROM into the CD-ROM drive of your computer.
1Copy “Alright.wav”to the desktop by dragging it from the “Sample_Data”
folder of the CD-ROM.
2Right-click the copied file “Alright.wav”, and select Properties from the
menu that appears.
fig.02-10.e
3Click the Preview tab, and then click the button.
The sample data will begin playing.
fig.02-11.e
In order to listen to the
sample data, you will
need approximately 30
MB of free space on the
hard disk that contains
your system.
Other manuals for UA-30
1
Table of contents
Other Roland Accessories manuals

Roland
Roland GK-2A-Kit User manual

Roland
Roland VK-8M Manual

Roland
Roland MICRO BR Manual

Roland
Roland Edirol UA-25 User manual

Roland
Roland VS4S-1 User manual

Roland
Roland FC-100 mkII User manual

Roland
Roland MCB-3 User manual

Roland
Roland TM-6 PRO User manual

Roland
Roland DIF-800 User manual

Roland
Roland GK-3B User manual

Roland
Roland UA-101 Assembly instructions

Roland
Roland FC-7 User manual

Roland
Roland GFC-50 User manual

Roland
Roland GK-3B User manual

Roland
Roland DUO-CAPTURE User manual

Roland
Roland Duo-Capture UA-11 User manual

Roland
Roland VK-8M Manual

Roland
Roland DUO-CAPTURE EX User manual

Roland
Roland VK-8M User manual

Roland
Roland AE-7000 User manual