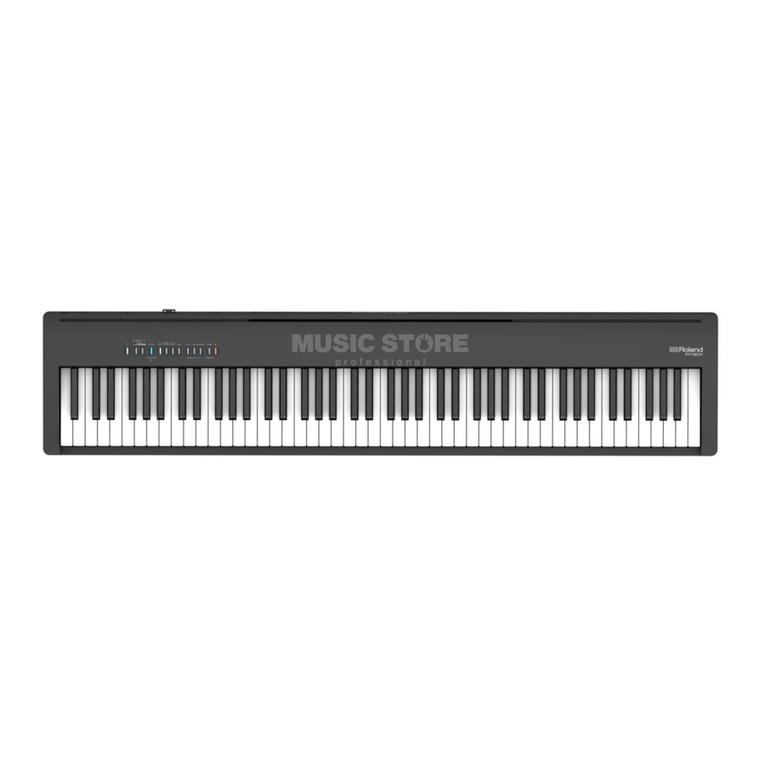
Roland f-20 User manual

Digital Piano
Deutsch Français Italiano Español Português NederlandsEnglish


Deutsch Français Italiano Español Português NederlandsEnglish
Before using this unit, carefully read the sections entitled “USING THE UNIT SAFELY” and “IMPORTANT NOTES” (leaet “USING THE UNIT SAFELY” and
Owner’s Manual p. 10). These sections provide important information concerning the proper operation of the unit. Additionally, in order to feel assured
that you have gained a good grasp of every feature of your new unit, read leaet “USING THE UNIT SAFELY” and Owner’s Manual in its entirety. This
manual should be saved and kept on hand as a convenient reference.
Copyright © 2013 ROLAND CORPORATION
All rights reserved. No part of this publication may be reproduced in any form without the written permission of ROLAND CORPORATION.
Digital Piano
Easy Operation Guide (Front Panel) 2
Turning the Power On/O .......................................2
Adjusting the Volume ...........................................2
Selecting a Sound ...............................................2
Layering Two Sounds (Dual) .....................................2
Playing Dierent Sounds with Left and Right Hands (Split) . . . . . . . 2
Changing the Keyboard Response (Key Touch) . . . . . . . . . . . . . . . . . . . 2
Using the Metronome ...........................................3
Playing Back Songs/Rhythms (Automatic Accompaniment for
Chords) .........................................................3
Recording Your Performance ....................................3
Before You Play 4
Placing the F-20 on a Stand .....................................4
Rear Panel Connections .........................................4
Attaching the Music Rest ........................................5
Turning the Power On/O .......................................5
Making the Power Automatically Turn O After a Time (Auto O) . 5
Listening to the Demo Songs ....................................5
Advanced Features 6
Adjusting the Brilliance (Brilliance) . . . . . . . . . . . . . . . . . . . . . . . . . . . . . . . 6
Adjusting the Reverberation (Ambience). . . . . . . . . . . . . . . . . . . . . . . . .6
Dividing the Keyboard in Two (Twin Piano) . . . . . . . . . . . . . . . . . . . . . . 6
Disabling the Buttons (Panel Lock) . . . . . . . . . . . . . . . . . . . . . . . . . . . . . . . 6
Saving the Settings (Memory Backup) . . . . . . . . . . . . . . . . . . . . . . . . . . .6
Restoring the Factory Settings (Factory Reset) . . . . . . . . . . . . . . . . . . . 6
Formatting a USB Flash Drive ....................................6
Various Function Settings (Function Mode) . . . . . . . . . . . . . . . . . . . . . . 7
Matching the Pitch with Other Instruments (Master Tuning) 7
Changing the Key of the Keyboard (Transpose) . . . . . . . . . . . .7
About the Wireless LAN Function 8
What Is Wireless LAN Function? ..................................8
Basic Connection Method (Connect by WPS) . . . . . . . . . . . . . . . . . . . . .8
Connecting in Ad-Hoc mode ..............................8
Troubleshooting 9
Contents
Environmentally Friendly Energy-Ecient Design
When 30 minutes have elapsed since you last played or operated the F-20, the power will
turn o automatically.
* If you don’t want the power to turn o automatically, change the “Auto O”
setting (p. 5).
Main Specications
Keyboard 88 keys (Ivory Feel-G keyboard with escapement)
Power Supply AC adaptor
Power Consumption
9 W (2 W–18 W)
9 W: Average power consumption while piano is
played with volume at center position
2 W: Power consumption immediately after
power-up; nothing being played
18 W: Rated power consumption
Dimensions 1,282 (W) x 296 (D) x 132 (H) mm
50-1/2 (W) x 11-11/16 (D) x 5-1/4 (H) inches
Weight 20 kg
44 lbs 2 oz
Accessories
Owner’s manual, Leaet “USING THE UNIT SAFELY,”
Music rest, AC adaptor, Power cord (for connecting
AC adaptor), Damper pedal (capable of continuous
detection)
Options
(Sold Separately)
Dedicated Stand (KSC-68), Keyboard Stand (KS-18Z,
KS-12), Damper Pedal (DP-10), USB Flash Memory (*1),
Wireless USB Adapter (WNA1100-RL) (*1)
*1: Use USB Flash Memory and Wireless USB Adapter
sold by Roland. We cannot guarantee operation if
other products are used.
* In the interest of product improvement, the specications and/or
appearance of this unit are subject to change without prior notice.

2
Easy Operation Guide (Front Panel)
Turning the Power On/O
Adjusting the Volume
Use the [VOLUME] knob to adjust the volume.
Changing the Keyboard Response (Key Touch)
If you turn the [KEY TOUCH] button on, you can
change the responsiveness of the keyboard (key
touch).
When the [KEY TOUCH] button is o, the “MEDIUM”
touch (equivalent to an acoustic piano) is selected.
Selecting a Sound
Hold down the TONE button and press one of the following keys; the sound changes.
Playing Dierent Sounds with Left and Right Hands (Split)
Turn the [SPLIT] button on, and the keyboard is divided into left and right sections,
allowing you to play a dierent sound in each section.
If you hold down the [SPLIT] button, the TONE button assigned to the left section will
light.
Switching Sounds (Split)
Switching the left sound While pressing the [SPLIT] button, hold down one of the
TONE buttons, and press a key.
Switching the right sound Use the same operation as in “Selecting a Sound,” above.
Selecting a Piano
Selecting Other Sounds
Selecting an E. Piano
Layering Two Sounds (Dual)
By pressing two TONE buttons simultaneously,
you can layer two sounds.
Mix Balance
You can adjust the mix balance of the two sounds (ve steps, 0 = default value).
Changing the Point Where the Keyboard Is Divided (Split Point)
Hold down the [SPLIT] button and press a key (Default: F 3).
Hold down
Hold down
LIGHT You can achieve fortissimo () play with a less forceful touch than “MEDIUM,” so
the keyboard feels lighter. This setting makes it easy to play, even for children.
HEAVY
You have to nger the keyboard more forcefully than “MEDIUM” in order to play
fortissimo (), so the keyboard feels heavier. Dynamic ngering adds even more
feeling to what you play.
FIX The sound plays at one set volume, regardless of the force used to play the keys.
LIGHT
FIX
HEAVY
1
2
Hold down
E. Piano 1
Celesta
Clav.
E. Piano 3
E. Piano 2
Vibraphone
Synth Bell
1
2
Hold down
Grand Piano 1
Harpsichord 2
Ragtime Piano
Grand Piano 3
Grand Piano 2
Harpsichord 1
1
2
Hold down
Strings 1
Accordion
Choir 1
Choir 2
Synth Pad
Steel-str.Gt
Decay Strings
Decay Choir Pad
A.Bass + Cymbal
Fingered Bass
Church Organ 1
Jazz Organ 1
Harp
Strings 2
Thum Voice
Jazz Organ 2
Decay Choir
Church Organ 2
Acoustic Bass
Jazz Scat
Choir 3
Nylon-str.Gt
1
2
(p. 5)
Hold down
12
B1 B6
Hold down
+
00
+––
Mix balance for Dual
Mix balance for Split
TONE button
that’s lit
2
1

Easy Operation Guide (Front Panel)
3
Deutsch Français Italiano Español Português NederlandsEnglish
Playing Back Songs/Rhythms (Automatic Accompaniment for Chords)
To play or stop a song, press the [SONG] button. To play or stop the rhythm (automatic accompani-
ment based on the chords you play), press the [RHYTHM] button.
You can select an internal song or rhythm by holding down the [SONG] or [RHYTHM] button and
pressing one of the following keys.
REFERENCE For details on the song names and rhythm names, refer to “Internal Song List”
and “Rhythm List” at the end of this manual.
Using the Metronome
Turn the [METRONOME] button on; the metronome will sound. Use the [SLOW]/[FAST] buttons to adjust the tempo.
Specifying a Numeric Tempo
A numeric value can also be specied for the tempo (20–250) (default: 108).
Changing the Number of Beats
You can choose from 0 (weak beats only), 2 (2 beats), 3 (3 beats), 4 (4 beats), 5 (5
beats), or 6 (6 beats).
You can also change the number of beats by holding down the [METRONOME]
button and using the [SLOW]/[FAST] buttons.
Example: To enter 120, hold down the [METRONOME] button and press the keys in
this order: 1 2 0 ENTER.
Recording Your Performance
Here’s how to record a song.
* Before you begin, select the sound that you want to record.
1. Press the [SONG] button and [RHYTHM] button simultaneously.
* To cancel recording, press the [SONG] button and [RHYTHM] button
simultaneously once again.
2. Play the keyboard to start recording.
3. Press the [SONG] button to stop recording.
If You Want to Record Along with the Metronome
* Sound the metronome and set the number of beats and tempo, before
recording.
If you press the [SONG] button in step 2, recording starts after a two-measure
count.
Recording Along with Rhythm
* Select a rhythm before recording.
If you press the [RHYTHM] button in step 2, recording starts after a two-measure
count.
Playing the Song You Recorded
Hold down
1
2
E3
If You Want to Redo the Recording
Start recording again from step 1.
Saving the Recorded Song to a USB Flash Drive
* Connect your USB ash drive before you continue.
Hold down the [KEY TOUCH] button and press the [SONG] button.
Once all the LEDs on the buttons are lit, the data has been saved (up
to 99 songs).
Playing a Song from a USB Flash Drive
Hold down the [SONG] button and press the “F 3” key.
You can use the two keys adjacent to “F 3” to select a song on the USB ash drive.
Hold down
Play
Prev.
Next
12
F3
* You can also copy a WAV le or MIDI le from your computer to a USB ash drive,
and play it back on the F-20. For details on the formats that can be played, refer
to the end of this manual.
Hold down
0 3 4 6
52
1
2
Selecting a Rhythm
Hold down
12
Selecting an Internal Song
Hold down
Press the right end key; all songs play
consecutively.
12
Hold down
0 2 4 6 7 9
1 3 5 8
ENTER
1
2
Mix Balance
You can adjust the mix balance between the song/rhythm and the keyboard (ve levels,
0 = default).
+
0
–
2
While holding
either
1
Rhythm Flow
[RHYTHM] on [RHYTHM] o
Intro Accompaniment Ending

4
PHONES jack
Connect headphones (sold separately).
* If you’re connecting only one set of
headphones, you must connect them to
the PHONES jack.
OUTPUT jack
If you connect this jack to
amplied speakers, the sound of
this unit will be heard through
them.
PEDAL jack
Connect the included
damper pedal.
DC IN jack
Connect the included AC adaptor here.
USB COMPUTER port
If you use a commercially available USB cable to connect the F-20’s USB
COMPUTER port to your computer’s USB port, you’ll be able to do the following
things.
• SMF data played back by MIDI-compatible software can be sounded by the
F-20.
• MIDI data can be transferred between the F-20 and your sequencer software,
opening up a wide range of possibilities for music production and editing.
Placing the F-20 on a Stand
If you want to place the F-20 on a stand, use the Roland KSC-68 (refer to the KSC-68 Owner’s Manual), KS-18Z or KS-12.
* Be careful not to pinch your ngers when setting up the stand.
Before You Play
Rear Panel Connections
KS-18Z KS-12
AC Outlet
Power Cord
Place the AC adaptor so the side with the indicator
(see illustration) faces upwards and the side with
textual information faces downwards.
The indicator will light when you plug the AC
adaptor into an AC outlet.
If two people are using
headphones (sold
separately), connect
the headphones to the
PHONES jack and the
OUTPUT jack.
Align the front of the F-20
with the front of the stand.
Adjust so that the
height does not
exceed 1 meter
(Adjust the stand
to a level no higher
than the second
level from the
bottom).
Adjust the width of the stand
so that the rubber feet of the
F-20 straddle the stand.
Keyboard side
Top view
Align the legs of the stand with
the screws of the rear panel.
To prevent malfunction and
equipment failure, always turn
down the volume, and turn o
all the units before making any
connections.
USB MEMORY port
Connect a USB ash drive here.
• If a USB ash drive is connected, you can play
or save songs.
• If a wireless USB adapter (WNA1100-RL; sold
separately) is connected, you can use wireless-
compatible iOS apps (p. 8).
• The volume of the F-20’s speakers will be
reduced if you connect a USB device to the USB
MEMORY port.
* Never insert or remove a USB ash drive while
this unit is turned on. Doing so may corrupt the
unit’s data or the data on the USB ash drive.
* Carefully insert the USB ash drive all the way
in—until it is rmly in place.

Before You Play
5
Deutsch Français Italiano Español Português NederlandsEnglish
Attaching the Music Rest
Here’s how to attach the included music rest.
1. Loosen the music rest attachment screws located on the
back of the piano (two locations).
2. Place the music rest between the screws and the chassis.
3. While using one hand to support the music rest, tighten
the screws (two locations) to fasten the music rest rmly
in place.
* When attaching the music rest, you must use your hand to
support it rmly so that it does not fall. Be careful not to pinch
your hand.
* Don’t apply excessive force to the installed music rest.
* When attaching the music rest, you must use the music rest
attachment screws that were attached to the piano.
To remove the music rest, support it with one hand while you
loosen the screws. Remove the music rest, and then securely
retighten the screws.
Turning the Power On/O
Once everything is properly connected (p. 4), be sure to follow the
procedure below to turn on their power. If you turn on equipment
in the wrong order, you risk causing malfunction or equipment
failure.
Turning the Power On
1. Turn the [VOLUME] knob all the way toward the left to
minimize the volume.
2. Press the [ ] (POWER) button to turn the power on.
* This unit is equipped with a protection circuit. A brief interval (a
few seconds) after turning the unit on is required before it will
operate normally.
3. Use the [VOLUME] knob to adjust the volume.
* Before turning the unit on/o, always be sure to turn the volume
down. Even with the volume turned down, you might hear some
sound when switching the unit on/o. However, this is normal
and does not indicate a malfunction.
Turning the Power O
1. Turn the [VOLUME] knob all the way toward the left to
minimize the volume.
2. Hold down the [ ] (POWER) button for one second or
longer; the power will be turned o.
Making the Power Automatically
Turn O After a Time (Auto O)
The power to this unit will be turned o automatically after
a predetermined amount of time has passed since it was last
used for playing music, or its buttons or controls were operated
(Auto O function).
If you do not want the power to be turned o automatically,
change the Auto O setting to “OFF.”
(Default: 30 min.)
* To restore power, turn the power on again.
Hold down
240 min.
OFF
10 min.
30 min.
1 2
3
* This setting is remembered even after the power is turned o.
Listening to the Demo Songs
While holding either
12
There are three demo songs.
Press the [SONG] button to stop.
Precautions regarding placement of this unit on a stand
Be sure to follow the instructions in the Owner’s Manual
carefully when placing this unit on a stand (p. 4).
If it is not set up properly, you risk creating an unstable
situation which could lead to the unit falling or the stand
toppling, and may result in injury.
Place the instrument 30 cm away from the wall
The speakers of the F-20 are mounted on
its rear panel. For this reason, you might
have trouble hearing the sound from the
speakers if the rear panel is placed directly
against a wall.
Don’t let the instrument fall over!
To prevent the F-20 from falling over,
don’t apply excessive force to it, and
never sit or stand on it.
30 cm
(12 inch)
* All rights reserved.
Unauthorized use
of this material for
purposes other
than private, per-
sonal enjoyment
is a violation of
applicable laws.

6
Adjusting the Brilliance (Brilliance)
Here’s how to adjust the brilliance of the sound (3 levels).
Hold down
BRIGHT
MELLOW
NORMAL
C5 C6
12
3
Adjusting the Reverberation (Ambience)
You can adjust a reverberation of the sound, and get the impression
that you are performing in a concert hall (5 levels).
Hold down
+–
DEFAULT
C5 C6
1 2
3
Dividing the Keyboard in Two (Twin Piano)
You can divide the keyboard into left and right sections so that two
people can play the same pitch ranges. This function lets you use
the unit as though it were two pianos.
C5 C6
Hold down
OFF
PAIR
INDIVIDUAL
1 2
3
The keyboard will be divided into left and right sections, with
“middle C” located in the center of each section.
You can choose one of the following ways in which the sound will
be heard.
Value Explanation
PAIR
The sound will be heard from the right as you play toward
the right of the keyboard, and from the left as you play
toward the left.
INDIVIDUAL
Notes played in the right area will be heard from the right
speaker, and notes played in the left area will be heard
from the left speaker.
* The left and right sections will have the same tone (Piano). Twin
Piano will be cancelled when you push one of the TONE buttons.
* The damper pedal aects only the right section of the keyboard.
Disabling the Buttons (Panel Lock)
While holding down the [PIANO] button, turn the power on. Keep
holding down [PIANO] button for at least six seconds. Panel Lock
will be set, and buttons other than the [ ] (POWER) button will be
disabled. This prevents the tones or settings from being changed if
you inadvertently press a button.
Panel Lock will be cancelled when you turn o the power.
Saving the Settings (Memory Backup)
When this unit’s power is turned o, it will return to its default
settings. However, if desired, you can save the following settings
so that they will be remembered even after the power is o. This is
called the “Memory Backup” function.
Settings saved by Memory Backup Page
Key Touch p. 2
Brilliance p. 6
Ambience p. 6
Master Tuning p. 7
1. Hold down the [KEY TOUCH] button and press the
[RHYTHM] button.
The [OTHER] button and the [SPLIT] button will blink.
To cancel, press the [OTHER] button.
2. To save the settings, press the [SPLIT] button.
When all the LEDs on the buttons are lit, the operation is complete.
Restoring the Factory Settings (Factory Reset)
The settings you’ve changed in the function mode (p. 7) can be
restored to their factory-set condition.
NOTE
When you execute a factory reset, all settings will be
initialized and the song you recorded in internal memory
will be erased.
1. While holding down the [KEY TOUCH] button, turn the
power on. Keep holding down [KEY TOUCH] button for at
least six seconds.
The [OTHER] button and the [SPLIT] button will blink.
To cancel, press the [OTHER] button.
2. To execute the Factory Reset, press the [SPLIT] button.
When all the LEDs on the buttons are lit, the operation is complete.
3. Turn the power o, then on again.
Formatting a USB Flash Drive
Here’s how to initialize (format) the entire contents
saved on a USB ash drive.
NOTE
• Formatting will erase everything that has been saved on the
USB ash drive.
• Before using a new USB ash drive with the F-20 for the rst
time, you must format the USB ash drive.
1. Connect the USB ash drive that you want to format to
the USB MEMORY port.
2. While holding down the [SONG] button, turn the power
on. Keep holding down [SONG] button for at least six
seconds.
The [OTHER] button and the [SPLIT] button will blink.
To cancel, press the [OTHER] button.
3. To execute the format, press the [SPLIT] button.
When all the LEDs on the buttons are lit, the operation is complete.
4. Turn the power o, then on again.
Advanced Features

Advanced Features
7
Deutsch Français Italiano Español Português NederlandsEnglish
Hold down 3
OFF
240 min.
30 min.
10 min.
1
0
13
+2
15
-1
12
-3
10
-5
8
+4
5
3
1
+5
6
OFF
Ad-Hoc OFF
OFF
V-LINK
ON
MELLOW
BRIGHT
+
+
–
–
440.0 Hz
2
+1
14
-2
11
-4
9
4
-6
7
2
+3
16
PAIR
Ad-Hoc ON
OFF
NORMAL
DEFAULT
MVC
Auto O (p. 5)
USB Memory Mode
Twin Piano (p. 6)
Wireless LAN (p. 8)
Local Control
Brilliance (p. 6)
Ambience (p. 6)
Visual Control Mode
Transpose
MIDI
Transmit Channel
Master Tuning
Various Function Settings (Function Mode)
To make settings in Function mode, while pressing the [KEY TOUCH] button, hold down the [PIANO] button, and press one of the keys
shown in the illustration.
Changing the USB Flash Drive Setting (USB Memory Mode)
In some cases, when USB ash drive is connected to the USB MEMORY port, it may take longer for data to
be loaded, or data may fail to be loaded successfully. In this case, you may be able to solve the problem by
changing the USB MEMORY Mode setting to “1.” When the unit left the factory, this was set to “2.” Normally,
there is no need to make this setting.
* After you change this setting, you must turn the power o, then back on again. The new setting takes
eect when you turn the power back on.
Matching the Pitch with Other Instruments (Master Tuning)
When playing ensemble with other instruments and in other such instances, you can match the standard
pitch to another instrument.
The standard pitch generally refers to the pitch of the note that’s played when you nger the middle A key.
For a cleaner ensemble sound while performing with one or more other instruments, ensure that each
instrument’s standard pitch is in tune with that of the other instruments. This tuning of all the instruments to
a standard pitch is called “master tuning.”
You can adjust the tuning in the range of 415.3 Hz–440.0 Hz (default)–466.2 Hz (in 0.1 Hz steps).
Changing the Key of the Keyboard (Transpose)
You can use the Transpose function to transpose the keyboard
in semitone steps.
For example, if a song is in the key of E major, and you want to
play it with the ngering of C major, set Transpose to a value of
“+4.”
Controlling Video Equipment (Visual Control Mode)
Visual Control is a function that lets you control images along with your performance.
If you’ve set Visual Control mode to “MVC” (MIDI Visual Control, p. 9) or “V-LINK,” playing the keyboard of this
unit will control the images produced by the Visual Control device connected to this unit using a USB MIDI.
Visual Control function chart
Playing the lowest 12 keys of this unit (A0–G 1) will transmit the following MIDI messages.
Visual Control function Transmitted MIDI message This unit’s operation
Switch images CC 0 (Bank Select): 0–4 Play black keys
Program Change: 1–7 Play white keys
MIDI Transmit Channel Settings
This setting species the MIDI channel on which this unit will transmit.
MIDI uses sixteen “MIDI channels,” which are numbered 1 through 16. By connecting MIDI devices and
specifying the appropriate MIDI channel for each device, you can play or select sounds on those devices.
This unit will receive all sixteen channels (1–16).
Preventing Double Notes When Working with a
Software Synthesizer (Local Control)
If a software synthesizer is connected to USB
MIDI, turn this item “OFF.”
Since most software synthesizer have their
Thru function turned on, notes you play on the
keyboard may be sounded in duplicate, or get
dropped. To prevent this, you can enable the
“Local O” setting so that the keyboard and
internal sound generator will be disconnected.
If you play C E G It will sound E G B
Software
Synthesizer
Local Control
Sound Generator
USB MIDI
In
USB MIDI
Out
Computer
C1
C2
C3
C4
C5
C6
C7
C8
WPS
INDIVIDUAL
1 2

8
About the Wireless LAN Function
What Is Wireless LAN Function?
By inserting the wireless USB Adapter (WNA1100-RL; sold
separately) into the F-20’s USB MEMORY port, you’ll be able
to use wireless-compatible applications (iOS apps such as the
“Piano Partner” or “Air Performer” ).
F-20
Wireless USB Adapter (sold
separately:
WNA1100-RL)
Wireless LAN access point
(e.g., wireless LAN router)
Wireless LAN Wireless LAN
iPhone etc.
Items required to use the wireless LAN function
Wireless USB Adapter (sold separately: WNA1100-RL)
Wireless LAN access point (e.g., wireless LAN router) *1 *2
iPhone, iPad, or iPod touch etc.
*1 The wireless LAN access point you use must support WPS. If
you’re unable to connect to the wireless LAN access point, try
connecting using Ad-Hoc mode.
*2 The ability to connect with all kinds of wireless LAN access
points is not guaranteed.
Basic Connection Method (Connect by WPS)
The rst time you connect the F-20 to a new wireless network, you’ll
need to perform the following procedure (WPS) to join the wireless
network.
This procedure is required only the rst time. (Once you’ve joined
the network, this procedure will no longer be necessary.)
What is WPS?
This is a standard that makes it easy to make security settings when
connecting to a wireless LAN access point. We recommend that you
use WPS when connecting to a wireless LAN access point.
1. Insert the wireless USB Adapter (WNA1100-RL; sold
separately) into the F-20’s USB MEMORY port.
2. Hold down the button of the Wireless USB
Adapter for three seconds.
The LED indicator of the Wireless USB Adapter will blink.
NOTE
* If you apply excessive force to the USB adapter when
pressing the button, you may damage it. Please use caution.
MEMO
You can also perform the WPS procedure by pressing “WPS” in
“Various Function Settings (Function Mode)” (p. 7) instead of
pressing the button of the wireless USB adapter.
3. Perform the WPS operation on your wireless LAN access
point (e.g., press the WPS button on your wireless LAN
access point).
For details on WPS operation of your wireless LAN access point,
refer to the owner’s manual for your wireless LAN access point.
Once successfully connected, the LED indicator of the Wireless USB
Adapter will light.
You can use the wireless connection from an iOS app such as
“Air Performer.” Choose “F-20” in the instrument select screen of
your iOS app.
NOTE
* The device (e.g., iPhone) running the app must be connected to
the same network.
MEMO
• The connection data is stored in memory when you perform
the WPS procedure; the device will automatically connect to the
wireless network from the next time.
• All connection data will be erased if you perform a factory reset.
LED indicator of the Wireless USB Adapter
LED Explanation
Lit The adapter is connected to a network.
Unlit The adapter is not connected to a network.
Blinking The adapter is searching for a network.
Connecting in Ad-Hoc mode
Here’s how to connect in Ad-Hoc mode.
What is Ad-Hoc mode?
Ad-Hoc mode lets you connect the F-20 directly to an iPhone or
other wireless device without using a wireless LAN access point. This
is a convenient way to use the F-20 with an iPhone or other wireless
device if you’re in a location where the wireless LAN access point
you normally use is unavailable, such as when you’re away from
home.
Limitations
The iPod touch or other wireless device connected in Ad-Hoc
mode will be unable to communicate with the Internet or with
another wireless device. However, an iPhone or other wireless
device that has cellular capability will be able to connect to the
Internet via the cellular connection.
Please be aware that if you use a cellular connection for Internet
connectivity, you may incur costs depending on your rate plan.
1. In “Various Function Settings (Function Mode)” (p. 7), press
“Ad-Hoc ON.”
2. On the iPhone or other wireless device that you want
to connect, select “F-20” to make the connection. (For
example, on an iPhone, choose [Settings] [Wi-Fi]
[Choose a Network] to select “F-20.” A password entry
screen will appear; enter “f20ak”.)
Ad-Hoc SSID F-20
Password f20ak
For details on how to connect to a wireless LAN from an iPhone or
other device, refer to the owner’s manual of that device.
3. When you want to end the Ad-Hoc mode connection,
restore the iPhone settings in [Settings] [Wi-Fi]
[Choose a Network] to their previous state.

9
Deutsch Français Italiano Español Português NederlandsEnglish
Troubleshooting
Problem Cause/Action
All LEDs other than
the [ ] (POWER)
button are blinking
Excessive current ow occurred at the USB MEMORY port.
Check whether there might be a problem with the USB ash drive. Next,
turn the power o, then back on again.
The speakers
produce sound
even though
headphones are
connected
Could the headphones be connected to the OUTPUT jack instead of the
PHONES jack (p. 4)?
Even though you’re
using headphones
and the sound is
muted, a thumping
sound is heard
when you play the
keyboard
This unit uses a hammer action keyboard in order to simulate an acoustic
piano’s playing touch as realistically as possible. For this reason, you’ll hear
the hammers thump when you play the keyboard, just as you would when
playing an acoustic piano. Since this unit allows you to adjust its volume,
you might notice the sound of the hammers in certain situations, but this
does not indicate a malfunction. If vibration transmitted to the oor or
walls is a concern, you may be able to minimize the vibration by moving
the piano away from the wall, or by laying down a commercially available
anti-vibration mat designed for use with pianos.
Power turns o on
its own
When 30 minutes have elapsed since you last played or operated this unit,
the power will turn o automatically (This is the factory setting).
If you don’t need the power to turn o automatically, turn the “Auto O”
setting “OFF” (p. 5).
Power does not
turn on Is the AC adaptor connected correctly (p. 4)?
Pedal does not
work, or is “stuck”
Is the pedal connected correctly?
Plug the cord rmly into the PEDAL jack (p. 4).
No sound/
No sound when you
play back a song
Could the unit’s volume be turned down?
Could headphones be connected?
The speakers will not produce sound if headphones is connected to the
PHONES jack (p. 4).
Pitch of the
keyboard or song is
incorrect
Could you have made Transpose settings (p. 7)?
Is the Master Tune setting appropriate (p. 7)?
The notes of a piano are tuned using a unique method (stretched tuning),
which makes upper-range notes slightly higher in pitch, and lower-range
notes slightly lower in pitch. For this reason, you might perceive the pitch
as being incorrect, but this is the way an acoustic piano should sound.
Sounds are heard
twice (doubled)
when the keyboard
is played
Could you have selected a dual tone (p. 2)?
The sound of
the higher notes
suddenly changes
from a certain key
On an acoustic piano, the approximately one and a half octaves of notes
at the upper end of the keyboard will continue sounding regardless of the
damper pedal. These notes also have a somewhat dierent tonal character.
This unit faithfully simulate this characteristic of acoustic pianos. On
this unit, the range that is unaected by the damper pedal will change
according to the transpose setting.
High-pitched
ringing is heard
If you hear this in headphones:
Piano sounds that have a brilliant and crisp character contain substantial
high-frequency components that may sound as though a metallic ringing
has been added. This is because the characteristics of an actual piano are
being faithfully reproduced, and is not a malfunction.
This ringing is more obtrusive if the reverb eect is applied heavily, so you
may be able to minimize it by decreasing the reverb.
If you don’t hear this in headphones:
It is likely that there is some other reason (such as resonances within the
unit). Please contact your dealer or the nearest Roland service center.
Volume is reduced The volume will be reduced if you connect a USB device to the USB
MEMORY port. This does not indicate a malfunction.
Problem Cause/Action
Sound wrong, or
are buzzy
If you set the volume to the maximum setting, the sound may be distorted
depending on how you perform. If this occurs, turn down the volume.
If you don’t hear this in headphones:
Performing at high volumes may cause the speakers or objects near
the unit to resonate. Fluorescent lights or glass doors may also resonate
sympathetically. In particular, this is more likely to occur for lower notes
and higher volumes. You can take the following measures to minimize
resonances.
• Locate this unit 30 cm (12 inch) away from walls or other surfaces.
• Keep the volume down.
• Move away from the objects that are resonating.
If you hear this in headphones:
It is likely that there is some other reason. Please contact your dealer or a
nearby Roland service center.
Power turns o
In some cases, playing back extremely high-volume SMF or WAV data from
a USB ash drive may cause the protection circuit to operate, turning the
power o.
If this occurs, reduce the volume.
When Using the Wireless LAN Function
Problem Cause/Action
Can’t connect to a
wireless LAN access
point
• Make sure that your wireless LAN access point supports WPS.
If your wireless LAN access point does not support WPS, you can connect
using the procedure described in “Connecting in Ad-Hoc mode” (p. 8).
• The 802.11a/b wireless standard is not supported. Please use the
802.11g/n (2.4 GHz) wireless standard.
• The WEP authentication method is not supported. Please use the WPA or
WPA2 authentication method.
• Make sure that DHCP is enabled for your wireless LAN access point.
• The connection might not occur successfully due to the state of the
radio signal. If so, use the procedure described in “Basic Connection
Method (Connect by WPS)” (p. 8), and reconnect your wireless LAN access
point.
• There is a limit to the connection data that can be remembered. Making
a new connection may cause older connection data to be deleted.
All connection data will be deleted if you execute a factory reset. If the
connection data has been deleted, please re-connect to the wireless
LAN access point.
Communication is
unstable
Communication may be unstable depending on the usage of the radio
frequency spectrum.
If communication is unstable, the response may be sluggish, or if using
audio communication, there may be dropouts in the audio.
The following actions may improve the situation.
• Move the wireless LAN access point and the F-20 closer to each other.
• Change the channel setting of the wireless LAN access point.
The F-20 is not
found in the instru-
ment connections
of the iOS app (such
as “Air Performer”)
• Is the F-20 turned on?
• Is the wireless USB adapter (WNA1100-RL) inserted to the F-20?
• Is the F-20 connected to the wireless LAN?
• Are the F-20 and the iPhone connected to the same network (the same
wireless LAN access point)?
• Is the wireless LAN access point set to allow communication between
wireless LAN devices?
For details on settings, refer to the owner’s manual of your wireless LAN
access point.
What is MIDI Visual Control?
MIDI Visual Control is an internationally-used recommended practice that was added to the MIDI specication so that visual expression could be linked with
musical performance. Video equipment that is compatible with MIDI Visual Control can be connected to electronic musical instruments via MIDI in order to control
video equipment in tandem with a performance.
What is V-LINK?
V-LINK is Roland’s proprietary specication that allows visual expression to be linked with musical performance. Video equipment that is compatible
with V-LINK can be connected to electronic musical instruments via MIDI, making it easy to enjoy a variety of visual eects that are linked with the
performance.
What is MIDI?
MIDI, short for “Musical Instrument Digital Interface,” was developed as a universal standard for the exchange of performance data among electronic musical instruments and computers.
This unit is equipped with USB COMPUTER port to let it exchange performance data with external devices. These connectors can be used to connect the unit to an external device for
even greater versatility.

USING THE UNIT SAFELY
To completely turn o power to the unit, pull out the plug
from the outlet
Even with the power switch turned o, this unit
is not completely separated from its main
source of power. When the power needs to be
completely turned o, turn o the power switch
on the unit, then pull out the plug from the
outlet. For this reason, the outlet into which you choose to
connect the power cord’s plug should be one that is within
easy reach and readily accessible.
Concerning the Auto O function
The power to this unit will be turned o
automatically after a predetermined amount of
time has passed since it was last used for
playing music, or its buttons or controls were
operated (Auto O function). If you do not want
the power to be turned o automatically,
disengage the Auto O function (p. 5).
Use only the stand that is recommended
This unit should be used only with a stand that
is recommended by Roland.
Do not place in a location that is unstable
When using the unit with a stand recommended
by Roland, the stand must be carefully placed so
it is level and sure to remain stable. If not using a
stand, you still need to make sure that any
location you choose for placing the unit
provides a level surface that will properly
support the unit, and keep it from wobbling.
Precautions regarding placement of this unit on a stand
Be sure to follow the instructions in the Owner’s
Manual carefully when placing this unit on a
stand (p. 4).
If it is not set up properly, you risk creating an
unstable situation which could lead to the unit
falling or the stand toppling, and may result in injury.
Use only the supplied AC adaptor and the correct voltage
Be sure to use only the AC adaptor supplied with
the unit. Also, make sure the line voltage at the
installation matches the input voltage specied
on the AC adaptor’s body. Other AC adaptors
may use a dierent polarity, or be designed for a
dierent voltage, so their use could result in
damage, malfunction, or electric shock.
Use only the supplied power cord
Use only the attached power cord. Also, the
supplied power cord must not be used with any
other device.
CAUTION
Use only the specied stand(s)
This unit is designed to be used in combination
with specic stands (KSC-68, KS-18Z, KS-12)
manufactured by Roland. If used in combination
with other stands, you risk sustaining injuries as
the result of this product dropping down or
toppling over due to a lack of stability.
Evaluate safety issues before using stands
Even if you observe the cautions given in the
owner’s manual, certain types of handling may
allow this product to fall from the stand, or
cause the stand to overturn. Please be mindful
of any safety issues before using this product.
Cautions when moving this unit
If you need to move the instrument, take note of
the precautions listed below. At least two
persons are required to safely lift and move the
unit. It should be handled carefully, all the while
keeping it level. Make sure to have a rm grip, to
protect yourself from injury and the instrument
from damage.
• When using the KSC-68 stand, check to make sure the
screws securing the unit to the stand have not become
loose. Fasten them again securely whenever you notice
any loosening.
• Disconnect the power cord.
• Disconnect all cords coming from external devices.
• Remove the music stand.
Keep small items out of the reach of children
To prevent accidental ingestion of the parts
listed below, always keep them out of the reach
of small children.
• Removable Parts
Music rest attachment screws (p. 5)
Take care not to get burned
The area shown in the illustration may become
hot, so take care to avoid burns.
Rear panel
WARNING
IMPORTANT NOTES
Placement
• Do not expose the unit to direct sunlight, place it near
devices that radiate heat, leave it inside an enclosed
vehicle, or otherwise subject it to temperature extremes.
Also, do not allow lighting devices that normally are used
while their light source is very close to the unit (such as a
piano light), or powerful spotlights to shine upon the same
area of the unit for extended periods of time. Excessive heat
can deform or discolor the unit.
• Do not allow objects to remain on top of the keyboard. This
can be the cause of malfunction, such as keys ceasing to
produce sound.
• Depending on the material and temperature of the surface
on which you place the unit, its rubber feet may discolor or
mar the surface.
You can place a piece of felt or cloth under the rubber feet
to prevent this from happening. If you do so, please make
sure that the unit will not slip or move accidentally.
Maintenance
• To clean the unit, use a dry, soft cloth; or one that is slightly
dampened. Try to wipe the entire surface using an equal
amount of strength, moving the cloth along with the
grain of the wood. Rubbing too hard in the same area can
damage the nish.
Repairs and Data
• Before sending the unit away for repairs, be sure to make
a backup of the data stored within it; or you may prefer
to write down the needed information. Although we will
do our utmost to preserve the data stored in your unit
when we carry out repairs, in some cases, such as when
the memory section is physically damaged, restoration of
the stored content may be impossible. Roland assumes no
liability concerning the restoration of any stored content
that has been lost.
Additional Precautions
• Any data stored within the unit can be lost as the result of
equipment failure, incorrect operation, etc. Save the songs
you’ve recorded on a USB ash drive, so that you won’t lose
them in the event of such a failure.
• Roland assumes no liability concerning the restoration of
any stored content that has been lost.
• The sound of keys being struck and vibrations produced by
playing an instrument can be transmitted through a oor
or wall to an unexpected extent. Please take care not to
cause annoyance to others nearby.
• Do not apply undue force to the music stand while it is
in use.
• The volume will be reduced if you connect a USB device to
the USB MEMORY port.
Using External Memories
• Please observe the following precautions when handling
external memory devices.
Also, make sure to carefully observe all the precautions that
were supplied with the external memory device.
• Do not remove the device while reading/writing is in
progress.
• To prevent damage from static electricity, discharge
all static electricity from your person before handling
the device.
Care of the keyboard
• Do not write on the keyboard with any pen or other
implement, and do not stamp or place any marking on the
instrument. Ink will seep into the surface lines and become
unremovable.
• Do not ax stickers on the keyboard. You may be unable to
remove stickers that use strong adhesives, and the adhesive
may cause discoloration.
• To remove stubborn dirt, use a commercially available
keyboard cleaner that does not contain abrasives. Start
by wiping lightly. If the dirt does not come o, wipe using
gradually increasing amounts of pressure while taking care
not to scratch the keys.
Copyrights/Licences/Trademarks
• It is forbidden by law to make an audio recording, video
recording, copy or revision of a third party’s copyrighted
work (musical work, video work, broadcast, live
performance, or other work), whether in whole or in part,
and distribute, sell, lease, perform, or broadcast it without
the permission of the copyright owner.
• Do not use this product for purposes that could infringe
on a copyright held by a third party. We assume no
responsibility whatsoever with regard to any infringements
of third-party copyrights arising through your use of this
product.
• The copyright of content in this product (the sound
waveform data, style data, accompaniment patterns,
phrase data, audio loops and image data) is reserved by
Roland Corporation.
• Purchasers of this product are permitted to utilize said
content (except song data such as Demo Songs) for the
creating, performing, recording and distributing original
musical works.
• Purchasers of this product are NOT permitted to extract
said content in original or modied form, for the purpose
of distributing recorded medium of said content or making
them available on a computer network.
• Roland, GS, SuperNATURAL are either registered trademarks
or trademarks of Roland Corporation in the United States
and/or other countries.
WARNING CAUTION
10

DeutschFrançais Italiano Español Português NederlandsEnglish
Lesen Sie zuerst die Abschnitte“SICHERHEITSHINWEISE”und“WICHTIGE HINWEISE”(Merkblatt “SICHERHEITSHINWEISE”und diese Anleitung, S. 10).
Diese enthalten wichtige Informationen bzgl. des sicheren Betriebes des Gerätes. Lesen Sie dann diese Anleitung ganz durch, um einen Überblick über
alle Funktionen zu erhalten. Bewahren Sie die Anleitung auf und verwenden Sie diese als Referenz.
Copyright © 2013 ROLAND CORPORATION
Alle Rechte vorbehalten. Vervielfältigung, als Print oder Datei, als Ganzes oder in Teilen, bedarf einer schriftlichen Genehmigung der ROLAND
CORPORATION.
Digital Piano
Bedienungsanleitung
Kurzanleitung 2
Ein-/ Ausschalten................................................2
Einstellen der Lautstärke ........................................2
Auswählen der Klänge...........................................2
Übereinander legen zweier Klänge (Dual) ........................2
Spielen von zwei Klängen nebeneinander (Split) .................2
Einstellen der Tastaturdynamik (Key Touch) ......................2
Anwendung des Metronoms ....................................3
Abspielen eines Songs/ Rhythmus (Automatische Begleitung) ....3
Aufnahme des Spiels ............................................3
Vorbereitungen 4
Verwendung eines Piano-Ständers...............................4
Anschlüsse an der Rückseite .....................................4
Anbringen der Notenablage.....................................5
Ein- und Ausschalten ............................................5
Die Auto O-Funktion ...........................................5
Abspielen der Demo Songs......................................5
Weitere Funktionen 6
Einstellen der Brillianz (Brilliance) ................................6
Einstellen des Raumhall-Eekts
(Ambience). . . . . . . . . . . . . . . . . . . . . . . .6
Teilen der Tastatur (Twin Piano) ..................................6
Sperren der Taster-Funktionen (Panel Lock) ......................6
Sichern von Einstellungen (Memory Backup) .....................6
Abrufen der Werksvoreinstellungen (Factory Reset) ..............6
Formatieren eines USB-Speichers ................................6
Der Function-Modus (Function Mode) ...........................7
Anpassen der Stimmung an andere Instrumente (Master
Tuning) ...................................................7
Transponieren der Tastatur (Transpose) ....................7
Die Wireless LAN-Funktion 8
Was ist die Wireless LAN-Funktion?...............................8
Grundlegende Verbindungsmethode (WPS)......................8
Verbindung im Ad-Hoc-Modus ............................8
Mögliche Fehlerursachen 9
&Inhalt
&Umweltfreundliches, energieezientes Design
Das F-20 wird nach 30 Minuten automatisch abgeschaltet, wenn es in der Zwischenzeit
nicht gespielt bzw. bedient wurde.
* Wenn Sie diese automatische Abschaltung de-aktivieren möchten, stellen Sie den
Parameter “Auto O” auf “OFF” (S. 5).
&Technische Daten
Tastatur 88 Tasten (Ivory Feel-G Klaviatur mit Druckpunkt-
Simulation)
Stromversorgung AC-Adapter
Stromverbrauch
9 W (2 W–18 W)
9 W: durchschnittlicher Stromverbrauch bei
Lautstärkeregler in der Mittelposition
2 W: Stromverbrauch nach Einschalten ohne
Spielen des Instrumentes
18 W: Maximaler Stromverbrauch
Abmessungen 1,282 (W) x 296 (D) x 132 (H) mm
Gewicht 20 kg
Beigefügtes
Zubehör
Bedienungsanleitung, Merkblatt “SICHERHEITS-
HINWEISE”, Notenablage, AC-Adapter, Netzkabel,
Damper-Pedal (Halbpedal-fähig)
Zusätzliches
Zubehör
Ständer für stationäre Installation (KSC-68), Mobile
Ständer (KS-18Z, KS-12), Damper-Pedal (DP-10),
USB Flash-Speicher (*1), Wireless-USB-Adapter
(WNA1100 - RL) (*1)
*1: Verwenden Sie nur von Roland empfohlene
USB-Speicher und Wireless-USB-Adapter. Bei Ver-
wendung anderer Produkte kann die einwandfreie
Funktion nicht gewährleistet werden.
* Änderungen der technischen Daten und des Designs sind möglich.
Für Druckfehler wird keine Haftung übernommen.

2
Kurzanleitung
Ein-/ Ausschalten
Einstellen der Lautstärke
Stellen Sie mit dem [VOLUME]-Regler die Lautstärke
ein.
Einstellen der Tastaturdynamik (Key Touch)
Drücken Sie den [KEY TOUCH]-Taster, so dass die
Anzeige leuchtet. Sie können nun bestimmen,
mit welchem Kraftaufwand Sie die verschiedenen
Dynamikstufen erreichen.
Wenn die Anzeige des [KEY TOUCH]-Taster
erloschen ist, ist“MEDIUM” ausgewählt. Diese
Einstellung entspricht am ehesten dem eines
akustischen Pianos.
Auswählen der Klänge
Halten Sie einen der TONE-Taster gedrückt, und wählen Sie den gewünschten Klang mit den folgenden Tasten aus.
Spielen von zwei Klängen nebeneinander (Split)
Drücken Sie den [SPLIT]-Taster, so dass die Anzeige leuchtet. Die Tastatur ist nun in zwei
Bereiche aufgeteilt, und Sie können mit der linken und rechten Hand zwei verschiedene
Klänge spielen. Wenn Sie den [SPLIT]-Taster gedrückt halten, leuchtet der TONE-Taster
für die linke Seite.
Wechseln der Klänge (Split)
Klang der linken Seite
Halten Sie den [SPLIT]-Taster, halten Sie dann zusätzlich
einen der TONE-Taster gedrückt, und wählen Sie über
die Tastatur den gewünschten Klang aus.
Klang der rechten Seite Gehen Sie wie bei “Auswählen der Klänge”vor (s. oben).
Auswahl eines Pianoklangs
Auswahl anderer Klänge
Auswahl eines E. Pianoklangs
Übereinander legen zweier Klänge (Dual)
Drücken Sie zwei TONE-Taster gleichzeitig.
Mix Balance
Sie können das Lautstärke-Verhältnis beider Klänge einstellen (fünf Schritte,
0 = Werksvoreinstellung).
Verschieben des Splitpunktes
Halten Sie den [SPLIT]-Taster, und spielen Sie die gewünschte Note (Voreinstellung: F 3).
Gedrückt halten
LIGHT Ermöglicht es, Fortissimo-Klänge ( ) zu spielen, ohne allzu stark auf die Tasten
schlagen zu müssen. Diese Einstellung ist insbesondere für Kinder geeignet.
HEAVY
Bei dieser Einstellung müssen Sie die Tasten stärker anschlagen, um Fortissimo-
klänge () zu spielen. Diese Einstellung stellt die größte Dynamik-Bandbreite zur
Verfügung und ist daher besonders für Piano-Pros geeignet.
FIX Der Sound reagiert nicht auf Anschlagdynamik. Er wird mit einer fest
eingestellten Lautstärke wiedergegeben.
LIGHT
FIX
HEAVY
1
2
Gedrückt halten
E. Piano 1
Celesta
Clav.
E. Piano 3
E. Piano 2
Vibraphone
Synth Bell
1
2
Gedrückt halten
Grand Piano 1
Harpsichord 2
Ragtime Piano
Grand Piano 3
Grand Piano 2
Harpsichord 1
1
2
Gedrückt halten
Strings 1
Accordion
Choir 1
Choir 2
Synth Pad
Steel-str.Gt
Decay Strings
Decay Choir Pad
A.Bass + Cymbal
Fingered Bass
Church Organ 1
Jazz Organ 1
Harp
Strings 2
Thum Voice
Jazz Organ 2
Decay Choir
Church Organ 2
Acoustic Bass
Jazz Scat
Choir 3
Nylon-str.Gt
1
2
(S. 5)
Gedrückt halten
12
B1 B6
Gedrückt halten
+
00
+––
Mix Balance (Dual)
Mix Balance (Split)
leuchtender
TONE-Taster
2
1
Gedrückt halten

Kurzanleitung
3
DeutschFrançais Italiano Español Português NederlandsEnglish
Abspielen eines Songs/ Rhythmus (Automatische Begleitung)
Drücken Sie den [SONG]-Taster, um ein Song-Playback zu starten/ zu stoppen, und den [RHYTHM]-
Taster, um ein Rhythmus-Playback (Begleitung zu Ihren Akkorden) zu starten/ zu stoppen.
Sie können einen internen Song oder Rhythmus anwählen, in dem Sie den [SONG]- oder
[RHYTHM]-Taster gedrückt halten und die folgenden Tasten verwenden.
REFERENZ Eine Liste der internen Songs und Rhythmen nden Sie im Abschnitt“Internal
Song List” und“Rhythm List” am Ende dieser Anleitung.
Anwendung des Metronoms
Drücken Sie den [METRONOME]-Taster, so dass die Anzeige leuchtet; das Metronom erklingt. Stellen Sie mit den [SLOW]/[FAST]-Tastern das Tempo ein.
Ändern des Tempos durch Eingabe eines Zahlenwertes
Sie können das Tempo auch durch Eingabe eines Zahlenwertes bestimmen (20–250)
(Werksvoreinstellung: 108).
Einstellen der Taktart
Sie können zwischen 0 (nur unbetonte Zählzeiten), 2, 3, 4, 5 oder 6 Zählzeiten
wählen.
Sie können die Anzahl der Zählzeiten auch verändern, in dem Sie den
[METRONOME]-Taster gedrückt halten und die [SLOW]/[FAST]-Taster verwenden.
Beispiel: Um “120” einzugeben, halten Sie den [METRONOME]-Taster gedrückt, und
drücken Sie die Tasten in dieser Reihenfolge 1 2 0 ENTER.
Aufnahme des Spiels
Sie können Ihr Spiel aufzeichnen.
* Wählen Sie zunächst den Klang aus, den Sie aufnehmen möchten.
1. Drücken Sie gleichzeitig den [SONG]- und den [RHYTHM]-Taster.
* Um die Aufnahme abzubrechen, drücken Sie erneut beide Taster gleichzeitig.
2. Beginnen Sie mit dem Tastaturspiel; die Aufnahme startet.
3. Drücken Sie den [SONG]-Taster, um die Aufnahme zu beenden.
Aufnahme mit Metronom
* Aktivieren Sie das Metronom, und stellen Sie Taktart und Tempo ein, bevor Sie
mit der Aufnahme beginnen.
Wenn Sie bei Schritt 2den [SONG]-Taster betätigen, startet die Aufnahme erst nach
einem Vorzähler von zwei Takten.
Aufnahme mit Rhythmus-Playback
* Wählen Sie den gewünschten Rhythmus aus.
Wenn Sie bei Schritt 2 den [RHYTHM]-Taster betätigen, startet die Aufnahme erst
nach einem Vorzähler von zwei Takten.
Abspielen der Aufnahme
Gedrückt halten
1
2
E3
Wiederholen der Aufnahme
Beginnen Sie die Aufnahme wieder ab Schritt 1.
Sichern der Aufnahmedaten auf einem USB-Speicher
* Schließen Sie einen USB-Speicher an.
Halten Sie den [KEY TOUCH]-Taster gedrückt, und drücken Sie den
[SONG]-Taster. Sobald alle Taster-Anzeigen leuchten, sind die Daten
gespeichert (bis zu 99 Songs).
Abspielen eines Songs von einem USB-Speicher
Halten Sie den [SONG]-Taster gedrückt, und drücken Sie die “F 3”-Taste.
Mit den beiden Tasten vor und nach“F 3”können Sie einen Song auf dem
USB-Speicher auswählen.
Gedrückt halten
Play
Prev.
Next
12
F3
* Sie können auch eine WAV- oder MIDI-Datei von Ihrem Computer auf den USB-
Speicher kopieren und diese auf dem F-20 abspielen. Genauere Informationen
zu den Formaten nden Sie am Ende dieser Anleitung.
Auswahl eines Rhythmus
Gedrückt halten
12
Auswahl eines Songs
Gedrückt halten
Drücken Sie die letzte rechte Taste; alle
Songs werden nacheinander gespielt.
12
Gedrückt halten
0 2 4 6 7 9
1 3 5 8
ENTER
1
2
Einstellung der Mix Balance
Sie können das Lautstärke-Verhältnis von Begleitung (Rhythmus, Song) und Tastaturspiel
einstellen (fünf Level, 0 = Werksvoreinstellung).
+
0
–
2
Jeweils
gedrückt halten
1
Rhythmus-Verlauf
[RHYTHM] an [RHYTHM] aus
Intro Begleitung Ending
Gedrückt halten
0 3 4 6
52
1
2

4
PHONES-Buchse
Zum Anschluss eines Stereokopfhörers.
* Wenn Sie nur einen Kopfhörer
anschließen wollen, nutzen Sie diese
Buchse.
OUTPUT-Buchse
Hier können Sie ein externes
Verstärker-System anschließen.
PEDAL-Buchse
Schließen Sie das
beigefügte Damper-
Pedal an.
DC IN-Buchse
Hier wird der beigefügte Netzadapter angeschlossen.
USB COMPUTER-Anschluss
Sie können mithilfe eines handelsüblichen USB-Kabels das F-20 mit einem
Computer verbinden und
• SMF-Daten (Standard MIDI Files) mit dem F-20 abspielen.
• MIDI-Daten vom F-20 in Ihre Sequenzer-Software übertragen und dort weiter
bearbeiten und editieren.
Verwendung eines Piano-Ständers
Die folgenden Roland-Ständer sind für das F-20 zu verwenden: KSC-68 (lesen Sie dazu die Anleitung des KSC-68-Ständers), KS-18Z oder KS-12.
* Achten Sie darauf, sich bei Aufstellen des Ständers und des Instrumentes nicht die Hände zu verletzen.
Vorbereitungen
Anschlüsse an der Rückseite
KS-18Z KS-12
Steckdose
Stromkabel
Verlegen Sie den Netzadapter so, dass die Seite mit
der Leucht-Anzeige nach oben zeigt. Wenn Sie den
Adapter mit einer Steckdose verbinden, die Strom
führt, leuchtet diese Anzeige.
Wenn Sie zwei Kopf-
hörer anschließen
wollen, nutzen Sie
die PHONES- und
zusätzlich die OUTPUT-
Buchse.
Die Vorderseite des F-20
muss mit der Vorderseite des
Ständers abschließen.
Stellen Sie den
Ständer nicht
höher als bis auf
die zweitniedrigste
Stufe ein.
Stellen Sie die Breite des Stän-
ders so ein, dass die Gummifüße
des F-20 auf dem Ständer
auiegen.
Tastatur-Seite
Ansicht von oben
Die Schrauben auf der Rückseite
benden sich über den Beinen.
Bevor Sie Verbindungen mit
externen Geräten vornehmen,
schalten Sie alle beteiligten
Geräte aus. Sie verhindern so
eventuelle Fehlfunktionen
bzw. Beschädigungen der
Lautsprecher oder der
angeschlossenen Geräte.
USB-Speicher-Anschluss
• Mithilfe eines USB-Speichers können Sie Songs
abspielen und speichern.
• Mithilfe eines Wireless USB-Adapters
(WNA1100-RL; zusätzliches Zubehör) können Sie
Drahtlos-kompatible iOS Apps nutzen (S. 8).
• Bei Anschluss eines USB-Gerätes wird die
Lautstärke der F-20-Lautsprecher reduziert.
* Schalten Sie das Gerät aus, bevor Sie einen
USB-Speicher anschließen oder entfernen,
andernfalls können Daten im Insturment oder
auf dem USB-Speicher beschädigt werden.
* Stellen Sie sicher, dass der USB-Speicher fest
eingesteckt ist.

Vorbereitungen
5
DeutschFrançais Italiano Español Português NederlandsEnglish
Anbringen der Notenablage
Setzen Sie die Notenablage wie nachfolgend gezeigt auf.
1. Lösen Sie die beiden Schrauben an der Rückseite des
Pianos.
2. Setzen Sie die Notenablage zwischen die Schrauben und
das Gehäuse.
3. Halten Sie mit einer Hand die Notenablage in Position,
und drehen Sie mit der anderen Hand die Schrauben fest.
* Sie müssen die Notenablage bei der Montage fest in der
eingesteckten Position halten, damit sie nicht herab fällt. Achten
Sie darauf, sich nicht die Finger einzuklemmen.
* Üben Sie keinen übermäßigen Druck auf die montierte
Notenablage aus.
* Verwenden Sie ausschließlich die Schrauben, die dafür
vorgesehen sind.
Zum Entfernen der Notenablage halten Sie diese mit einer
Hand fest, während Sie die Schrauben lösen. Nehmen Sie die
Notenablage heraus und ziehen Sie die Schrauben wieder fest.
Ein- und Ausschalten
Wenn alles korrekt angeschlossen ist (S. 4), können Sie das
Instrument wie nachfolgend beschrieben einschalten. Falls diese
Schritte nicht in der richtigen Reihenfolge durch geführt werden,
riskieren Sie eine Fehlfunktion oder Beschädigung der Lautsprecher.
Einschalten
1. Drehen Sie den [VOLUME]-Regler ganz nach links, um die
Lautstärke auf Minimum zu stellen.
2. Drücken Sie den [ ] (POWER)-Schalter.
* Aufgrund der Überbrückung einer Schutzschaltung benötigt
das Instrument eine kurze Zeit nach dem Einschalten, bevor es
einsatzbereit ist.
3. Stellen Sie mit dem [VOLUME]-Regler die gewünschte
Lautstärke ein.
* Bevor Sie das Instrument ein- oder ausschalten, regeln Sie
immer die Lautstärke auf ein Minimum. Auch bei minimaler
Lautstärke ist bei Ein- und Ausschalten ein Nebengeräusch
hörbar, dies ist aber normal und keine Fehlfunktion.
Ausschalten
1. Drehen Sie den [VOLUME]-Regler ganz nach links, um die
Lautstärke auf Minimum zu stellen.
2. Halten Sie den [ ] (POWER)-Schalter solange gedrückt,
bis das Instrument ausgeschaltet ist.
Die Auto O-Funktion
Das Instrument wird in der Werksvoreinstellung nach einiger
Zeit automatisch ausgeschaltet, wenn in der Zwischenzeit
keine Bedienregler betätigt wurden bzw. nicht auf der Klaviatur
gespielt wurde.
Wenn Sie diese automatische Abschaltung de-aktivieren
möchten, stellen Sie den Parameter“Auto O”auf “O”.
(Voreinstellung: 30 Min.)
* Drücken Sie den [ ] (POWER)-Schalter, um das Instrument
wieder einzuschalten.
Halten
240 min.
OFF
10 min.
30 min.
1 2
3
* Diese Einstellung bleibt auch nach Abschaltung gespeichert.
Abspielen der Demo Songs
Jeweils gedrückt halten
12
Das Instrument beinhaltet drei Demo Songs.
Starten Sie das Demo Song-Playback, in dem Sie einen der TONE-
Taster gedrückt halten und den [SONG]-Taster betätigen. Stoppen
Sie das Playback durch erneutes Drücken des [SONG]-Tasters.
Vorsichtsmaßnahmen beim Platzieren auf einen Ständer
Halten Sie sich bei der Montage des Gerätes auf einen
Ständer genau an die Bedienungsanleitung (S. 4).
Wenn das Instrument nicht richtig platziert wird, riskieren
Sie, dass es herab fällt oder der Ständer kippt, was zu
Beschädigungen und Verletzungen führen kann.
Platzierung mit 30 cm Abstand zurWand.
Die Lautsprecher des F-20 benden sich
auf der Rückseite des Gerätes. Stellen Sie es
nicht zu nahe an einer Wand auf, da sonst
der Sound beeinträchtigt werden kann.
Nicht umkippen lassen!
Üben Sie keinen übermäßigen Druck auf
das F-20 aus, und setzen oder stellen Sie
sich niemals darauf.
30 cm
* Alle Rechte
vorbehalten. Bitte
beachten Sie
die gesetzlichen
Copyright-
Vorschriften.

6
Einstellen der Brillianz (Brilliance)
Sie können die Brillianz der Klänge in drei Stufen verändern.
Halten
BRIGHT
MELLOW
NORMAL
C5 C6
12
3
Einstellen des Raumhall-Eekts
(Ambience)
Sie können einen Hall-Eekt auf die Klänge legen, so dass der Ein-
druck entsteht, Sie würden z.B. in einer Konzerthalle spielen (5 Stufen).
Halten
+–
DEFAULT
C5 C6
1 2
3
Teilen der Tastatur (Twin Piano)
Sie können die Tastatur in zwei Bereiche unterteilen, so dass zwei
Personen nebeneinander mit gleicher Tonlage spielen können, wie
auf zwei einzelnen Pianos.
C5 C6
Halten
OFF
PAIR
INDIVIDUAL
1 2
3
Die Tastatur wird in einen linken und einen rechten Bereich unter-
teilt, in deren Mitte jeweils das“mittlere C”(C4) angeordnet ist. Sie
können wählen, wie die Töne wiedergegeben werden:
Einstellung Beschreibung
PAIR
Wenn Sie weiter rechts auf der Tastatur spielen, hören Sie
den Sound ebenfalls weiter rechts, wenn Sie weiter links
spielen, hören Sie den Sound ebenfalls weiter links.
INDIVIDUAL
Auf der rechten Seite gespielte Töne hören Sie aus dem
rechten Lautsprecher, auf der linken Seite gespielte Töne
aus dem linken Lautsprecher.
* Linker und rechter Bereich verwenden den gleichen Klang
(Piano). Das Damper Pedal wirkt nur auf die rechte Tastaturseite.
* Um den Twin Piano-Modus zu beenden, drücken Sie einen der
TONE-Taster.
Sperren der Taster-Funktionen(Panel Lock)
Wenn Sie beim Einschalten des Instrumentes den [PIANO]-Taster
mindestens sechs Sekunden lang gedrückt halten, werden alle
Taster mit Ausnahme des [ ] (POWER)-Tasters blockiert, so dass
Einstellungen nicht versehentlich verändert werden können. Mit
Ausschalten des Instrumentes wird“Panel Lock” de-aktiviert.
Sichern von Einstellungen (Memory Backup)
Im Function-Modus geänderte Einstellungen werden normalerweise
wieder auf deren jeweilige Voreinstellungen zurück gesetzt, wenn
das Instrument ausgeschaltet wird. Wenn Änderungen an den
folgenden Einstellungen erhalten bleiben sollen, gehen Sie wie
nachfolgend beschrieben vor.
Einstellungen Seite
Key Touch (Tastaturdynamik) S. 2
Brilliance (Brillianz) S. 6
Ambience (Raumhall-Eekt) S. 6
Master Tuning (Gesamtstimmung) S. 7
1. Halten Sie den [KEY TOUCH]-Taster gedrückt, und drücken
Sie den [RHYTHM]-Taster.
Die Taster [OTHER] und [SPLIT] blinken. Um den Vorgang
abzubrechen, drücken Sie den [OTHER]-Taster.
2. Drücken Sie auf [SPLIT], um die Einstellungen zu sichern.
Sobald alle Taster-Anzeigen leuchten, ist der Vorgang beendet.
Abrufen der Werksvoreinstellungen (Factory Reset)
Sie können die im Function-Modus geänderten MEMORY Backup-
Einstellungen (S. 7) auf deren Werksvoreinstellungen zurück
setzen.
WICHTIG
Nach einem Factory Reset sind sämtliche Benutzer-
Einstellungen gelöscht, auch Ihre im internen Speicher
aufgenommenen Songs.
1. Halten Sie beim Einschalten des Instrumentes den
[KEY TOUCH]-Taster mindestens sechs Sekunden lang
gedrückt.
Die Taster [OTHER] und [SPLIT] blinken. Um den Vorgang
abzubrechen, drücken Sie den [OTHER]-Taster.
2. Drücken Sie auf [SPLIT], um die Werksvoreinstellungen
abzurufen.
Sobald alle Taster-Anzeigen leuchten, ist der Vorgang beendet.
3. Schalten Sie das Instrument aus und nach kurzer Zeit
wieder ein.
Formatieren eines USB-Speichers
Mit dieser Funktion können Sie einen USB-Speicher
formatieren.
WICHTIG
• Dabei werden alle vorherigen Inhalte des USB-Speichers
gelöscht.
• Ein neuer bzw. bisher anderweitig verwendeter USB-Speicher
muss vom F-20 formatiert werden, damit er für dieses
Instrument verwendet werden kann.
1. Schließen Sie den zu formatierenden USB-Speicher an
den USB-Speicher-Anschluss an.
2. Halten Sie beim Einschalten des Instrumentes den
[SONG]-Taster mindestens sechs Sekunden lang gedrückt.
Die Taster [OTHER] und [SPLIT] blinken. Um den Vorgang
abzubrechen, drücken Sie den [OTHER]-Taster.
3. Drücken Sie auf [SPLIT], um den USB-Speicher zu
formatieren.
Sobald alle Taster-Anzeigen leuchten, ist der Vorgang beendet.
4. Schalten Sie das Instrument aus und nach kurzer Zeit
wieder ein.
Weitere Funktionen

Weitere Funktionen
7
DeutschFrançais Italiano Español Português NederlandsEnglish
Gedrückt halten 3
OFF
240 min.
30 min.
10 min.
1
0
13
+2
15
-1
12
-3
10
-5
8
+4
5
3
1
+5
6
OFF
Ad-Hoc OFF
OFF
V-LINK
ON
MELLOW
BRIGHT
+
+
–
–
440.0 Hz
2
+1
14
-2
11
-4
9
4
-6
7
2
+3
16
PAIR
Ad-Hoc ON
OFF
NORMAL
DEFAULT
MVC
Auto O (S. 5)
USB Memory Mode
Twin Piano (S. 6)
Wireless LAN (S. 8)
Local Control
Brilliance (S. 6)
Ambience (S. 6)
Visual Control Mode
Transpose
MIDI
Transmit Channel
Master Tuning
Der Function-Modus (Function Mode)
Im Function-Modus können Sie verschiedene Einstellungen für die Wiedergabe und Aufnahme vornehmen. Halten Sie die beiden
Taster [KEY TOUCH] und [PIANO] gedrückt, und wählen Sie mit den in der Abbildung gezeigten Tasten den gewünschten Parameter aus.
Ändern der USB-Speicher-Einstellungen (USB Memory Mode)
Wenn Daten vom USB-Speicher nicht korrekt geladen werden oder der Datenzugri länger als erwartet
dauert, versuchen Sie, durch Ändern des USB MEMORY Mode auf“1”Abhilfe zu schaen. Die Werksvorein-
stellung ist“2”; normalerweise muss diese Einstellung nicht verändert werden.
* Nach diesem Vorgang müssen Sie das Instrument aus- und wieder einschalten, damit die Änderung
wirksam wird.
Anpassen der Stimmung an andere Instrumente (Master Tuning)
Wenn Sie z. B. im Ensemble mit anderen Akustik-Instrumenten spielen, können Sie die Standard-Tonhöhe
des F-20 an ein anderes Instrument anpassen. Dies wird als„Master-Tuning“ bezeichnet. Die Standard-
Tonhöhe bezieht sich im Allgemeinen auf die Tonhöhe der Note„A4“. Stellen Sie sicher, dass die Standard-
tonhöhe des F-20 zu denen anderer Instrumente passt.
Sie können die Stimmung innerhalb des folgenden Bereiches anpassen:
415.3 Hz–440.0 Hz (Voreinstellung)–466.2 Hz (in 0,1 Hz-Schritten).
Transponieren der Tastatur (Transpose)
Mithilfe der Transpose-Funktion können Sie die Tonhöhe der
Tastatur in Halbton-Schritten verändern.
Wenn Sie z. B. einen Song in E-Dur lieber in C-Dur spielen
möchten, geben Sie als Transpose-Wert“+4” ein.
Steuern von Video-Equipment (Visual Control Mode)
Visual Control ist ein Steuer-Protokoll, welches ermöglicht, Bild- und Video-relevante Parameter über
MIDI-Befehle zu steuern.
Wenn Sie den Visual Control-Modus“MVC” (MIDI Visual Control, S. 9) oder“V-LINK”einstellen, können Sie
Ihre Musik sehr einfach zu einer Video-Performance synchronisieren.
Visual Control-Funktionen
Bei Spielen der 12 untersten Tasten (A0–G 1) werden die folgenden MIDI-Informationen übertragen:
Visual Control-Funktion Übertragene MIDI-Meldung Bedienvorgang am F-20
Umschalten von Bildern CC 0 (Bank Select): 0–4 Schwarze Taste spielen
Program Change: 1–7 Weiße Taste spielen
MIDI-Sendekanal (MIDI Transmit Channel)
Bestimmt den MIDI-Sendekanal des F-20 (1-16).
Empfangen kann das F-20 Daten auf allen MIDI-Kanälen (1–16).
Verbindung mit einem Sequenzer (Local Control)
Wenn Sie das F-20 mit einem MIDI-Sequenzer
verbinden, empelt sich die Einstellung“Local
O ” am F-20.
Grund: Das F-20 würde ansonsten das
Notensignal zweimal erhalten: einmal direkt
über das Tastaturspiel und ein weiteres Mal über
die Verbindung“F-20 MIDI OUT - Sequenzer
Soft Thru - F-20 MIDI IN”. Dabei kann es zum
Systemabsturz des MIDI-Sequenzers kommen,
oder das F-20 funktioniert nicht mehr korrekt.
Sie spielen C E G es erklingt E G H
Software
Synthesizer
Local Control
Klangerzeugung
USB MIDI
In
USB MIDI
Out
Computer
C1
C2
C3
C4
C5
C6
C7
C8
WPS
INDIVIDUAL
1 2

8
Die Wireless LAN-Funktion
Was ist die Wireless LAN-Funktion?
Durch Anschluss des Wireless-USB-Adapters (WNA1100-RL) an den
USB MEMORY-Anschluss des F-20 können Sie Anwendungen, die
mit WLAN kompatibel sind (z.B. iOS apps wie“Piano Partner” oder
“Air Performer”) nutzen.
F-20
Wireless USB Adapter
(
WNA1100-RL)
Wireless LAN Zugrispunkt
(z.B. Wireless LAN Router)
Wireless LAN Wireless LAN
iPhone etc.
Erforderliches Zubehör
Wireless USB Adapter (WNA1100-RL; zusätzliches Zubehör)
Wireless LAN-Zugrispunkt (z.B. Wireless LAN Router) *1 *2
iPhone, iPad, oder iPod touch etc.
*1 Der von Ihnen genutzte WLAN-Zugrispunkt muss WPS
unterstützen. Ist dies nicht der Fall, versuchen Sie, den Ad-Hoc-
Modus zu verwenden.
*2 Roland übernimmt keine Garantie für die Funktionsfähigkeit
eines WLAN-Zugrispunktes.
Grundlegende Verbindungsmethode (WPS)
Wenn Sie das F-20 das erste Mal mit einem Drahtlosnetzwerk
verbinden, müssen Sie folgende Schritte (WPS) durchführen,
um sich am Netzwerk anzumelden. Dieser Vorgang muss nur
beim ersten Mal durchgeführt werden. Ist das Netzwerk einmal
ausgewählt, ist dieser Schritt nicht mehr notwendig.
Was ist WPS?
Dieser Standard erleichtert die Eingabe von Sicherheitseinstell-
ungen, wenn Sie sich mit einem WLAN Zugrispunkt verbinden. Die
Verwendung von WPS wird grundsätzlich empfohlen.
1. Stecken Sie den Wireless USB-Adapter (WNA1100-RL) in
den USB MEMORY-Anschluss des F-20.
2. Halten Sie den Taster des Wireless USB-Adapters
für drei Sekunden gedrückt.
Die LED-Anzeige des Wireless USB-Adapters blinkt.
WICHTIG
* Üben Sie keinen übermäßigen Druck auf den USB-
Adapter aus, wenn Sie den Taster drücken. Er könnte sonst
beschädigt werden.
Hinweis
Sie können den WPS-Vorgang auch durchführen, indem Sie
im“Der Function-Modus (Function Mode)”(S. 7) “WPS”
auswählen statt auf den Taster des Wireless USB-Adapters zu
drücken.
3. Aktivieren Sie WPS auf Ihrem WLAN-Zugrispunkt
(drücken Sie z.B. den WPS-Taster auf Ihrem WLAN-Gerät).
Lesen Sie dazu bei Bedarf die Anleitung Ihres Wireless LAN-Gerätes.
Wenn die Verbindung erfolgreich hergestellt wurde, leuchtet die
LED-Anzeige des Wireless USB-Adapters.
Damit ist die Einrichtung abgeschlossen, und Sie können eine
Drahtlos-kompatible iOS App wie z.B.“Air Performer”nutzen.
Wählen Sie“F-20” in der Instrumentenauswahl Ihrer iOS app.
WICHTIG
* Das Gerät, auf welchem die App läuft (z.B. iphone), muss mit
dem selben Netzwerk verbunden sein.
Hinweis
• Die Verbindungsdaten werden im Speicher gesichert, wenn
Sie WPS aktivieren. Das Gerät wird sich beim nächsten Start
automatisch mit dem Drahtlosnetzwerk verbinden.
• Die Verbindungsdaten werden gelöscht, wenn Sie das Gerät auf
die Werksvoreinstellungen zurücksetzen.
Die LED-Anzeige des Wireless USB Adapters
LED Beschreibung
Leuchtet Ist mit einem Netzwerk verbunden.
Aus Hat keine Verbindung zu einem Netzwerk.
Blinkt Sucht nach Verbindung zu einem Netzwerk.
Verbindung im Ad-Hoc-Modus
Was ist der Ad-Hoc-Modus?
Im Ad-Hoc-Modus können Sie das F-20 direkt mit einem iPhone
oder einem anderen Drahtlos-kompatiblen Gerät verbinden, ohne
einen Wireless LAN-Zugrispunkt verwenden zu müssen, z.B. wenn
kein WLAN-Zugrispunkt zur Verfügung steht.
Hinweise zu Beschränkungen
Geräte, die im Ad-Hoc-Modus drahtlos verbunden sind, können
nicht mit dem Internet oder einem anderen Drahtlosgerät
kommunizieren. Geräte, die eine Mobiltelefonfunktion
besitzen (z.B. iPhone), können sich in diesem Fall über das
Mobilfunknetz mit dem Internet verbinden. Achten Sie bei
Mobilfunkverbindungen auf eventuell entstehende Mehrkosten.
1. Wählen Sie im“Function-Modus (S. 7) die Einstellung
“Ad-Hoc ON”.
2. Wählen Sie auf dem Drahtlos-kompatiblen Gerät, das
Sie verbinden möchten,“F-20” aus. Beispiel: iPhone
[Funktionen] [Wi-Fi] [Select Network]. Geben Sie
anschliessend innerhalb des Password-Displays“f20ak”
ein.
Ad-Hoc SSID F-20
Password f20ak
Lesen Sie dazu bei Bedarf die Anleitung Ihres Drahtlos-kompatiblen
Gerätes.
3. Zum Beenden der Ad-Hoc-Verbindung nehmen Sie
folgende Einstellungen an Ihrem iPhone vor: [Funktionen]
[Wi-Fi] [Select Network], und stellen Sie die
ursprünglichen Werte wieder her.
Table of contents
Languages:
Other Roland Musical Instrument manuals

Roland
Roland HP-147Re User manual

Roland
Roland 600 User manual

Roland
Roland RP301 User manual

Roland
Roland GP-9 Manual

Roland
Roland HP 147 e User manual

Roland
Roland RD-600 User manual

Roland
Roland DP603 User manual

Roland
Roland RD-700NX User manual

Roland
Roland Music Atelier AT 5 User manual

Roland
Roland RP401R User manual

Roland
Roland Atelier Combo AT-350C Instructions and recipes

Roland
Roland FP-9 User manual

Roland
Roland HP 337 User manual

Roland
Roland RP301R User manual

Roland
Roland RD-700NX User manual

Roland
Roland HP 900 User manual

Roland
Roland KR-105 User manual

Roland
Roland F-120R User manual

Roland
Roland HP 2800G User manual

Roland
Roland HP-207 User manual