To assure that assembly is carried out properly, make sure to read these instructions before you begin the assembly.
¹This leaet is for a dealer or a qualied professional installer. The customer should not attempt to move
or assemble the instrument.
¹Please consult your Roland dealer or a piano specialist to move or disassembling / assemble the piano.
Roland cannot warrant the safety of the assemble operation, if this operation is carried out by the
customer.
¹Save this leaet together with the Owner’s Manual so that it will be available for reference by a piano specialist when disassembling or
moving the instrument.
¹Make sure to keep screws and any other small parts in a safe location that is out of the reach of small children, so such small parts won’t
accidentally get swallowed.
* Since this product is very heavy, you must make sure that a sucient number of people are on hand to help, so you can lift and move it safely,
without causing strain. When assembling the unit, obtain the assistance of enough people that assembly can be performed safely and as
directed.
* Do not place the piano unit itself directly on the oor. Doing so will damage the jack enclosure, AC adaptor, and headphone hook that are
located on the bottom of the piano unit.
* Be careful not to pinch your hands or drop this unit on your foot during assembly or transport.
* The surface of the piano unit and the stand are very delicate; handle with care to avoid scratching them.
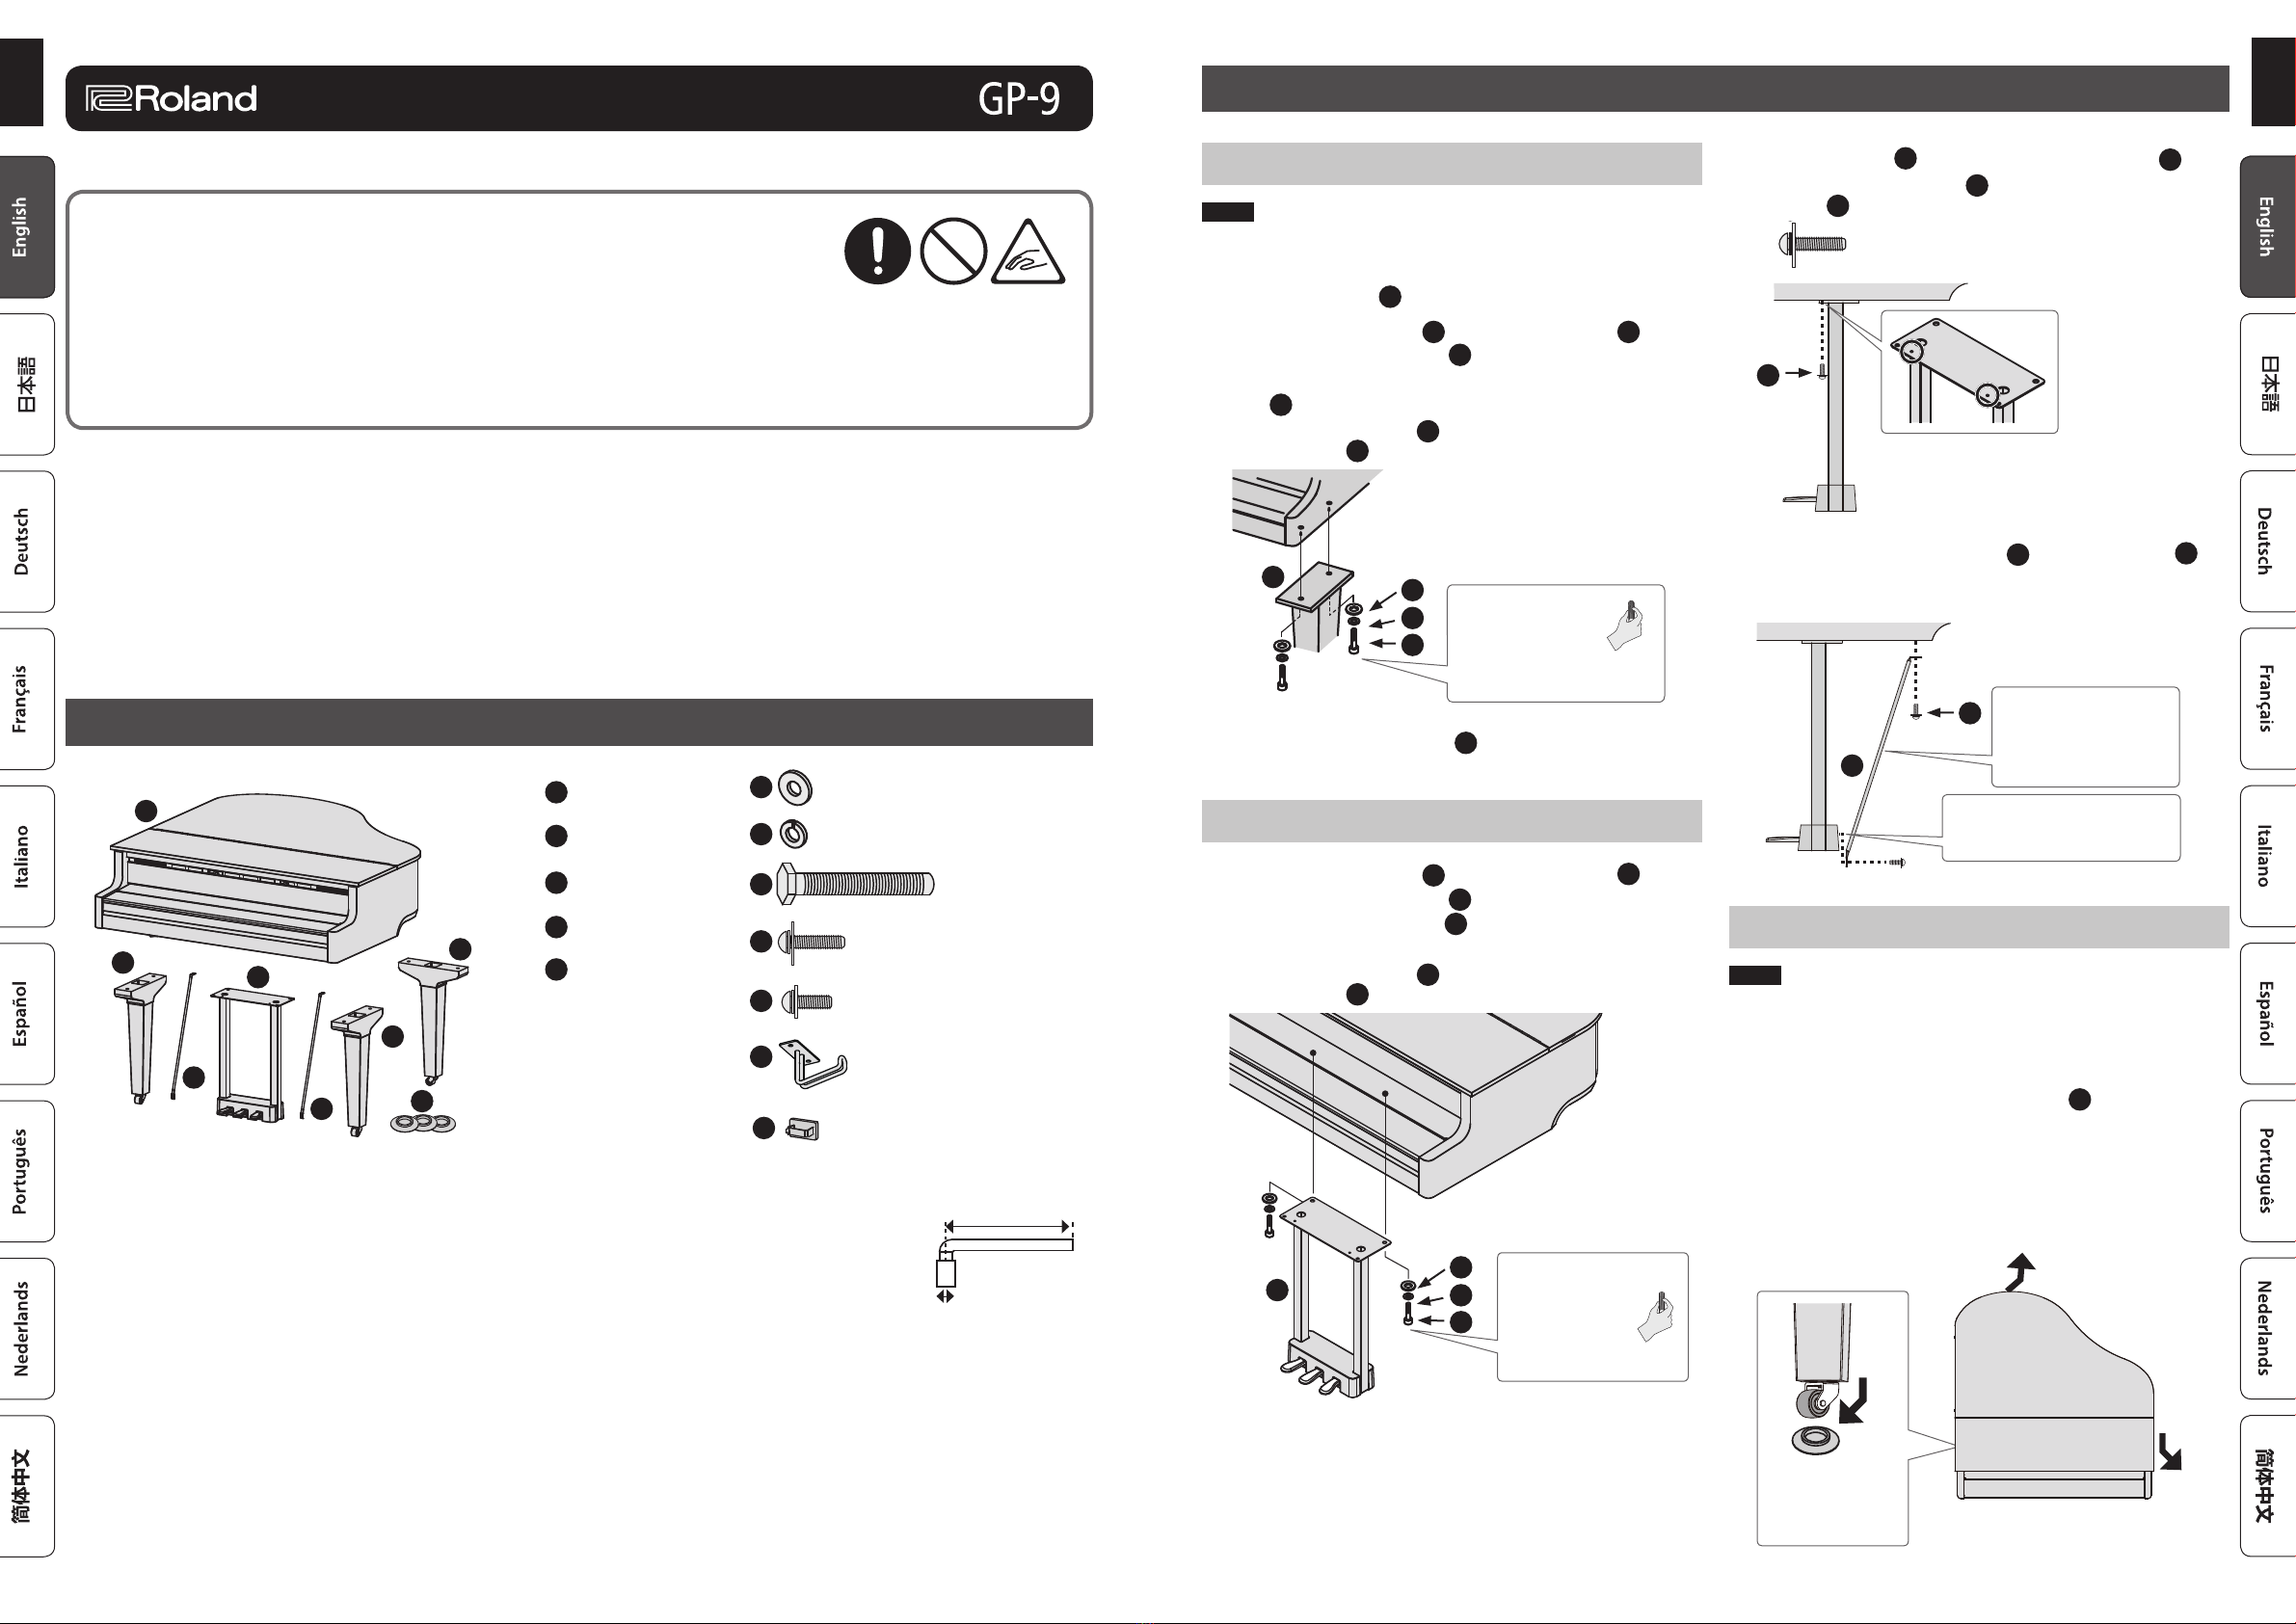
Parts Check
B
C
D
B
DE
B
APiano unit
A
1
2
3
4
5
6
Plain washers: 8
Spring washers: 8
Hex bolts: 8
Screws (4 x 20 mm): 4
Screws (4 x 16 mm): 2
Headphone hook: 1
B
C
D
Legs: 3
Lyre assembly: 1
Lyre support rods: 2
ECaster cups: 3
7Cord clamps: 3
* The tools used for assembly are not included. You will need to separately provide a Philips screwdriver (no. 2) and
a box wrench (19 mm across ats, length 200 mm or less).
Do not use an electric screwdriver. Doing so might strip the bolt or damage the screw threads. Box wrench
200 mm or less
19 mm across ats
Attach the Legs to the Piano
NOTE
The surface of the piano unit and the stand are very delicate; handle
with care to avoid scratching them.
1. Position the legs Bin place beneath the piano unit.
2. Place a spring washer 2and a plain washer 1in that
order onto each hex bolt 3. After provisionally hand-
tightening the bolts, use the box wrench to secure the
legs Bto the piano unit (two locations).
* Do not tighten hex bolts 3excessively. Stop tightening when the
spring washer 2becomes at.
B
Tighten as much as
you can by hand,
and then use a box
wrench to rmly
tighten.
1
2
3
3. Fasten the two other legs Bto the piano unit in the
same fashion.
Attach the Lyre Assembly
1. Place a spring washer 2and a plain washer 1in that
order onto each hex bolt 3. Use the box wrench to
fasten the lyre assembly Cto the piano unit with the
bolts (two locations).
* Do not tighten hex bolts 3excessively. Stop tightening when the
spring washer 2becomes at.
Tighten as much as you
can by hand, and
then use a box
wrench to rmly
tighten.
1
2
3
C
2. Use two screws 4to fasten the lyre assembly C.
* Be careful not to use screws 5by mistake.
Screws 4(4 x 20 mm)
4
3. Attach the lyre support rods Dby using screws 4
and the screws that are attached to the pedal unit
(four screws total).
Take care that the
support rod is in
the correct vertical
orientation.
4
Use the two screws that are
attached to the pedal unit.
D
Placing the Casters on the Caster Cups
NOTE
Make sure that the casters are placed on top of the caster cups. As the
caster cups stabilize the piano and prevent it from moving when you
are playing or when force is applied to the piano, you must use these
caster cups to prevent serious risk.
1. Place the casters on the caster cups E
(three locations).
* Be careful not to pinch your hands or drop this unit on your foot.
2. Position the casters and the metal parts that support
the casters in the directions shown in the illustration
below.
Direction of casters
Direction of the
metal parts that
support the
casters
Assembly Procedure
Leaet For a Dealer or a Qualied Professional Installer
© 2023 Roland Corporation
*5100078295-02*
11


