About the Wireless LAN Function
4
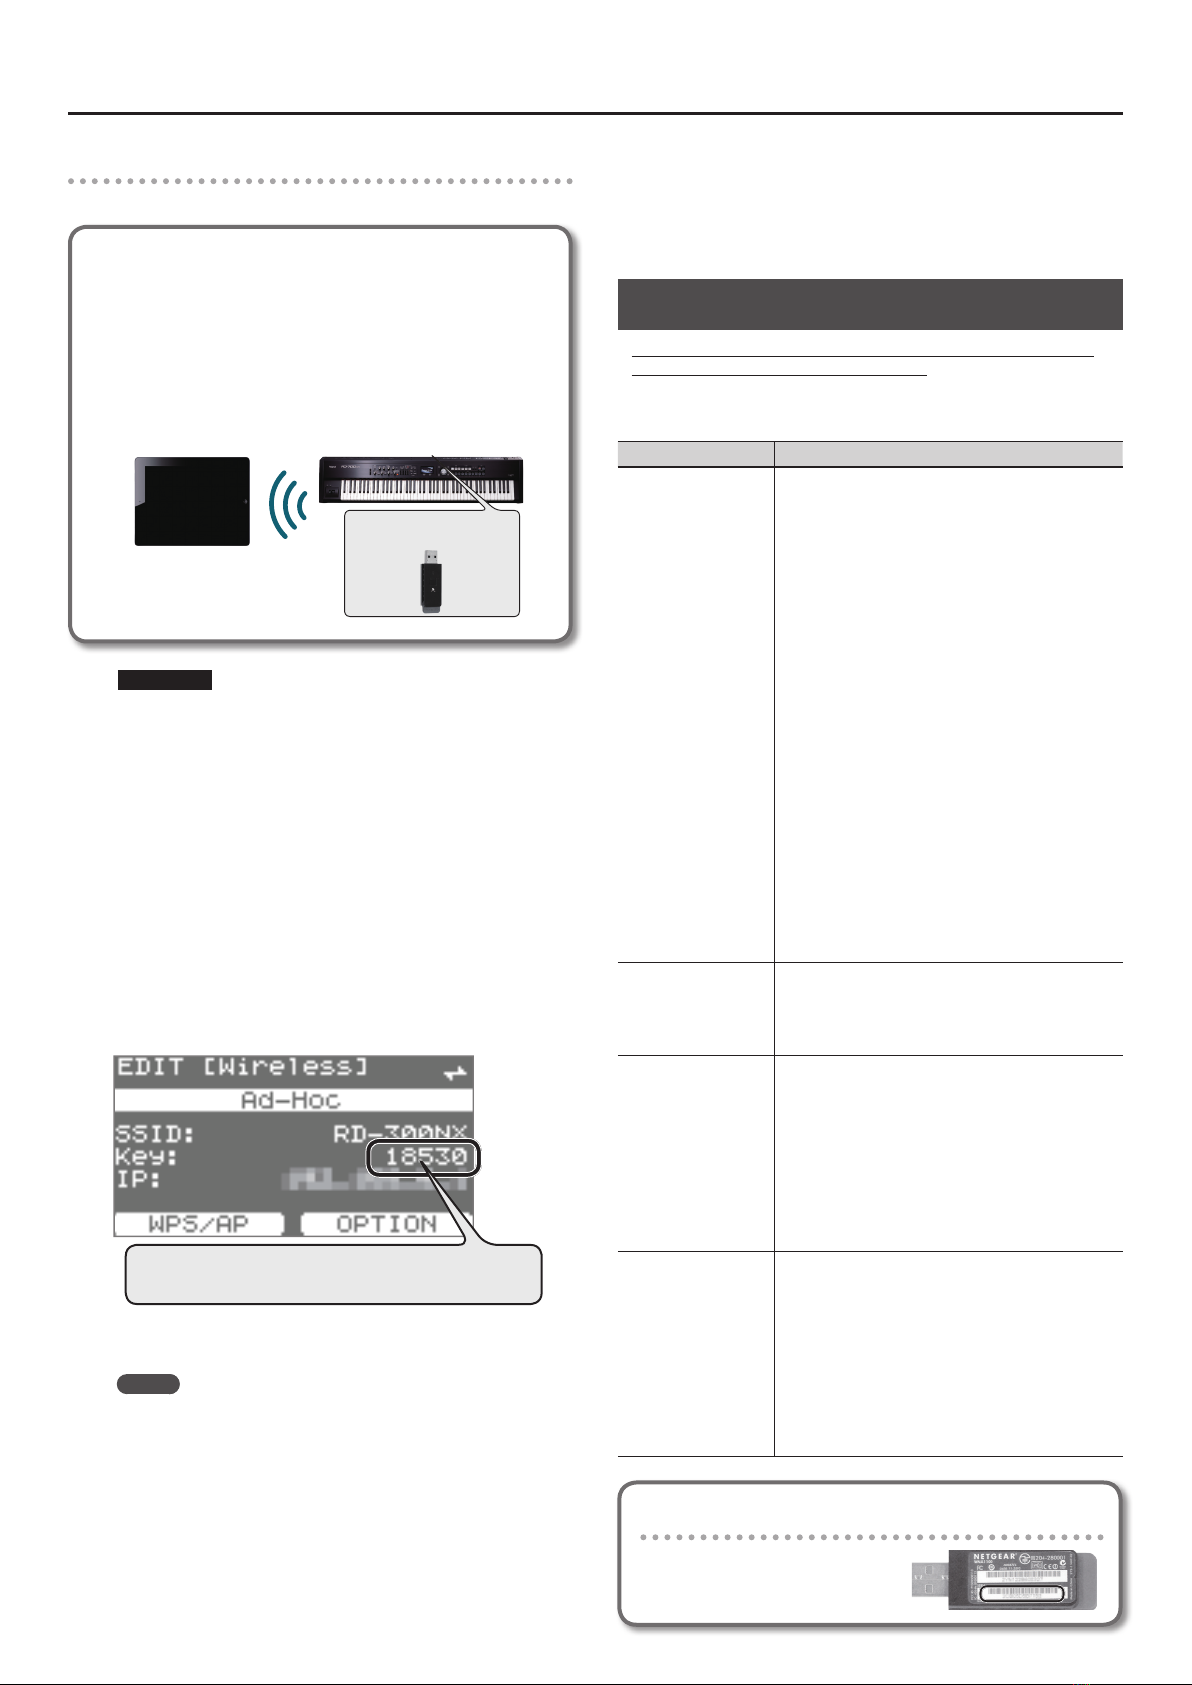
Connecting in Ad-Hoc mode
Here’s how to connect in Ad-Hoc mode.
What is Ad-Hoc mode?
Ad-Hoc mode lets you connect the RD-700NX/RD-300NX
directly to an iPad or other wireless device without using a
wireless LAN access point. This is a convenient way to use the
RD-700NX/RD-300NX with an iPad or other wireless device if
you’re in a location where the wireless LAN access point you
normally use is unavailable, such as when you’re away from
home.
RD-700NX/RD-300NX
Wireless USB Adapter (sold
separately: WNA1100-RL)
Wireless LAN
iPad etc.
Limitations
The iPad or other wireless device connected in Ad-Hoc mode
will be unable to communicate with the Internet or with another
wireless device. However, an iPad or other wireless device that
has cellular capability will be able to connect to the Internet via
the cellular connection.
Please be aware that if you use a cellular connection for Internet
connectivity, you may incur costs depending on your rate plan.
1. Select the [MENU] button g “Wireless” g [TONE EDIT]
(OPTION) button.
The Wireless Option screen will appear.
2. Turn the Ad-Hoc Mode “On.”
You can use Ad-Hoc Channel to specify a channel (1–11) for Ad-
Hoc mode. Normally, you won’t need to change the channel. Try
changing the channel only if you have problems connecting.
3. Press the [EXIT] button to access the Wireless screen.
The Ad-Hoc key is the ve-digit number that’s displayed here.
Each piano has its own unique number.
The Ad-Hoc SSID (“RD-700NX” or “RD-300NX”) and the Ad-Hoc Key (a
ve-character text string) will be displayed.
MEMO
The Ad-Hoc SSID (“RD-700NX” or “RD-300NX”) will be the value
that you specied in the Wireless Option screen “Wireless ID”
setting.
4. On the iPad or other wireless device that you want to
connect, select the Ad-Hoc SSID shown in the above screen
to make the connection. (For example, on an iPad, choose
[Settings] g [Wi-Fi] g [Choose a Network] to select the
above Ad-Hoc SSID. A password entry screen will appear;
enter the above Ad-Hoc key.)
For details on how to connect to a wireless LAN from an iPad or other
device, refer to the owner’s manual of that device.
5. When you have nished the Ad-Hoc mode connection,
restore the iPad settings in [Settings] g [Wi-Fi] g [Choose a
Network] to their previous state.
Troubleshooting
* For problems related to communication, refer also to the owner’s
manual of your wireless LAN access point.
* For details on operating your wireless LAN access point, refer to its
owner’s manual.
Problem Action
Can’t connect to a
wireless LAN access
point
• Make sure that your wireless LAN access point supports
WPS.
If your wireless LAN access point does not support
WPS, you can connect using the procedure described
in “Connecting to a Wireless LAN Access Point That You
Select (Select AP)” (p. 2).
• The 802.11a/b wireless standard is not supported.
Please use the 802.11g/n (2.4 GHz) wireless standard.
• The WEP authentication method is not supported.
Please use the WPA or WPA2 authentication method.
• Make sure that DHCP is enabled for your wireless LAN
access point.
• If you don’t get connected to the previously-connected
wireless LAN access point when you turn on the
unit, check and make sure the setting described in
“Connecting in Ad-Hoc mode” (p. 3) is OFF.
• The connection might not occur successfully due to
the state of the radio signal. If so, use the procedure
described in “Connecting to a Wireless LAN Access
Point That You Select (Select AP)” (p. 2), and select your
wireless LAN access point and reconnect.
• There is a limit to the connection data that can be
remembered. Making a new connection may cause
older connection data to be deleted.
All connection data will be deleted if you execute a
factory reset.
If the connection data has been deleted, please
re-connect to the wireless LAN access point.
The display indicates
“This Access Point is not
supported,” and can’t
connect to the wireless
LAN access point
• This Access Point is not supported. Please use the WPA
or WPA2 authentication method.
Communication is
unstable
Communication may be unstable depending on the
usage of the radio frequency spectrum.
If communication is unstable, the response may be
sluggish, or if using audio communication, there may be
dropouts in the audio.
The following actions may improve the situation.
• Move the wireless LAN access point and the
RD-700NX/RD-300NX closer to each other.
• Change the channel setting of the wireless LAN access
point.
This unit is not found
in the instrument
connections of the app
(such as the iPad app
RD Editor)
• Is the RD-700NX/RD-300NX powered up?
• Is the wireless USB adapter (WNA1100-RL) inserted to
the RD-700NX/RD-300NX?
• Is the RD-700NX/RD-300NX connected to the wireless
LAN?
• Are the RD-700NX/RD-300NX and the iPad connected to
the same network (the same wireless LAN access point)?
• Is the wireless LAN access point set to allow communi-
cation between wireless LAN devices?
For details on settings, refer to the owner’s manual of
your wireless LAN access point.
Checking the MAC Address
The MAC address indicated on the
bottom of the wireless USB adapter
(WNA1100-RL; sold separately).