H 1
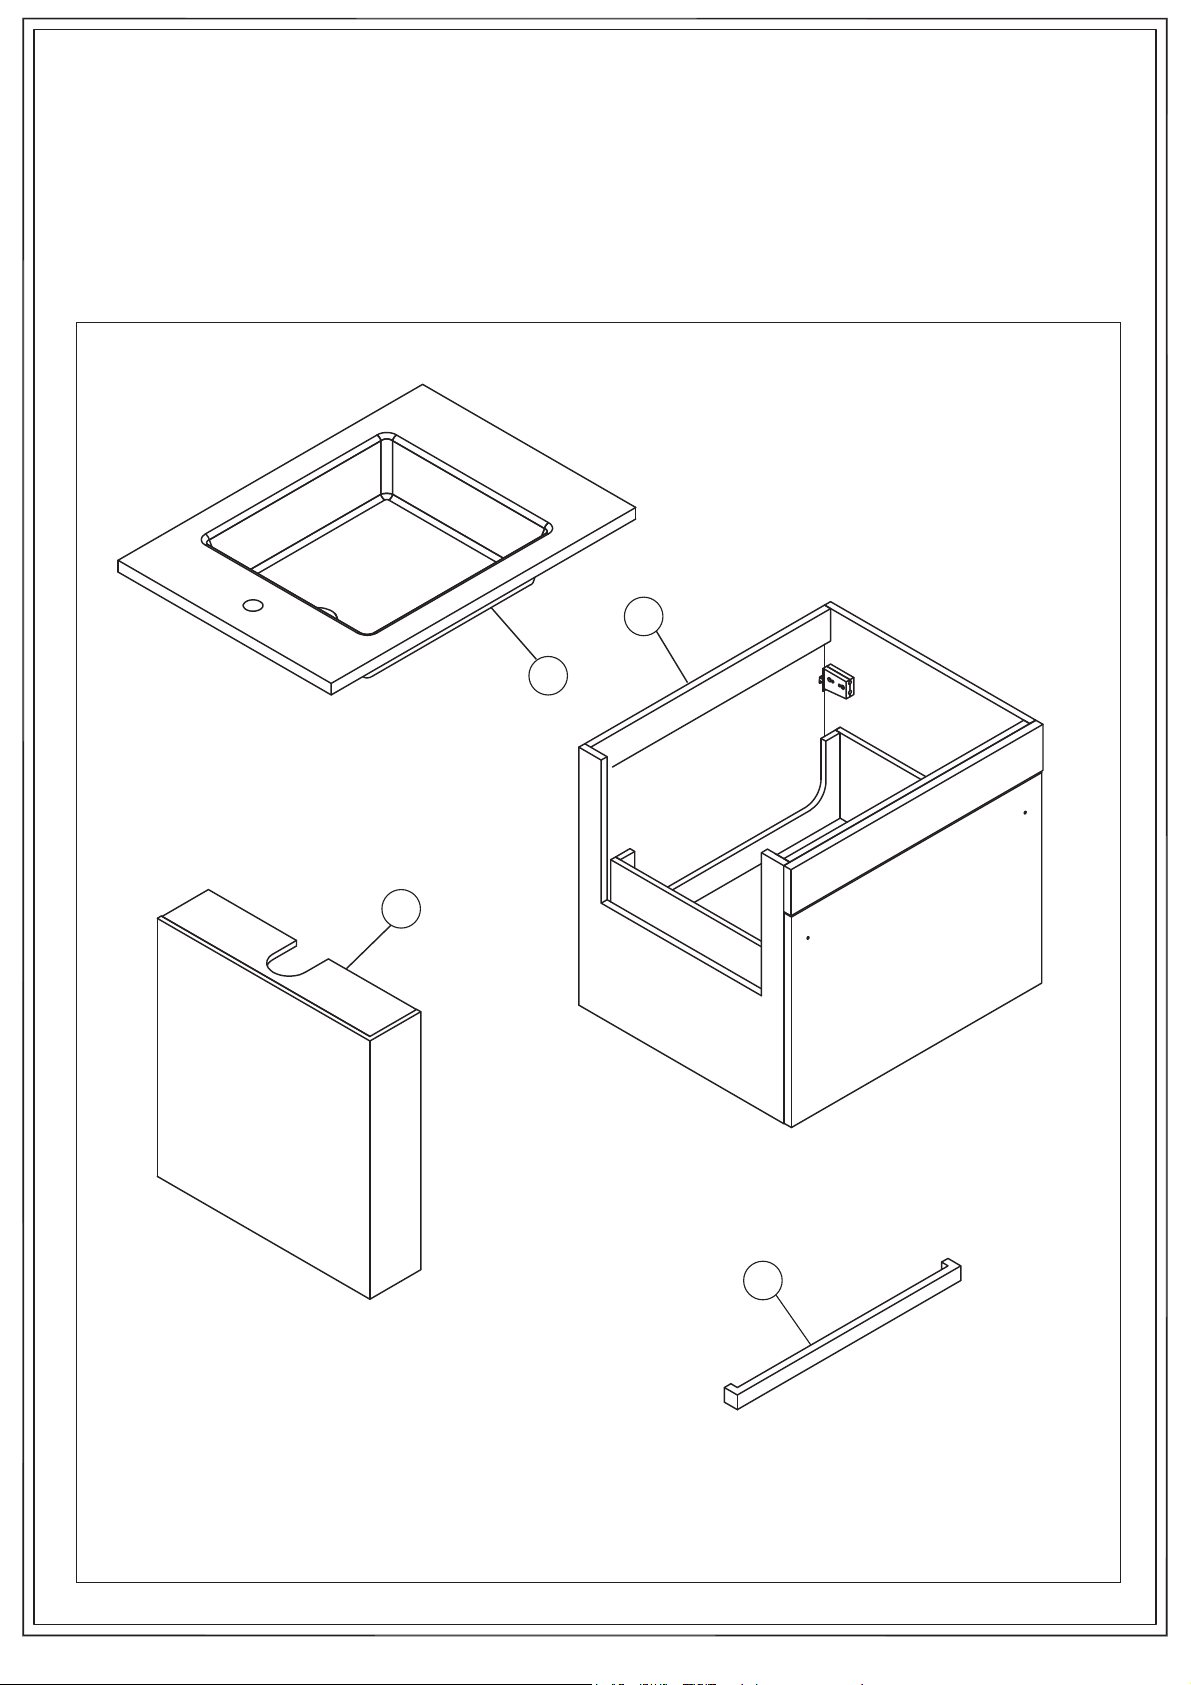
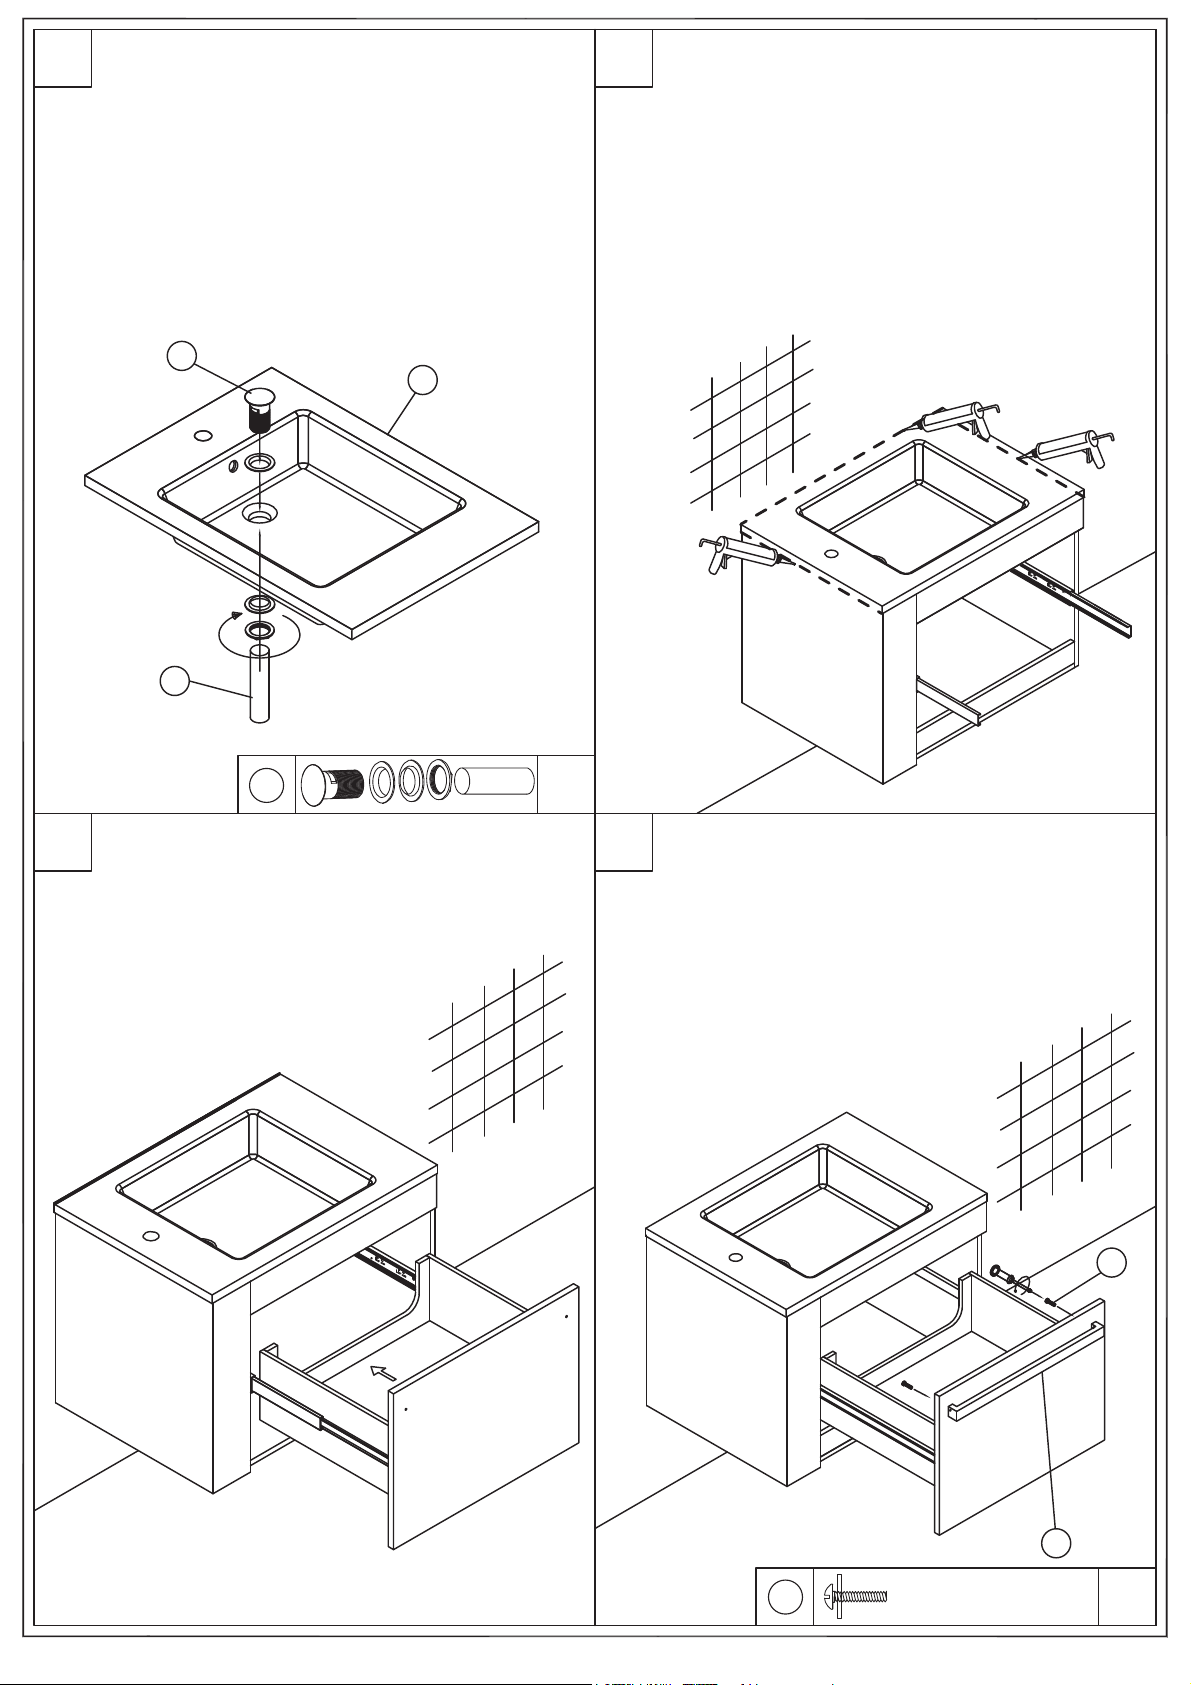
Installez le tuyau du drain dans le lavabo, tel
qu'illustré.
(Pour l'installation de la bonde mécanique,
veuillez consulter les directives d'installation
fournies dans la boîte de celle-ci.)
Install the pop-up in the sink as illustrated.
(For the pop-up installation, please refer to a
separate installation manual in the pop-up box.)
1
H
H
Placez le dessus sur le meuble, en alignant le
trou pour le robinet avec le panneau blanc du
meuble (côté gauche). Appliquez un filet de
silicone sur les lignes pointillées (illustrées) afin
de fixer le dessus du meuble en place.
Put the counter top on the vanity with the
faucet hole aligning with the white panel of the
vanity (on the left). Then apply silicone sealant
along the dotted lines for securing its position.
Replacez le tiroir sur ses glissières dans le
meuble.
Put the drawer back on the sliders in the vanity.
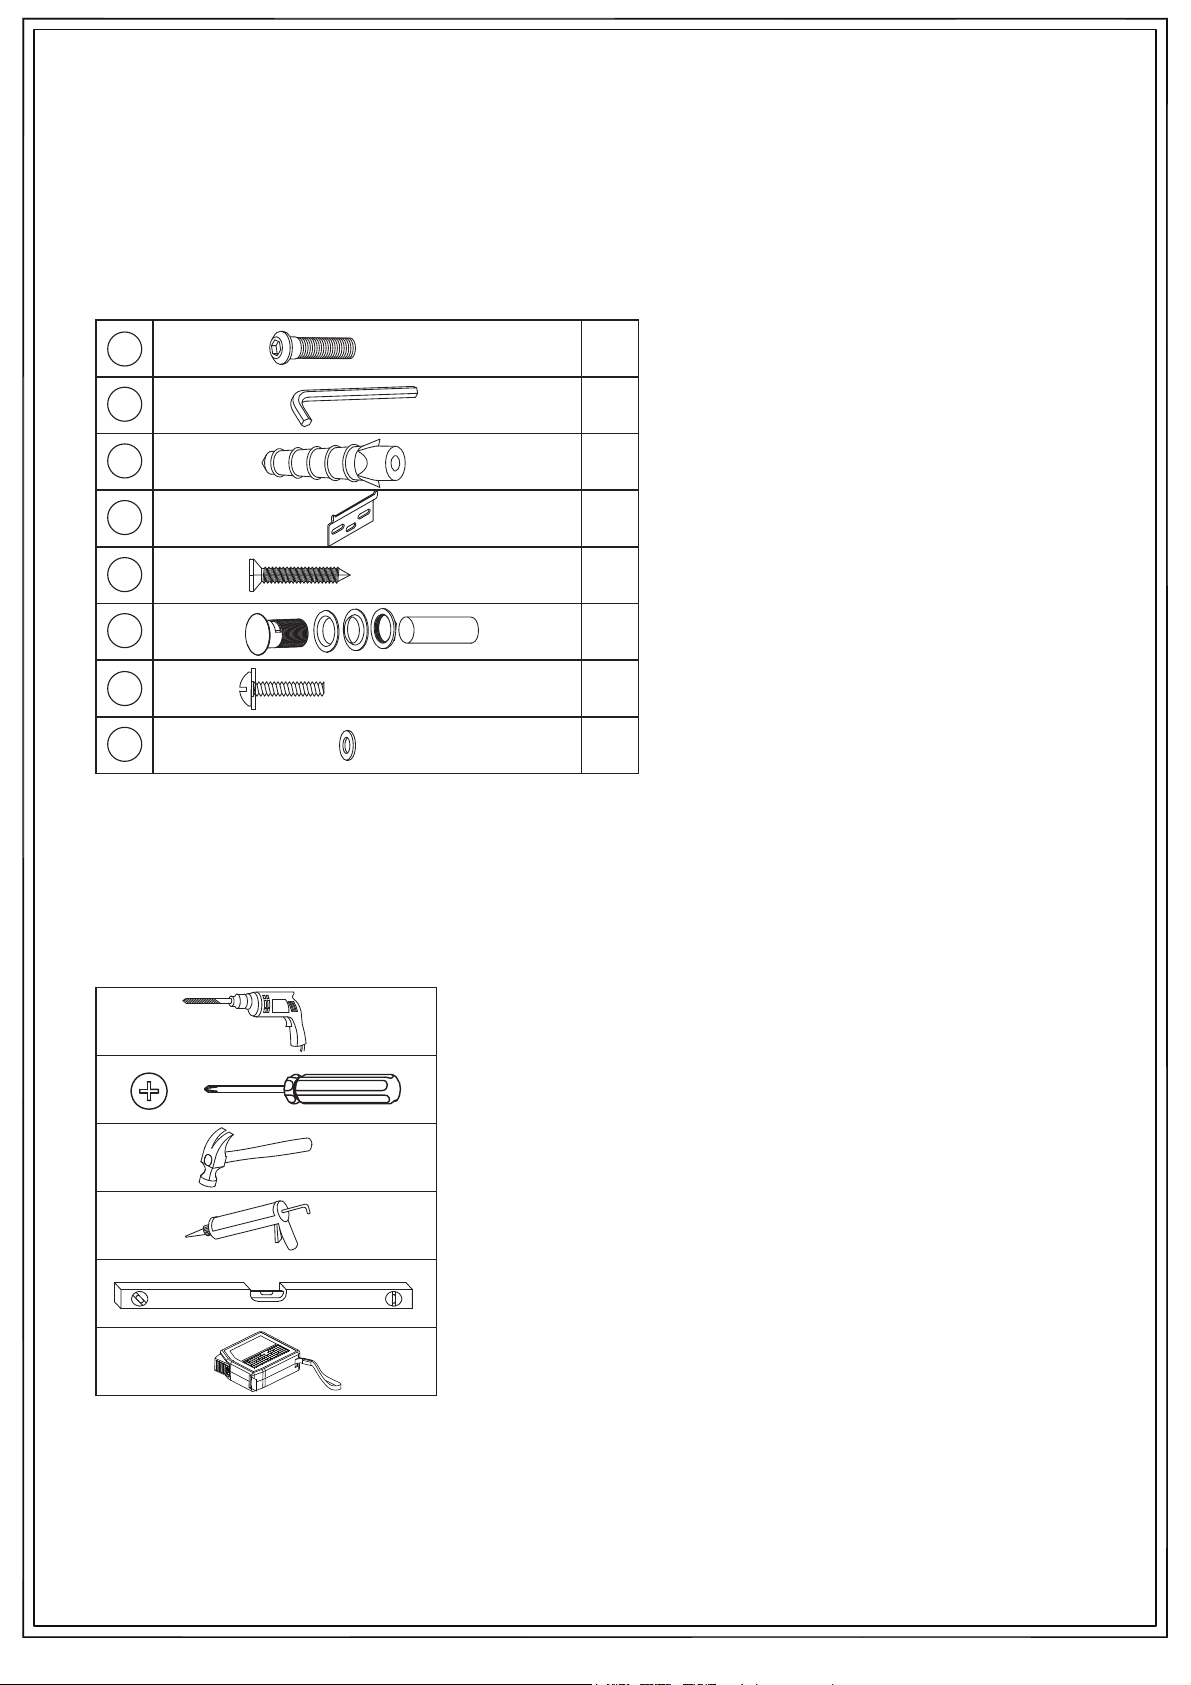
I
5/32” x 7/8” L
2
Posez la poignée du tiroir tel qu'indiqué en
utilisant les boulons I; serrez au moyen d'un
tournevis Phillips.
Fix the handle to the drawer as illustrated by
using bolt I, tighten with Phillips screwdriver.
4
I
9 10
11 12
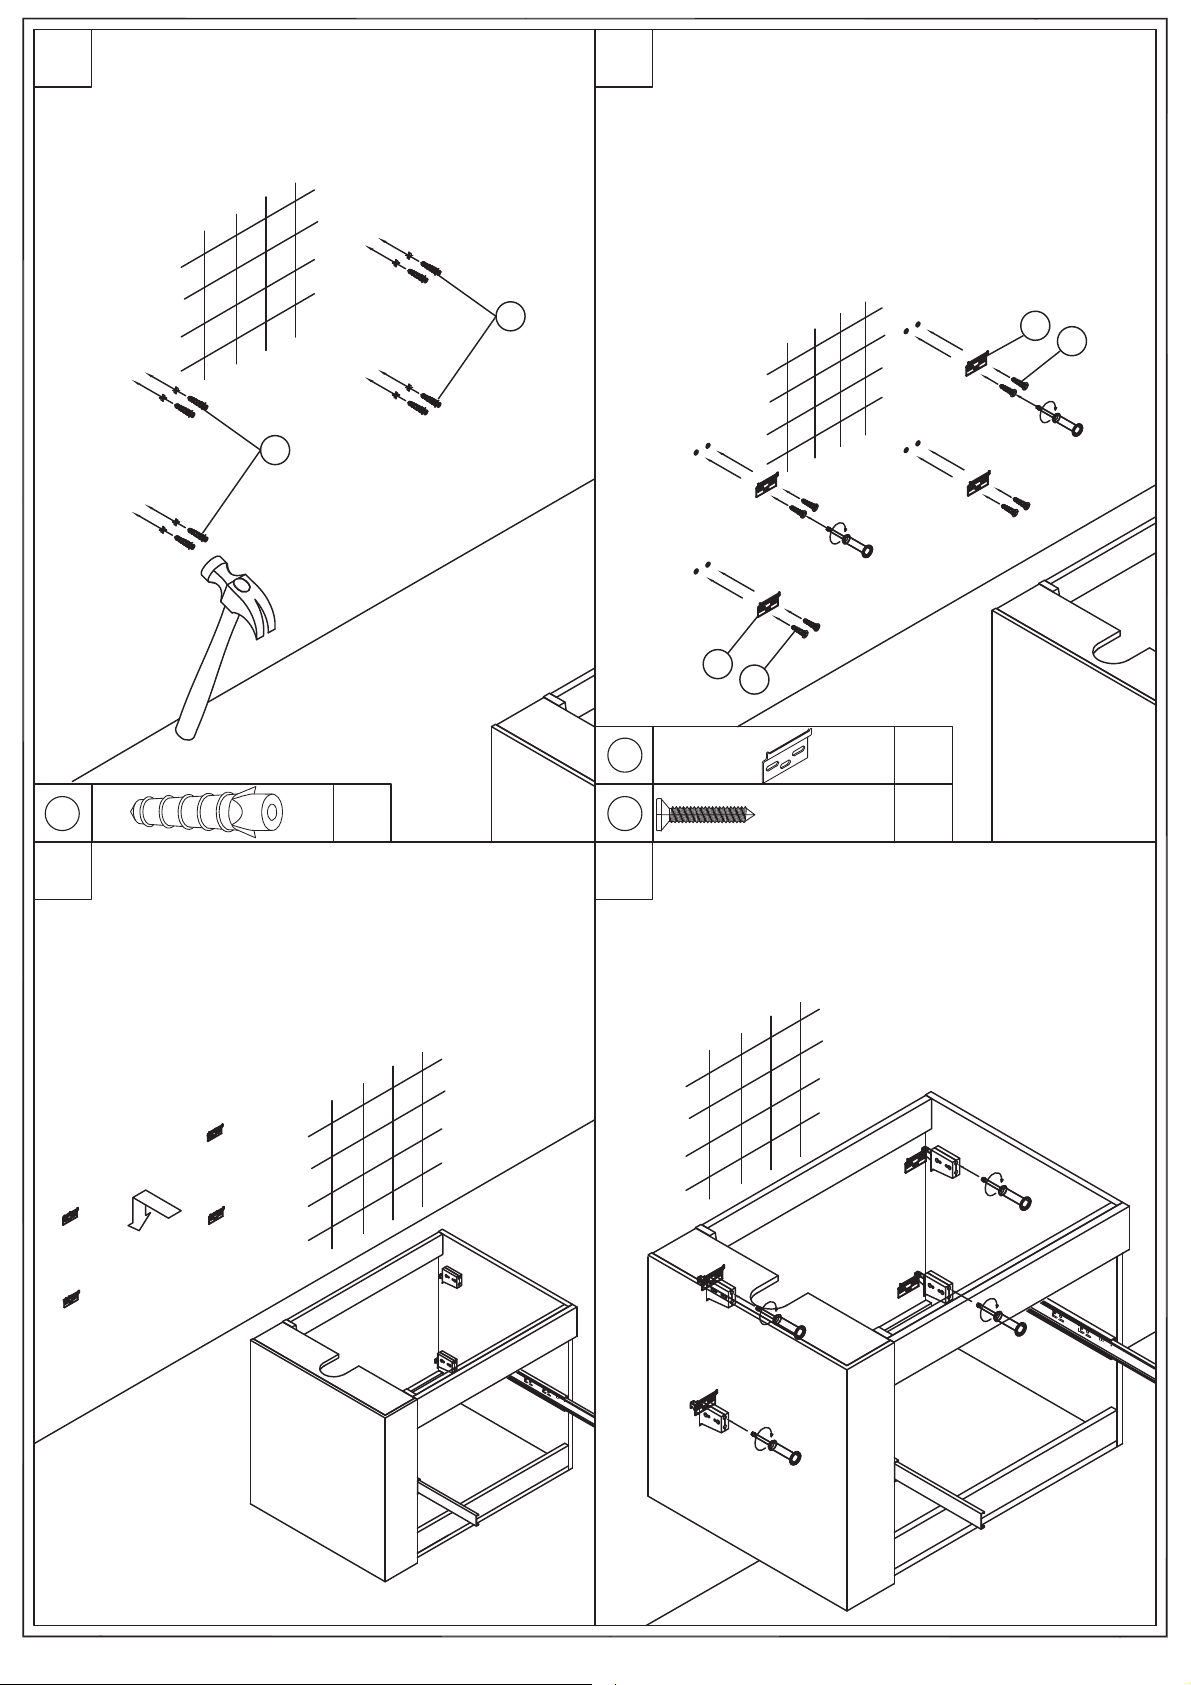
Mur
Wall
Mur
Wall Mur
Wall
5