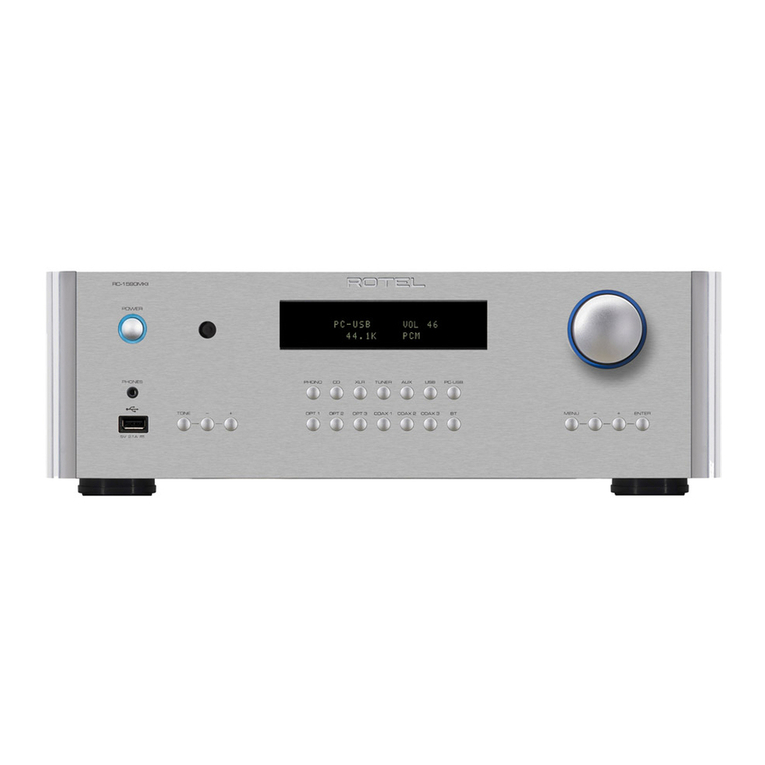
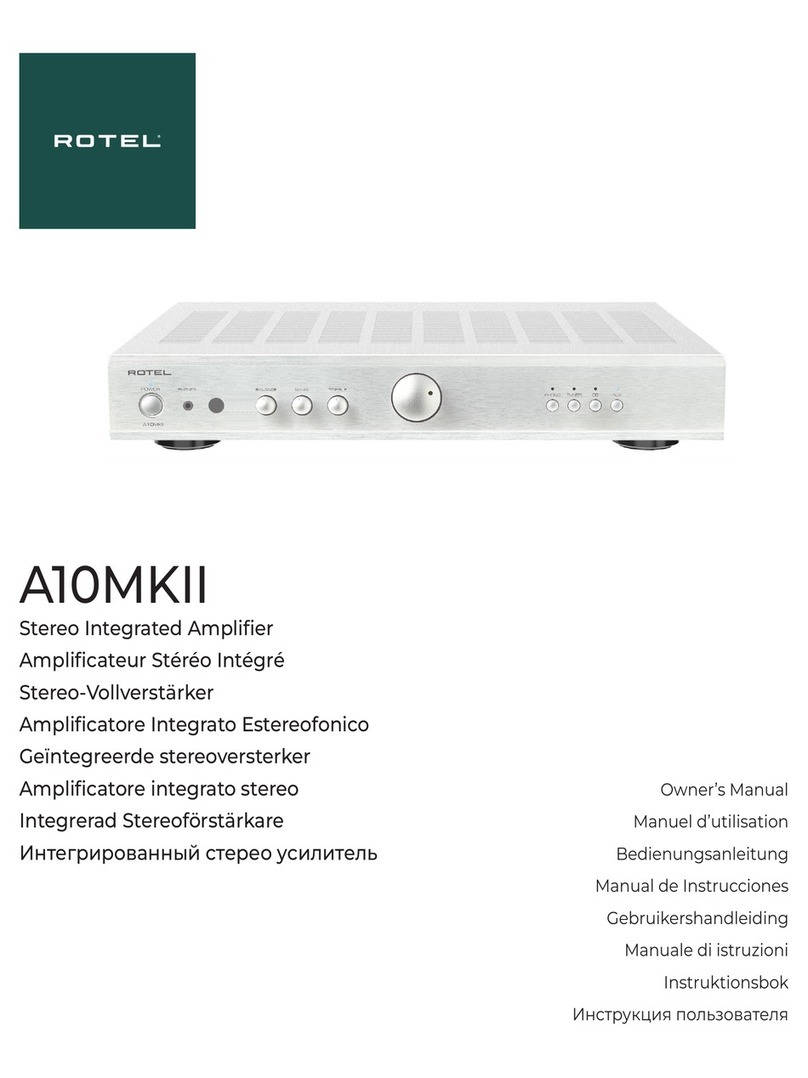
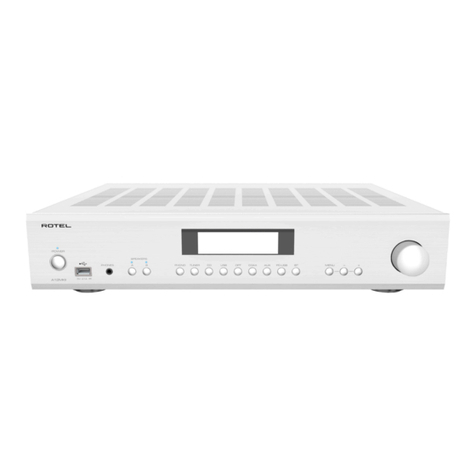
Rotel RA-630 User manual

RA-630
Stereo Integrated Amplier
立体声放大器
Owner’s Manual
使用说明书

2RA-630 Stereo Integrated Amplifier
You must allow a minimum 10 cm or 4 inches of unobstructed
clearance around the unit.
WARNING: The rear panel power cord connector is the mains power
disconnect device. The device must be located in an open area that
allows access to the cord connector.
The unit must be connected to a power supply only of the type and
voltage specified on the rear panel. (USA: 120 V/60Hz, EC: 230V/50Hz)
Connect the component to the power outlet only with the supplied
power supply cable or an exact equivalent. Do not modify the supplied
cable. Do not use extension cords.
The mains plug is the disconnect of the unit. In order to completely
disconnect the unit from the supply mains, remove the main plug from
the unit and the AC power outlet. This is the only way to completely
remove mains power from the unit.
Use Class 2 wiring for speaker connections to ensure proper installation
and minimize the risk of electrical shock.
The batteries in the remote control should not be exposed to excessive
temperature such as sunshine, fire or other heat sources. Batteries
should be recycled or disposed as per state and local guidelines.
Notice
TThe RS232 connection should be handled by authorized persons only.
WARNING: There are no user serviceable parts inside. Refer all
servicing to qualified service personnel.
WARNING: To reduce the risk of fire or electric shock, do not expose
the unit to moisture or water. Do not expose the unit to dripping or
splashing. Do not place objects filled with liquids, such as vases, on
the unit. Do not allow foreign objects to get into the enclosure. If the
unit is exposed to moisture, or a foreign object gets into the enclosure,
immediately disconnect the power cord from the wall. Take the unit
to a qualified service person for inspection and necessary repairs.
Read these instructions.
Keep these instructions.
Heed all warnings.
Follow all instructions.
Do not use this apparatus near water.
Clean only with dry cloth.
Do not block any ventilation openings. Install in accordance with the
manufacturer’s instructions.
Do not install near any heat sources such as radiators, heat registers,
stoves, or other apparatus (including amplifiers) that produce heat.
Do not defeat the safety purpose of the polarized or grounding-type
plug. A polarized plug has two blades with one wider than the other.
A grounding type plug has two blades and a third grounding prong.
The wide blade or the third prong are provided for your safety. If
the provided plug does not fit into your outlet, consult an electrician
for replacement of the obsolete outlet.
Protect the power cord from being walked on or pinched particularly
at plugs, convenience receptacles, and the point where they exit
from the apparatus.
Only use attachments/accessories specified by the manufacturer.
Use only with the cart, stand, tripod, bracket, or table
specified by the manufacturer, or sold with the apparatus.
When a cart is used, use caution when moving the cart/
apparatus combination to avoid injury from tip-over.
Unplug this apparatus during lightning storms or when unused for
long periods of time.
Refer all servicing to qualified service personnel. Servicing is required
when the apparatus has been damaged in any way, such as power-
supply cord or plug is damaged, liquid has been spilled or objects
have fallen into the apparatus, the apparatus has been exposed to
rain or moisture, does not operate normally, or has been dropped.
The apparatus should be used in non tropical climate.
Rotel productsare designedto complywith international
directives on the Restriction of Hazardous Substances
(RoHS) in electrical and electronic equipment and
the disposal of Waste Electrical and Electronic
Equipment (WEEE). The crossed wheelie bin symbol
indicates compliance and that the products must be
appropriately recycled or processed in accordance
with these directives.
Important Safety Instructions
This symbol means that this unit is double insulated.
An earth connection is not required.
POWER
PHONES
MENU DOWNUP
RIGHTLEFT
PHONO TUNER CD USB
1 2
AUX1 AUX2
OPT/COAX

3
Figure 1: Controls and Connections
127
5
4
3 6 8
90
=
-q
w e r t y u

4RA-630 Stereo Integrated Amplifier
RR-AX91
123
456
789
0>10 >10
USB TUNER PHONO CD
D 1 D 2 AUX 1 AUX 2
QUEUE
DIM
BACK REPLY
SETUP
EXIT
ENT
ON
OFF
-
+
VOLUME
SCAN
-PRESET +
RANDOM
TIME CLEAR REV PROG
MUTE
BASS TREBLE BAL
-TUNE +
BYPASS
A
D
B
E
H
J
L
C
G
K
I
M
F
Figure 2: Remote Control RR-AX91

5
Figure 3: Preamp Input and Speaker Output Connections
DIGITAL OUTPUT
DIGITAL MEDIA / CD PLAYER
CD PLAYER
PHONO

6RA-630 Stereo Integrated Amplifier
Figure 4: Rotel Link and 12V Trigger Connections
Tuner RT-12
CD Player RCD-630
Amplier RA-630
Important! : The 12V trigger cables will override the Rotel Link commands. Do not connect the 12V trigger cable if Rotel Link is connected.

7
Important Notes
When making connections be sure to:
4Turn off all the components in the system before hooking up any components, including loudspeakers.
4Turn off all components in the system before changing any of the connections to the system.
It is also recommended that you:
4Turn the volume control of the amplifier all the way down before the amplifier is turned on or off.

8RA-630 Stereo Integrated Amplifier
About Rotel
Our story began over 50 years ago. Over the decades, we have received
hundreds of awards for our products and satisfied hundreds of thousands
of people who take their entertainment seriously – like you.
Rotel was founded by a family whose passionate interest in music led them
to manufacture high-fidelity components of uncompromising quality.
Through the years, that passion has remained undiminished and the family
goal of providing exceptional value for audiophiles and music lovers,
regardless of their budget, is shared by all Rotel employees.
Rotel’s engineers work as a close team, listening to, and fine tuning, each
new product until it reaches their exacting musical standards. They are
free to choose components from around the world in order to make that
product the best they can. You are likely to find capacitors from the United
Kingdom and Germany, semiconductors from Japan or the United States,
while toroidal power transformers are manufactured in Rotel’s own factory.
We all have concerns about our environment. And, as more and more
electronics are produced it is especially important for a manufacturer to do all
it can to engineer products that have a minimum impact on the environment.
At Rotel, we are proud to do our part. We have reduced the lead content
in our products by using special lead-free ROHS solder and components.
Our engineers continually strive to improve power supply efficiency without
compromise to quality. When in standby mode Rotel products use minimal
power to meet global Standby Power Consumption requirements.
The Rotel factory is also doing their part to help the environment through
constant improvements to product assembly methods for a cleaner and
greener manufacturing processes.
All of us at Rotel thank you for buying this product. We are sure it will bring
you many years of enjoyment.
Getting Started
Thank you for purchasing the Rotel RA-630 Stereo Integrated Amplifier.
When used in a high-quality music audio system, Rotel products will provide
years of musical enjoyment.
This amplifier is a full featured, high performance component. All aspects
of the design have been optimized to retain the full dynamic range and
subtle nuances of your music. The unit has a highly regulated power supply
incorporating a Rotel custom-designed toroidal power transformer. This low
impedance power supply has ample power reserves, which enables the
amplifier to easily reproduce the most demanding audio signals. This type
of design is more expensive to manufacture, but it is better for the music.
The printed circuit boards (PCB) are designed with Symmetrical Circuit
Traces. This ensures that the precise timing of the music is maintained and
faithfully recreated. The circuitry uses metal film resistors and polystyrene
or polypropylene capacitors in important signal paths. All aspects of this
design have been examined to ensure the most faithful music reproduction.
The main functions of the RA-630 are easy to install and use. If you have
experience with other stereo systems, you shouldn’t find anything perplexing.
Simply plug in the associated components and enjoy.
Contents
Important Safety Instructions ..........................................2
Figure 1: Controls and Connections 3
Figure 2: Remote Control RR-AX91 4
Figure 3: Preamp Input and Speaker Output Connections 5
Figure 4: Rotel Link and 12V Trigger Connections 6
Important Notes 7
About Rotel .......................................................8
Getting Started ....................................................8
A Few Precautions 9
Placement 9
Cables 9
The RR-AX91 Remote Control..........................................9
Second Amplier Remote Code 9
AC Power and Control ...............................................9
AC Power Input u 9
Power Switch 1Aand Power Indicator 2 9
12V Trigger Out =10
Protection Indicator 3.............................................10
Input Signal Connections w..........................................10
Phono Input wand Ground Connection (GND) 10
Line Level Inputs w10
Digital Signal Inputs rt ...........................................10
Preamp Outputs e................................................10
Speaker Outputs y...............................................10
Speaker Selection 10
Speaker Wire Selection 10
Polarity and Phasing 10
Speaker Connection 11
Headphone Output 4 .............................................11
Remote Sensor 5................................................11
Display 6......................................................11
Front USB Input 9...............................................11
Bluetooth Dongle 11
Audio Controls ....................................................11
Volume Control 8B11
Balance Control 7C 11
Tone Control Bypass 7F 11
Bass and Treble Controls 7C 11
Dim control 7I 12
Source Input Selector 0L 12
Rotel Link -....................................................12
RS232 Connector q...............................................12
Settings Menu ....................................................12
Troubleshooting ...................................................13
Power Indicator Is Not Illuminated 13
Fuse Replacement 13
No Sound 13
Cannot Connect via Bluetooth 13
Playable Audio Format 13
Specications.....................................................14

9
A Few Precautions
WARNING: To avoid potential damage to your system, turn off ALL
the components in the system when connecting or disconnecting the
loudspeakers or any associated components. Do not turn the system
components back on until you are sure all the connections are correct
and secure. Pay particular attention to the speaker wires. There must
be no loose strands that could contact the other speaker wires, or the
chassis of the amplifier.
Please read this manual carefully. It provides information on how to incorporate
the RA-630 into your system as well as information that will help you get
optimum sound performance. Please contact your authorized Rotel dealer
for answers to any questions you might have. In addition, all of us at Rotel
welcome your questions and comments.
Save the shipping carton and all enclosed packing material for future use.
Shipping or moving the amplifier in anything other than the original packing
material may result in severe damage to your amplifier.
If included in the box please fill out and send in the owner’s registration
card. Also be sure to keep the original sales receipt. It is your best record
of the date of purchase, which you will need in the event warranty service
is ever required.
Placement
Like all audio components that handle low level signals, this amplifier
can be affected by its environment. Avoid placing the unit on top of other
components. Also avoid routing audio signal cables near power cords. This
will minimize the chance it will pick up hum or interference.
The unit generates heat as part of its normal operation. The heat sinks and
ventilation openings in the amplifier are designed to dissipate this heat. The
ventilation slots in the top cover must be open. There should be 10 cm (4
inches) of clearance around the chassis, and reasonable airflow through
the installation location, to prevent the amplifier from overheating.
Remember the weight of the amplifier when you select an installation location.
Make sure that the shelf or cabinet can support it. We recommend installing
the unit in furniture designed to house audio components. Such furniture is
designed to reduce or suppress vibration which can adversely affect sound
quality. Ask your authorized Rotel dealer for advice about component
furniture and proper installation of audio components.
Cables
Be sure to keep the power cords, digital signal cables and regular audio
signal cables in your installation away from each other. This will minimize
the chance of the regular audio signal cables picking up noise or interference
from the power cords or digital cables. Using only high quality, shielded
cables will also help to prevent noise or interference from degrading the
sound quality of your system. If you have any questions see your authorized
Rotel dealer for advice about the best cable to use with your system.
The RR-AX91 Remote Control
Some functions can be done with either the front panel controls, or the
supplied RR-AX91 remote control. When these operations are described,
the square call out numbers refer to the main unit, while the encircled letters
refer to the remote control.
Second Amplier Remote Code
The factory setting is remote code 1. If you find that the remote is conflicting
with other Rotel amplifiers, you can change to remote code 2 with the
following steps.
1. From the remote control press Tuner Land 2 Hat the same time to set
the remote control to send Audio Code 2.
2. Point the remote at the unit and press 2 Hbutton for 8 seconds. The
unit will show “Audio Custom Code 1 -> 2”.
3. Repeat the above procedure and press “1” button instead of “2” to
change the unit back to Code 1.
NOTE: The remote control can be used to operate the basic functions of
Rotel tuners and CD players. Remote control buttons labeled HMJK
can be used to operate CD or Tuner functions in your system. For the
remote to operate properly, make sure both the remote and the CD or
Tuner are both in same remote code, either Code 1 or 2.
AC Power and Control
AC Power Input u
Your unit is configured at the factory for the proper AC line voltage in the
country where you purchased it (either 120 volts AC or 230 volts AC with
a line frequency of either 50 Hz or 60 Hz). The AC line configuration is
noted on a decal on the back panel.
NOTE: Should you move your amplifier to another country, it is possible
to reconfigure it for use on a different line voltage. Do not attempt to
perform this conversion yourself. Opening the enclosure of the unit
exposes you to dangerous voltages. Consult a qualified service person
or the Rotel factory service department for information.
NOTE: Some products are intended for sale in more than one country
and as such are supplied with more than one AC cord. Please only use
the one appropriate for your country/region.
The unit does not draw high levels of current from the power outlet. However,
whenever possible, it should be plugged directly into a 2-pin polarized wall
outlet. Do not use an extension cord. A heavy duty multi-tap power outlet
strip may be used if it (and the wall outlet) can handle the current demanded
by the amplifier and all the other components connected to it.
If you are going to be away from home for an extended period of time
such as a month-long vacation, it is a sensible precaution to unplug your
amplifier (as well as other audio and video components) while you are away.
Power Switch 1Aand Power Indicator 2
Press the front panel Power Switch button 1, to turn the unit on. The Power
Indicator light 2is illuminated when the unit is on. Press Power Switch
button again to turn the unit off.
When the power switch is in the ON position, the remote control ON and
OFF buttons may be used to activate the RA-630. In Standby mode the
power LED remains illuminated, but the display is turned OFF.
10 RA-630 Stereo Integrated Amplifier
12V Trigger Out =
See Figure 4
Some audio components can be turned on automatically when they receive
a 12V turn on “signal”. The two 12V Trigger Outputs of the RA-630 provide
the required signal. Connect compatible components to the amplifier with a
conventional 3.5mm mini plug cable. When the unit is turned off, the trigger
signal is interrupted, and the components controlled by it are turned off.
NOTE: If you are using other units in the series with Rotel Link, please
use the Rotel Link connection to turn the units on or off. Do not connect
both the Rotel Link and 12V trigger cables. The 12V trigger’s power
on or off features will override the Rotel Link features.
Protection Indicator 3
The amplifier has both thermal and over-current protection circuitry that
protects the amplifier against damage in the event of extreme or faulty
operating conditions. The protection circuits are independent of the audio
signal and have no impact on sonic performance. Instead, the protection
circuits monitor the temperature of the output devices and shut down the
amplifier if temperatures exceed safe limits.
Most likely, you will never see this protection circuitry in action. However,
should a faulty condition arise, the amplifier will stop playing and the LED
indicator on the front panel will light up.
If this happens, turn the amplifier off. Let it cool down for several minutes,
and attempt to identify and correct the problem that caused the protection
circuitry to engage. When you turn the amplifier back on, the protection
circuit will automatically reset and the indicator LED should go out.
In most cases, the protection circuitry activates because of a fault condition
such as shorted speaker wires, or inadequate ventilation leading to an
overheating condition. In very rare cases, highly reactive or extremely
low impedance speaker loads could cause the protection circuit to engage.
If the protection circuitry triggers repeatedly and you are unable to isolate
and correct the faulty condition, contact your authorized Rotel dealer for
assistance in troubleshooting.
Input Signal Connections w
See Figure 3
NOTE: To prevent loud noises that neither you nor your speakers will
appreciate, make sure the system is turned off when you make any
signal connections.
Phono Input wand Ground Connection (GND)
Plug the cable from the turntable into the appropriate left and right phono
inputs. If the turntable has a “ground” wire, connect it to the screw terminal
to the left of the Phono inputs. It will help prevent hum and noise.
Line Level Inputs w
The CD, Tuner, and Aux inputs of the amplifier are “line level” inputs. These
are for connecting components such as CD players or other audio playback
devices with an analog audio output.
The Left and Right channels are labeled and should be connected to the
corresponding channels of the source component. The Left connectors
are white, the Right connectors are red. Use high quality RCA cables for
connecting input source components to the unit. Ask your authorized Rotel
dealer for advice about cables.
Digital Signal Inputs rt
See Figure 3
There are two sets of digital inputs labeled COAXIAL and OPTICAL. Connect
the COAXIAL or OPTICAL outputs of your player into these sockets. The
digital signals will be decoded and played by the amplifier. The unit is
capable of decoding PCM signals up to 24 bit, 192kHz.
Preamp Outputs e
The amplifier has a set of preamp outputs. The currently selected source
input is available from this output. Typically the PRE OUT output is used to
provide a signal to another integrated amplifier or power amplifier, which
is used to drive remote speakers.
NOTE: Changes to the settings of the Volume, Balance or Tone controls
affect the signal from the Preamp Outputs.
Speaker Outputsy
See Figure 3
Speaker Selection
The speakers may have an impedance as low as 4 ohms when be used
at any given time. Speaker impedance ratings are less than precise. In
practice, very few loudspeakers will present any problems for the unit. See
your authorized Rotel dealer if you have any questions.
Speaker Wire Selection
Use insulated two-conductor stranded wire to connect the unit to the speakers.
The size and quality of the wire can have an audible effect on the performance
of the system. Standard speaker wire will work, but can result in lower
output or diminished bass response, particularly over longer distances. In
general, heavier wire will improve the sound. For best performance, you
may want to consider special high-quality speaker cables. Your authorized
Rotel dealer can help in the selection of cables for your system.
Polarity and Phasing
The polarity - the positive/negative orientation of the connections - for every
speaker and amplifier connection must be consistent so all the speakers will
be in phase. If the polarity of one connection is reversed, bass output will
be very weak and stereo imaging degraded. All wire is marked so you can
identify the two conductors. There may be ribs or a stripe on the insulation
of one conductor. The wire may have clear insulation with different color
conductors (copper and silver). There may be polarity indications printed
on the insulation. Identify the positive and negative conductors and be
consistent with every speaker and amplifier connection.

11
Speaker Connection
Turn off all the components in the system before connecting the speakers.
The amplifier has color-coded binding post type speaker connectors on the
back panel. These connectors accept bare wire, connector lugs, or dual
banana type connectors. (except in European Community countries where
their use is not permitted)
Route the wire from the amplifier to the speakers. Give yourself enough slack
so you can move the components to allow access to the speaker connectors.
If you are using dual banana plugs, connect them to the wires and then
plug into the backs of the binding posts. The thumbscrews of the binding
posts should be screwed in all the way (clockwise).
If you are using terminal lugs, connect them to the wires. If you are attaching
bare wires directly to the binding posts, separate the wire conductors and
strip the insulation from the end of each conductor. Be careful not to cut
into the wire strands. Unscrew (turn counterclockwise) the binding post
thumbscrews. Place the connector lug or wire around the binding post
shaft. Turn the thumbscrews clockwise to clamp the connector lug or wire
firmly in place.
NOTE: Be sure there are no loose wire strands that could touch adjacent
wires or connectors.
Headphone Output 4
The headphone output allows you to connect headphones for private listening.
This output accepts a standard 3.5mm (1/8”) mini stereo headphone
connector. Plugging in a set of headphones will cut off the signal to the
speaker outputs. The settings of the Function Selector determines which
source is heard.
NOTE: Because the sensitivity of speakers and headphones can
vary widely, always reduce the volume level before connecting or
disconnecting headphones.
Remote Sensor 5
This remote sensor window receives IR commands from the remote control.
Please do not block this sensor.
Display 6
The front panel display shows the source selected, volume level and tone
settings.
Front USB Input 9
The front USB input can be connected to an iPod, iPhone, USB flash memory
or the Bluetooth dongle (supplied) for wireless streaming. With iPod or
iPhones, simply plug the device into the front USB and select USB function
from the source selector. The iPod and iPhone remain active allowing search
and play functions.
Bluetooth Dongle
Insert the supplied Bluetooth Dongle into the front USB of the RA-630 for
wireless streaming via Bluetooth, from your device (i.e. mobile phones).
From your mobile device, look for “Rotel Bluetooth” and connect to it.
Connection is normally automatic, but if prompted for a password, please
press “0000” then enter on your device.
NOTE: Not all Bluetooth dongles will operate with RA-630. Please
use the one supplied.
Audio Controls
Volume Control 8B
Turn the controls clockwise to increase the volume, or counter clockwise to
decrease the volume. From the remote control press the volume + or - button
to turn the volume up or down. Press the MUTE Bbutton to completely
mute the volume.
Balance Control 7C
The Balance Control adjusts the left-to-right balance of the sound output.
The factory default is the center position or “0”. To change the balance
from the front panel, press the MENU 7button to toggle the front display
to BALANCE SETTING mode. Then press the left/right arrow button on the
front panel to change the value to LEFT or RIGHT. The value can change
from L15 to R15.
NOTE: This setting is saved permanently including after powering off
the RA-630.
To make temporary changes not saved after power off, from the remote,
press the BAL Cbutton to access the BALANCE SETTING menu, then
press the left/right arrow button to adjust. When finished, press the EXIT
Gbutton to exit the menu.
Tone Control Bypass 7F
Bass and Treble Control (Tone Control) circuits are bypassed at factory
default to ensure the purest possible sound. The front display will show
TONE BYPASS. To turn on the tone control from the front panel, press the
MENU 7button to toggle to the Bypass control then press the left/right
arrow button to turn bypass on or off.
NOTE: This setting is saved permanently including after powering off
the RA-630.
To temporarily changes the Tone Control Bypass, press the BYPASS Fbutton
on the remote control to toggle the Bypass mode enabled and disabled.
Bass and Treble Controls 7C
Set the Bass or Treble controls from the front panel by pressing the MENU
7button to toggle to either the Bass or Treble Setting menu. Then press
the left/right arrow button to adjust the value. The Bass and Treble values
range from -10 to +10.
NOTE: These settings are saved permanently including after powering
off the RA-630.
To temporarily change the Bass and Treble settings from the remote control,
press the Bass or Treble Cbutton , then press the left/right arrow button
on the remote to adjust the value.

12 RA-630 Stereo Integrated Amplifier
A properly setup high-performance audio system produces the most natural
sound with little or no adjustment of the tone controls. Use these controls
sparingly. Be particularly careful when turning the controls up. This increases
the power output in the bass or treble range, increasing the load on the
amplifier and speakers.
NOTE: Setting the Bass and Treble controls do not automatically turn
on the tone control. To turn on tone control, refer to previous section
Tone Control Bypass.
Dim Control 7I
To change the brightness of the front display, press the MENU 7button
to toggle to the Display Settings. Then press the left/right arrow button on
the front panel to change the display brightness.
NOTE: This setting is saved permanently including after powering off
the RA-630.
To temporarily change the display brightness, press the DIM Ibutton on
the remote.
Source Input Selector 0L
Press the corresponding input button on the front panel 0or remote control
Lto select the desired listening source.
Push the front panel source buttons to toggle between Optical / Coaxial
1- 2 and Aux 1 - 2 or use the dedicated source button on the remote control.
Rotel Link -
See Figure 3
This 3.5 mm stereo mini-jack (labeled ROTEL LINK IN) can optionally attach
to Rotel network enabled products with ROTEL LINK OUT connections. This
allows the attached Rotel products to communicate with each other and
be controlled via the Rotel Remote App (available for download on the
iTunes®store).
RS232 Connector q
The RA-630 can be controlled via RS232 for integration with automation
systems. The RS232 input accepts a standard straight DB-9 Male-to-Female
cable.
For additional information on the connections, software, and operating
codes for RS232 control of the RA-630, contact your authorized Rotel dealer.
Settings Menu
You can access the settings menu from the front panel by pressing the
MENU 7button or the SETUP Dbutton on the remote. You can change
the value of the selected option by pressing the LEFT/RIGHT button on the
front panel or the left/right arrow button on the remote. Step through the
sub-menus by pressing the MENU 7button on the front panel or up/down
Earrow button on the remote.
•BASS: BASS level can be changed to desired settings. Press the MENU
7button on the front panel or SETUP Don the remote to toggle to BASS
SETTING. (For more information refer to Bass and Treble control section.)
NOTE: This setting is stored permanently even after the RA-630 is
powered off.
•TREBLE: Refer to Bass and Treble control section.
NOTE: This setting is stored permanently even after the RA-630 is
powered off.
•BALANCE: Change left/right balance. (For more information refer to
Balance control section.)
NOTE: This setting is stored permanently even after the RA-630 is
powered off.
•TONE: TONE BYPASS on/off (For more information refer to Tone Control
Bypass section).
NOTE: This setting is stored permanently even after the RA-630 is
powered off.
•CONTRAST: Changes the front panel display contrast between the back
light and the actual characters.
•DIMMER: Dims the display in 7 steps.
NOTE: This setting is stored permanently even after the RA-630 is
powered off.
•ROTEL LINK CD: Selects how the CD player is connected to the amplifier,
either CD (analog), CX1 (coaxial 1) or CX2 (coaxial 2). CD is the factory
default.
NOTE: This function works only with the Rotel App when selecting the
CD (Rotel CD) input and does not change the front panel or IR remote
control source buttons.
•POWER ON MAX VOL: This sets the maximum volume level when the unit
is turned on. “45” is the factory default.
NOTE: Power On Max Volume settings do not apply to sources
configured with Fixed Gain.
•AUTO POWER OFF: The RA-630 can be configured to automatically power
off if unused for a specified period. If no changes are made to the unit
within the specified “Auto Power Off” timer the unit will automatically go
to STANDBY mode. The Auto Power Off timer will be restarted if changes
are made to the volume, source or playback. The default for Auto Power
Off is set to DISABLE.
Valid settings include: DISABLE, 1 HOUR, 2 HOURS, 5 HOURS, 12 HOURS.
•FIXED GAIN: Configures a Fixed Volume level for a specified input. To
enable this feature select the desired fixed volume level for Coax 1, Coax
2, Optical 1, Optical 2 or Bluetooth. When enabled and the input with
a Fixed Volume is selected, the Volume level will immediately be set to
the specified level.

13
Valid settings include: VARIABLE, FIXED MIN, FIXED 01-95, FIXED MAX.
•COAX1 VOL: VARIABLE (disabled) is factory default.
• COAX2 VOL: VARIABLE (disabled) is factory default.
• OPT1 VOL: VARIABLE (disabled) is factory default.
• OPT2 VOL: VARIABLE (disabled) is factory default.
• BLUETOOTH VOL: VARIABLE (disabled) is factory default.
NOTE: The Volume knob on the front panel and Volume +/- buttons
on the IR remote are disabled when the volume is Fixed. To disable this
feature set the Fixed Volume level to “Variable”.
•SOFTWARE VERSION : This shows the current software version loaded
into the amplifier.
•FACTORY DEFAULT: This sets the unit back to the original state as when
it left the factory. Press the RIGHT button on the front panel or the right
arrow button on the remote control to select <YES>. The unit will ask for
confirmation, press the RIGHT button again to confirm.
NOTE: All previously configured options will be erased and reset to
the factory default settings.
Troubleshooting
Most difficulties in audio systems are the result of incorrect connections, or
improper control settings. If you encounter problems, isolate the area of the
difficulty, check the control settings, determine the cause of the fault and
make the necessary changes. If you are unable to get sound from the unit,
refer to the suggestions for the following conditions:
Power Indicator Is Not Illuminated
The Power Indicator and the basic items in the Display window should be
illuminated whenever the unit is plugged into the wall power outlet and the
Power button is pushed in. If it does not light, test the power outlet with
another electrical device, such as a lamp. Be sure the power outlet being
used is not controlled by a switch that has been turned off.
Fuse Replacement
If another electrical device works when plugged into the power outlet,
but the Power Indicator still will not light when the unit is plugged into the
wall outlet, it indicates that the internal power fuse may have blown. If you
believe this has happened, contact your authorized Rotel dealer to get the
fuse replaced.
No Sound
Check the signal source to see if it is functioning properly. Make sure the
cables from the signal source to the amplifier inputs are connected properly.
Be sure the Listening Selector is set to the proper input. Check the wiring
between the amplifier and the speakers.
Cannot Connect via Bluetooth
If you cannot pair your Bluetooth enabled device to the RA-630, delete the
memory of the previous connection on the RA-630 and on your device. On
your device this is often listed as “Forget this Device”. On the RA-630 IR
remote PRESS and HOLD the STOP Mbutton for 5 seconds until the front
display shown “Reset BT DB List?“ then release the button. Select <Yes> and
press “ENT“. Then try to make the connection again.
Playable Audio Format
USB Apple (iPhone, iPod, iPad)
Format Notes
Any supported file
loaded to Apple device.
Phone may resample depending on stored format. May
exclude Apps designed to play formats not originally
supported by the sending device.
USB Bluetooth
Format Notes
Any format supported
by the sending device.
May exclude Apps designed to play formats not originally
supported by the sending device.
USB Flash Drive
Format Notes
MP3
48kHz,16 Bit (Maximum)
WMA
WAV
OGG Vorbis
Coax/Optical
Format Notes
SPDIF LPCM
44.1kHz, 48kHz, 88.2kHz, 96kHz, 176.4kHz,
192kHz
16 bit, 24 bit

14 RA-630 Stereo Integrated Amplifier
Specifications
Continuous Power Output 60 watts/ch
(20 - 20k Hz, < 0.03%, 8 ohms)
Total Harmonic Distortion (20 Hz - 20k Hz) < 0.03%
Intermodulation Distortion (60 Hz : 7 k Hz, 4:1) < 0.03%
Frequency Response (8 ohms)
Phone input 20Hz - 20kHz, ± 0.5dB
Line Level Inputs 10Hz - 100kHz, ± 1dB
Damping Factor (20 - 20,000 Hz, 8 ohms) 180
Input Sensitivity / Impedance
Phone input 2.5mV / 47 kOhms
Line Level Inputs 150 mV / 24 kOhms
Input Overload
Phone input 180mV
Line Level Inputs 5 V
Preamp Output / Impedance 1 V / 470 Ohms
Tone Controls - Bass / Treble ±10 dB at 100 Hz / 10k Hz
Signal to Noise Ratio (IHF “A” weighted)
Phone input 80 dB
Line Level Inputs 100 dB
Digital Section
Frequency Response 10 Hz - 95k Hz (± 3.0dB,MAX)
Signal to Noise Ratio (IHF ”A” weighted) 100dB
Input Sensitivity/Impedance: 0 dBfs/75 ohms
Preout/Impedance: 1.2V/470 ohms (at - 20dB)
Decodable front USB Digital Signals: WAV, MP3, WMA
(up to 48K 16 bit)
Coaxial/Optical SPDIF LPCM
(up to 192k Hz 24 bit)
General
Power Requirements
USA 120 V, 60 Hz
EC 230 V, 50 Hz
Standby Power Consumption < 0.5 W
Power Consumption 300 Watts
BTU (4 ohms, 1/8th power) 517 BTU/h
Dimensions (W, H, D) 430 x 93 x 342 mm
17” x 3 5/8” x 13 1/2”
Panel Height 80 mm / 3 1/16”.
Weight (net) 7.9 kg, 17.4 lbs.
All specifications are accurate at the time of printing.
Rotel reserves the right to make improvements without notice.
Rotel and the Rotel HiFi logo are registered trademarks of The Rotel Co.,
Ltd. Tokyo, Japan.
“Made for iPod,” and “Made for iPhone,” means that an electronic accessory
has been designed to connect specifically to iPod or iPhone, respectively, and
has been certified by the developer to meet Apple performance standards.
Apple is not responsible for the operation of this device or its compliance with
safety and regulatory standards. Please note that the use of this accessory
with iPod, or iPhone may affect wireless performance.
iPhone, iPod, iPod classic, iPod nano, and iPod touch are trademarks of
Apple Inc., registered in the U.S. and other countries.

15
本产品周围最少应有10cm或4in.的间隙。
警告:后面板上的电源线接头是主电源断开装
置。应该将本机放在可拔插电源线接头的开放的
地方。
只能将本产品连接到后面板指定的型号和电压的
电源上。(美国:120V/60Hz,欧洲:230V/50Hz,
中国:220V/50Hz)
只能用本产品提供的电源线或严格等同的电源线
将本产品连接到电源插座上。不得更改随本产品
提供的电源线。不要使用延长线。
电源电缆的主插头是本产品的断电装置。要将
本产品从电源完全断开,应从主(交流)插座
上拔下电源电缆的主插头。这是机器唯一的彻
底断电方式。
使用2类电线连接音箱,以确保正确的安装及将
触电风险减至最低。
请勿将遥控器内的电池暴露于如阳光、火源等
类似的高温条件下。电池的循环再用与废弃应
遵循当地法律法规。
注意:RS232接口只能由授权人士进行操作。
警告:机内无客户可以维修的部件,请合资格
维修人员维修。
警告:为减少火灾或触电的危险,不要将本产品
置于潮湿环境中或水中,不要将本产品置于滴水
或溅水环境中,不要将含有液体的物件(例如花
瓶)放在本产品上,不要让异物进入本产品外壳
内。如果本产品进入潮湿环境中,或异物进入本
产品内,立即从墙上拔掉电源线,将本产品送交
合资格维修人员检查或进行必要的维修。
请仔细阅读所有说明。
请保留所有说明手册。
请留意这些说明和装置上的所有警告。
请遵从操作说明。
不要在接近水的地方使用本装置。
只能用干布清洁。
不要堵塞本装置任何通风口。请依照制造商的
指导进行安装。
请勿将本装置安置于靠近辐射、热源、火炉或其
它发热器具(包括放大器)的地方。
请注意两极插头或接地插头的安全作用。两极插
头有两个插刀,其中一个插刀比另一个宽。接地
插头有两个插刀和第三个接地插刀。这些都是为
了您的安全。如果随本产品提供的插头与您的插
座不匹配,请咨询电工更换陈旧的插座。
请合理放置电源线,避免踩踏或挤压插头、简易
插座以及从本装置拔插的部分。
只能使用制造商指定的附件或配件。
只能使用制造商指定或随本装置一同
出售的机架、立架、支架或桌子。在
支架或机架上移动本装置时,请小心
避免因机器或机架翻倒导致受伤。
雷暴天气中或本装置长时间不使用时,应将电源
插头从插座中拔出。
若本装置有任何损坏,如电源线或插头损坏,异
物或液体进入装置中,本装置遭受雨淋或受潮,
本装置显示不正确操作的迹象或本装置跌落时,
立即停止使用,并请合格维修机构检测和维修。
本产品应在非热带气候条件下安全使用。
警 告
警告:为避免触电危险,非专业人员请勿打开机壳!
电击危险,请勿打开!
洛得产品符合电气和电子设备限制
有害物质(RoHS)以及处理废旧电气
和电子设备(WEEE)的国际指令。带
叉形符号的轮式垃圾箱标志指合乎规
定,且该产品应根据这些指令以适当
的方法进行回收或处理。
重要安全说明
POWER
PHONES
MENU DOWNUP
RIGHTLEFT
PHONO TUNER CD USB
1 2
AUX1 AUX 2
OPT/COAX
本符号表示本装置有双重保护。无
需接地。
本标记用于提醒用户,本产品内有未绝缘的
危险电压,可能引致触电风险。
标记提醒用户遵从本手册及随附文件中的操
作和维护(维修)指引。
适用于美国、加拿大、或其它核准使用的地方。
小心:避免触电,请将宽片插头对准宽口插座。完全插入。
注意:为避免触电,请将插头最大(长)的那片(头)插入
插座相应端口并插到底。

16 RA-630立体声放大器
图 1:控制和连接
127
5
4
3 6 8
90
=
-q
w e r t y u

17
RR-AX91
123
456
789
0>10 >10
USB TUNER PHONO CD
D 1 D 2 AUX 1 AUX 2
QUEUE
DIM
BACK REPLY
SETUP
EXIT
ENT
ON
OFF
-
+
VOLUME
SCAN
-PRESET +
RANDOM
TIME CLEAR REV PROG
MUTE
BASS TREBLE BAL
-TUNE +
BYPASS
A
D
B
E
H
J
L
C
G
K
I
M
F
图 2:RR-AX91遥控器

18 RA-630立体声放大器
图 3:信号输入和音箱输出连接
DIGITAL OUTPUT
数字媒体/CD播放机
CD 播放机
唱盘机
音箱

19
图 4: Rotel Link和12V触发连接
收音机 RT-12
CD 播放机 RCD-630
放大器 RA-630
重要: 12V触发电缆将会覆盖Rotel Link命令。当已经连接Rotel link时,不要再连接12V触发电缆。
重要注意事项
进行连接时,请确保:
4 连接任何设备(包括音箱)之前,应关闭系统中所有设备的电源。
4 改变系统的任何连接之前,应关闭系统中所有设备的电源。
我们还建议您:
4 打开或关闭放大器之前,将放大器的音量控制调到最低。

20 RA-630立体声放大器
关于洛得
洛得已有超过50年的历史。几十年来,我们的产品已赢得数百次奖项,满
足了无数对娱乐有着严肃态度的人士-比如您。
洛得是一个家族公司,他们对音乐的激情让他们致力于制造高品质的高
保真音响设备。
多年以来,这种激情丝毫未减,而为不同预算的高保真音响发烧友和音乐
爱好者提供超值产品的目标,是洛得所有员工的共同追求。
洛得的工程师紧密协作,认真倾听并精确调谐每个新产品,直到其符合苛
刻的音乐标准。他们从世界各地选购部件,以令其产品尽善尽美。您可能
会发现英国和德国生产的电容器、日本和美国产的半导体,以及洛得自家
工厂制造的环形功率变压器。
我们十分关注环境问题。随着越来越多电子产品的出现,制造商竭尽所能
把产品设计为对环境负面影响最小的产品显得尤为重要。
在洛得,我们做到了这一点,对此我们深感自豪。通过使用特殊的无铅
ROHS焊料和部品,我们大大降低了产品中的铅含量。洛得工程师在保证
产品质量的同时不断提高电源供应的效率。洛得产品在待机模式下仅需运
行最低功率,符合国际待机功耗标准。
洛得还不断研发更清洁、更环保的制造工艺为环保事业贡献自己的力量。
洛得全体同仁感谢您购买本产品。我们深信,本产品将为您带来数年的
美妙享受。
开始使用
感谢您购买洛得 RA-630立体声放大器。配合高质量的音乐音频系统使用,
洛得产品可为您提供多年的音乐享受。
本放大器是功能齐备、品质上乘的设备。设计的各个方面已进行优化,
以获得音乐的全部动态范围和细微差别。其配有高度规范的电源和洛得
自家设计的环形电源变压器。低阻抗的电源有充足的电力储备,使其能够
轻松再现要求最苛刻的音频信号。这种设计制造起来更加昂贵,但可获
得更佳的音乐效果。
印刷电路板使用对称电路线路(Symmetrical Circuit Traces)设计。这可确
保忠实再现精确的音乐时间。本放大器的电路在重要的信号通道使用金属
薄膜电阻和聚苯乙烯或聚丙烯膜电容器。这种设计的各个方面均已进行测
试,确保最忠实地再现音乐。
RA-630 的主要功能均易于安装和使用。如果您有使用其它立体声系统的
经验,您会发现一切均易如反掌。只要插上关联的设备,就可以开始欣
赏音乐了。
几点注意事项
警告:要避免可能造成系统的损坏,进行连接或断开音箱或相关组件
之前应关闭所有系统组件。确保所有连接均正确和安全后再开启系统
组件。请特别注意音箱线。确保没有松开的线束与其它音箱的电线或
放大器的机架接触。
请仔细阅读本手册。本手册提供如何将RA-630 连接到系统的完整资料,以
及可帮助您获得最佳音响效果的全面资料。如果您遇到任何问题,请联络
洛得授权经销商。另外,洛得全体同仁欢迎您提出问题或建议。
目录
重要安全指示 .................................................. 15
图1:控制和连接 16
图 2:RR-AX91遥控器 17
图 3: 信号输入和音箱输出连接 18
图 4:Rotel Link和12V触发连接 19
重要注意事项 19
关于洛得 ...................................................... 20
开始使用 ...................................................... 20
几点注意事项 20
放置 21
电缆 21
RR-AX91遥控器................................................... 21
遥控器遥控代码 21
交流电源和控制 ................................................ 21
交流电输入 u21
电源开关 1A和电源指示灯 221
12V 触发输出 = 21
保护指示灯 3� � � � � � � � � � � � � � � � � � � � � � � � � � � � � � � � � � � � � � � � � � � 21
输入信号连接 w............................................... 22
唱盘机输入 w 和地线连接(GND)22
线性电平输入 w22
数字信号输入 rt ............................................. 22
前置放大器输出 e. . . . . . . . . . . . . . . . . . . . . . . . . . . . . . . . . . . . . . . . . . . . . . 22
音箱输出 y................................................... 22
音箱选择 22
音箱线 22
极性和相位 22
音箱连接 22
耳机输出 4.................................................... 22
遥控感应器 5................................................. 22
显示屏 6..................................................... 22
前置USB 输入 9................................................ 22
蓝牙适配器 22
音频控制 ...................................................... 23
音量控制 8B23
均衡控制 7C23
音调控制旁通 7F23
低音和高音控制 7C23
调光控制 7I 23
源输入选择键 0L23
Rotel Link -..................................................... 23
RS232接口 q. . . . . . . . . . . . . . . . . . . . . . . . . . . . . . . . . . . . . . . . . . . . . . . . . . . . 23
设置菜单 ...................................................... 23
故障排除 ...................................................... 24
电源指示灯不亮 24
更换保险丝 24
没有声音 24
不能通过蓝牙连接 24
可播放的音频格式 24
技术参数 ...................................................... 25
Table of contents
Other Rotel Amplifier manuals

Rotel
Rotel RB-985 MKII User manual

Rotel
Rotel RB-06 User manual

Rotel
Rotel RA-05 SE User manual

Rotel
Rotel RA-713 User manual

Rotel
Rotel RA-500 User manual

Rotel
Rotel RC-995 User manual

Rotel
Rotel RA-1570 User manual

Rotel
Rotel RB-1090-1 User manual

Rotel
Rotel RC-870BX User manual

Rotel
Rotel RC-850 User manual

Rotel
Rotel RMB-1085 User manual

Rotel
Rotel RB-870 User manual

Rotel
Rotel The Power Amp RB-5000 User manual

Rotel
Rotel RA-05 SE User manual

Rotel
Rotel RA-2020 User manual

Rotel
Rotel RA-06 User manual

Rotel
Rotel RA-06 SE User manual

Rotel
Rotel RB-981 User manual

Rotel
Rotel RB-1562 User manual

Rotel
Rotel RB-930AX User manual