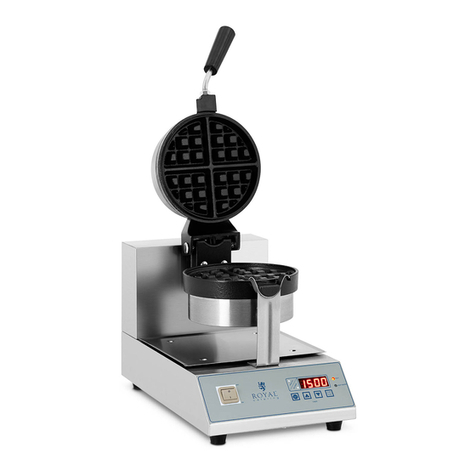
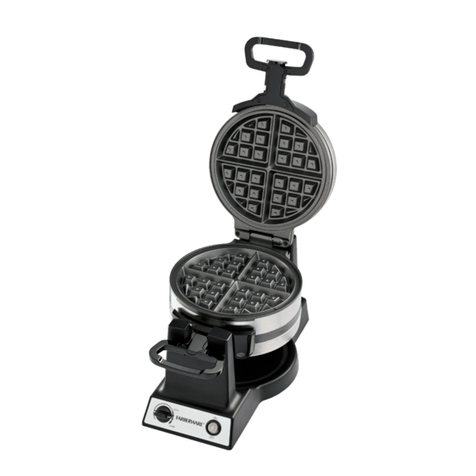
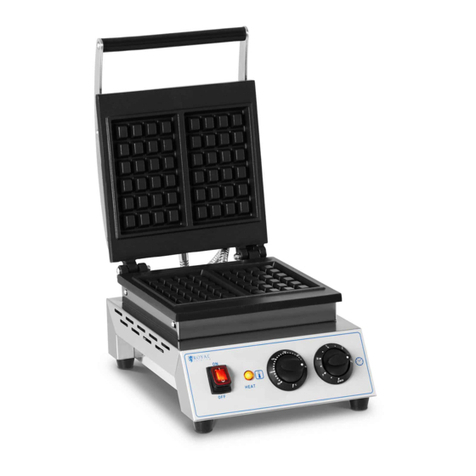
Royal Catering RCWM-1500-S User manual

expondo.de
RCWM-1500-S
BEDIENUNGSANLEITUNG
STIEL WAFFEL MAKER
USER MANUAL
POPSICLE WAFFLE MAKER
INSTRUKCJA OBSŁUGI
OPIEKACZ DO CORN DOGÓW
ISTRUZIONI D‘USO
PIASTRA PER WAFFLE SU STECCO
MANUEL D‘UTILISATION
GAUFRIER EN ÉPI
MANUAL DE INSTRUCCIONES
GOFRERA CON FORMA DE ESPIGA

Deutsch
English
Polski
Italiano
Français
Español
3
6
10
14
18
22
Inhalt | Content | Contenu | Contenido | Treść
expondo.de
1.TECHNISCHE DETAILS
Modell RCWM-1500-S
Spannung 230V
Power 1.55 kW
Maße 340*410*295 mm
Timer max. 15min
2. SICHERHEITSHINWEISE
Lesen Sie vor Inbetriebnahme dieses Gerätes die Bedienungsanleitung sehr sorgfältig
durch und bewahren Sie diese inkl. Rechnung und nach Möglichkeit den Karton mit
der Innenverpackung gut auf.
• Bitte halten Sie das Gerät vor direkter Sonneneinstrahlung, Feuchtigkeit (auf
keinen Fall in Flüssigkeiten tauchen) und scharfen Kanten fern. Benutzen Sie das
Gerät nicht mit feuchten Händen. Bei feucht oder nass gewordenem Gerät so-
fort den Netzstecker (ziehen Sie am Stecker, nicht am Kabel) ziehen.
• Schalten Sie das Gerät aus und ziehen Sie immer den Stecker aus der Steckdose
(ziehen Sie am Stecker, nicht am Kabel), wenn Sie das Gerät nicht benutzen, zur
Reinigung oder bei Störung.
• Betreiben Sie das Gerät nicht unbeaufsichtigt. Sollten Sie den Arbeitsplatz verlas-
sen, schalten Sie das Gerät bitte immer aus, bzw. ziehen Sie den Stecker aus der
Steckdose (ziehen Sie am Stecker, nicht am Kabel).
• Prüfen Sie das Gerät und Kabel regelmäßig auf Schäden. Ein beschädigtes Gerät
bitte nicht in Betrieb nehmen.
• Zur Sicherheit Ihrer Kinder lassen Sie keineVerpackungsteile (Plastikbeutel,
Karton, Styropor etc.) erreichbar liegen. Lassen Sie kleine Kinder nicht mit Folie
spielen. Es besteht Erstickungsgefahr.
• Betreiben Sie das Gerät nicht an einer externen Zeitschaltuhr oder einem sepa-
raten Fernwirksystem.
• Die Backächen und der Deckel werden sehr heiß (Verbrennungsgefahr!). Fassen
Sie nur den Griff an.
• Stellen Sie das Gerät auf eine hitzebeständige Unterlage!
• Um einen Hitzestau zu vermeiden, das Gerät nicht direkt unter einen z.B.
Schrank stellen. Sorgen Sie für genügend Freiraum!
• Achten Sie beim Öffnen der Backächen auf den austretenden Dampf.
• Das Gerät bitte nie in der Nähe oder unterhalb von Gardinen und anderen
brennbaren Materialien verwenden!
3. INBETRIEBNAHME DES GERÄTES
Bitte lesen Sie diese Bedienungsanleitung sorgfältig durch und bewahren Sie diese an
einem sicheren Ort auf. Bei Weitergabe des Artikels übergeben Sie bitte auch diese
Anleitung.
3
Rev. 15.03.2017

4 5
5. REINIGUNG UND PFLEGE
• Ziehen Sie den Netzstecker (ziehen Sie am Stecker, nicht am Kabel) und lassen
Sie das Gerät abkühlen.
• Pinseln Sie Krümel oder Reste von den Backächen und den Rändern.
• Reinigen Sie das Gerät nur mit einem leicht feuchten Tuch.
• Verwenden Sie keine scharfen Reinigungsmittel.
• Tauchen Sie das Gerät nicht ins Wasser!
6. REGELMÄSSIGE PRÜFUNG DES GERÄTES
Prüfen Sie regelmäßig, ob Elemente des Gerätes Beschädigungen aufweisen. Sollte dies
der Fall sein, wenden Sie sich an IhrenVerkäufer, um Nachbesserungen vorzunehmen.
Was tun im Problemfall?
Kontaktieren Sie IhrenVerkäufer und bereiten Sie folgende Angaben vor:
• Rechnungs- und Seriennummer (letztere nden Sie auf dem Typenschild)
• Ggf. ein Foto des defekten Teils
• Ihr Servicemitarbeiter kann besser eingrenzen, worin das Problem besteht, wenn
Sie es so präzise wie möglich beschreiben. Formulierungen wie z.B. „das Gerät
heizt nicht“ können missverständlich sein, und bedeuten, dass das Gerät zu wenig
oder eben gar nicht heizt. Dies sind aber zwei verschiedene Fehlerursachen!
• Geben Sie stets den Zustand der Leuchten an, da dies die Diagnose erleichtert:
Geht die grüne Leuchte an , wenn Sie das Gerät einschalten? Geht die orangene
Leuchte an, wenn Sie die Temperatur einstellen?
Je detaillierter Ihre Angaben sind, umso schneller kann Ihnen geholfen werden!
ACHTUNG: Öffnen Sie niemals das Gerät ohne Rücksprache mit dem Kundenser-
vice. Dies kann zu einem Garantieverlust führen!
1. Fetten Sie die Backächen vor dem ersten Gebrauch leicht ein.
2. Betreiben Sie das Gerät mit geschlossenen Backächen ca. 10 Minuten (siehe
Benutzung des Gerätes). Danach mit einem feuchten Spültuch nachwischen.
Das erste Gebäck bitte nicht verzehren!
4. BENUTZUNG DES GERÄTES
• Wickeln Sie das Kabel bitte vollständig ab.
• Nach dem Sie das Gerät an die vorschriftsmäßig installierte Schutzkontaktsteck-
dose 230V/50 Hz angeschlossen haben, geht die grüne Kontrolleuchte an. Drehen
Sie das Thermostat im Uhrzeigersinn (die grüne Kontrolleuchte ist immer noch
an und die gelbe leuchtet nun auch). Das Gerät beginnt zu heizen. Es braucht
einige Minuten bis das Gerät die maximale Temperatur 300°C erreicht.Wenn die
Temperatur von 300 °C erreicht wurde, beginnt das Gerät automatisch mit dem
Unterbrechen der Hitze.Wenn die Temperatur unter eine bestimmte eingestellte
Grenze senkt, beginnt das Gerät automatisch wieder zu heizen.
• Es gibt eine Timer-Einstellung (der Timer ist maximal auf 15 Minuten einstellbar)
bei diesem Gerät. Er zeigt nur die Betriebszeit an und hat keineVerbindung mit
der elektrischen Funktion. Sie können den Timer auf der rechten Seite auf die
gewünschte Zeit einstellen.Wenn die Zeit abgelaufen ist und die Einstellung
beendet ist, wird das Gerät Sie mit einem Ton „Ting“, darauf hinweisen, dass die
Zeit abgelaufen ist und die Produktion abgeschlossen ist.
• Halten Sie während der Aufheizzeit die Backächen geschlossen.
• Öffnen Sie den Deckel, stecken sie den Holzspieß in die Kerbe ein, geben Sie den
Teig in die Mitte der Backäche und legen sie dort das Würstchen. Der Einfüll-
vorgang sollte rasch erfolgen, da sonst das Gebäck nicht gleichmäßig braun wird.
• Mit dem Regler können Sie die gewünschte Backtemperatur einstellen.Wird ihr
Gebäck zu dunkel, drehen Sie den Regler auf eine niedrigere Stufe.
• Erlischt die Kontrollleuchte, ist der Backvorgang beendet. Die Backzeit hängt
vom individuellen Geschmack ab. Das Gebäck ist aber meistens dunkel, wenn die
Heizkontrollleuchte erneut erlischt. Die Betriebskontrollleuchte bleibt an und
zeigt an, dass das Gerät im Betreib ist.
• Deckel öffnen und das fertige Gebäck entnehmen. Keine scharfen oder schnei-
denden Gegenstände benutzen, so dass die Beschichtung der Backächen nicht
beschädigt wird.
• Fetten Sie die Backächen, nach den einzelnen Backvorgängen, nach Bedarf er-
neut ab.
• Die Backächen sollten in den Backpausen immer geschlossen sein.
• Möchten Sie den Betrieb beenden, ziehen Sie den Stecker (ziehen Sie am Stecker,
nicht am Kabel) aus der Steckdose. Die Kontrollleuchten gehen aus.
Rev. 15.03.2017 Rev. 15.03.2017

expondo.de
USER MANUAL
POPSICLE WAFFLE MAKER
7
RCWM-1500-S
I.TECHNICAL PARAMETER
Name RCWM-1500-S
Voltage 230V
Power 1,55 kW
Dimension 340*410*295 mm
Timer max 15min
2. SAFETY INSTRUCTIONS
Please read this manual carefully before operating the unit and keep manual an invoice
for future reference and if possible keep the cardboard with inner packages.
• Please avoid direct exposure of sunlight and moisture (do not immerse in liquids)
and avoid sharp edges. Do not use the unit with wet hands. If the unit became
wet or damp, please plug off the mains plug immediately (pull the plug, not the
cable).
• Turn the unit off and pull in any case the plug out of the socket (pull the plug, not
the cable), when the device is not operated, for cleaning purposes or in case of
failure.
• Do not leave the appliance unattended while it is operating. If you leave the wor-
king place, please turn the device off or pull the plug out off the socket (pull the
plug, not the cable).
• Regularly check unit and cable for damages. Do not operate the device, when it is
damaged.
• For the security of your children do not leave packaging parts unattended (plastic
bags, cardboard, polystrene etc.). Do not allow children to play with foil.There is
danger of suffocation!
• Do not operate the unit with an external timer or separate remote system.
• The grids and the lid are getting very hot (Danger of burning!). Only touch the
handle.
• Place the unit on a heat resistant basis!
• To prevent heat congestion, do not place the unit below e. g. a cupboard. Make
sure there is sufcient free space!
• Please be careful steam emits, when the grids are opened.
• Do not operate the unit near or below curtains or other ammable materials!
3. OPERATING THE UNIT
Please read and understand these instructions carefully before operating the device
and keep it for future reference. If this device will be passed to third parties, the ma-
nual must be passed on too.
1. Season the grids with cooking spray or vegetable oil before you use the unit for
the rst time.
Rev. 15.03.2017

8 9
5. CLEANING AND MAINTENANCE
• Pull the main plug (pull the plug, not the cable) and let the unit cool down.
• Remove crumbs and residues from grids and edges.
• Clean the unit only with a damp cloth.
• Do not use any aggressive detergents.
• Never immerse the unit into water!
6. REGULAR CONTROL OF THE DEVICE
Control regularly that the device doesn´t present any damage. If it should be the case,
please contact your customer service to solve the problem.
What to do in case of problem?
Please contact your customer service and join following information:
• Invoice number and serial number (the latest is to be found on the technical
plate on the device)
• If relevant, a picture of the damaged, broken or defective part
• It will be easier for your customer service clerk to determinate the source of
the problem if you make a detailed and precise description of the matter.A void
formulations like “the device doesn´t heat”, which may mean that it doesn´t heat
enough or even not at all.Though, those two possibilities have a different causati-
on!
• Still indicate the performance of the lights to facilitate the diagnosis: Does the
green light get on when you turn on the device? Does the orange light turn on
when you set the temperature?
The more detailed your information, the quicker the customer service will be able to
answer your problem rapidly and efciently!
CAUTION: Never open the device without the authorization of your customer ser-
vice. This can lead to a loss of warranty!
2. Operate the unit with closed grids approx. 10 minutes (see operation of the
unit).After use clean the unit with a wet dishcloth.
4. INSTRUCTION
• Please unwrap completely the power cord.
• Plug in socket, green indication light on, turn on thermostat clockwise, green
indication light is on, yellow indication light is on as well, means equipment starts
to heat.When temperature goes up to setting temperature, the equipment stops
heating automatically.When temperature drops down to certain temperature
data, the equipment restarts to heat. It runs repeatedly in this way to make sure
temperature is constant within working temperature range. It needs several
minutes from pressing power switch to the temperature of oven goes up to its
maximum 300°C.When temperature of this equipment goes up to 300°C, the
device will stop heating.
• Adjust the timer on right side (the range of setting time is 0~15 minutes, opera-
tor can set time with their own).When time is to the setting one, the oven will
give out a sound “Ting” to point out operator that time is up, the production is
nished. Then operator can make other food. When all food is nished, operator
should cut off electricity.Timer shows only working time and does not affect into
electric functions of the device.
• Please keep the grids closed during heat-up.
• Open the lid, insert the stick into the groove and pour dough onto the centre
of the lower grid and place the hot-dog sausage into it. Please do this procedure
rather fast, because otherwise the products will not become evenly brown.
• You can choose the required baking temperature with the controller. If the pro-
ducts are too dark please turn the controller to a lower level.
• User can make time setting according to his own preferences. Generally, the
more time lasts, the darker products will be. However, products will be usually
brown when the heating control lamp will turn off again. Power control lamp will
still be turned on.
• Open the lid and take out the baked products. Do not use sharp or cutting tools,
to prevent damages of the grids.
• If necessary, lubricate the grids with cooking spray or vegetable oil again.
• When baking is completed, please always close the grids, until the next baking
procedure.
• If you want to stop operating, please pull off the plug (pull the plug, not the cable)
out of the socket.The indication light will go off.
Please do not eat the rst products!
Rev. 15.03.2017 Rev. 15.03.2017

expondo.de
INSTRUKCJA OBSŁUGI
OPIEKACZ DO CORN DOGÓW
11
RCWM-1500-S
1. DANE TECHNICZNE
Model RCWM-1500-S
Napięcie 230V
Moc 1,55 kW
Wymiary 340*410*295 mm
Programator zegarowy maksymalnie15min
2. WSKAZÓWKI BEZPIECZEŃSTWA
Przed uruchomieniem urządzenia prosimy o bardzo dokładne przeczytanie niniejszej
instrukcji, a następnie o zachowanie jej wraz z fakturą i w miarę możliwości z karto-
nem i opakowaniem wewnętrznym.
• Prosimy chronić urządzenie przed bezpośrednim promieniowaniem słonecznym,
wilgocią (w żadnym wypadku nie należy zanurzać urządzenia w cieczy) oraz
uderzeniem o ostre krawędzie. Urządzenia nie należy dotykać wilgotnymi dłońmi.
W przypadku zawilgotnienia lub zamoczenia urządzenia należy natychmiast
wyciągnąć wtyczkę z gniazdka (należy ciągnąć za wtyczkę, a nie za kabel).
• W przypadku, gdy urządzenie nie jest używane, w celu jego wyczyszczenia lub w
przypadku awarii należy wyłączyć urządzenie i zawsze wyciągnąć wtyczkę z gniaz-
da wtykowego (należy ciągnąć za wtyczkę, a nie za kabel).
• Nie należy użytkować urządzenia bez nadzoru. W razie opuszczenia miejsca wy-
konywania prac należy zawsze wyłączyć urządzenie i/lub wyciągnąć wtyczkę z
gniazda wtykowego (należy ciągnąć za wtyczkę, a nie za kabel).
• Należy regularnie sprawdzać urządzenie i kabel pod kątem widocznych
uszkodzeń. Prosimy nie używać uszkodzonego urządzenia.
• Ze względu na bezpieczeństwo Państwa dzieci nie należy pozostawiać w ich
zasięgu elementów opakowania (torebek plastikowych, kartonów, styropianu itd.)
Nie należy zezwalać małym dzieciom na zabawę folią. Istnieje niebezpieczeństwo
uduszenia.
• Urządzenia nie należy obsługiwać za pomocą zewnętrznego przełącznika zegaro-
wego lub oddzielnego systemu zdalnego sterowania.
• Powierzchnie opiekające oraz pokrywa bardzo się nagrzewają
(niebezpieczeństwo oparzenia). Należy chwytać tylko za uchwyt.
• Urządzenie należy ustawić na podłożu odpornym na działanie wysokiej tempera-
tury!
• W celu uniknięcia nagromadzenia się ciepła, urządzenia nie należy stawiać
bezpośrednio pod przykładowo szafką. Należy zadbać o wystarczającą ilość wol-
nej przestrzeni!
• Podczas otwierania powierzchni opiekających należy uważać na wydostającą się
parę.
• Prosimy nigdy nie używać urządzenia w pobliżu lub pod ranami oraz w pobliżu
innych materiałów palnych!
Rev. 15.03.2017

12 WWW.CATERINGROYAL.DE 13
• Otworzyć pokrywę i wyjąć gotowe produkty. Nie należy używać ostrych lub
przecinających przedmiotów, aby nie uszkodzić powłok, którymi pokryte są po-
wierzchnie opiekające.
• Po zakończeniu pieczenia, jeżeli będzie to konieczne, należy ponownie natłuścić
powierzchnie opiekające.
• Podczas przerw w trakcie pieczenia powierzchnie opiekające powinny zawsze
pozostawać zamknięte.
• W przypadku chęci zakończenia użytkowania urządzenia należy wyciągnąć wtycz-
kę z gniazda wtykowego (należy ciągnąć za wtyczkę, a nie za kabel). Lampki kon-
trolne wyłączą się.
5. CZYSZCZENIE I KONSERWACJA
• Wyciągnąć wtyczkę z gniazdka (należy ciągnąć za wtyczkę, a nie za kabel) i po-
zwolić, by urządzenie wystygło.
• Za pomocą pędzelka należy usunąć okruszki lub pozostałości z powierzchni opie-
kających i brzegów urządzenia.
• Urządzenie należy czyścić tylko lekko zwilżoną ściereczką.
• Nie należy stosować żrących środków czystości.
• Nie należy zamaczać urządzenia w wodzie!
6. REGULARNA KONTROLA URZĄDZENIA
Należy regularnie sprawdzać, czy elementy urządzenia nie są uszkodzone. Jeżeli ele-
menty te będą uszkodzone, to należy zwrócić się do sprzedawcy z prośbą o ich na-
prawę.
Co należy zrobić w przypadku pojawienia się problemu?
Należy skontaktować się ze sprzedawcą i przygotować następujące dane:
• Numer faktury oraz numer seryjny (nr seryjny podany jest na tabliczce znamio-
nowej).
• Ewentualnie zdjęcie niesprawnej części.
• Pracownik serwisu jest w stanie lepiej ocenić, na czym polega problem, jeżeli
opiszą go Państwo w sposób tak precyzyjny, jak jest to tylko możliwe. Sformu-
łowania, takie jak np. „urządzenie nie grzeje“ mogą być dwuznaczne i oznaczają
zarówno, że urządzenie grzeje za słabo lub w ogóle nie grzeje. Są to jednak dwie
różne przyczyny usterek!
• Prosimy podawać zawsze informacje o stanie lampek kontrolnych, gdyż w znacz-
nym stopniu ułatwi to diagnozę: Czy w momencie załączenia urządzenia, zapala
się zielona lampka kontrolna? Czy w momencie ustawiania temperatury zapala się
pomarańczowa lampka kontrolna?
UWAGA: Nigdy nie wolno otwierać urządzenia bez konsultacji z serwisem klienta.
Może to prowadzić do utraty gwarancji!
3. URUCHAMIANIE URZĄDZENIA
Przed użyciem prosimy o staranne przeczytanie niniejszej instrukcji obsługi, a następ-
nie o przechowywanie jej w bezpiecznym miejscu. W przypadku przekazania artykułu
innym osobom należy dołączyć również niniejszą instrukcję.
• Przed pierwszym użyciem powierzchnie opiekające należy lekko natłuścić.
• Urządzenie z zamkniętymi powierzchniami opiekającymi powinno pracować
przez ok. 10 minut (patrz użytkowanie urządzenia). Następnie należy je przetrzeć
wilgotną ściereczką.
4. UŻYTKOWANIE URZĄDZENIA
• Prosimy całkowicie rozwinąć kabel.
• Po podłączeniu urządzenia do zainstalowanego zgodnie z przepisami gniazdka
wtykowego 230V/50Hz zapali się zielona lampka kontrolna. Należy przekręcić
termostatem zgodnie z ruchem wskazówek zegara (zielona lampka kontrolna
nadal pozostaje zapalona, a dodatkowo zapala się również żółta). Urządzenie
zaczyna się nagrzewać. Potrzebuje ono kilkunastu minut do chwili, gdy tempera-
tura gofrownicy osiągnie maksymalną wartość 300°C. Gdy temperatura osiągnie
wartość 300°C, urządzenie automatycznie przestanie grzać.
• Gdy temperatura spadnie poniżej określonej ustalonej granicy, urządzenie zacznie
się automatycznie ponownie nagrzewać.
• Urządzenie posiada możliwość ustawienia programatora zegarowego (progra-
mator zegarowy można ustawić na maksymalnie 15 minut). Wyświetla on tylko
czas użytkowania i nie ma wpływu na działanie funkcji elektrycznych. Na progra-
matorze zegarowym po prawej stronie można ustawić pożądany czas. Po upływie
wybranego czasu i zakończeniu ustawienia urządzenie wyda dźwięk „Ting“ sygna-
lizując, że czas minął i przygotowywanie produktu zakończyło się.
• Na czas nagrzewania się urządzenia powierzchnie opiekające powinny pozosta-
wać zamknięte.
• Otworzyć pokrywę, włożyć patyczek w wyżłobienie, nanieść ciasto na środek
powierzchni opiekającej i następnie umieścić tam parówkę. Proces napełniania
powinien być szybki, ponieważ w przeciwnym razie wyroby nie będą równomier-
nie brązowe.
• Za pomocą regulatora można ustawić pożądaną temperaturę pieczenia. Jeżeli cia-
sto po upieczeniu jest zbyt ciemne należy przekręcić regulator na niższy stopień.
• Zgaśnięcie lampki kontrolnej oznacza zakończenie procesu pieczenia. Czas pie-
czenia zależy od indywidualnych upodobań. Jednakże wyroby są zwyczajnie brą-
zowe, gdy lampka kontrolna grzania ponownie zgaśnie. Lampka kontrolna zasilania
pozostaje zaświecona i wskazuje, że urządzenie pracuje.
Prosimy nie spożywać pierwszych wyrobów!
Rev. 15.03.2017 Rev. 15.03.2017
1. DETTAGLI TECNICI
Modello RCWM-1500-S
Alimentazione 230V
Alimentazione 1.55 kW
Dimensioni 340*410*295 mm
Timer max. 15min
2. NORME DI SICUREZZA
Leggere attentamente le istruzioni d`uso prima di utilizzare l`apparecchio e conser-
varle insieme alla fattura. Conservare inoltre anche il cartone di imballaggio col pac-
chetto interno.
• Si prega di evitare che l`apparecchio venga a contatto con un` umidita‘ eccessiva,
coi raggi solari oppure con oggetti e strumenti taglienti e non immergere mai lo
strumento nei liquidi. Non utilizzare l‘apparecchio con le mani umide. Nel caso
l`apparecchio sia venuto a contatto con liquidi o umidita‘ staccare immediata-
mente la spina di corrente elettrica (tirarla dalla presa e non dal cavo).
• In caso insorgano dei problemi o vogliate semplicemente pulire l`apparecchio
spegnetelo sempre e staccate lo spinotto dalla presa (non tirare dal cavo ma dalla
presa) quando non utilizzate l`apparecchio.
• Non azionate l`apparecchio senza prestare attenzione alle istruzioni d`uso.
Se lasciate momentaneamente il posto di lavoro si prega di spegnere sempre
l`apparecchio e di staccare lo spinotto dalla presa di corrente (tirare dalla spina e
non dal cavo).
• Esaminare regolarmente il cavo e l`apparecchio per vericare che non abbiano
subito danni. Non utilizzare l`apparecchio in caso sia danneggiato.
• Per la sicurezza dei vostri bambini vi consigliamo di non lasciare gli elementi di
imballaggio dello strumento (sacchetti di plastica, cartone, polistirolo ecc.) in
posti facilmente accessibili. Non lasciare che i bambini giochino con le pellicole
di imballaggio. Pericolo di soffocamento.
• Non utilizzare il dispositivo con un timer non omologato o con un sistema di
comando a distanza separato.
• Le superci di cottura e il coperchio diventano molto caldi (pericolo di ustione!).
Toccare soltanto il manico.
• Disporre l‘apparecchio su una base resistente al calore!
• Per per evitare un accumulo di calore non disporre l`apparecchio diretta-
mente sotto ad un armadio. Lasciare uno spazio libero sufciente intorno
all`apparecchio!
• Fare attenzione al vapore che fuoriesce una volta aperte le superci di cottura.
• Non utilizzare l`apparecchio vicino o sotto stoffe, tende o altri materiali incendia-
bili!
15
expondo.de
ISTRUZIONI D‘USO
PIASTRA PER WAFFLE SU STECCO
RCWM-1500-S
Rev. 15.03.2017

16
1. Prima di utilizzare lo strumento ungere leggermente le superci di cottura.
2. Mantenere chiuse le superci di cottura per circa 10 minuti dall`accensione
dell`apparecchio (vedere la voce uso dell‘apparecchio). Pulire quindi con un pan-
no umido.
Non mangiare il primo Wafe prodotto!
4. UTILIZZO DELL‘APPARECCHIO
• Svolgere il cavo completamente sulla supercie.
• Dopo aver collegato l`apparecchio alla presa di contatto di sicurezza installata
230V/50 Hz, La luce di controllo si illumina. Girare il termostato in senso orario
(la luce di controllo verde è sempre accesa e adesso si illumina anche la luce
gialla).. L‘apparecchio comincia a riscaldare. Dopo alcuni minuti l`apparecchio
raggiunge la temperatura massima di 300°C. Quando la temperatura di 300
°C e‘ stata raggiunta, lo strumento inizia automaticamente a interrompere la
produzione di calore. Quando la temperatura si abbassa sotto un certo limite
l`apparecchio comincia nuovamente a riscaldarsi.
• Questo strumento dispone di un`installazione timer (il timer e‘ installabile manu-
almente no ad un massimo 15 minuti). Indica solo il tempo in cui lo strumento
e‘ in funzione e non ha collegamento elettrico. Potete impostare il timer alla
temperatura voluta. Il timer va impostato sulla parte destra dello strumento. Se
il tempo e‘ scaduto, l`apparecchio emette il suono „Ting“ per segnalare che la
produzione e‘ giunta al termine.
• Durante il processo di riscaldamento tenere chiuse le piastre.
• Aprire il coperchio e mettere lo stecco di legno nell`intaglio. Mettere la pastella
al centro della piastra per wafe. La pastella deve essere posata velocemente sul-
la piastra per evitare che si cuocia in modo non uniforme o che il wafe si bruci.
• Con il regolatore potete impostare la temperatura che desiderate. Se le wafe
diventano troppo scure si prega di abbassare la temperatura.
• Quando la luce di controllo scompare la cottura e‘ terminata. Il tempo di cot-
tura dipende dal proprio gusto personale. Il Wafe diventa scuro quando la luce
di controllo del calore si spegne nuovamente. La luce di funzionamento rimane
accesa ed indica che l‘apparecchio è in funzione.
• Aprire il coperchio e togliere il wafe. Non utilizzare strumenti appuntiti o tagli-
enti per non danneggiare il rivestimento delle piastre.
• Dopo le procedure di cottura ungere la piastra quanto basta.
• Le piastre di cottura dovrebbero essere sempre chiuse quando si cuoce il wafe.
17
• Se non utilizzate piu’ lo strumento, staccate la spina dalla presa di corrente elett-
rica (tirare dalla spina e non dal cavo). Le luci di controllo si spengono.
5. PULIZIA E MANUTENZIONE
• Staccare il cavo di alimentazione (tirare dalla spina, non dal cavo) e lasciare raff-
reddare l`apparecchio.
• Eliminare i resti della cottura dalla piastra per Wafe.
• Pulire l`apparecchio solo con un panno umido.
• Non utilizzare detergenti forti o corrosivi.
• Non immergere l‘apparecchio nell‘acqua!
6. REGOLARE CONTROLLO DELL‘APPARECCHIO
Vericare regolarmente che gli elementi dell‘apparecchio non possiedano danni. In
caso rileviate dei danni contattate il vostro venditore per effettuare le modiche ne-
cessarie.
Cosa fare in caso si verichino problemi?
Contattare il venditore e fornire i seguenti dati:
• Numero di fatturazione e numero di serie (li troverete sulla targhetta del disposi-
tivo)
• Fornire una foto del pezzo difettoso
• Provvedete a descrivere il problema che avete riscontrato nel modo piu` preciso
possibile in modo che il servizio clienti sia in grado di circoscrivere il problema
e di risolverlo. Descrizioni del tipo „l‘apparecchio non riscalda “ possono esse-
re ambigue e signicare che l`apparecchio si riscalda troppo poco o che non si
riscalda per niente. Queste sono tuttavia cause di due disfunzioni ben diverse
dell`apparecchio!
• Comunicare sempre la condizione delle spie per facilitare la diagnosi: si accen-
de la spia verde quando accendete l`apparecchio? Si accende la spia arancione
quando impostate la temperatura?
Piu` dettagliate sono le informazioni da voi fornite, maggiore e‘ l`aiuto che possiamo
fornirvi!
N.B.: Non aprire o smontare mai l`apparecchio senza l`autorizzazione del servizio
clienti. Ciò può condurre ad una perdita della garanzia!
3. MESSA IN FUNZIONE DELL`APPARECCHIO
Si prega di leggere attentamente le istruzioni d`uso e di conservarle in un luogo sicu-
ro. Se cedete questo articolo a terzi, consegnate anche le istruzioni d`uso.
Rev. 15.03.2017 Rev. 15.03.2017
1. DÉTAILS TECHNIQUES
Modèle RCWM-1500-S
Tension 230V
Puissance 1.55 kW
Dimensions 340*410*295 mm
Minuterie max. 15min
2. CONSIGNES DE SÉCURITÉ
Lisez très soigneusement les instructions d‘emploi avant le démarrage de cet appareil.
Conservez la facture et, dans la mesure du possible, les protections intérieures du
carton.
• Veuillez tenir cet appareil à l‘écart des radiations directes du soleil, de toute
surface tranchante et de l‘humidité (ne plongez en aucun cas l‘appareil dans un
quelconque uide). N‘utilisez pas l‘appareil avec des mains humides. Dans le cas
où l‘appareil est humidié, mouillé ou inondé, débranchez immédiatement la prise
électrique (en tirant sur la prise et non le câble).
• En cas de panne, nettoyage, ou non-utilisation de l‘appareil, éteignez le et débran-
chez l‘alimentation en tirant sur la prise (et en aucun cas sur le câble directe-
ment).
• Veillez à ne pas allumer l‘appareil de manière accidentelle. À chaque fois que
vous quittez votre lieu de travail, veillez à toujours éteindre la machine en tirant
sur la prise.
• Vériez régulièrement l‘état de la machine et des câbles. Veuillez ne pas faire
fonctionner un appareil endommagé.
• An de protéger vos enfants, veillez à ne pas laisser des parties de l‘emballage
(sac plastique, carton, polystyrene) à leur portée. Ne les laissez pas jouer avec les
lms plastiques. Il existe un danger d‘asphyxie.
• Ne pas utiliser l‘appareil avec une minuterie ou un système d‘activation à dis-
tance. Les surfaces de cuisson et les protections deviennent très chaudes (danger
de brûlure !). Ne saisissez l‘appareil que par ses poignées.
• Ne placez l‘appareil que sur une surface réfractaire!
• Pour éviter que la chaleur ne devienne trop intense, évitez de placer l‘appareil
directement en-dessous d‘une armoire ou d‘un endroit conné. Choisissez un
espace sufsamment aéré et espacé.
• Faites attention à la vapeur émanant des plaques de cuisson lors de l‘ouverture
du coffret.
• Il est IMPÉRATIF de ne jamais placer le gaufrier à épi prés ou en dessous de ri-
deaux ou autre matériau inammable!
3. DÉMARRAGE DE L‘APPAREIL
Lisez attentivement ce manuel d‘utilisation et conservez-le dans un endroit sûr.
19
expondo.de
MANUEL D‘UTILISATION
GAUFRIER EN ÉPI
RCWM-1500-S
Rev. 15.03.2017

20
1. Avant la première utilisation, veuillez enduire de matière grasse les plaques de
cuisson.
2. Chauffez l‘appareil avec le coffret fermé pendant une dizaine de minutes (Cf
„UTILISATION DE L’APPAREIL“). Puis, frottez la machine à l‘aide d‘un chiffon
humide.
Ne consommez/mangez pas votre première réalisation!
4. UTILISATION DE L‘APPAREIL
• Veuillez dérouler le câble de toute sa longueur.
• Branchez l’appareil à une prise conforme aux normes de sécurité (230V/50Hz).
Une fois le gaufrier branché, le voyant vert (témoin de fonctionnement) s’allume
Tournez le thermostat dans le sens des aiguilles d‘une montre (le témoin vert est
toujours allumé et un autre de couleur jaune s‘allumera dès lors). Cela signie
alors que l‘appareil commencera à chauffer. Il faut patienter quelques minutes
pour que la température maximale de 300°C soit atteinte. Lorsque la tempéra-
ture des plaques chauffantes atteint 300°C, l‘appareil interrompra l‘afux de
chaleur. Si la température redescend en-dessous d‘une certaine limite, l‘appareil
recommencera à chauffer.
• L‘appareil dispose d‘une minuterie (Elle peut être réglée jusqu‘à 15 minutes ma-
ximum). Celle-ci vous sert à gérer le temps de cuisson. Elle n’est pas reliée à la
fonction électrique de l’appareil et n’arrête pas ellemême la cuisson.Tournez le
bouton de la minuterie vers la droite pour programmer le temps désiré. Lorsque
le temps est écoulé et que le bouton de la minuterie est revenu au point de
départ, l‘appareil émet un son („Ting“) indiquant que la cuisson est terminée.
• Maintenez l’appareil fermé pendant la cuisson (la plaque supérieure posée sur la
plaque inférieure).
• Ouvrez le coffret, placez les baguettes en bois dans les rainures, versez la pâte à
l‘intérieur des rainures de la plaque de cuisson et placez les saucisses par-dessus.
Veuillez effectuer le remplissage rapidement sinon vos réalisations n‘auront pas la
même cuisson (brunissage différent).
• Grâce au régulateur, vous pouvez ajuster la température à la chaleur que vous
souhaitez. Si votre pâtisserie est trop foncée, diminuez la température de chauffa-
ge grâce au régulateur de température.
• Lorsque le témoin de chauffage s‘éteint, la cuisson est terminée. Le temps de
cuisson dépend du goût désiré et est propre à chacun. Si entre-temps, le témoin
de chauffage s‘allume et se ré-éteint de nouveau, votre pâtisserie sera plus cuite
encore (plus foncée) Le témoin d‘activité de l‘appareil (vert) reste allumé et in-
dique que l‘appareil est alimenté (et pas forcément en train de chauffer).
21
• Ouvrez, ensuite, le coffret supérieur et prélevez vos réalisations. An de ne pas
endommager le revêtement des plaques de cuisson, n‘utilisez jamais d‘objets ou
de bords tranchants et/ou coupants.
• Graissez les surfaces de cuisson après chaque utilisation et chaque cuisson.
N‘hésitez pas à le faire plus que nécessaire.
• Les plaques de cuisson doivent toujours être refermées lorsque l‘appareil n‘est
pas utilisé, même s‘il s‘agit d‘une courte interruption.
• Si vous n‘avez plus besoin de vous servir de l‘appareil, débranchez l‘appareil (en
tirant sur la prise et non le câble). Les témoins d‘alimentation et de chauffage
s‘éteindront alors.
5. NETTOYAGE ET ENTRETIEN
• Débranchez l‘appareil (tirez sur la prise et non sur le câble) et laissez refroidir
l‘appareil.
• Balayez les miettes et les restes restants sur les plaques de cuisson et sur les
bords.
• Ne nettoyez l‘appareil qu‘avec un chiffon légèrement humidié.
• N‘utilisez pas de produits agressifs ou d‘objets pouvant rayer ou égratigner les
surfaces de cuisson.
• Ne plongez pas l‘appareil dans l‘eau!
6. EXAMEN RÉGULIER DE L‘APPAREIL
Contrôlez régulièrement le bon état des différents éléments de l‘appareil. Si un élé-
ment devait être abîmé, contactez le vendeur an de trouver une solution.
Que faire en cas de problème?
Prenez contact avec votre vendeur et préparez les éléments suivants:
• Vos numéros de série et de facture (que vous trouverez sur la plaque signalé-
tique)
• Une photo de l‘élément endommagé (si tel est le cas)
• Plus vos descriptions seront précises, plus votre conseiller sera en mesure de
comprendre le problème et de vous aider à le résoudre. Les formulations trop
générales comme p. ex. „l‘appareil ne chauffe pas“ peuvent conduire à des ma-
lentendus (l‘appareil ne chauffe pas du tout? pas assez?) Les causes des défauts
peuvent en effet être différentes selon le problème!
• Indiquez toujours l‘état / le fonctionnement ou non des voyants lumineux an
de faciliter le diagnostic: La lumière verte s‘allume-t-elle lorsque vous allumez
l‘appareil? Le voyant orange s‘allume-t-il lorsque vous sélectionnez une tempéra-
ture?
Plus détaillées seront vos indications, plus rapidement nous pourrons vous aider!
ATTENTION: N‘ouvrez jamais l‘appareil sans l‘accord du service client. Cela peut
entraîner une perte de garantie!
Au cas oú vous transmettriez cette machine à quelqu'un d'autre, veuillez joindre ce
manuel également.
Rev. 15.03.2017 Rev. 15.03.2017

1. DETALLES TÉCNICOS
Modelo RCWM-1500-S
Tensión nominal 230V
Potencia nominal 1.55 kW
Medidas 340*410*295 mm
Duración max. 15min
2. INDICACIONES DE SEGURIDAD
Antes de poner en marcha este aparato, lea atentamente el manual de instrucciones y
guárdelo, incluyendo la factura. y en lo posible el cartón de embalaje, también.
• Por favor mantenga alejado el aparato de la luz solar directa, humedad y de bor-
des alados ( por ningún motivo sumergirlo en líquido). No utilice el aparato con
manos húmedas. En caso de que el aparato se humedezca o se moje, desenchúfe-
lo inmediatamente (tire del enchufe y no del cable).
• En caso de avería, limpieza o no utilización del aparato, desconéctelo y tire
siempre del enchufe, no del cable.
• Nunca utilice el aparato sin supervisión, y en caso de abandonar el lugar de tra-
bajo, por favor siempre deje el aparato desconectado.
• Para asegurarse que no haya ningún daño revise periódicamente el aparato y el
cable. Nunca utilizarlo si está dañado.
• Para seguridad de sus niños no deje a su alcance restos del embalaje ( Bolsas de
plástico, cartón o espuma de poliestireno, etc.). No deje jugar niños pequeños
con láminas de plástico, ya que existe riesgo de asxia.
• No utilice el aparato con un reloj conmutador o algún sistema separado de con-
trol remoto.
• Las supercies de cocción y la tapa se calientan mucho (riesgo de quemaduras).
Por esta razón, siempre manipúlelas del mango.
• Coloque el aparato sobre un soporte resistente al calor.
• Para evitar acumulaciones de calor, nunca coloque el aparato bajo un mueble y
procure un lugar espacioso y libre!
• Al abrir la supercie de cocción tenga cuidado con el escape de vapor.
• Nunca utilice el aparato cerca de jardines o debajo de materiales inamables.
3. PUESTA EN MARCHA DEL APARATO
Por favor lea atentamente el manual de instrucciones y guárdelo en un lugar seguro.
En caso de transferir este artículo, adjunte este manual de instrucciones también.
23
expondo.de
MANUAL DE INSTRUCCIONES
GOFRERA CON FORMA DE ESPIGA
RCWM-1500-S
Rev. 15.03.2017

24
1. Antes del primer uso engrase levemente las supercies de cocción.
2. Ponga en marcha el aparato con las placas cerradas durante aproximadamente 10
minutos ( lea el uso del aparato). Luego limpie la supercie con un paño húmedo,
una vez enfriado.
¡No consumir el primer gofre!
4. USO DEL APARATO
• Desenrolle el cable completamente
• Después de que haya conectado el aparato a una toma de corriente alterna de
230V/50 Hz, dotada de puesta a tierra y debidamente instalada, se enciende la
lámpara de control verde. Gire el Termostato en el sentido de las agujas del reloj
( la lámpara de control verde permanece encendida y ahora se enciende también
la amarilla). El aparato empieza a calentar y necesita algunos minutos hasta que
haya alcanzado la temperatura máxima de 300°C. Cuando se alcanza la tempe-
ratura de 300°C, automáticamente, el aparato comienza con la interrupción del
calor. Cuando la temperatura, bajo un determinado límite seleccionado, se redu-
ce, el aparato comienza automáticamente a calentar nuevamente.
• Este aparato cuenta con un temporizador (el cual se puede ajustar hasta un má-
ximo de 15 minutos), el cual solo muestra el tiempo de funcionamiento y no po-
see una conexión con la función eléctrica. En el lado derecho del temporizador
Usted puede ajustar la duración deseada. Cuando haya terminado la duración del
tiempo deseado, el aparato indicará con un sonido „Ting“ que el tiempo se agotó
y que la producción se ha completado.
• Durante el calentamiento mantenga las supercies de cocción cerradas
• Abra la tapa e introduzca el palillo en la ranura, ponga la masa en el centro y
ponga el embutido. El proceso de llenado debe efectuarse de forma rápida, sino
el bollo no se dorará de forma pareja.
• Con el indicador usted puede ajustar la cocción a una temperatura deseada. En
caso de que el horneado quede muy oscuro, gire el indicador a una temperatura
más baja.
• Al apagarse la lámpara de control, termina el proceso de horneado. El tiempo
de horneado depende del gusto individual. Normalmente el horneado se pone
oscuro cuando la lámpara de control del horno se vuelve a apagar. La lámpara de
control se queda prendida e indica que el aparato está en funcionamiento.
• Abra la tapa y retire el horneado ya preparado. Para no dañar el revestimiento de
la supercie horneada, no utilice objetos cortantes o alados.
• Engrase las supercies de cocción tras cada proceso de cocción, y de ser necesa-
rio vuélvalas a engrasar.
25
• En cada pausa de horneado las supercies de cocción deben permanecer siemp-
re cerradas.
• Si desea apagar el aparato tire del enchufe que va a la toma de corriente y no del
cable. Las lámparas de control se apagarán.
5. LIMPIEZAY MANTENCIÓN
• Tire del enchufe que va a la toma de corriente y no del cable y deje que el apara-
to se enfríe.
• Retire con una brocha las migas o restos queden en las supercies de horneado
o en las orillas.
• Limpie el aparato solo con un paño levemente humedecido.
• No utilice productos de limpieza abrasivos
• No sumerja el aparato en agua!
6. REVISIÓN PERIÓDICA DEL APARATO
Revise periódicamente si elementos del aparato presentan daños. En caso de ser así,
diríjase a su vendedor para corregir posibles defectos.
¿Qué hacer en caso de problema?
Prenez contact avec votre vendeur et préparez les éléments suivants:
• Póngase en contacto con su vendedor y tenga a mano las siguientes informacio-
nes:
• Factura y el número de serie (este último lo encuentra en la placa del modelo)
• En caso necesario, una foto de la pieza defectuosa
• Su técnico de servicio puede delimitar la razón del problema, siempre y cuando
usted pueda describirlo de la forma más precisa. Formulaciones, tales como; „El
aparato no calienta“ pueden ser mal interpretadas y signicaría que el aparato
calienta muy poco o nada. En este caso se trataría de dos causantes de fallas
diferentes.
• Para facilitar el diagnóstico, siempre mencione el estado de las lámparas: ¿Se enci-
ende la lámpara verde, cuando usted enciende el aparato?, ¿se enciende la lámpa-
ra naranja, cuando usted regula la temperatura?
Cuanto más detalladas sean sus Informaciones, más rápido se le podrá proponer una
solución!
ATENCIÓN: Nunca abra el aparato, sin antes, consultar a su servicio al cliente. Esto
puede causar la anulación de la garantía.
Rev. 15.03.2017 Rev. 15.03.2017
26 27
Rev. 15.03.2017
DE
Hiermit bestätigen wir, dass die hier in dieser Anleitung aufgeführten Geräte
CE-konform sind.
EN
We hereby certify that the appliances listed in this manual are CE compliant.
FR
Par la présente, nous conrmons que les appareils présentés dans ce mode d´emploi
sont conformes aux normes Ce.
PL
Niniejszym potwierdzamy, że urządzenia opisane w tej instrukcji są zgodne
z deklaracją CE.
IT
Con la presente documentazione si certica che i dispositivi descritti all´interno del
manuale sono conformi alle vigenti norme CE.
ES
Por la presente conrmamos que los dispositivos detallados en este manual son
conformes con las normativas de la CE.

Hersteller an Verbraucher
Sehr geehrte Damen und Herren,
gebrauchte Elektro- und Elektronikgeräte dürfen gemäß europäischer Vorgaben [1] nicht zum unsortierten Siedlungsabfall
gegeben werden, sondern müssen getrennt erfasst werden. Das Symbol der Abfalltonne auf Rädern weist auf die Notwendigkeit
der getrennten Sammlung hin. Helfen auch Sie mit beim Umweltschutz. Sorgen Sie dafür, dieses Gerät, wenn Sie es nicht mehr
weiter nutzen wollen, in die hierfür vorgesehenen Systeme der Getrenntsammlung zu geben.
In Deutschland sind Sie gesetzlich [2] verpichtet, ein Altgerät einer vom unsortierten Siedlungsabfall getrennten Erfassung
zuzuführen. Die öffentlich - rechtlichen Entsorgungsträger (Kommunen) haben hierzu Sammelstellen eingerichtet, an denen
Altgeräte aus privaten Haushalten ihres Gebietes für Sie kostenfrei entgegengenommen werden. Möglicherweise holen die
rechtlichen Entsorgungsträger die Altgeräte auch bei den privaten Haushalten ab.
Bitte informieren Sie sich über Ihren lokalen Abfallkalender oder bei Ihrer Stadt- oder Gemeindeverwaltung über die in Ihrem
Gebiet zur Verfügung stehenden Möglichkeiten der Rückgabe oder Sammlung von Altgeräten.
[1] RICHTLINIE 2002/96/EG DES EUROPÄISCHEN PARLAMENTS UND DES RATES
ÜBER ELEKTRO- UND ELEKTRONIK - ALTGERÄTE
[2] Gesetz über das Inverkehrbringen, die Rücknahme und die umweltverträgliche Entsorgung
von Elektro- und Elektronikgeräten (Elektro- und Elektronikgerätegesetz - ElektroG).
Umwelt- und Entsorgungshinweise
Utylizacja produktu
Produkty elektryczne i elektroniczne po zakończeniu okresu eksploatacji wymagają segregacji i oddania ich do wyznaczonego
punktu odbioru. Nie wolno wyrzucać produktów elektrycznych razem z odpadami gospodarstwa domowego. Zgodnie
z dyrektywą WEEE 2012/19/UE obowiązującą w Unii Europejskiej, urządzenia elektryczne i elektroniczne wymagają segregacji
i utylizacji w wyznaczonych miejscach. Dbając o prawidłową utylizację, przyczyniasz się do ochrony zasobów naturalnych
i zmniejszasz negatywny wpływ oddziaływania na środowisko, człowieka i otoczenie. Zgodnie z krajowym prawodawstwem,
nieprawidłowe usuwanie odpadów elektrycznych i elektronicznych może być karane!
For the disposal of the device please consider and act according to the national and local rules and regulations.
CONTACT
expondo Polska sp. z o.o. sp. k.
ul. Dekoracyjna 3
65-155 Zielona Góra | Poland, EU
e-mail: info@expondo.de
expondo.de
Table of contents
Languages:
Other Royal Catering Waffle Maker manuals

Royal Catering
Royal Catering RCWM-01-E User manual

Royal Catering
Royal Catering RC-WMR01 User manual

Royal Catering
Royal Catering RCWM-2000-E User manual

Royal Catering
Royal Catering RCWM-1300-RE User manual

Royal Catering
Royal Catering RC-WMR01 User manual

Royal Catering
Royal Catering RCPMW-1400K User manual

Royal Catering
Royal Catering RCWM-1400-B User manual

Royal Catering
Royal Catering RCWM-1200-R1 User manual