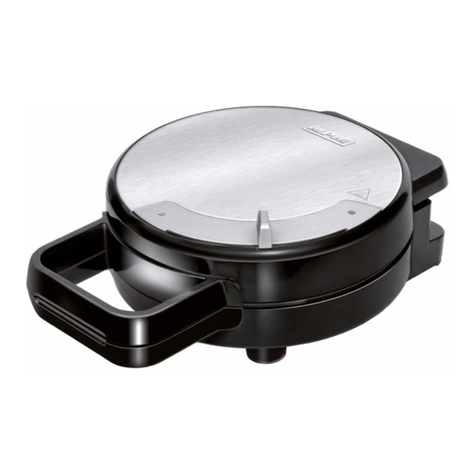
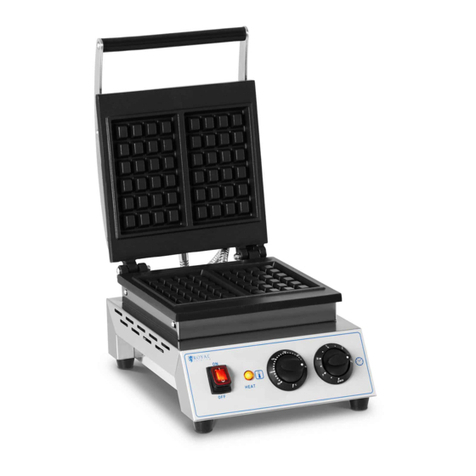
Royal Catering RCWM-1300-RE User manual

expondo.de
BEDIENUNGSANLEITUNG
User manual | Manuel d´utilisation | Istruzioni per l‘uso | Manual de instrucciones | Instrukcja | Návod k použití
RCWM-1300-RE
WAFFELEISEN

3
7
12
17
22
27
32
WWW.CATERINGROYAL.DE
Deutsch
English
Polski
Česky
Italiano
Español
Français
SYMBOLE
3
Lesen Sie die Bedienungsanleitung sorgfältig.
Elektrische Geräte dürfen nicht mit dem Hausmüll entsorgt werden.
Das Gerät entspricht der CE-Erklärung.
Achtung! Heiße Oberäche- Verbrennungsrisiko!
CE
In der vorliegenden Anleitung sind Beispielbilder vorhanden, die von dem tatsächlichen Aussehen der
Maschine abweichen können.
Die originale Anweisung ist die deutschsprachige Fassung. Sonstige Sprachfassungen sind Übersetzungen aus
der deutschen Sprache.
I. SICHERHEITSHINWEISE
Allgemeine Sicherheitshinweise bei der Benutzung von Elektrogeräten:
Um das Verletzungsrisiko durch Feuer oder Stromschlag gering zu halten, bitten wir Sie, einige
grundlegende Sicherheitsanweisungen zu beachten, wenn Sie dieses Gerät verwenden. Bitte lesen Sie diese
Bedienungsanleitung sorgfältig und vergewissern Sie sich, dass keine Fragen offen bleiben. Bewahren Sie
diese Betriebsanleitung bitte sorgfältig in der Nähe des Produktes auf, um bei Fragen auch später noch
einmal nachschlagen zu können. Verwenden Sie stets einen geerdeten Stromanschluss mit der richtigen
Netzspannung (siehe Anleitung oder Produktschild). Sollten Sie bezüglich des Anschlusses Zweifel haben,
lassen Sie ihn durch einen qualizierten Fachmann überprüfen. Benutzen Sie niemals ein defektes Stromkabel!
Öffnen Sie dieses Gerät nicht in feuchter oder nasser Umgebung, ebenso nicht mit nassen oder feuchten
Händen.Außerdem sollten Sie das Gerät vor direkter Sonneneinstrahlung schützen. Betreiben Sie das Gerät
nur an geschützten Orten, sodass niemand auf Kabel treten, über sie stürzen und/oder sie beschädigen kann.
Sorgen Sie darüber hinaus für ausreichende Luftzirkulation, wodurch die Kühlung des Gerätes gewährleistet,
und Wärmestaus vermieden werden. Ziehen Sie vor der Reinigung dieses Gerätes den Netzstecker und
benutzen Sie zur Reinigung ein feuchtes Tuch. Vermeiden Sie den Einsatz von Putzmitteln und achten Sie
darauf,dass keine Flüssigkeit in das Gerät eintritt,bzw. darin verbleibt.Das Innere dieses Gerätes enthält keine
für den Benutzer wartungspichtigen Teile. Überlassen Sie Wartung, Abgleich und Reparatur qualiziertem
Fachpersonal. Im Falle eines Fremdeingriffs verfällt die Garantie!
II. SICHERHEITSHINWEISE
1. Lesen Sie diese Gebrauchsanweisung vor Inbetriebnahme des Gerätes sorgfältig durch! Beachten Sie
alle Sicherheitshinweise, um Schäden durch falschen Gebrauch zu vermeiden!
2. Bewahren Sie die Gebrauchsanleitung für den weiteren Gebrauch auf. Sollte dieses Gerät an Dritte
weitergegeben werden, muss die Gebrauchsanleitung mit ausgehändigt werden.
3. Verwenden Sie das Gerät nur für den vorgesehenen Zweck und nur in Innenräumen.
4. Im Falle von unsachgemäßem Gebrauch oder falscher Handhabung kann keine Haftung für eventuell
auftretende Schäden übernommen werden.
5. Vor dem ersten Gebrauch prüfen Sie bitte, ob die Art des Stroms und die Netzspannung mit den
Angaben auf dem Produktschild kompatibel sind.
6. Dieses Gerät ist nicht dafür geeignet, durch Personen, einschließlich Kindern, mit eingeschränkten
physischen, sinnlichen oder geistigen Fähigkeiten, sowie mangelnder Erfahrung und/oder mangelndem
Wissen benutzt zu werden. Als Ausnahme gilt, wenn diese durch eine für ihre Sicherheit zuständige
Person beaufsichtigt werden, oder Gebrauchsanweisungen erhalten haben.
7. STROMSCHLAGGEFAHR! Versuchen Sie niemals, das Gerät selbst zu reparieren. Lassen Sie stattdessen
das Gerät im Störungsfall nur von qualizierten Fachleuten reparieren.
Rev. 10.02.2017
HINWEIS!

4
8. Überprüfen Sie regelmäßig den Netzstecker und das Netzkabel. Sollte das Netzkabel beschädigt
werden, muss es durch den Hersteller, den Kundendienst oder eine ähnliche Person ersetzt werden,
um Gefährdungen zu vermeiden.
9. Verhindern Sie eine Beschädigung des Netzkabels durch Quetschen, Knicken oder Anschlagen an
scharfen Kanten und halten Sie es von heißen Oberächen und offenen Flammen fern.
10. ACHTUNG LEBENSGEFAHR! Tauchen und Halten Sie das Gerät während des Reinigens oder des
Betriebes nie in Wasser oder andere Flüssigkeiten.
11. Öffnen Sie unter keinen Umständen das Gehäuse.
12. Beim Betrieb des Geräts darf weder Heizplatte noch das Gehäuse berührt werden. Es besteht das
Risiko der Verbrennungsverletzungen. Beim Öffnen des erhitzten Geräts ist auf den freigesetzten
Dampf zu achten.
13. Das Gerät sollte weit von leicht entammbaren Stoffen und mindestens 20 cm von den Wänden,
Fenstern etc. aufgestellt werden.
III.TECHNISCHE DETAILS
Produktname Waffeleisen rund LED
Modell RCWM-1300-RE
Artikelnummer 1338
Nennspannung [V]/Frequenz [Hz] 230~ / 50
Leistung [kW] 1,3
Temperaturbereich [°C] 124-230
Größe (L x B x H) [ [mm] 480 x 255 x 300
Abmessungen der Heizplatte (Durchmesser /Höhe) [mm] 180 x 30
Gewicht [kg] 13,8
IV. ANWENDUNGSGEBIET
Elektrisches Waffeleisen ist zur Waffelvorbereitung bestimmt.
Für alle Schäden bei nicht sachgemäßer Verwendung haftet allein der Betreiber.
V. VOR DER ERSTEN BENUTZUNG
Prüfen Sie bei Erhalt der Ware die Verpackung auf Mängel und öffnen Sie diese, falls keine vorhanden sind. Falls
die Verpackung Beschädigungen aufweist, setzen Sie sich innerhalb von 3 Tagen mit der Transportgesellschaft
und Ihrem Vertriebspartner in Verbindung. Dokumentieren Sie die Beschädigungen so gut wie möglich. Stellen
Sie das Paket mit Inhalt nicht über Kopf auf! Sollten Sie das Paket weiter transportieren,halten Sie es aufrecht
und stabil.
VI. ENTSORGUNG DER VERPACKUNG
Es wird darum gebeten, das Verpackungsmaterial (Pappe, Plastikbänder und Styropor) zu behalten, um das
Gerät im Servicefall bestmöglich geschützt zurücksenden zu können!
VII. AUFBAU DES GERÄTES
PLATZIERUNG DES GERÄTES
Stellen Sie das Gerät auf einer trockenen, stabilen, hitzebeständigen Oberäche vertikal auf, damit es sich
beim Betrieb nicht bewegt. Platzieren Sie das Gerät auf einem achen, ebenen Boden, der ausreichend
tragfähig ist, um das Gewicht des Geräts samt seinem Inhalt tragen zu können. In der Nähe des Geräts
dürfen sich keine leicht entammbaren Werkstoffe benden. Stellen Sie das Gerät so auf, dass der Stecker
ständig zugänglich ist. Man sollte sich vergewissern, dass die Stromversorgung des Geräts den Angaben auf
Rev. 10.02.2017 5
Rev. 10.02.2017
dem Typenschild entspricht. Vor dem ersten Gebrauch sind alle Bestandteile auszubauen und zu reinigen. Auf
diese Weise ist das ganze Gerät zu reinigen.
VIII. WIE FUNKTIONIERT DAS GERÄT? – DAS GRUNDPRINZIP
Beschreibung des Geräts
1. Griff
2. Obere Heizplatte
3. Befestigung, die die Drehung ermöglicht
4. Untere Heizplatte
5. Metallgehäuse
6. Einlage
7. Steuerungsfeld mit dem Display
8. Hauptschalter
1
2
3
4
5
6
7
8
Betrieb des Geräts:
1. Das Gerät gem. dem Foto aufstellen. Den Griff in die entsprechende Stellung bringen und mit der
Mutter sichern.
2. Hauptschalter in die „0” -Stellung bringen und das Gerät gründlich reinigen, insbesondere die Heiz-
platten.
3. Stecker in die Steckdose stecken. Hauptschalter in die „I”- Stellung bringen. Es leuchtet die orangen-
gefärbte Kontrollleuchte, die den Beginn der Erhitzung signalisiert.
4. Auf dem Display erscheinen die entsprechenden Zahlwerte, die der Erhitzungszeit entsprechen. Um
die Erhitzungszeit einzustellen ist die „+”-Taste (um die Erhitzungszeit zu verlängern) oder „-” -Tas-
te (um die Erhitzungszeit zu kürzen) gedrückt zu halten. Durch Drücken der „START / STOP” -Taste
auf der rechten Seite des Steuerfeldes lässt sich die Sollzeit einstellen. Die zwei Ziffern auf der rech-
ten Seite sind die Sekunden und die zwei auf der linken Seite die Minuten.Anschließend ist auf dem
Display die gewünschte Temperatur einzustellen. Um das zu tun ist gleichzeitig die „START / STOP”
-sowie „SET”-Taste (Diese Taste wird zur Änderung der Zeit und Temperatur verwendet) zu drücken.
Danach wird die „+” und „-” -Taste gewählt (Temperatur wird in °C angezeigt). Das Gerät verfügt
über eingebauten Speicher. Die Parameter „Temperatur“ und „Betriebszeit“ werden gespeichert und
müssen so nicht vor jeder Einschaltung des Geräts eingestellt werden.
5. Wenn die Temperatur und Zeit bereits eingestellt sind, kann die Zeit gemessen werden. Um das zu
tun ist mit der „SET”-Taste die Zeit einzustellen und die Taste „START / STOP” zu drücken.
6. Die Erhitzung des Geräts wird durch die orangengefärbte Kontrollleuchte signalisiert.Wenn die
Temperatur, den am Steuerfeld vorgegebenen Wert erreicht, wird die grüne Kontrollleuchte aueuch-
ten. Das Gerät hält die vorgegebeneTemperatur automatisch ein. Die Erhitzung des Geräts bis zur
maximalen Temperatur (230°C) dauert ca. 15 Minuten.
7. Greifen Sie dann den Hebel um den obigen Deckel vorsichtig zu öffnen (nach Bedarf sind die Heiz-
platten zu schmieren). Die vorgesehene Menge der Schmiermasse ist auf der unteren Heizplatte zu
verteilen. Danach ist das Gerät zu verschließen und die Masse im Bereich der Heizelemente durch
Drehen des Hebels in die Uhrzeitrichtung zu verteilen. Maximaler Winkeldrehwert der verschlosse-
nen Heizplatten beträgt 180°.
8. Um die fertige Waffel herauszunehmen sind die Heizplatten in die Anfangsstellung zu bringen. Danach
ist der obige Deckel vorsichtig zu öffnen (hohe Temperatur nach der Erhitzung).

6
9. Waffel herausnehmen. Beim Herausnehmen der Waffel darauf achten, die Heizplatten nicht zu
beschädigen.Achtung! Die ersten ein paar Waffeln sollten eher nicht verzehrt werden.
10. Um weitere Waffeln vorzubereiten sollte man dem beschriebenen Verfahren folgen und die
Zeit kontrollieren. Läuft die eingestellte Zeit auf dem Display ab, ertönt ein charakteristischer
ununterbrochener Signalton,der sich durch Drücken der „START/STOP”-Taste oder des Hauptschalters
ausschalten lässt.
11. Nach der Beendigung der Waffelvorbereitung ist der Schalter in die „0”- Stellung zu bringen. Die
Versorgungsquelle ist durch Ziehen des Steckers aus der Steckdose zu trennen.
12. Nach dem Abkühlen des Geräts ist es gründlich zu reinigen.
ACHTUNG: Vor der ersten Inbetriebnahme des Geräts sind die Heizplatten gründlich zu reinigen und zu
fetten, danach sind sie ohne Teig zu erhitzen.Während der Erhitzung des Geräts kann es zu einer geringen
Rauchentwicklung kommen,das ist eine ganz normale Erscheinung. Sorgen Sie lediglich für eine ausreichende
Belüftung. Nach ein paar Minuten ist das Gerät auszuschalten und abzuwarten, bis es sich abkühlt. Danach
sind die Heizplatten zu fetten und anschließend ist das Gerät wieder betriebsbereit.
IX.TRANSPORT UND LAGERUNG
Beim Transport ist das Gerät vor Erschütterung und Stürzen zu sichern. Stellen Sie das Gerät aufrecht und
nicht Kopf über ab. Lagern Sie es in einer gut durchlüfteten Umgebung mit trockener Luft und ohne korrosive
Gase.
X. REINIGUNG UND WARTUNG
• Ziehen Sie vor jeder Reinigung und nach jedem Gebrauch den Netzstecker und lassen Sie das Gerät
vollständig abkühlen.
• Verwenden Sie zum Reinigen der Oberäche ausschließlich Mittel ohne ätzende Inhaltsstoffe.
• Nach jeder Reinigung müssen alle Bestandteile gründlich getrocknet und durch Fetten der Heizplatten
gesichert werden.
• Bewahren Sie das Gerät an einem trockenen, kühlen, vor Feuchtigkeit und direkter Sonneneinstrahlung
geschütztem Ort auf.
• Spritzen Sie das Gerät niemals mit Wasser ab. Es dürfen bei der Reinigung keinerlei Bürsten oder
Utensilien benutzt werden, welche die Geräteoberäche beschädigen können.
XI. REGELMÄSSIGE PRÜFUNG DES GERÄTES
Prüfen Sie regelmäßig, ob Elemente des Gerätes eventuelle Beschädigungen aufweisen. Sollte dies der Fall
sein, darf das Gerät nicht mehr benutzt werden. Wenden Sie sich umgehend an Ihren Verkäufer, um das Gerät
reparieren zu lassen.
Was tun im Problemfall?
Kontaktieren Sie den Verkäufer und bereiten Sie folgende Angaben vor:
• Rechnungs- und Seriennummer (letztere nden Sie auf dem Produktschild)
• Ggf. ein Foto des defektenTeils
• Der Servicemitarbeiter kann das Problem besser erkennen, wenn Sie dieses so präzise wie möglich
beschreiben. Formulierungen wie beispielsweise „das Gerät heizt nicht“ können missverständlich
verstanden werden oder mehrdeutig sein!
ACHTUNG: Öffnen Sie niemals das Gerät ohne Rücksprache mit dem Kundenservice. Dies kann Ihren
Garantieanspruch beeinträchtigen!
Rev. 10.02.2017 expondo.de
USER MANUAL

SYMBOLS
Operation manual must be reviewed.
Never dispose of electrical equipment together with household waste.
This machine complies to the CE declarations.
Attention! Hot surface may cause burns.
CE
Drawings in this manual are for illustration purposes only and in some details may differ from the actual
machine.
The original operation manual is in German. Other language versions are translations from German.
I. SAFETY INSTRUCTIONS
General safety instructions for the use of electrical devices:
To avoid injury from re or electric shock, please follow the basic safety instructions when using this device.
Please read the instructions carefully and make sure that you have understood them well. Please keep this
manual near the equipment to be able to read it at any time.Always use current sources connected to the
ground that also provides the necessary voltage (indicated on the label on the device). If you have any doubt,
let an electrician check that your outlet is properly grounded. Never use a damaged power cable. Do not
open the unit in a damp or wet environment,or if your hands or body are damp or wet.Protect the unit from
solar radiation.Use the device in a protected place to avoid damaging the equipment or putting at risk others.
Make sure the device is able to cool and avoid placing it too close to other devices that produce heat.Before
cleaning, disconnect it from the power source. Use a soft damp cloth for cleaning.Avoid using detergents and
make sure that no liquid enters the unit. No internal element of this device needs to be maintained by the
user. Opening the device without our approval leads to a loss of warranty!
II. GENERAL SAFETY INFORMATION
1. Please read and understand these instructions carefully before using the device! Please observe the
safety guidelines carefully in order to prevent damages through improper use!
2. Please keep this manual available for future reference. If this device is passed on to third parties, the
manual must be passed on with it.
3. Only use this device indoors and for its intended use.
4. We do not offer any warranty for damages resulting from improper use or incorrect operation.
5. Before using this device, make sure whether the main voltage type and current comply with the
indicated data on the type plate.
6. This device is not intended to be used by persons (including children) with limited physical, sensory
or mental capabilities, as well as lack of experience and/or knowledge, unless they are supervised by a
person responsible for their safety or have received instruction from this person as to how the device
is used.
7. ELECTRIC SHOCK HAZARD! Do not attempt to repair the unit yourself. In case of device failures,
repairs must be done by qualied experts.
8. Please check the main plug and power cable regularly. If the power cable for this device is damaged, it
has to be replaced by the manufacturer or its customer service or another qualied person in order
to prevent hazards.
9. Prevent damages to the power cable by avoiding squeezing or bending it or rubbing it on sharp edges.
Also keep the power cable away from hot surfaces and open ames.
10. ATTENTION! DANGER TO LIFE! While cleaning, never immerse the device in water or other liquids.
11. Under no circumstances should the housing be opened
PLEASE NOTE!
7Rev. 10.02.2017
12. When using the device, never touch the heating plate or its enclosure, as they constitute a scalding
hazard.When opening hot device, remember that steam will be released.
13. Place the device away from ammable materials and at least 20 cm from walls, windows, etc.
III.TECHNICAL DATA
Product name Wafe Maker round LED
Model RCWM-1300-RE
Article No. 1338
Voltage [V] / Frequency [Hz] 230~ / 50
Power [kW] 1,3
Temperature range [°C] 124-230
Dimensions (L.xW.xH.) [ mm] 480 x 255 x 300
Dimensions of the heating plate (diameter/height) [mm] 180 x 30
Weight [kg] 13,8
IV. SCOPE OF APPLICATION
The electric wafe iron is intended for the preparation of wafes.
The user is liable for any damage resulting from non-intended use of the device!
V. BERORE THE FIRST USE
Upon receipt of the goods, check the packaging for defects and open the packaging if there are no damages.
If the packaging is damaged, please contact your transport company and distributor within 3 days, and
document the damages as detailed as possible. Do not turn the package upside down! When transporting
the package, please ensure that it is kept horizontal and stable.
VI. DISPOSING OF THE PACKAGING
Please keep all packaging materials (cardboard, plastic tapes and Styrofoam), so that in case of a problem, the
device can be sent back to the service centre in accurate condition!
VII. INSTALLING THE APPLIANCE
Positioning the machine
Place the device on a dry, stable and heat-resistant surface, in a vertical position, so that it does not move
during operation. Place the device on a at and even surface, which can support the weight of the device
and its contents. No ammable materials are permitted near the device. The device is to be located in such
a way that the mains plug is accessible at all times. Make sure that the mains supply is compatible with the
details specied on the rating plate. Before the rst use, dismantle all the components and wash them, as
well as the entire device.
8
Rev. 10.02.2017

VIII. MACHINE OPERATION - BASICS
Description of the device:
1. Handle
2. Upper heating plate
3. Rotary mounting
4. Lower heating plate
5. Metal enclosure
6. Tray
7. Control panel with display
8. Main switch
1
2
3
4
5
6
7
8
Using the device:
1. Assemble the device, as shown in the photo. Place the handle in the desired position and tighten the
nut.
2. Move the main switch to the “0” position and thoroughly clean the device, particularly the heating
plates.
3. Insert the plug into a socket and move the main switch to the “I” position, the orange indicator lamp,
signalling that heating is in progress, will go on.
4. The display shows digits indicating the heating time. In order to set the heating time, press and hold
the “+” buttons (in order to expand the heating time) or the “-“button (in order to reduce it), then
press the “START/STOP” button on the right side of the panel to set the required time.The two
digits on the right are the numbers of seconds, the two digits on the left are the number of minutes.
Next, set the required temperature on the display. In order to do so, press and hold the “START/
STOP” and “SET” buttons simultaneously (the latter is used to change the time and temperature set-
tings), then use the “+” and “-” buttons to set the required temperature (the temperature is displayed
in oC).The device has an integrated memory, which stores the working temperature and time, which
means it is not necessary to set these parameters before every use of the device.
5. Once the temperature and time are set, you can start the timer.To do so, use the “SET” button to
choose the time on the display and press the “START/STOP” button.
6. The orange indicator light means that the device is heating up. Once the temperature reaches the
pre-set value, a green indicator light on the display will go on.The device maintains the temperature
automatically. Reaching the maximum temperature of the device (230oC) takes about 15 minutes.
7. Next, carefully open the top cover by holding the lever (grease the heating plates if necessary), spread
an appropriate amount of pre-made dough on the lower heating plate, close the device and turn the
lever clockwise in order to spread the dough over the heating elements. Closed heating plates may be
rotated by the maximum angle of 180o.
8. In order to remove the nished wafes, put the heating plates in the initial position and carefully open
the top lid (keep in mind the high temperature).
9. Remove the wafe. Be careful not to damage the heating plates when removing the wafes. Caution!
The rst few wafes should not be eaten.
10. In order to make more wafes, follow the described procedures and check the time. When the time
on the display runs out, the device will emit a distinctive, continuous beep; in order to turn it off,
press the “START/STOP” button or turn it off with the main switch.
9Rev. 10.02.2017
11. After you have nished with the preparation of the wafes, move the switch to the “0” position and
disconnect the power supply by removing the plug from the socket.
12. Once the device has cooled down, clean it thoroughly.
CAUTION: before the rst use, be sure to thoroughly clean and grease the heating plates, then heat them
up without dough. As the device heats up, the smoke can develop slowly – which is perfectly normal. You just
need to ensure sufcient ventilation. After a few minutes, turn the device off and wait for it to cool down,
then grease the heating plates – the device is ready for work.
IX.TRANSPORTATION AND STORAGE
During transport, the machine should be protected from shaking, crashing and turning upside down. Store it
in a properly ventilated place with dry air and without any corrosive gas.
X. CLEANING AND MAINTENANCE
• Always unplug the device before cleaning the equipment. Disconnect the device from the electricity
when it is not in use. Let the device cool down before cleaning it.
• Use only cleaner without corrosive substances to clean the surface.
• After each cleaning, all the elements must be carefully dried and secured by greasing the heating plates.
• Store the unit in a dry, cool place, free from moisture and direct exposure to sunlight.
• Never clean the device with a pressurized water-jet, industrial cleaners, and brushes or any other type
of cleaning utensil that could damage the surface of the appliance.
XI. REGULAR CONTROL OF THE DEVICE
Check regularly the device to see if it presents any damages. If there is any damage, please stop using the
device. Please contact your customer service to solve the problem.
What to do in case of a problem?
Please contact your customer service and prepare the following information:
• Invoice number and serial number (the latter is to be found on the technical plate on the device).
• If relevant, take a picture of the damaged, broken or defective part.
• It will be easier for your customer service clerk to determine the source of the problem if you give a
detailed and precise description of the matter.Avoid ambiguous formulations like “the device does not
heat”, which may mean either that it does not heat enough or that it does not heat at all.The more
detailed your information, the better the customer service will be able to solve your problem rapidly
and efciently!
CAUTION: Never open the device without the authorization of your customer service.This can lead to a
loss of warranty!
10
Rev. 10.02.2017
expondo.de
INSTRUKCJA
SYMBOLE
13
Należy zapoznać się z instrukcją obsługi.
Nie wolno wyrzucać urządzeń elektrycznych razem z odpadami gospodarstwa domowego.
Urządzenie jest zgodne z deklaracją CE.
Uwaga! Gorąca powierzchnia może spowodować oparzenia.
CE
Ilustracje w niniejszej instrukcji obsługi mają charakter poglądowy i w niektórych szczegółach mogą różnić
się od rzeczywistego wyglądu produktu.
Instrukcją oryginalną jest niemiecka wersja instrukcji. Pozostałe wersje językowe są tłumaczeniami z języka
niemieckiego.
I. ZALECENIA ODNOŚNIE BEZPIECZEŃSTWA
Ogólne zalecenia odnośnie bezpieczeństwa podczas użytkowania urządzeń elektrycznych:
W celu zminimalizowania ryzyka obrażeń na skutek działania ognia lub porażenia prądem prosimy Państwa
o stałe przestrzeganie kilku podstawowych zasad bezpieczeństwa podczas użytkowania urządzenia. Prosimy
o staranne przeczytanie niniejszej instrukcji użytkowania i upewnienie się, że znaleźli Państwo odpowiedzi
na wszystkie pytania dotyczące tego urządzenia. Prosimy o staranne przechowywanie niniejszej instrukcji
użytkowania w pobliżu produktu, aby w razie pojawienia się pytań można było do niej jeszcze raz powrócić
również w późniejszym czasie. Prosimy zawsze stosować uziemione przyłącze prądu z prawidłowym
napięciem sieciowym (patrz instrukcja lub tabliczka znamionowa)! W razie wątpliwości w odniesieniu do
tego, czy przyłącze jest uziemione, prosimy zlecić sprawdzenie tego wykwalikowanemu specjaliście. Nigdy
nie należy stosować niesprawnego kabla zasilania! Urządzenia nie należy otwierać w wilgotnym lub mokrym
miejscu ani też mokrymi lub wilgotnymi rękoma. Poza tym urządzenie należy chronić przed bezpośrednim
promieniowaniem słonecznym. Urządzenie należy użytkować zawsze w bezpiecznym miejscu, tak aby nikt
nie mógł nadepnąć na kabel, przewrócić się o niego i/lub uszkodzić go. Przed przystąpieniem do czyszczenia
urządzenia należy wyciągnąć wtyczkę sieciową, a do czyszczenia używać jedynie wilgotnej ściereczki. Należy
unikać stosowania środków czyszczących i uważać, aby jakakolwiek ciecz nie dostała się do urządzenia i/lub
tam nie pozostała. Należy wyłączyć urządzenie natychmiast po zauważeniu nieprawidłowości w sposobie
jego funkcjonowania. Powinno się również wyciągnąć wtyczkę z gniazdka sieciowego, gdy urządzenie nie jest
używane. Wykonanie prac związanych z konserwacją, wyregulowaniem i naprawą urządzenia należy zlecić
wyspecjalizowanemu personelowi. W przypadku napraw dokonywanych przez osoby trzecie gwarancja
wygasa!
II. WSKAZÓWKI BEZPIECZEŃSTWA
1. Przed przystąpieniem do uruchomienia prosimy o dokładne przeczytanie niniejszej instrukcji!
Należy przestrzegać wszystkich wskazówek bezpieczeństwa, aby unikać szkód powstałych na skutek
użytkowania niezgodnego z przeznaczeniem!
2. Zachowaj instrukcję użytkowania w celu jej późniejszego użycia. W razie gdyby urządzenie miało zostać
przekazane osobom trzecim, to wraz z nim należy przekazać również instrukcję użytkowania.
3. Urządzenie należy stosować wyłącznie zgodnie z przeznaczeniem i tylko wewnątrz pomieszczeń.
4. W przypadku użytkowania niezgodnego z przeznaczeniem lub nieprawidłowej obsługi wyklucza się
odpowiedzialność producenta za powstałe ewentualnie szkody.
5. Przed pierwszym użyciem prosimy sprawdzić, czy rodzaj prądu i napięcie sieciowe odpowiadają danym
wskazanym na tabliczce znamionowej.
6. Urządzenie nie jest przeznaczone do tego, by było użytkowane przez osoby (w tym dzieci) o
ograniczonych funkcjach psychicznych, sensorycznych i umysłowych lub nieposiadające odpowiedniego
doświadczenia i/lub wiedzy, chyba że są one nadzorowane przez osobę odpowiedzialną za ich
bezpieczeństwo lub otrzymały od niej wskazówki dotyczące tego, jak należy obsługiwać urządzenie.
Rev. 10.02.2017
UWAGA!

14
7. NIEBEZPIECZEŃSTWO PORAŻENIA PRĄDEM! Nigdy nie próbuj samemu naprawiać urządzenia. W
razie awarii zleć naprawę urządzenia wyłącznie wykwalikowanym specjalistom.
8. Sprawdzaj regularnie wtyczkę sieciową i kabel zasilający. Jeżeli kabel zasilający urządzenia jest uszkodzony,
to, aby uniknąć zagrożenia, producent, jego serwis klienta lub osoba o podobnych kwalikacjach musi go
wymienić.
9. Należy zapobiegać uszkodzeniu kabla zasilającego na skutek jego zgniecenia, przełamania lub przetarcia
na ostrych krawędziach oraz trzymać go z dala od gorących powierzchni i otwartych źródeł ognia.
10. UWAGA – ZAGROŻENIE ŻYCIA! Podczas czyszczenia lub użytkowania urządzenia nigdy nie wolno
zanurzać go w wodzie lub innych cieczach. Urządzenia nigdy nie należy trzymać pod bieżącą wodą lub
polewać innymi cieczami.
11. Pod żadnym pozorem nie należy otwierać obudowy.
12. Podczas użytkowania urządzenia nie wolno dotykać płyty grzewczej ani jej obudowy, ponieważ istnieje
zagrożenie poparzenia. Podczas otwierania rozgrzanego urządzenia należy pamiętać, o wydostającej się
parze.
13. Urządzenie należy umieścić z dala od materiałów łatwopalnych i w odległości co najmniej 20 cm od
ścian, okien, itp.
III. DANE TECHNICZNE
Nazwa produktu GOFROWNICA OKRĄGŁA LED
Model RCWM-1300-RE
Nr art. 1338
Napięcie [V] / Częstotliwość [Hz] 230~ / 50
Moc [kW] 1,3
Zakres temperatur [°C] 124-230
Wymiary (Dł.xSzer.xWys.) [mm] 480 x 255 x 300
Wymiary płyty grzewczej (średnica / wysokość) [mm] 180 x 30
Waga [kg] 13,8
IV. OBSZAR ZASTOSOWANIA
Elektryczna gofrownica przeznaczona jest do pieczenia gofrów.
Odpowiedzialność za wszelkie szkody powstałe w wyniku użytkowania niezgodnego z przeznaczeniem
ponosi użytkownik.
V. PRZED PIERWSZYM UŻYCIEM
Kontrola po otrzymaniu towaru
W momencie otrzymania towaru należy sprawdzić opakowanie pod kątem występowania ewentualnych
uszkodzeń i otworzyć je. Jeżeli opakowanie jest uszkodzone prosimy o skontaktowanie się w przeciągu 3
dni z przedsiębiorstwem transportowym lub Państwa dystrybutorem oraz o udokumentowanie uszkodzeń
w jak najlepszy sposób. Prosimy nie stawiać pełnego opakowania do góry nogami! Jeżeli opakowanie będzie
ponownie transportowane prosimy zadbać o to, by było ono przewożone w pozycji poziomej i by było
stabilnie ustawione.
VI. UTYLIZACJA OPAKOWANIA
Prosimy o zachowanie elementów opakowania (tektury, plastykowych taśm oraz styropianu), aby w razie
konieczności oddania urządzenia do serwisu można go było jak najlepiej ochronić na czas przesyłki!
Rev. 10.02.2017 15
Rev. 10.02.2017
VII. MONTAŻ URZĄDZENIA
Umiejscowienie urządzenia
Urządzenie należy ustawić na suchej, stabilnej i odpornej na działanie wysokich temperatur powierzchni,
w pozycji pionowej tak, aby podczas pracy nie przemieszczało się. Urządzenie należy ustawić na płaskim,
wypoziomowanym podłożu, które wytrzyma ciężar urządzenia wraz z zawartością. W pobliżu urządzenia
nie mogą znajdować się materiały łatwopalne. Urządzenie należy umiejscowić w taki sposób, by w dowolnej
chwili można się było dostać do wtyczki sieciowej. Należy pamiętać o tym, by zasilanie urządzenia energią
odpowiadało danym podanym na tabliczce znamionowej! Przed pierwszym użyciem zdemontować wszystkie
elementy i umyć je jak również umyć całe urządzenie.
VIII. JAK FUNKCJONUJE URZĄDZENIE – PODSTAWOWA ZASADA
Opis urządzenia:
1. Uchwyt
2. Górna płyta grzewcza
3. Mocowanie umożliwiające obrót
4. Dolna płyta grzewcza
5. Metalowa obudowa
6. Tacka
7. Panel sterujący z wyświetlaczem
8. Główny włącznik
1
2
3
4
5
6
7
8
Użytkowanie urządzenia:
1. Urządzenie należy złożyć tak, jak pokazano na zdjęciu. Uchwyt należy umieścić w wybranej pozycji i
dokręcić nakrętką.
2. Ustawić główny włącznik na pozycję „0” i dokładnie wyczyścić urządzenie, w szczególności płyty
grzewcze.
3. Należy włożyć wtyczkę do gniazdka elektrycznego i ustawić główny włącznik w pozycję „I”, włączy się
pomarańczowa lampka kontrolna sygnalizująca rozpoczęcie grzania.
4. Na wyświetlaczu pojawią się liczby oznaczające czas grzania. Uby ustawić czas grzania należy
przytrzymać przycisk z symbolem „+” (aby wydłużyć czas grzania) lub „-” (aby skrócić czas grzania)
i poprzez wciskanie przycisku „START / STOP” znajdującego się po prawej stronie panelu ustawić
żądany czas. Dwie cyfry z prawej strony oznaczają liczbę sekund, dwie cyfry z lewej strony oznaczają
liczbę minut. Następnie należy ustawić na wyświetlaczu żądaną temperaturę. Aby to zrobić należy
jednocześnie wcisnąć przyciski „START / STOP” oraz „SET” (przycisk ten służy do zmiany ustawień
czasu i temperatury), następnie przyciskami „+” i „-” wybrać odpowiednią temperaturę(temperatura
wyświetlana jest w oC). Urządzenie posiada wbudowaną pamięć, przez co temperatura i czas pracy
zostają zapamiętane i nie trzeba ustawiać tych parametrów przed każdym użyciem urządzenia.
5. Gdy temperatura i czas będą już ustawione można uruchomić odmierzanie czasu. Aby to zrobić
należy za pomocą przycisku „SET” wybrać na wyświetlaczu czas i nacisnąć przycisk „START / STOP”.
6. Grzanie urządzenia sygnalizuje pomarańczowa lampka. Gdy temperatura osiągnie zadaną wartość
na panelu sterowania zapali się zielona lampka. Urządzenie automatycznie utrzymuje temperaturę.
Nagrzanie się urządzenia do maksymalnej temperatury (230oC) zajmuje około 15 minut.
7. Następnie należy ostrożnie otworzyć górną pokrywę chwytając za dźwignię, (w razie potrzeby natłuścić
płyty grzewcze), rozprowadzić odpowiednią ilość wcześniej przygotowanej masy na dolnej

16
płycie grzewczej, zamknąć urządzenie i poprzez obrót dźwigni zgodnie ze wskazówkami ruchu zegara
rozprowadzić masę po elementach grzewczych. Maksymalny kąt, o jaki można obrócić zamknięte płyty
grzewcze to 180o.
8. Aby wyjąć gotowe gofry należy ustawić płyty grzewcze w początkowej pozycji i ostrożnie otworzyć
górną pokrywę (należy pamiętać o wysokiej temperaturze).
9. Wyjąc gofry. Należy uważać, aby podczas wyjmowania gofra nie uszkodzić płyt grzewczych. Uwaga! Nie
zaleca się spożywania kilku pierwszych gofrów.
10. Aby przygotować kolejne gofry należy postępować analogicznie do wcześniej opisanych czynności,
kontrolując czas. Gdy czas na wyświetlaczu się skończy urządzenie wyda charakterystyczny, ciągły
dźwięk, aby go wyłączyć należy wcisnąć przycisk „START/STOP” lub wyłączyć urządzenie głównym
włącznikiem.
11. Po zakończeniu pieczenia gofrów należy przełączyć przełącznik w pozycję „0” i odłączyć źródło zasilania
poprzez wyciągnięcie wtyczki z gniazdka.
12. Po ostygnięciu urządzenia należy je dokładnie wyczyścić.
UWAGA: przed pierwszym użyciem urządzenia należy dokładnie umyć i natłuścić płyty grzewcze a następnie
rozgrzać je bez ciasta. W trakcie rozgrzewania urządzenia może wystąpić niewielkie dymienie – jest to
zjawisko całkowicie normalne. Należy zadbać jedynie o odpowiednią wentylację. Po kilku minutach wyłączyć
urządzenie i poczekać aż ostygnie, następnie natłuścić płyty grzewcze – urządzenie jest gotowe do pracy.
IX.TRANSPORT I PRZECHOWYWANIE
Podczas transportu urządzenie należy zabezpieczyć przed wstrząsami i przewróceniem się oraz nie ustawiać
go „do góry nogami”. Urządzenie należy przechowywać w dobrze wentylowanym pomieszczeniu, w którym
obecne jest suche powietrze i nie występują gazy powodujące korozję.
X. CZYSZCZENIE I KONSERWACJA
• Przed każdym czyszczeniem, a także jeżeli urządzenie nie jest używane, należy wyciągnąć wtyczkę
sieciową i całkowicie ochłodzić urządzenie.
• Do czyszczenia powierzchni należy stosować wyłącznie środki niezawierające substancji żrących.
• Po każdym czyszczeniu wszystkie elementy należy dobrze wysuszyć i zabezpieczyć poprzez natłuszczenie
płyt grzewczych.
• Urządzenie należy przechowywać w suchym i chłodnym miejscu chronionym przed wilgocią i
bezpośrednim promieniowaniem słonecznym.
• Nigdy nie należy spryskiwać urządzenia strumieniem wody. Do czyszczenia nie należy używać
jakichkolwiek szczotek czy przyborów, które mogłyby uszkodzić powierzchnię urządzenia.
XI. REGULARNA KONTROLA URZĄDZENIA
Należy regularnie sprawdzać, czy elementy urządzenia nie są uszkodzone. Jeżeli tak jest, należy zaprzestać
użytkowania urządzenia. Proszę niezwłocznie zwrócić się do sprzedawcy w celu przeprowadzenia naprawy.
Co należy zrobić w przypadku pojawienia się problemu?
Należy skontaktować się ze sprzedawcą i przygotować następujące dane:
• Numer faktury oraz numer seryjny (nr seryjny podany jest na tabliczce znamionowej).
• Ewentualnie zdjęcie niesprawnej części.
• Pracownik serwisu jest w stanie lepiej ocenić, na czym polega problem, jeżeli opiszą go Państwo w
sposób tak precyzyjny, jak jest to tylko możliwe. Sformułowania, takie jak np. „urządzenie nie grzeje“
mogą być dwuznaczne i oznaczają zarówno, że urządzenie grzeje za słabo lub w ogóle nie grzeje. Są to
jednak dwie różne przyczyny usterek! Im bardziej szczegółowe są dane, tym szybciej można Państwu
pomóc!
UWAGA: Nigdy nie wolno otwierać urządzenia bez konsultacji z serwisem klienta. Może to prowadzić do
utraty gwarancji!
Rev. 10.02.2017Rev. 10.02.2017 expondo.de
NÁVOD K POUŽITÍ

SYMBOLY
CE
POZOR!
18 Rev. 10.02.2017
1338
19
Rev. 10.02.2017

1
2
3
4
5
6
7
8
20 Rev. 10.02.2017
•
•
•
•
•
•
•
•
21
Rev. 10.02.2017
expondo.de
ISTRUZIONI PER L‘USO
SIMBOLI
23
Leggere attentamente le istruzioni d'uso.
Gli apparecchi elettrici non devono essere smaltiti con i riuti domestici.
Il dispositivo è conforme alla dichiarazione di conformità CE.
Attenzione! Superci calde - Rischio di ustioni.
CE
Le immagini in questo manuale sono puramente dimostrative, per cui i singoli dettagli possono differire
dall‘aspetto reale dell‘apparecchio.
Il manuale originale è stato scritto in tedesco. Le versioni in altre lingue sono traduzioni dalla lingua tedesca.
I. NORME DI SICUREZZA
Norme di sicurezza generali per l‘utilizzo di apparecchi elettrici:
Per mantenere minimo il rischio di lesioni a causa di incendi o scosse elettriche, si prega di osservare
alcune precauzioni di sicurezza quando si utilizza questo dispositivo. Si prega di leggere attentamente questo
manuale di istruzioni e assicurarsi di non aver dubbi al riguardo. Conservare con cura e a portata di mano
queste istruzioni in maniera tale da poterle consultare in seguito. Utilizzare sempre una fonte di energia
con messa a terra dotata della tensione corretta (vedere le istruzioni o l‘etichetta del prodotto). Se non si
è sicuri delle norme di installazione farla comprovare da un tecnico qualicato. Non usare mai un cavo di
alimentazione difettoso. Non aprire questo apparecchio in un ambiente umido o bagnato o con mani bagnate
o umide. Inoltre, è necessario proteggere il dispositivo dalla luce diretta del sole. Utilizzare l‘apparecchio solo
in luoghi protetti, così che nessuno possa calpestare il cavo, inciamparvi sopra e/o arrecarvi danni. Inoltre,
bisogna fornire un‘areazione sufciente che garantisca il raffreddamento dell‘unità e impedisca l‘accumulo
di calore. Estrarre la spina prima di pulire l‘apparecchio e utilizzare un panno umido per la pulizia. Evitare
l‘uso di detergenti e assicurarsi che nessun liquido penetri l‘apparecchio o vi permanga. L‘interno di questo
apparecchio non contiene parti che richiedono manutenzione da parte dell‘utente. Far eseguire i lavori di
manutenzione, regolazione e riparazione a personale qualicato. Nel caso di intervento di terzi, la garanzia
decade!
II. NORME DI SICUREZZA
1. Leggere attentamente questo manuale di istruzioni prima di azionare l‘apparecchio! Osservare tutte le
norme di sicurezza per evitare danni dovuti a uso improprio!
2. Conservare le istruzioni d‘uso per un futuro utilizzo. Nel caso in cui il dispositivo venisse afdato a terzi,
bisogna consegnare anche queste istruzioni d‘uso.
3. Utilizzare l‘apparecchio solo per lo scopo previsto e solo al chiuso.
4. Nel caso di un uso improprio o di manomissione il produttore o il rivenditore non potrà essere
ritenuto responsabile per eventuali danni.
5. Prima del primo utilizzo, si prega di vericare che il tipo di corrente e di tensione corrispondano alle
caratteristiche riportate sull‘etichetta del prodotto.
6. Questo dispositivo non è adatto per essere utilizzato da persone, bambini compresi, con ridotte capacità
siche, sensoriali o mentali, così come privi di adeguata esperienza e/o conoscenze. Si fa eccezione per
coloro i quali siano sorvegliati da un responsabile qualicato che si prenda carico della loro sicurezza e
abbia ricevuto istruzioni al riguardo.
7. PERICOLO DI SCOSSA ELETTRICA! Non tentare di riparare l‘apparecchio autonomamente. In caso
di guasto far riparare il dispositivo da professionisti qualicati.
8. Controllare regolarmente la spina e il cavo di alimentazione. Se il cavo di alimentazione è danneggiato
deve essere sostituito tramite il produttore, l‘operatore del servizio clienti o chi possa farne le veci, al
ne di evitare qualsivoglia rischio.
Rev. 10.02.2017
ATTENZIONE!

24
9. Evitare di danneggiare il cavo di alimentazione tramite piegamenti,attorcigliamenti o sfregandolo contro
spigoli appuntiti, e tenerlo lontano da superci calde e amme libere.
10. ATTENZIONE: PERICOLO DI MORTE! Non immergere il dispositivo durante la pulizia o la messa in
funzione in acqua o altri liquidi.
11. Non aprire in nessun caso l‘alloggiamento.
12. Quando si utilizza il dispositivo né la piastra calda né l‘alloggiamento devono essere toccati. Vi è rischio
di ustioni. Quando si apre il dispositivo caldo fare attenzione al vapore rilasciato.
13. Installare l‘apparecchio lontano da materiali inammabili e ad almeno 20 cm da pareti, nestre, ecc.
III. DETTAGLI TECNICI
Nome del prodotto Piastra per wafe rotonda - LED
Modello RCWM-1300-RE
Numero dell'articolo 1338
Tensione nominale [V] / Frequenza [Hz] 230~ / 50
Potenza [kW] 1,3
Intervallo di temperatura [°C] 124-230
Dimensioni (L x P x A) [mm] 480 x 255 x 300
Dimensioni della piastra (diametro / altezza) [mm] 180 x 30
Peso [kg] 13,8
IV. INDICAZIONI D‘USO
La piastra per wafe elettrica è destinata esclusivamente alla preparazione di waffel.
L‘operatore è responsabile di tutti i danni derivanti da un uso improprio.
V. PRIMA DEL PRIMO UTILIZZO
Controllare l‘imballaggio del pacco al momento della consegna e aprirlo in un secondo momento. Se la
confezione risulta danneggiata, contattare entro 3 giorni la compagnia di trasporto, nonché il rivenditore,
documentando i danni il più precisamente possibile. Si prega di non capovolgere la confezione! Nel caso in
cui fosse necessario trasportare il pacco, ssarlo in posizione orizzontale in modo da evitare il più possibile
danni.
VI. SMALTIMENTO DELL‘IMBALLAGGIO
Si prega di conservare l‘intero imballaggio (cartone, nastro adesivo e polistirolo),nel caso in cui per problemi
di funzionamento fosse necessario rispedire il prodotto al servizio clienti!
VII. MONTAGGIO DELLA MACCHINA
POSIZIONAMENTO DELL‘UNITÀ
Poggiare l‘apparecchio su una supercie asciutta, stabile e resistente al calore, afnché non si sposti durante il
funzionamento. Posizionare l‘unità su un piano orizzontale sufcientemente stabile e in grado di sopportare
il peso del dispositivo e il relativo contenuto. In prossimità del dispositivo non devono trovarsi materiali
inammabili. Posizionare il dispositivo in modo che la spina sia sempre accessibile. È necessario assicurarsi
che l‘alimentazione del dispositivo sia conforme alle speciche sulla targhetta di identicazione. Prima del
primo impiego smontare tutte le componenti e pulirle. In questo modo l‘intero dispositivo sarà pulito.
Rev. 10.02.2017 25
Rev. 10.02.2017
VIII. COME FUNZIONA IL DISPOSITIVO? – IL PRINCIPIO DI BASE
Descrizione del dispositivo
1. Maniglia
2. Piastra superiore
3. Chiusura che permette la rotazione
4. Piastra inferiore
5. Alloggiamento in metallo
6. Vassoio raccogli residui
7. Pannello di controllo dotato di display
8. Interruttore principale
1
2
3
4
5
6
7
8
Funzionamento del dispositivo:
1. Posizionare l‘unità come in foto. Impostare la maniglia nella posizione appropriata assicurarla con il
dado.
2. Impostare l‘interruttore principale in posizione „0“ e pulire minuziosamente l‘unità, in particolare le
piastre riscaldanti.
3. Inserire la spina nella presa. Impostare l‘interruttore principale in posizione „I“. Si accende la spia
colorata arancione che segnala l‘inizio del riscaldamento.
4. SSul display vengono visualizzati i valori corrispondenti al tempo di riscaldamento. Per impostare il
tempo di riscaldamento premere il pulsante „+“ (al ne di aumentare il tempo di riscaldamento) o
„-“ (per diminuire i tempi di riscaldamento). Premere il tasto „START / STOP“ sul lato destro del
pannello di controllo per impostare il tempo desiderato. Le due cifre a destra sono i secondi e le due
sul lato sinistro sono i minuti. La temperatura desiderata è regolabile sul display. A tal ne bisogna
premere contemporaneamente i tasti „START / STOP“ e „SET“ (Questo pulsante viene utilizza-
to per regolare il tempo e la temperatura). Dopo selezionare i tasti „+“ e „-“ (La temperatura è
visualizzata°C). Il dispositivo ha una memoria interna. I parametri „Temperatura“ e „Tempo“ vengono
memorizzati e non devono essere impostati prima di ogni riaccensione dell‘apparecchio.
5. Se la temperatura e il tempo sono già impostati, il tempo può essere misurato. A tal ne premere il
tasto „SET“ per impostare il tempo e poi „START / STOP“.
6. Il riscaldamento del dispositivo è indicato dalla spia colorata arancione. Raggiunta la temperatura,
ovvero il valore specicato sul pannello di controllo, la spia verde si accende. Il dispositivo mantiene
automaticamente la temperatura preimpostata. Il riscaldamento del dispositivo alla temperatura
massima (230°C) dura circa 15 minuti.
7. Impugnare la maniglia per aprire delicatamente il coperchio (Secondo necessità lubricare le piastre
riscaldanti). La quantità necessaria di lubricante è da distribuire sulla piastra riscaldante inferiore.
Chiudere poi il dispositivo e distribuire la massa lubricante nella zona degli elementi riscaldanti
ruotando la maniglia in senso orario. Il valore massimo di rotazione angolare delle piastre riscaldanti
è 180°.
8. Per rimuovere il waffel pronto bisogna portare le piastre riscaldanti nella posizione iniziale. Dopo di
che il coperchio saprire attentamente il coperchio superiore (Alta temperatura dopo il riscaldamen-
to).

26
9. Estrarre il waffel. Quando si rimuove il waffel assicurarsi di non danneggiare le piastre riscaldanti.
Attenzione! I primi waffel non dovrebbero essere consumati.
10. Per preparare i waffel è necessario seguire la procedura descritta e vericare il tempo. Non appena
scade il tempo sul display, il dispositivo emette un segnale acustico ininterrotto, che può essere spento
premendo il tasto „START/STOP“ o l‘interruttore principale.
11. A preparazione ultimata impostare l‘interruttore in posizione „0“. Staccare la fonte di alimentazione
estraendo la spina dalla presa di corrente.
12. Dopo che il dispositivo si è raffreddato, pulirlo accuratamente.
ATTENZIONE! Prima della messa in servizio dell‘apparecchio bisogna pulire accuratamente le piastre
riscaldanti e oliarle. In seguito riscaldarle senza impasto. Durante il riscaldamento del dispositivo è possibile
che venga prodotta una quantità minima di fumo: si tratta di un fenomeno normale.Assicurare un‘aerazione
sufciente. Dopo pochi minuti spegnere l‘apparecchio e attendere che si raffreddi, quindi oliare le piastre: il
dispositivo è così pronto per il funzionamento.
IX. TRASPORTO E STOCCAGGIO
Proteggere l‘apparecchio durante il trasporto da vibrazioni e cadute. Collocare l‘apparecchio in posizione
verticale e non sottosopra. Conservare in luogo ben ventilato con aria secca senza gas corrosivi.
X. PULIZIA E MANUTENZIONE
• Rimuovere la spina dalla corrente prima di effettuare la pulizia e dopo ogni uso e far raffreddare
completamente l‘apparecchio.
• Per pulire la supercie utilizzare solo detergenti senza ingredienti corrosivi.
• Dopo ogni pulizia asciugare tutte le componenti accuratamente e oliare le piastre riscaldanti.
• Tenere l‘apparecchio in un luogo asciutto, fresco, protetto dall‘umidità e dalla luce diretta del sole.
• Non spruzzare il dispositivo con acqua. Non utilizzare spazzole o altri utensili per la pulizia che
potrebbero danneggiare la supercie dell‘unità.
XI. CONTROLLI REGOLARI DELLA MACCHINA
Vericare regolarmente che gli elementi dell‘apparecchio non presentino danni. Nel caso in cui si
riscontrassero danni, è severamente vietato qualsiasi impiego del dispositivo. Si prega di contattare il
venditore di riferimento afnché vengano effettuate le modiche necessarie.
Cosa fare in caso di problemi?
Contattare il venditore e fornire i seguenti dati:
• Numero di fatturazione e numero di serie (dei quali l‘ultimo si trova sulla targhetta del dispositivo)
• Se possibile fornire una foto del pezzo difettoso
• Provvedere a descrivere il problema riscontrato nel modo più preciso possibile in modo tale che il
servizio clienti sia in grado di circoscrivere il problema e di risolverlo.Formulazioni come, per esempio,
„l‘unità non riscalda“ possono essere ambigue o fuorvianti!
ATTENZIONE! Non aprire mai o smontare l‘apparecchio senza l‘autorizzazione del servizio clienti.
Un‘operazione del genere non autorizzata fa decadere la garanzia!
Rev. 10.02.2017 expondo.de
MANUAL DE INSTRUCCIONES

SÍMBOLOS
Por favor, lea detenidamente este manual de instrucciones.
Está prohibido tirar dispositivos eléctricos al contenedor de basura doméstico.
El producto cumple con la normativa CE.
¡Atención! Supercie caliente - riesgo de quemaduras
CE
En este manual se incluyen fotos ilustrativas, que podrían no coincidir exactamente con la apariencia real
del dispositivo.
El texto en alemán corresponde a la versión original. Los textos en otras lenguas son traducciones de las
instrucciones en alemán.
I. MEDIDAS DE SEGURIDAD
Medidas generales de seguridad para el uso de dispositivos eléctricos:
Para reducir el riesgo de lesiones por quemadura o electrocución, le rogamos que tome siempre ciertas
medidas de seguridad cuando utilice este aparato. Lea con detenimiento este manual de instrucciones y
cerciórese de que no tiene dudas al respecto. Guarde cuidadosamente este manual con el producto para
poder consultarlo cuando lo necesite. Utilice siempre una conexión con toma a tierra y voltaje adecuado
(véase el manual o la placa de características del producto). Si tiene dudas sobre la conexión a tierra de su
instalación, permita que un técnico especializado la revise. ¡Nunca utilice un adaptador defectuoso! No abra
este equipo en un ambiente húmedo y menos con las manos mojadas. Además, debe proteger el equipo
contra la exposición solar directa. Ponga en marcha el equipo siempre en un lugar seguro, donde nadie
pueda pisar los cables, dañarlos o caerse. Garantice una óptima ventilación en la zona de trabajo para ayudar
a refrigerar el equipo y evitar la acumulación de calor. Desenchufe el dispositivo antes de limpiarlo y
utilice solo un trapo húmedo sin detergentes agresivos para ese n. Evite que cualquier líquido penetre y se
estanque en el interior del equipo. Este equipo contiene piezas cuyo mantenimiento no debe ser efectuado
por el usuario. Deje las tareas de mantenimiento y reparación a personal autorizado. Cualquier intervención
externa conllevará la pérdida de la garantía.
II. MEDIDAS DE SEGURIDAD
1. ¡Lea detenidamente este manual de instrucciones antes de poner en marcha el dispositivo!¡Respete
todas las medidas de seguridad para evitar daños derivados de un uso inadecuado del equipo!
2. Conserve el manual de instrucciones para futuras consultas. Este manual debe ser entregado a toda
persona que vaya a hacer uso del dispositivo.
3. Utilice el equipo solo para los nes previstos y únicamente en espacios interiores.
4. No nos hacemos responsables de los daños ocasionados por un uso indebido del dispositivo.
5. Antes de utilizarlo por primera vez, verique que el tipo de corriente y el voltaje de la conexión que va
a utilizar coinciden con los datos indicados en la placa de características del dispositivo.
6. Este aparato no debe ser utilizado por niños, ni tampoco por personas con capacidades físicas,
sensoriales o mentales reducidas o con falta de experiencia y/o conocimiento, a menos que sean
supervisadas por un responsable.
7. ¡PELIGRO DE ELECTROCUCIÓN! Nunca intente reparar el equipo usted mismo. En caso de avería,
deje que lo repare únicamente personal técnico cualicado.
8. Examine regularmente el enchufe y el cable del adaptador. Si el cable estuviese deteriorado, deberá ser
reemplazado por un técnico autorizado, a n de evitar riesgos.
9. Absténgase de aplastar, doblar o rozar el cable, y manténgalo siempre alejado de fuego o supercies
calientes.
10. ¡ATENCIÓN, PELIGRO DE MUERTE! Nunca sumerja el equipo en agua u otros líquidos durante su
limpieza o funcionamiento.
NOTA!
28 Rev. 10.02.2017
11. No abra la carcasa del dispositivo bajo ninguna circunstancia.
12. Durante el funcionamiento del aparato no toque ni la placa de calentamiento ni la carcasa, ya que existe
riesgo de quemaduras.Tenga cuidado al abrir la tapa de la máquina, ya que se desprende vapor muy
caliente.
13. Mantenga este dispositivo alejado de materiales inamables y al menos a 20 cm de paredes, ventanas,
etc.
III. DATOS TÉCNICOS
Nombre del producto Gofrera redonda LED
Modelo RCWM-1300-RE
Número de artículo 1338
Voltaje nominal (V) / Frecuencia (Hz) 230~ / 50
Potencia (kW) 1,3
Rango de temperatura (°C) 124-230
Tamaño (L x A x A) (mm) 480 x 255 x 300
Dimensiones de la placa (diámetro / altura) (mm) 180 x 30
Peso (kg) 13,8
IV. ÁMBITO DE APLICACIÓN
Este aparato está diseñado para preparar gofres.
El usuario es responsable de los daños derivados de un uso inadecuado del aparato.
V. ANTES DEL PRIMER USO
Cuando reciba el producto, cerciórese de que el embalaje no presenta desperfectos y ábralo solo si está en
perfecto estado. En caso de que el embalaje presente desperfectos, póngase en contacto el transportista y el
vendedor en un plazo de 3 días y documente lo mejor posible el alcance de los daños. ¡No ponga el paquete
al revés! Si necesita transportarlo, asegúrese de que esté al derecho y se mantiene estable.
VI. ELIMINACIÓN DEL EMBALAJE
¡Rogamos mantenga el embalaje original (cartón, bridas de plástico y poliestireno) para poder devolver el
aparato lo mejor protegido posible, en caso de que fuera necesaria una reparación!
VII. MONTAJE DE LA MÁQUINA
COLOCACIÓN DEL EQUIPO
Coloque el aparato sobre una supercie seca, estable y resistente al calor. Esta supercie debe de soportar
el peso del aparato con la masa de los gofres.No coloque sustancias inamables cerca del aparato. Ubique la
máquina de manera que el enchufe esté siempre accesible y garantice que el suministro eléctrico corresponde
con la placa de características técnicas en el producto. Limpie la máquina antes de su primer uso.
29
Rev. 10.02.2017

VIII. ¿CÓMO FUNCIONA EL APARATO? - PRINCIPIO BÁSICO
Descripción del equipo:
1. Palanca
2. Placa superior
3. Fijación que permite girar la máquina
4. Placa inferior
5. Carcasa metálica
6. Depósito
7. Panel de control con pantalla
8. Interruptor principal
1
2
3
4
5
6
7
8
Funcionamiento del aparato:
1. Coloque el equipo tal y como se muestra en la foto. Coloque la palanca en la posición correspon-
diente y aprietela con la tuerca.
2. Coloque el interruptor en posición „0“ y limpie el aparato en profundidad, sobre todo las placas.
3. Enchufe el aparato a la corriente y ponga el interruptor en posición „I“. El piloto naranja se iluminará,
lo que signica que el aparato empieza a calentar.
4. La pantalla indicará el tiempo de calentamiento, que se puede ajustar a través de las teclas „+“ y „-“
(para aumentarlo o reducirlo). A traves del botón „START / STOP“, en la parte derecha del panel de
control, se puede ajustar el tiempo de funcionamiento. Los dos dígitos derechos corresponden a los
segundos y los dos izquierdos a los minutos. Para ajustar la temperatura de trabajo deberá de presio-
nar las teclas „START / STOP“ y „SET” simultáneamente. Con los botones „+“ y „-“ podrá aumentar
o reducir la temperatura, que se mostrará en centígrados en la pantalla. El equipo dispone de una
función de memoria, que permite guardar los parámetros de temperatura y tiempo para no tener que
volver ajustarlos la próxima vez que encienda la máquina.
5. Una vez ajustada la temperatura podrá ajustar el tiempo, a través de set. A continuación pulse „START
/ STOP“.
6. El calentamiento de la máquina viene señalado por el piloto narajna. Cuando la temperatura alcanza el
valor seleccionado, se ilumina el piloto verde y el calor se mantiene constante de forma automática.
La máquina alcanza su máxima temperatura (230°C) en aproximadamente 15 minutos.
7. Tire cuidadosamente de la palanca para abrir la placa superior (en caso de necesidad lubrique las
placas ). Reparta la masa del gofre de manera uniforme sobre la placa inferior, cierre las placas y gire
la gofrera tirando de la palanca en sentido horario. El ángulo máximo de giro es de 180°.
8. Para retirar el gofre coloque las placas en la posición inicial. A continuación abra la placa superior con
cuidado (muy caliente).
9. Extraiga el gofre, teniendo cuidado de no dañar las placas. Atención! No consuma los 2 primeros
gofres.
10. Para preparar más gofres, proceda como descrito previamente y controle el tiempo. En cuanto el
tiempo seleccionado se agota, la máquina emite una señal acústica continua, que puede ser apagada a
través del botón „START/STOP“ o el interruptor principal.
11. Tras terminar de trabajar coloque el interruptor en posición „0“ y desenchufe la gofrera de la corri-
ente.
12. Después de que la máquina se enfríe, límpiela en profundidad.
30 Rev. 10.02.2017
ATENCIÓN: Antes del primer uso, limpie las placas en profundidad y caliéntelas a continuación sin masa. Es
normal que el primer calentamiento de la máquina genere algo de humo. Garantice una buena ventilación en
la estancia. Apague la máquina, espere a que se enfríe y a continuación lubrique las placas. La máquina estará
operativa.
IX. TRANSPORTE Y ALMACENAJE
Cuando vaya a transportarlo, proteja el aparato contra vibraciones y caídas. Coloque la máquina siempre al
derecho. Almacénela en un espacio bien ventilado, seco y lejos de gases corrosivos.
X. LIMPIEZAY MANTENIMIENTO
• Después de cada uso y antes de su limpieza, desenchufe el aparato y deje que se enfríe completamente.
• Para limpiar la supercie, utilice solo productos que no contengan sustancias corrosivas.
• Después de que cada limpieza deberá secar todos los componentes en profundidad y lubricar las placas.
• Guarde el aparato en un lugar seco, fresco y protegido de la humedad y la radiación solar directa.
• Evite mojar el dispositivo. Para la limpieza no utilice cepillos o utensílios que puedan dañar la supercie
del aparato.
XI. REVISIÓN PERIÓDICA DEL APARATO
Compruebe periódicamente si los componentes del dispositivo están deteriorados. Si así fuera, se prohíbe
utilizar el aparato. Diríjase inmediatamente a su vendedor para llevar a cabo la reparación.
¿Qué hacer en caso de problemas?
Póngase en contacto con el vendedor y prepare la siguiente información:
• Número de factura y número de serie (este último lo encontrará en la placa de características técnicas).
• En caso necesario, incluya una foto de la pieza defectuosa.
• El personal del servicio técnico podrá determinar mejor cuál es el problema cuanto más detallada sea
la descripción. Frases como por ejemplo „el aparato no calienta“ pueden dar lugar a malentendidos o
ser ambiguas.
ATENCIÓN: Nunca intente reparar o abrir el aparato sin consultar previamente con el servicio técnico.
¡Esto puede conllevar la extinción de la garantía!
31
Rev. 10.02.2017

expondo.de
MANUEL D´UTILISATION
SYMBOLE
33
Veuillez lire attentivement ces instructions d'emploi.
Les appareils électriques ne doivent pas être jetés dans des poubelles ménagères.
L'appareil est conforme aux directives européennes en vigueur.
Attention! Surfaces chaudes - risque de brûlure.
CE
ATTENTION Certaines illustrations, présentes dans cette notice, peuvent différer de la véritable apparence
de l‘appareil.
La version originale de ce manuel a été rédigée en allemand. Les autres versions sont des traductions de
l‘allemand.
I. CONSIGNES DE SÉCURITÉ
Consignes de sécurité générales relatives à l‘utilisation d‘appareils électriques:
An de minimiser les risques de blessures dues au feu ou aux chocs électriques, veuillez constamment
prendre en considération les consignes et indications de sécurité, présentes dans ce manuel, lorsque vous
utilisez l‘appareil. Veuillez lire attentivement ces instructions d‘emploi et assurez-vous d‘avoir trouvé réponse
à toutes vos questions. Conservez soigneusement cette notice à proximité de l‘article an de pouvoir le
consulter plus tard en cas de besoin. Utilisez toujours une prise électrique reliée à la terre et avec la
bonne tension secteur (v. Guide ou plaque signalétique)! Dans le cas où vous auriez des doutes quant au
raccordement de votre appareil, veuillez faire vérier votre installation par un électricien qualié. N‘utilisez
jamais de câble électrique défectueux! N‘ouvrez pas l‘appareil dans un environnement humide, et veillez à ce
que vos mains ne soient ni humides ni mouillées. De plus, protégez l‘appareil des rayonnements directs du
soleil. Ne mettez l‘appareil en marche que dans un espace protégé, de manière à ce que personne ne marche
sur les câbles, ne se prenne les pieds dedans, ni ne les abîme. Veillez également à ce que la pièce, dans laquelle
se trouve l‘appareil, soit sufsamment aérée an d‘éviter une concentration trop importante de chaleur
mais aussi pour faciliter le refroidissement de l‘appareil. Pensez à toujours débrancher l‘appareil avant de le
nettoyer et utilisez un chiffon humide pour le nettoyage. N‘utilisez pas de produits de nettoyage et veillez à
ce qu‘aucun uide ne s‘inltre dans l‘appareil ou ne reste à l‘intérieur. L‘intérieur de l‘appareil ne doit pas être
nettoyé / entretenu par l‘utilisateur. Conez l‘entretien, le réglage et les réparations à une personne qualiée.
La garantie deviendra caduque en cas d‘intervention d‘une personne non-qualiée.
II. CONSIGNES DE SÉCURITÉ
1. Veuillez lire attentivement ces instructions d‘emploi avant d‘utiliser l‘appareil. Veuillez respecter les
consignes de sécurité an d‘éviter tout incident lié à une utilisation non conforme!
2. Conservez le mode d‘emploi à disposition pour les utilisations à venir. Si cet appareil est utilisé par une
autre personne, celle-ci doit impérativement être informée des conditions d‘utilisation et disposer du
manuel.
3. N‘utilisez cet appareil que pour l‘usage prescrit et seulement en intérieure.
4. Le constructeur décline toute responsabilité en cas de dommages résultant d‘un usage inapproprié ou
d‘une manipulation non conforme de l‘appareil.
5. Avant la première utilisation, veuillez vérier que la tension électrique ainsi que le type de courant
utilisé soient compatibles avec les données présentes sur la plaque signalétique.
6. Cet appareil ne doit pas être utilisé par des personnes (enfants compris) ayant des capacités physiques,
mentales ou sensorielles réduites. Sont considérées comme des exceptions les personnes ayant lu le
mode d‘emploi ou étant complétement responsables de leur propre sécurité.
7. DANGERS D‘ÉLECTROCUTION! N‘essayez jamais de réparer l‘appareil par vous-même. En cas de
dysfonctionnement, faites réparer l‘appareil par un spécialiste qualié.
Rev. 10.02.2017
INDICATION!

34
8. Contrôlez régulièrement la prise et le câble d‘alimentation. Si le câble secteur de cet appareil est
endommagé, celui-ci doit être remplacé par le fabricant, le service client ou une personne qualiée pour
éviter tout danger.
9. Protégez le câble d‘éventuelles pressions, coupures, frottements, en le tenant à l‘abri de surfaces
pointues, tranchantes, chauffantes, et à l‘abri des ammes.
10. ATTENTION DANGER DE MORT! Ne plongez jamais l‘appareil dans l‘eau ou dans tout autre liquide,
ni lors de son fonctionnement, ni lors du nettoyage.
11. N‘ouvrez sous aucun prétexte le boîtier de l‘appareil.
12. Pendant le fonctionnement de l‘appareil, ne touchez pas aux plaques chauffantes et au boîtier. Vous
risquerez de vous brûler. Durant l‘ouverture de l‘appareil en fonctionnement, il faut faire attention à la
vapeur dégagée.
13. L‘appareil doit se trouver loin ( à au moins 20 cm ) des matières facilement inammables, des fenêtres
etc.
III. DÉTAILS TECHNIQUES
Nom du produit Gaufrier rond avec LED
Modèle RCWM-1300-RE
Numéro d'article 1338
Tension nominale [V] / Fréquence [Hz] 230~ / 50
Puissance (kW) 1,3
Plage de température de chauffe [°C] 124-230
Dimension (L x l x H) [mm] 480 x 255 x 300
Dimensions de la plaque chauffante mm (diamètre / hauteur) 180 x 30
Poids [kg] 13,8
IV. UTILISATION
Le gaufrier sert exclusivement à préparer des gaufres.
L‘utilisateur assume toute responsabilité en cas de dommages liés à un usage inapproprié de l‘appareil.
V. AVANT LA PREMIÈRE UTILISATION
Dès réception de la marchandise, veuillez inspecter le colis et ouvrez-le an de s‘assurer qu‘aucun élément
ou composant du colis ne soit manquant. Si l‘emballage est endommagé, prenez contact sous 3 jours avec
la société de transport ainsi qu‘avec votre distributeur et fournissez un maximum d‘indications et photos
des dégâts. Documentez les éventuels dégâts avec le plus de précision possible. Ne tenez jamais le colis à
l‘envers! Si vous devez transporter ou manipuler le colis, assurez-vous qu‘il soit maintenu droit et stablement.
VI. TRAITEMENT DES DÉCHETS
Veuillez garder l‘emballage de l‘appareil (carton, plastique, polystyrène) an de pouvoir le renvoyer dans les
meilleures conditions en cas de besoin.
VII. INSTALLATION DE L‘APPAREIL
Placement de l‘appareil
L‘appareil doit être placé sur une surface sèche, stable et verticale an qu‘il ne bouge pas pendant le
fonctionnement. Placez l‘appareil sur une surface plate et égale, sufsamment solide pour pouvoir porter
le poids de l‘appareil y compris son contenu. Aucune matière facilement inammable ne doit se trouver
à proximité de l‘appareil. Placez l‘appareil de telle sorte à ce que la prise de courant soit constamment
accessible. Il faut s‘assurer que l‘alimentation en courant de l‘appareil correspond aux indications sur
Rev. 10.02.2017 35
Rev. 10.02.2017
la plaque signalétique. Avant la première utilisation tous les éléments doivent être démontés et nettoyés.
L‘appareil entier doit être nettoyé de cette manière.
VIII. COMMENT FONCTIONNE L‘APPAREIL ? - PRINCIPE DE BASE
Description de l‘appareil:
1. Poignée
2. Plaque chauffante supérieure
3. Fixation qui permet la rotation à
4. Plaque chauffante inférieure
5. Boitier en métal
6. Insertion
7. Champ d‘orientation avec l‘afchage
8. Interrupteur principal
1
2
3
4
5
6
7
8
Fonctionnement de l‘appareil:
1. L’appareil est à monter comme sur la photo. Déplacez la poignée vers la position appropriée et xez
la avec l‘écrou.
2. Placez l‘interrupteur principal sur „0“ et nettoyez soigneusement l‘appareil, en particulier les plaques
chauffantes.
3. Branchez le câble d‘alimentation à une prise secteur. Placez l‘interrupteur principal sur „I“. La lumière
de contrôle orange signale que le gaufrier commence à chauffer.
4. Sur l‘écran d‘afchage apparaissent les chiffres correspondant qui correspondent au temps de chauffe.
Pour ajuster le temps de chauffe, appuyez sur le bouton „+“ (pour prolonger le temps de chauffe)
ou sur le bouton „-“ (pour réduire le temps de chauffe). En pressant la touche „START / STOP“,
située sur la partie droite du tableau de commande, vous pouvez régler le temps de cuisson. Les
deux chiffres, sur le côté droit, sont les secondes et les deux, sur le côté gauche, les minutes. Ensuite,
la température souhaitée doit être ajustée sur l‘écran. Pour cela, pressez simultanément les touches
„START / STOP” et „SET” (cette touche est utilisée pour modier le temps de la minuterie et la
température cuisson). Il faut ensuite presser les touches „+“ et „-“ pour sélectionner la température
souhaitée. (La température sera afchée en oC). L‘appareil dispose d‘une fonction d‘enregistrement.
Les paramètres „température“ et „temps de fonctionnement“ seront enregistrés et ne devront pas
être réglés de nouveau lors de la prochaine mise en marche de l‘appareil.
5. Si la température et le temps de cuisson sont déjà paramétrés, le temps peut alors être mesuré.
Pour faire cela, il faut paramétrer le temps de cuisson avec la touche „SET“ et presser la touche
„START / STOP“.
6. Un témoin lumineux orange signale lorsque l‘appareil est en état de chauffe. Si la température atteint
la valeur paramétrée sur le tableau de commande, le témoin lumineux vert s‘illumine. L‘appareil
maintiendra cette température paramétrée automatiquement. Le préchauffage de l‘appareil, jusqu‘à sa
température maximale (230oC), dure environ 15 minutes.
7. Utilisez ensuite le levier pour ouvrir avec précaution le couvercle du dessus (au besoin, huilez les
plaques chauffantes). La quantité prévue d‘huile / lubriant doit être étalée sur la plaque chauffante
au-dessous. Il faut ensuite fermer l‘appareil et répartir la masse dans la partie chauffante de l‘appareil
en tournant le levier dans le sens des aiguilles d‘une montre. L‘angle de rotation maximal des plaques
chauffantes fermées est de 180°.
8. Pour prélever la gaufre cuite, il faut ramener les plaques chauffantes dans leur position initiale. Ouvrez
ensuite avec précaution le couvercle supérieur (température élevée après chauffage).

36
9. Enlevez la gaufre. Veuillez faire attention, lorsque vous prélevez la gaufre, à ne pas endommager les
plaques chauffantes. ATTENTION! Les premières gaufres ne doivent pas être consommées.
10. Pour préparer d‘avantage de gaufres, il faut suivre le procédé expliqué et contrôler le temps de cuisson.
Lorsque le temps de cuisson réglé est écoulé sur l‘écran, un signal sonore caractéristique ininterrompu
retentit et peut être désactivé en pressant la touche „START/STOP“ ou l‘interrupteur principal.
11. Une fois vos préparations de gaufre terminées, placez le commutateur sur „0“. La source d‘alimentation
doit être débranchée de la che secteur.
12. Une fois l‘appareil refroidi, veuillez-le nettoyer en profondeur.
ATTENTION : Avant la première mise en marche de l‘appareil, nettoyez et dégraissez les plaques chauffantes
après les avoir chauffées sans pâte à gaufre. Pendant que l‘appareil chauffe, il se peut que de la fumée soit
générée, cela est normal. Veuillez assurer une aération sufsante de l‘appareil et de votre pièce. Après quelques
minutes, éteignez l‘appareil et attendez que celui-ci refroidisse. Dégraissez ensuite les plaques chauffantes et
l‘appareil sera de nouveau prêt-à-l‘emploi.
IX.TRANSPORT ET STOCKAGE
Lors du transport de l‘appareil, il est impératif de le sécuriser et de le protéger de toute secousse. Posez
l‘appareil de manière droite et non à l‘envers. Stockez-le dans un environnement sec et bien aéré, à l‘abri
des gaz corrosifs.
X. NETTOYAGE ET ENTRETIEN
• Après chaque utilisation et avant chaque nettoyage, débranchez l‘appareil et laissez-le refroidir
complètement.
• N‘utilisez lors du nettoyage que des détergents doux sans substances corrosives.
• Après chaque nettoyage, tous les éléments de l‘appareil doivent être soigneusement sèchés et les
plaques de cuisson doivent être huilées / lubriées.
• Conservez l‘appareil dans un endroit frais, sec, à l‘abri de l‘humidité et des rayons directs du soleil.
• N‘aspergez jamais l‘appareil avec l‘eau. Lors du nettoyage, n‘utilisez pas de brosse ou ustensile capable
d‘endommager l‘appareil.
XI. EXAMEN RÉGULIER DE L‘APPAREIL
Contrôlez régulièrement le bon état des différents éléments de l‘appareil. Si l‘un d‘entre eux est endommagé,
l‘appareil ne doit plus être utilisé. Adressez-vous immédiatement à votre vendeur pour faire réparer l‘appareil.
Que faire en cas de problème?
Prenez contact avec votre vendeur et préparez les éléments suivants:
• Vos numéros de série et de facture (que vous trouverez sur la plaque signalétique)
• Le cas échéant, une photo de l‘élément endommagé
• Plus vos descriptions seront précises, plus votre conseiller sera en mesure de comprendre le problème
et de vous aider à le résoudre. Les formulations comme par exemple: „L‘appareil ne chauffe pas“
peuvent conduire à des incompréhensions ou à des malentendus quant aux véritables problèmes.
ATTENTION: N‘ouvrez jamais l‘appareil sans l‘accord préalable du service client. Cela pourrait rendre votre
garantie caduque!
Rev. 10.02.2017
37
Rev. 10.02.2017
NAMEPLATES
TRANSLATIONS
Power

NAMEPLATES
TRANSLATIONS
38 Rev. 10.02.2017
Power
DE
Hiermit bestätigen wir, dass die hier in dieser Anleitung aufgeführten Geräte CE-konform sind.
EN
We hereby certify that the appliances listed in this manual are CE compliant.
FR
Par la présente, nous conrmons que les appareils présentés dans ce mode d´emploi sont conformes aux
normes Ce.
PL
Niniejszym potwierdzamy, że urządzenia opisane w tej instrukcji są zgodne z deklaracją CE.
IT
Con la presente documentazione si certica che i dispositivi descritti all´interno del manuale sono confor-
mi alle vigenti norme CE.
ES
Por la presente conrmamos que los dispositivos detallados en este manual son conformes con las norma-
tivas de la CE.
39
Rev. 10.02.2017
Table of contents
Languages:
Other Royal Catering Waffle Maker manuals

Royal Catering
Royal Catering RCPMW-1400K User manual

Royal Catering
Royal Catering RCWM-1400-B User manual

Royal Catering
Royal Catering RCWM-1500-S User manual

Royal Catering
Royal Catering RC-WMR01 User manual

Royal Catering
Royal Catering RCWM-2000-E User manual

Royal Catering
Royal Catering RC-WMR01 User manual

Royal Catering
Royal Catering RCWM-01-E User manual

Royal Catering
Royal Catering RCWM-1200-R1 User manual