The machine is shut down by turning off the on/off switch.
3.1. General safety rules
3.2. Stop functions
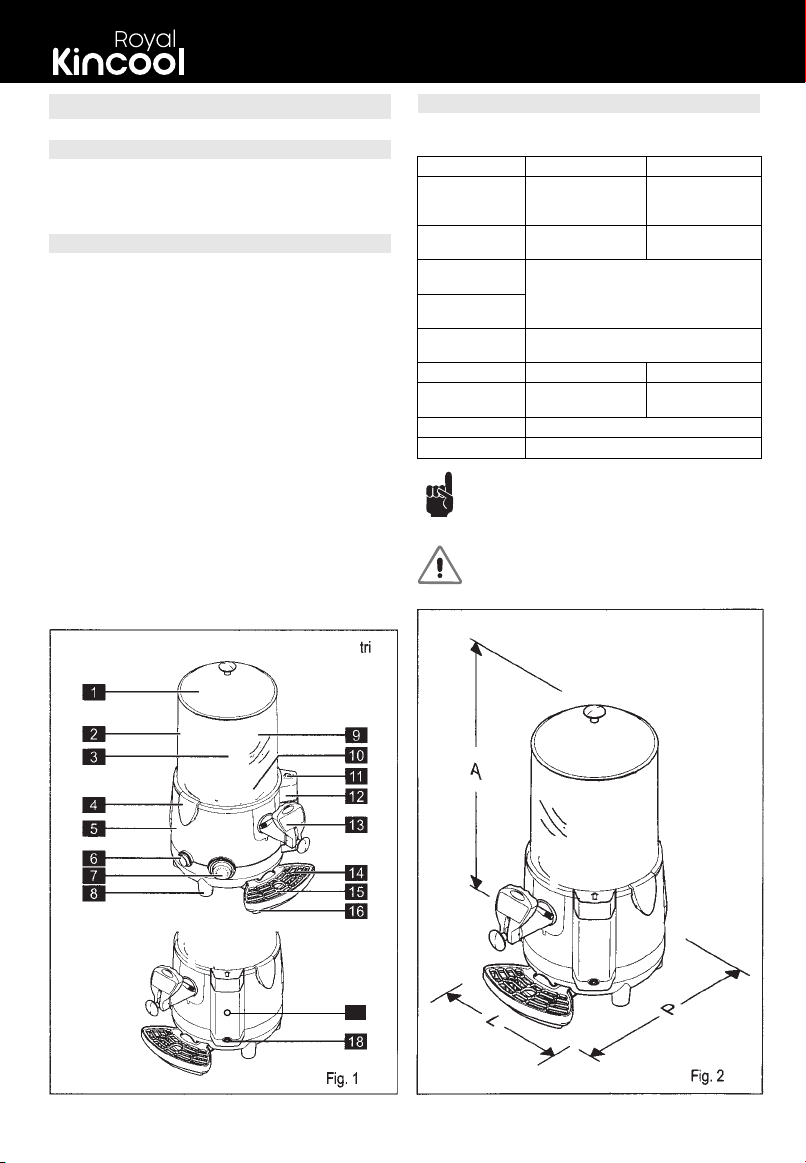
3.3. Plates
3.4. Emergency situations
3. SAFETY
● Carefully read the whole instruction manual.
● DONOT:
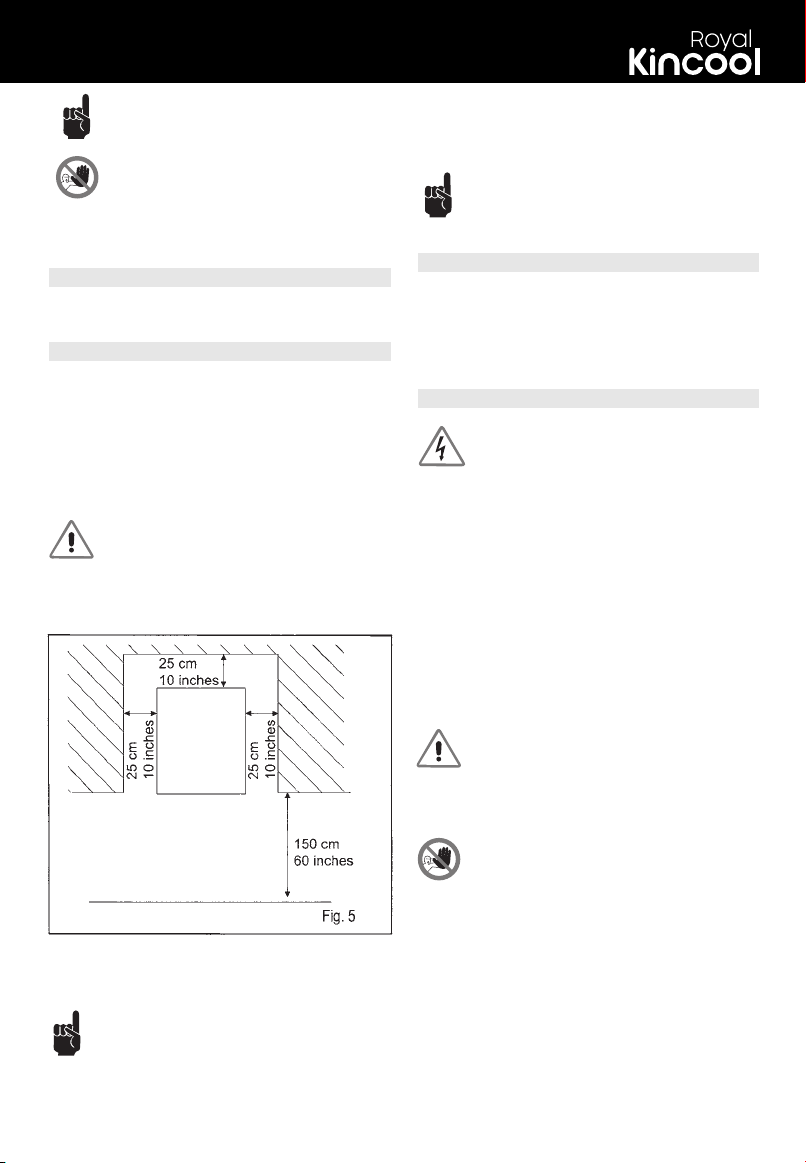
- install the machine in a manner other than that described in Chapter 5.
- install the machine in a place where it may be exposed to sprays of
Water.
- use the machine near inflammable and/or explosive substances.
- leave plastic bags, polystyrene, nails etc. within children's reach, since
they are potential sources of danger.
- allow children to play or stay near the machine.
- use spare parts other than those recommended by the manufacturer.
- make any technical changes to the machine.
- immerse the machine in any kind of liquid.
- spray water on the machine to wash it.
- use the machine other than as directed in this manual.
- use the machine when not in full possession of your mental and
physical faculties: under the infuence of drugs, alcohol, etc.
- install the machine on top of other equipment.
- use the machine in an explosive or aggressive atmosphere or in the
presence of a high concentration of dust or oily substances
suspended in the air.
- use the machine in a place where there is a risk of fire.
- use the machine to dispense substances that are not compatible
with the machine's specifications.
- clean or service the machine when the main switch is set to .
ON- or with the plug inserted into the mains outlet.
● This appliance is not intended for use by persons (including children) with
reduced physical, sensory or mental capabilties, or lack of experience and
knowledge,unless they have been given supervision or instruction
concerning use of the appliance by a person responsible for their safety.
● Children should be supervised to ensure thet they do not play with the
appliance.
● Before cleaning the machine, make sure it is unplugged; wait until the ma-
chine has cooled down sufficienty.
● The power cord must not be:
- allowed to come into contact with any kind of liquid: danger of electric
shocks and/or fire;
- crushed and/or brought into contact with sharp surfaces;
- used to move the machine;
- used if it shows any damage;
- handled with damp or wet hands;
- wound into a coil when the machine is on.
- tampered with.
- compatible with the plug provided with the machine;
- of dimensions conforming to the data shown on the
rating plate on the side of the machine;
- properly grounded;
- connected to a system provided with a differential switch and
circuit breaker;
connected to a system that has been certified according to
the current standards and regulations in the country of use.
● The connection to the electricity mains must comply with the current
safety standards in the user’s country.
● Do not clean the machine with gasoline and/or solvents of any kind.
The following are to be considered improper use:
● Repair work may be performed only by a Service Center authorized by
the Manufacturer and/or specialized, trained personnel.
● Do not site the machine near heating equipment (stoves or radiators).
● ln case of fire, use carbon dioxide (CO2) extinguishers. Do not use water
or powder extinguishers.
Warning: to stop the machine in any emergency situation,
firmly press the main switch so that it sets to -OFF-.
In the event of fire, lt ls necessary to clear the area in order
to allow trained staff, with the proper protective equiprent to
intervene. Always use approved extinguishers and never
use water or substances of an uncertain nature.
In the event of improper use, all warranty rights will be forfeited
and the manufacturer will accept no liability for injury or dam-
age to persons and/or property.
- any use other than the intended use and/or with methods other than those
described herein;
- any operation on the machine that is in contrast with the directions
provided herein;
- use of the machine after any components have been tampered with and/
or safety devices have been changed;
- use of the machine after it has undergone repair with components not
authorized by the manufacturer;
outdoor installation of the machine.
NONE OF THE PLATES OR LABELS APPLIED ON THE MACHINE MUST
BE REMOVED, COVERED OR DAMAGED, ESPECIALLY THOSE RELAT-
ING TO SAFETY.
IN THE EVENT OF DAMAGE TO ANY OF THE RATING PLATES ON THE
MACHINE, CONTACT THE MANUFACTURER FOR A REPLACEMENT.
● The machine must be connected to an electric outlet that is:
01/2021 - 5_EN-
User Manual