3
Cobia Smart R/F & Cobia Dental Intraoral - User Manual v2019.12A
Contents
..............................................................................................................
4
1. Product Overview
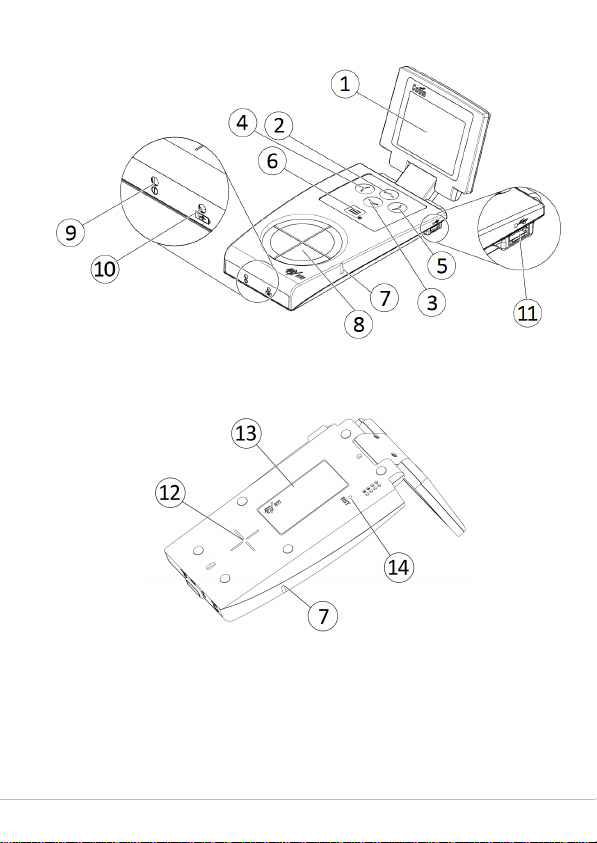
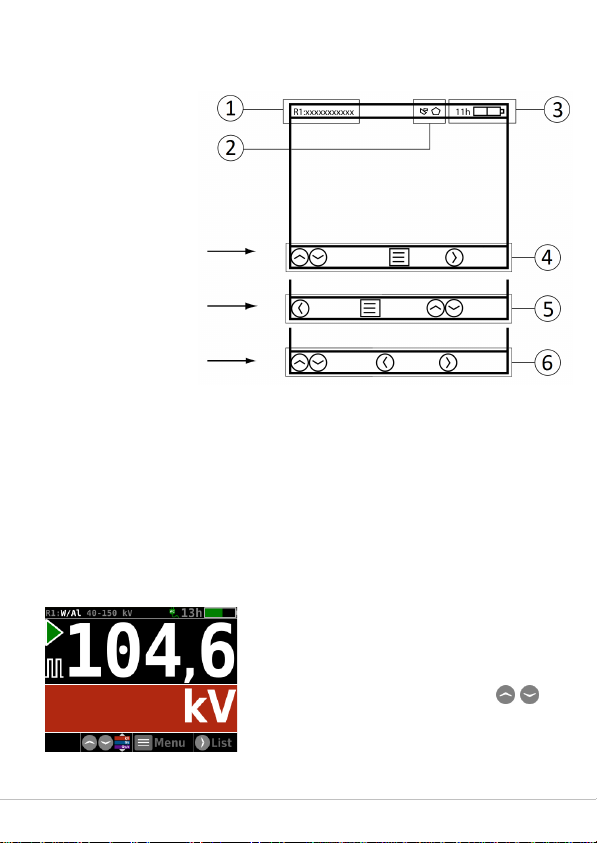
............................................................................................................1.1 User Interface 6
...........................................................................................61.1.1 Screen Description 6
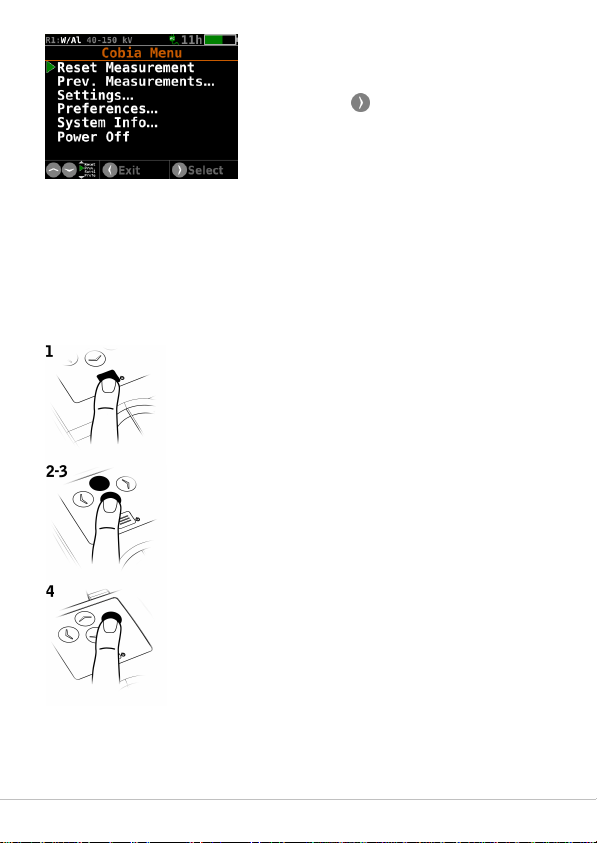
...........................................................................................81.1.2 Keyboard Operation 8
..............................................................................................................
9
2. Getting Started
............................................................................................................2.1 Before Starting the Cobia for the First Time 9
............................................................................................................2.2 Charging the Battery 9
..............................................................................................................
10
3. Performing a Measurement
............................................................................................................3.1 Measuring with the Internal Detector 10
..............................................................................................................
11
4. Maintenance
............................................................................................................4.1 Scheduled Calibration 11
............................................................................................................4.2 Updating the System 11
..............................................................................................................
13
5. Technical Data
............................................................................................................5.1 Battery Charging Details 13
............................................................................................................5.2 Battery Warnings 13
..............................................................................................................
14
6. Troubleshooting
..............................................................................................................
14
7. Standards and Compliances
............................................................................................................7.1 Intended Use of the Cobia 15