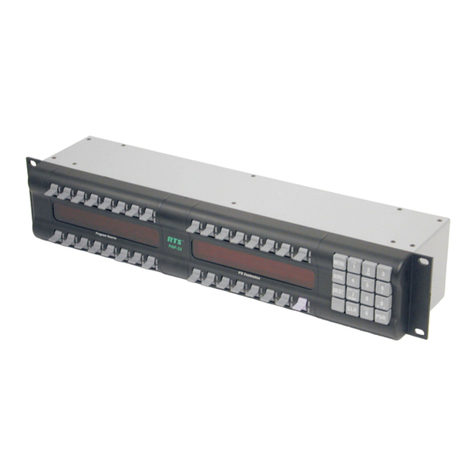
RTS RVON-I/O User manual

RVON-I/O User Manual
9350-7772-000 Rev F 12/2006

PROPRIETARY NOTICE
The product information and design disclosed herein were originated by and are
the property of Telex Communications, Inc. Telex reserves all patent, proprietary
design, manufacturing, reproduction, use and sales rights thereto, and to any
article disclosed therein, except to the extent rights are expressly granted to
others.
COPYRIGHT NOTICE
Copyright 2006 by Telex Communications, Inc. All rights reserved.
Reproduction, in whole or in part, without prior written permission from Telex is
prohibited.
WARRANTY NOTICE
See the enclosed warranty card for further details.
UNPACKING AND INSPECTION
Immediately upon receipt of the equipment, inspect the shipping container and
the contents carefully for any discrepancies or damage. Should there be any
discrepancies, notify factory service immediately. Notify the freight company and
factory service of any shipping damage.
CUSTOMER SUPPORT
Technical questions should be directed to:
Customer Service Department
Telex Communications, Inc.
12000 Portland Avenue South
Burnsville, MN 55337 U.S.A.
Telephone: (800) 392-3497
Fax: (800) 323-0498
Factory Service: (800) 553-5992 (Lincoln, NE)
RETURN SHIPPING INSTRUCTIONS
Customer Service Department
Telex Communications, Inc.
12000 Portland Avenue South
Burnsville, MN 55337 U.S.A.
Telephone: (800) 392-3497
Fax: (800) 323-0498
Factory Service: (800) 553-5992 (Lincoln, NE)
Please include a note in the box which supplies the company name, address,
phone number, contact person regarding the repair, the type and quantity of
equipment, a description of the problem and the serial number(s)
SHIPPING TO THE MANUFACTURER
All shipments of product should be made via UPS Ground, prepaid (you may
request a different shipping method from Factory Service). Any shipment
upgrades will be paid by the customer. The equipment should be shipped in the
original packing carton. If the original carton is not available, use any suitable
container that is rigid and of adequate size. If a substitute container is used, the
equipment should be wrapped in paper and surrounded by 4 (four) inches of
excelsior or similar shock absorbing material. All shipments must be sent to the
following address and must include the Proof of Purchase for warranty repair.
Upon completion of any repair, the equipment will be returned via United Parcel
Service or specified shipper, collect.
Factory Service Department
Telex Communications, Inc.
8601 Cornhusker Hwy.
Lincoln, NE 68507 U.S.A.
Attn: Service
This package should include:
Components Description Qty
90107772000 RVON-I/O Final Assembly 1
38110387 RTS Warranty Card 1
93507772000 RVON-I/O User Manual 1
8800102668 A/C Cord/ Conn 18 GA SVT
(7ft) Belden #17250, Kent 1

Table
of
Contents
Introduction ..............................................................................................................................................1
Description .........................................................................................................................................1
Features ..............................................................................................................................................1
Reference View ..................................................................................................................................2
Specifications .....................................................................................................................................3
Pin Outs for Connections ...................................................................................................................4
DIP Switches .....................................................................................................................................5
Installation ...............................................................................................................................................7
System Requirements ........................................................................................................................7
Reset the Current IP Address to the Default RVON-I/O IP Address ................................................8
Basic Installations ..............................................................................................................................8
Basic Local Mode Setup ....................................................................................................................9
Basic Remote Mode Setup .................................................................................................................9
RVON-I/O Trunk Setup ...................................................................................................................10
RVON Serial Pass-through Setup ....................................................................................................11
System Diagrams .............................................................................................................................12
RVON-1 Jumpers and Connections .................................................................................................16
Configuration .........................................................................................................................................17
Setup IP Addresses ..........................................................................................................................17
Configure the IP Address from a KP-32, KP-632, or a KP-832 ......................................................17
Configure the IP Address from a KP-812 ........................................................................................18
Configure the IP Address Using Telnet ...........................................................................................19
Configure the IP Address Using the Serial Debug Port ...................................................................21
Configure the RVON-I/O Using Telnet or a Serial Port .................................................................22
Configure RVON-I/O Using Telnet and Serial Port ........................................................................22
RVON-I/O Command Table ............................................................................................................25
Set Serial ..........................................................................................................................................29
Set GPIO ..........................................................................................................................................29
Set Panel ..........................................................................................................................................30
RVON-I/O Quick Start ..........................................................................................................................33
Setting Channel Information of an RVON-I/O for a Local Keypanel .............................................33
Setting Channel Information of an RVON-I/O for a Remote Keypanel .........................................34
NOTES .............................................................................................................................................36


1
CHAPTER 1
Introduction
Description
Coupled with the same VOIP technology used with the RVON-8, the RVON-I/O can take legacy analog audio and convert it to
digital VOIP audio. The RVON-I/O expands the boundaries of digital audio to include analog conversion. There are many
applications in which the RVON-I/O can be used, such as:
•ADAM Matrix AIO to RVON-I/O to RVON-1, RVON-8, RVON-I/O or VOIP Virtual Keypanel.
•Zeus to RVON-I/O to RVON-1, RVON-8, RVON-I/O or VOIP Virtual Keypanel.
•ADAM to RVON-I/O to Zeus
•Cronus to RVON-I/O to RVON-1, RVON-8, RVON-I/O or VOIP Virtual Keypanel.
•McCurdy 9500 to RVON-I/O to RVON-1, RVON-8, RVON-I/O or VOIP Virtual Keypanel.
RVON-I/O is fully compatible with the following internationally recognized standards and protocols; G.711, G.729AB, G.723.
Features
8Channelsof
Bidirectional
Audio plus
Keypanel
Data
The RVON-I/O supports 8 channels IN and OUT and has configurable network bandwidth parameters that
can be tailored to individual network conditions. Supports local and remote keypanels.
Addressing Eight individually addressable audio channels. The RVON-I/O can feed simultaneously VOIP (voice over
internet protocol)-capable keypanels, as well as, various other matrix intercom systems.
Ethernet
Capabilities The RVON-I/O uses standard Ethernet protocols and is compatible with 10 BASE-T and 100 BASE-TX
Ethernet compliant devices and networks.

Introduction
2
Reference View
FIGURE 1. RVON-I/O Reference View
l
O
OPEN
OPTIONS
CLOSED
GPI/O
SERIAL PORT
RELAY 1 & 2
J4
J3
J2
J1
I/O 8
I/O 7
I/O 6
I/O 5
I/O 4
I/O 3
I/O 2
I/O 1
FAIL
ETHERNET
90 - 240 VAC
TELEX®
TELEX COMMUNICATIONS, INC.
MADE IN U.S.A.
DIP Switch 1-4
Ethernet Connection
via RJ-45
RVON-I/O
Reset Power
1816 24
12
LED indicator displays
green when device is
powered ON
Reset IP Address
Push buttons 1&2 at the same time
while resetting the
device
Fail LED -
Microprocessor
did not initiate.
Power ON and OFF/
AC Power Plug
Resets the device
LED device status
module, for more detailed
information, see Table 7.
GPI/O Connection
25-pin DB-25 Connector
Relay Connection
DB-9 Connector
Serial Connection
DB-9 Data
Por t
}
J1 through J8
I/O Connections
used to pass audio and data to
keypanels and Matrices.
DB-9 Balance IN and OUT.
LED Explanation of the LED device status module
# Red LED Green LED
1VOIP not connected
channel 1 VOIP connected
Channel 1*
2VOIP not connected
channel 2 VOIP connected
Channel 2*
3VOIP not connected
channel 3 VOIP connected
Channel 3*
4VOIP not connected
channel 4 VOIP connected
Channel 4*
5VOIP not connected
channel 5 VOIP connected
Channel 5*
6VOIP not connected
channel 6 VOIP connected
Channel 6*
7VOIP not connected
channel 7 VOIP connected
Channel 7*
8VOIP not connected
channel 8 VOIP connected
Channel 8*
9 GPO 1 asserted GPI 1 asserted
10 GPO 2 asserted GPI 2 asserted
11 GPO 3 asserted GPI 3 asserted
12 GPO 4 asserted GPI 4 asserted
13 GPO 5 asserted GPI 5 asserted
14 GPO 6 asserted GPI 6 asserted
15 GPO 7 asserted GPI 7 asserted
16 GPO 8 asserted GPI 8 asserted
17
18 Pass-Through Serial TX
Activity Pass-Through Serial
RX Activity
19
20 Shell Log Message (TX)
Activity
21 Ethernet Half Duplex Ethernet Full Duplex
22 Ethernet 10 Mbps Ethernet 100 Mbps
23 Ethernet Not ‘AUTO’ Ethernet Link Good
24 Remote Mode Processor Good
*Green LED wink periodically when a keypanel is connected.
** If both LEDs are OFF or not lit, the channel is NOT
configured (this only applies to LEDs 23-16).

3
Specifications
Specifications
Connections
RJ-45 Ethernet
DB-9 I/O Port (8 bidirectional audio and keypanel data; Male)
DB-25 GPI/O Connection (Female)
DB-9 Relay Port (Female)
DB-9 Serial Port
Power
90-240 VAC
Physical
1 RU (height)
19 inches (482.6 mm) wide X 8 inches (203.2 mm) deep
Digital
NOTE: The Playout Delay and Bandwidth depend on the configured amount of audio per packet. The bandwidth values are
for bidirectional audio without VAD (Voice Activity Detection) enabled.
Analog Audio Specifications
Signal Type: Fully differential (balanced)
Nominal Level: 8dBu
Maximum Level: 20dBu
Input Impedance: High (22K Ω)
Output Impendance: Low (600 Ω)
A/D and D/A Specifications
Sampling Rate: 8 KHz
Resolution: 8 bits
Converter Architecture: 128x Over-sampling Σ- ΔModulator
TABLE 1. Digital Specifications
Codec Bit Rate Coding Delay Playout Delay Bandwidth MOS*
G.711 64 125 μs 20-60 ms 160-224 kbps 4.3
G.729AB 8 10 ms 20-120 ms 32-112 kbps 3.95
G.723 5.3, 6.3 30 ms 60-120 ms 29-45 kbps 3.5, 3.9
*MOS (Mean Option Score or ACR (Absolute Category Rating) is a widely known voice quality measuring method. The scale ranges from 5
(excellent) to 0 (unacceptable). The typical desirable range for VOIP transmission is from 3.5 to 4.2.

Introduction
4
Pin Outs for Connections
NOTE: The DB-25 pin GPI/O connector can be directly
connected to the Zeus, Zeus II, ADAM CS, and ADAM
** Connection to a Cronus Intercom requires a customer
cable assembly.
RJ-45 Pin Function Ethernet
1 Ethernet TPO+
2 Ethernet TPO-
3 Ethernet TPI+
4TPO+
5TPO-
6 Ethernet TPI-
7TPI+
8TPI-
DB-9 Pin Function I/O
1RS485+
2RS485-
3N/A
4 RVON-I/O Audio IN+
5 RVON-I/O Audio IN-
6N/A
7 RVON-I/O Audio OUT-
8 RVON-I/O Audio OUT+
9N/A
See page Figure 2, “DB-9 Crossover Cable Connection
Diagram,” on page 6.
DB-9 Function Serial Port
1N/A
2 RXD, RVON-I/O Received Data
3 TXD, RVON-I/O Transmitted Data
4N/A
5GND
6N/A
7N/A
8N/A
9N/A
DB-9 Pin Function Relay 1&2
1Closed0
2 Open 0
3 +12V Through 300 Ohm Resistor
4Closed1
5 Open 1
6Common0
7 GND
8GND
9Common1
DB-25 Pin Function GPI/O
1GPO1
2GPO2
3GPO3
4GPO4
5GPO5
6GPO6
7GPO7
8GPO8
9 GND
10 GND
11 GND
12 GND
13 GND
14 GPI 1
15 GPI 2
16 GPI 3
17 GPI 4
18 GPI 5
19 GPI 6
20 GPI 7
21 GPI 8
22 GND
23 GND
24 GND
25 GND
DB-9 Pin Function Relay 1&2

5
DIP Switches
DIP Switches
DIP Switch 1: RVON-I/O Mode
Default Position: OPEN
Switch Position: OPEN - Local Mode
CLOSED - Remote Mode
Description:
There are two modes in which the RVON-I/O can run: LOCAL and REMOTE mode
In LOCAL mode, keypanels are directly connected to the RVON-I/O. For example, a KP-32 is
connected serially to the RVON-I/O which is connected via Ethernet to the RVON-8 in the ADAM
system. The connection between the KP-32 and the RVON-I/O is LOCAL.
In REMOTE mode, a digital keypanel (such as a KP-32 with RVON-1) is connected to an RVON-I/O,
which is then connected to an ADAM CS, Zeus, Cronus or an ADAM with AIO cards.
NOTE: To see system drawing scenarios of both local and remote mode, see “System Diagrams” on
page 12
DIP Switch 2: Serial Debug Shell
Default Position: OPEN
Switch Position: OPEN - Pass-through port enabled
CLOSED - Serial Debug Shell enabled; IP configuration on Audio Port 8.
Description
When the DIP Switch is CLOSED, Serial Debug is enabled. When the DIP switch is OPEN, the Pass-
through Port is enabled.
The Pass-through Port is used to send serial port data over Ethernet.
The Serial Debug Shell provides the user access to a command shell (this is similar to Telnet, except
the connection is made through a serial cable).
The IP configuration on I/O Port 8 allows users to connect and configure the IP Address of the RVON-
I/O using a compatible keypanel (KP-32, KP-632, KP-832, and KP-812) connected serially to I/O Port
8 on the back of the RVON-I/O. IP Configurations are made from the keypanel service menu. Note, you
must have keypanel firmware version 2.02 or higher to configure the IP Address.
DIP Switch 3: Telnet Shell
Default Position: OPEN
Switch Position: OPEN - Telnet Shell is enabled
CLOSED - Disabled, user name and password are set to default
Description Using telnet, you can set permissions and configurations within the RVON-I/O application. See Table ,
“RVON-I/O Command Table,” on page 25.
DIP Switch 4: Boot Downloader
Default Position: OPEN
Switch Position: OPEN - Boot Downloader is disabled (runs the native flash program)
CLOSED - Boot Downloader is enabled (runs the boot downloader)
Description: Switches to the boot downloader flash program. This program is sent with the RVON-I/O in case the
native flash program becomes corrupt.

Introduction
6
FIGURE 2. DB-9 Crossover Cable Connection Diagram
FIGURE 3. RJ-12 to DB-9 Crossover Cable Connection Diagram
1
2
3
4
5
6
7
8
9
1
2
3
4
5
6
7
8
9
DB-9
Crossover Cable
Connection
Diagram
Optional: On the ADAM CS and the
Zeus, connect pins 3, 6, and 9 to sheild.
1
2
3
4
5
6
1
2
3
4
5
6
7
8
9
RJ-12 to DB-9
Crossover Cable
Connection
Diagram
DB-9 F
To RVON-I/O
RJ-12
To Matrix

7
CHAPTER 2
Installation
The RVON-I/O can operate in one of two modes, LOCAL mode or REMOTE mode. When operating in LOCAL mode, key-
panels are directly connected to the RVON-I/O. For example, a KP-32 is connected serially to the RVON-I/O, which is con-
nected via Ethernet to the RVON-8. The KP-32 RVON-I/O is in LOCAL mode. When operating in REMOTE mode, a digital
keypanel (such as KP-32 with RVON-1) is connected via Ethernet to an RVON-I/O, which is then connected to an intercom.
System Requirements
Before you install the RVON-I/O, verify the following items are updated:
Product Firmware
RVON-I/O 1.0.0 or higher
RVON-1 1.1.0 or higher
RVON-8 1.2.0 or higher
Master Controller 9.22.0 or higher
KP-32 2.0.2 or higher
AZedit 2.08.0 or higher
VKP 1.0.1 or higher

Installation
8
Reset the Current IP Address to the Default RVON-I/O IP Address
The RVON-I/O is shipped with a default IP Address already configured on the unit. The default IP Address is 192.168.0.1,
the default Netmask is 255.255.0.0, the default Gateway is set to zero. This feature is useful when using an RVON-I/O in the
field (i.e.; a mobile truck) where the IP Address is constantly changing from on destination network to the next. By being able
to reset the IP Address to a default address, you will be able to connect to the RVON-I/O without having to remember the IP
Address of the previous location. For more information on configuring the IP Address, see “Reset the Current IP Address to
the Default RVON-I/O IP Address” on page 8.
To reset the IP Address to default on the RVON-I/O, do the following:
1. On the front of the RVON-I/O unit, push and hold buttons 1and 2, then push the RESET button. Hold the buttons in for 15
seconds or until all the LED lights blink rapidly.
When all the LED lights blink rapidly, the RVON-I/O IP Address has been reset to the default.
NOTE: If buttons 1 and 2 are pressed during power ON, the unit will reset the IP Address.
Basic Installations
On the following pages, installation for Basic Local Mode, Basic Remote Mode, and Basic Trunked systems will be explained.
NOTE: When using Zeus with RVON-I/O GPI/O you must uncheck the “Configure onboard GPI/Os in FR9528 mode”
BEFORE you configure your system. If you set this after you configure your panels, it will cause the Zeus configuration to be
reset.
RVON-I/O
Reset Power
1816 24
12
Reset IP Address
Push buttons 1&2 at the same time
while resetting the device
Resets the device

9
Basic Local Mode Setup
NOTE: Keypanel version is not relevant in Local Mode.
In LOCAL mode, the keypanel is directly connected to the RVON-I/O through the use of a DB-9 serial cable.
To setup an RVON-IO local mode system, do the following
1.On the back of the RVON-I/O, put DIP switch 1 in the OPEN position (LOCAL mode).
2.Power ON the RVON-I/O unit.
3.Connect keypanels to the RVON-I/O (I/O ports), using a straight DB-9 (serial cable). See page 6
4.Connect the RVON-I/O to the Ethernet.
5.Set the IP Address for the RVON-I/O (see “Setup IP Addresses” on page 17).
6.Using Telnet or Serial programming (see “RVON-I/O Command Table” on page 25), configure the RVON-I/O as
follows:
NOTE: To see actual Telnet commands, see “RVON-I/O Command Table” on page 25
set channel [chan]
dest ip_addr (IP Address of the RVON-1, RVON-8, or RVON-I/O that is connected to the RVON-I/
O)
dest_type (the type of device, either an RVON-1, RVON-8, or RVON-I/O)
dest_chan
dest_codec (optional)
7.Once you are finished configuring the RVON-I/O, type ACTIVATE into the command prompt to activate the
configuration setup on the RVON-I/O
Basic Remote Mode Setup
In Remote Mode, the keypanel with RVON-1 installed is directly connected to the RVON-I/O via Ethernet.
To setup a basic remote mode system, do the following:
1. On the back of the RVON-I/O, put DIP switch 1 in the CLOSED position (Remote Mode).
2. Power ON the RVON-I/O unit.
3. Connect the matrix system to the RVON-I/O (I/O ports), using a DB-9 crossover cable. See page 6 for the different
connection diagrams.
4. Connect the RVON-I/O to Ethernet.
5. Set the IP Address for the RVON-I/O (see “Setup IP Addresses” on page 17).
6. Using Telnet or Serial programming (see “RVON-I/O Command Table” on page 25), configure the RVON-I/O as follows.
NOTE: To see actual Telnet commands, see “RVON-I/O Command Table” on page 25.
set channel [chan]
dest ip_addr (IP Address of the RVON-1, RVON-8, or RVON-I/O that is connected to the RVON-I/
O)
dest_type (the type of device, either an RVON-1, RVON-8, or RVON-I/O)
dest_chan
dest_codec (optional)
set panel [panel]
poll_id (see “Set Panel” on page 30)
baud

Installation
10
7. Once you are finished configuring the RVON-I/O, type ACTIVATE into the command prompt to activate the
configuration setup on the RVON-I/O.
NOTE: If you do not have a RVON-1 pre-installed, the KP-32 or the KP-812 must have the RVON-1 component
installed prior to Remote setup (See the RVON-1 User Manual for details).
RVON-I/O Trunk Setup
When trunking two intercom systems over Ethernet using RVON-I/O, you can setup the RVON-I/O on both ends
of the trunks in either LOCAL or REMOTE mode. However, a REMOTE to REMOTE mode system is the
preferred way of trunking.
To setup remote mode in a trunked system, do the following:
1. On the back of the RVON-I/O, put DIP switch 1 in the CLOSED position (Remote Mode).
2. Power ON the RVON-I/O unit.
3. Connect the Matrix to the RVON-I/O (via I/O ports), using a DB-9 crossover cable. See page 6 for the
different connection diagrams.
4. Connect the RVON-I/O to Ethernet.
5. Set the IP Address for the RVON-I/O (see “Setup IP Addresses” on page 17).
6. Using Telnet or Serial programming, configure the RVON-I/O as follows:
set channel [chan]
dest ip_addr (IP Address of the RVON-1, RVON-8, or RVON-I/O that is connected to
the RVON-I/O)
dest_type (the type of device, either an RVON-1, RVON-8, or RVON-I/O)
dest_chan
dest_codec
set panel [panel]
poll_id (see “Set Panel” on page 30)
NOTE: If the RVON-I/O is in Remote Mode, set the Panel Poll ID to 0, so it will not
be seen as keypanel.
baud
NOTE: To see actual Telnet commands, see “RVON-I/O Command Table” on page 25.
7. Once you are finished configuring the RVON-I/O, type ACTIVATE into the command prompt to activate the
configuration setup on the RVON-I/O
NOTE: To set up the other side of the trunk system, repeat steps 1 through 7.

11
RVON Serial Pass-through Setup
The Serial Pass through is the path in which data is sent and received
1. Verify the correct port is selected - on J1 see “Pin Outs for Connections” on page 4.
2. Verify the serial connections are correct.
3. Verify Pass Through Port is enabled (DIP Switch 2 OPEN), see “DIP Switches” on page 5.
4. Verify the RVON-I/O baud rate matches the baud rate of the device it is connecting with.
5. Using Telnet or Serial programming, configure the RVON-I/O as follows:
set serial
mode
ip_addr
baud
NOTE: To see actual Telnet commands, see “RVON-I/O Command Table” on page 25.
6. Once you are finished configuring the RVON-I/O, type ACTIVATE into the command prompt to activate the configuration
setup on the RVON-I/O
FIGURE 4. Serial Pass-Through system diagram
RTS
Reset Power
18 16 24
RTS™
RVON-I/O
Desktop PC
AIO-8
AIO-16
LAN/WAN
DB-9
Crossover
Cable
DB-9
Crossover
Cable
RTS
AIO-8
AIO-16
Serially
connected
Serially
connected
Connected through
Ethernet

Installation
12
System Diagrams
FIGURE 5. Local Mode - This system diagram shows Local mode. It is called local mode because the keypanel is
connected directly to the RVON-I/O.
LAN/WAN
Reset Power
18 16 24
RTS™
RVON-I/O
Call waiting
Mic
Headset
Vol.
MENU
FWD
BACK
MUTE CLR PGM
NUM
SLIST
1
PL
IFB
2
AUTO
ISO
3
PHONE
RELAY
4
PREFIX
TYPE
56
COPYCW
EXCOPY
7
E-PNL
DISPLAY
89
MULT
FUNC
0
1F01 DAN KP96 KP96 SL03 KP12 M009
---- ---- ---- ---- WKP4 ---- WKP4
KP12 OKP4 ANDY KP32 DAN KP96 TIF1 KP12
---- ---- ---- ---- ---- ---- ---- ----
Listen
Talk
Listen
Talk
Headset
Vol.Sel.
4
3
1
2
5
™
KP-32
RTS
RVON-8
DB-9
Straight
Cable

13
System Diagrams
FIGURE 6. Remote Mode - Remote Mode means the keypanels are not connected to the RVON-I/O directly. In the
example, the KP-32 with RVON-1 or the VKP has to pass through the LAN/WAN before connecting to the RVON-I/
O.
RTS
TM
1 8 16 24
POWER
STATUS
RESET
ADAM CS
Reset Power
18 16 24
RTS™
RVON-I/O
Call waiting
Mic
Headset
Vol.
MENU
FWD
BACK
MUTE CLR PGM
NUM
SLIST
1
PL
IFB
2
AUTO
ISO
3
PHONE
RELAY
4
PREFIX
TYPE
56
COPYCW
EXCOPY
7
E-PNL
DISPLAY
89
MULT
FUNC
0
1F01 DAN KP96 KP96 SL03 KP12 M009
---- ---- ---- ---- WKP4 ---- WKP4
KP12 OKP4 ANDY KP32 DAN KP96 TIF1 KP12
---- ---- ---- ---- ---- ---- ---- ----
Listen
Talk
Listen
Talk
Headset
Vol.Sel.
4
3
1
2
5
™
KP-32
With RVON-1
VOIP Virtual keypanel
on Desktop PC
AIO-8
AIO-16
LAN/WAN
DB-9
Crossover
Cable
DB-9
Crossover
Cable
DB-9
Crossover
Cable

Installation
14
FIGURE 7. Local and Remote Mode - The lower portion of the graphic shows a local setup (the keypanel is directly
connected to the RVON-I/O), while the upper portion of the graphic shows a remote setup. The RVON-I/O works
similar to an audio converter box. In the lower portion of the graphic, the audio coming from the KP-32 going
towards the TVON-I/O will be changed from analog to digital audio (and vice versa). The same holds true for the
upper portion of the graphic, where the audio coming from the RVON-I/O going towards the Zeus is converted to
analog.
LAN/WAN
Reset Power
18 16 24
RTS™
RVON-I/O
Call waiting
Mic
Headset
Vol.
MENU
FWD
BACK
MUTE CLR PGM
NUM
SLIST
1
PL
IFB
2
AUTO
ISO
3
PHONE
RELAY
4
PREFIX
TYPE
56
COPYCW
EXCOPY
7
E-PNL
DISPLAY
89
MULT
FUNC
0
1F01 DAN KP96 KP96 SL03 KP12 M009
---- ---- ---- ---- WKP4 ---- WKP4
KP12 OKP4 ANDY KP32 DAN KP96 TIF1 KP12
---- ---- ---- ---- ---- ---- ---- ----
Listen
Talk
Listen
Talk
Headset
Vol.Sel.
4
3
1
2
5
™
KP-32
TM
1 8 16 24
POWER
STATUS
RESET
Reset Power
18 16 24
RTS™
RVON-I/O
DB-9
Straight
Cable
DB-9
Crossover
Cable

15
System Diagrams
FIGURE 8. Trunking with RVON-I/O - When you trunk two intercom systems together using two RVON-I/O’s, you
can configure one as Remote and the other as Local. However, remote to remote setup is the preferred system setup
for trunking.
LAN
Reset Power
18 16 24
RTS™
RVON-I/O
Reset Power
18 16 24
RTS™
RVON-I/O
POWER
PS2
PS1
STATUS
RESET
TM
1 8 16 24
II
POWER
PS2
PS1
STATUS
RESET
TM
1 8 16 24
II
DB-9
Crossover
Cable
DB-9
Crossover
Cable

Installation
16
RVON-1 Jumpers and Connections
A selectable RS232/485 serial port is a connector J1. Jumper connections on J10, J11, and J12 select the signal mode on J1.
•When J10, J11, and J12 are jumped from pins 1 to 2 - J1 is configured for RS485.
•When J10, J11, and J12 are jumped from pins 2 to 3 - J1 is configured for RS232.
J21 must be jumped from pins 1 to 2 to select UART B for RS485 RVON-1 keypanel operation.
J2 Connector
The RVON-1 card is designed to be used with either a keypanel or an RVON-I/O card. The J2 connector mounts the RVON-1
card onto a keypanel.
RS232 debug serial port via Connector J3. J3 is a 6-pin heater that connects to RS-232 compatible serial ports of the
TNETV2020.
NOTE: Pin 1 of a jumper is shown as a black square.
FIGURE 9. Front and back of the RVON-1 board
Other manuals for RVON-I/O
2
Table of contents
Other RTS Intercom System manuals