5
Select the Recording Bit Rate
The choices in the dropdown menu are 10, 15 or 20 Mbps. Since MPEG compression is
based on motion, you can generally use a lower bit rate (resulting in smaller files) since
there isn’t a lot of motion in a deposition. If you’re going to be playing back video files or
inputting a video source, a higher bit rate will reduce the ‘macroblocking’ artifacts that
often result from low bit rate recordings of high motion images.
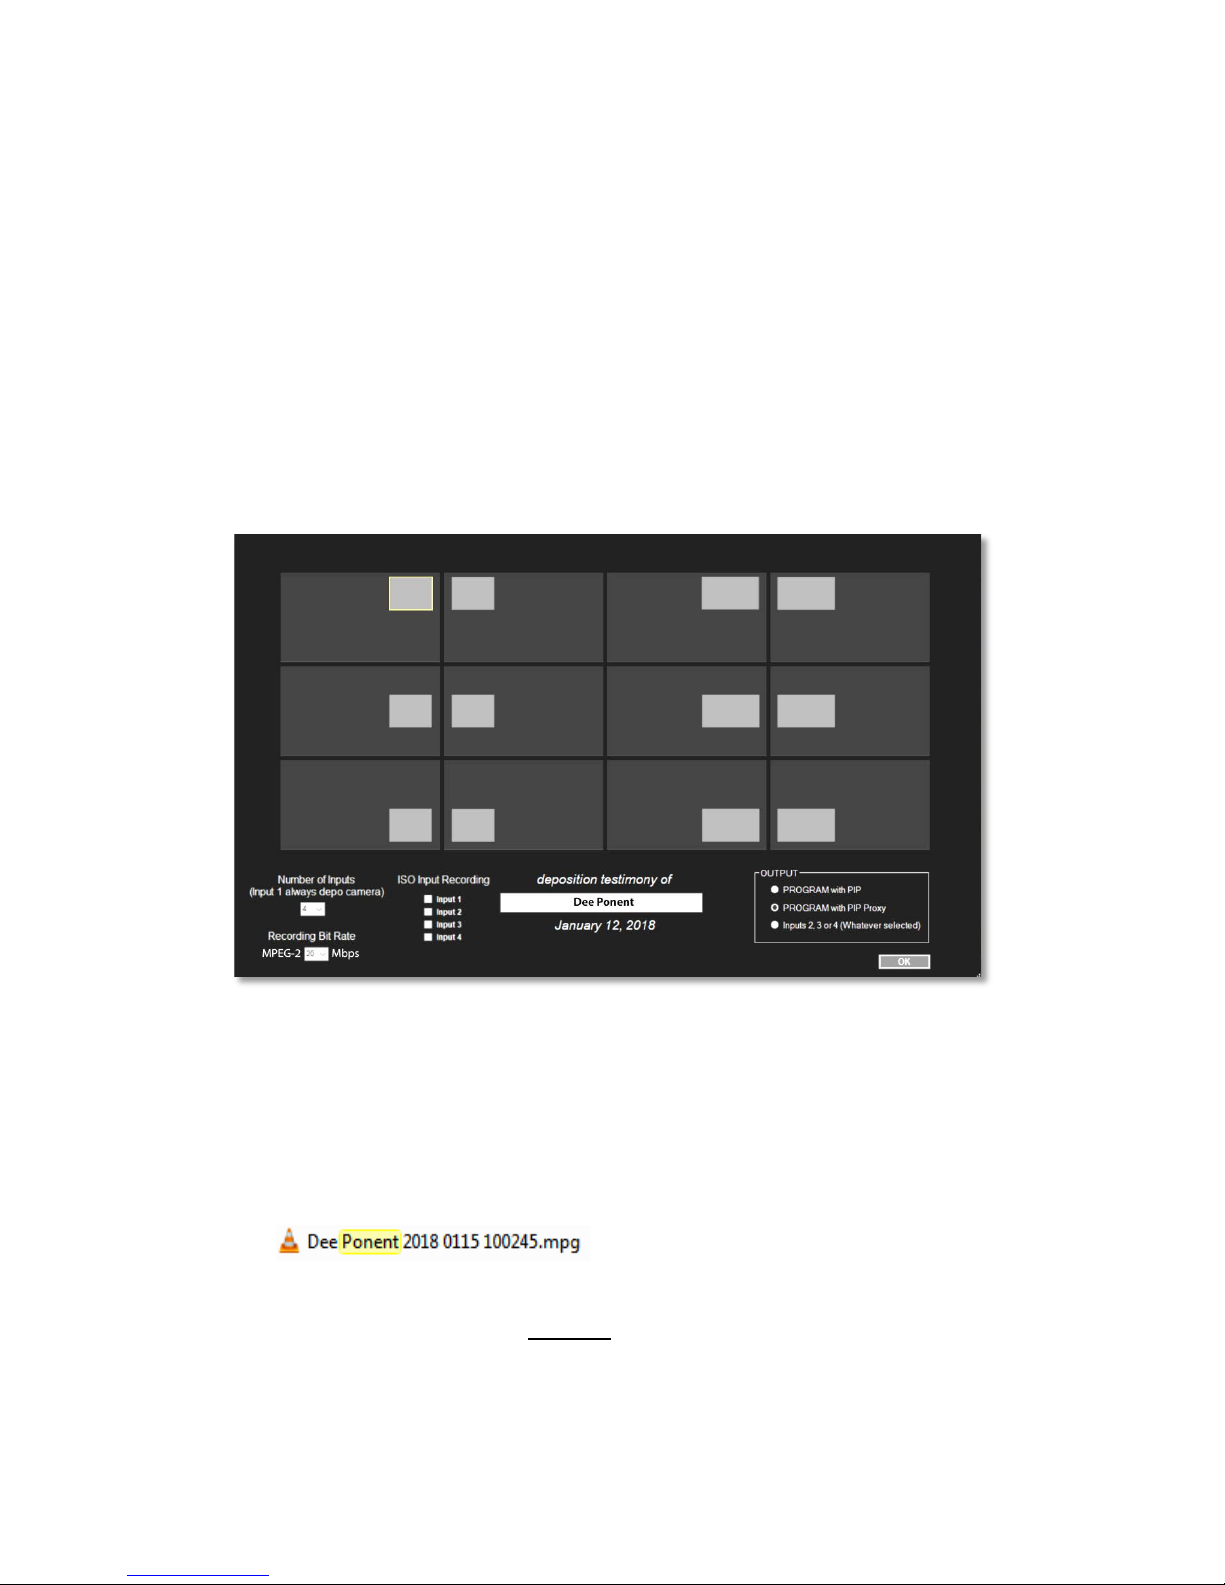
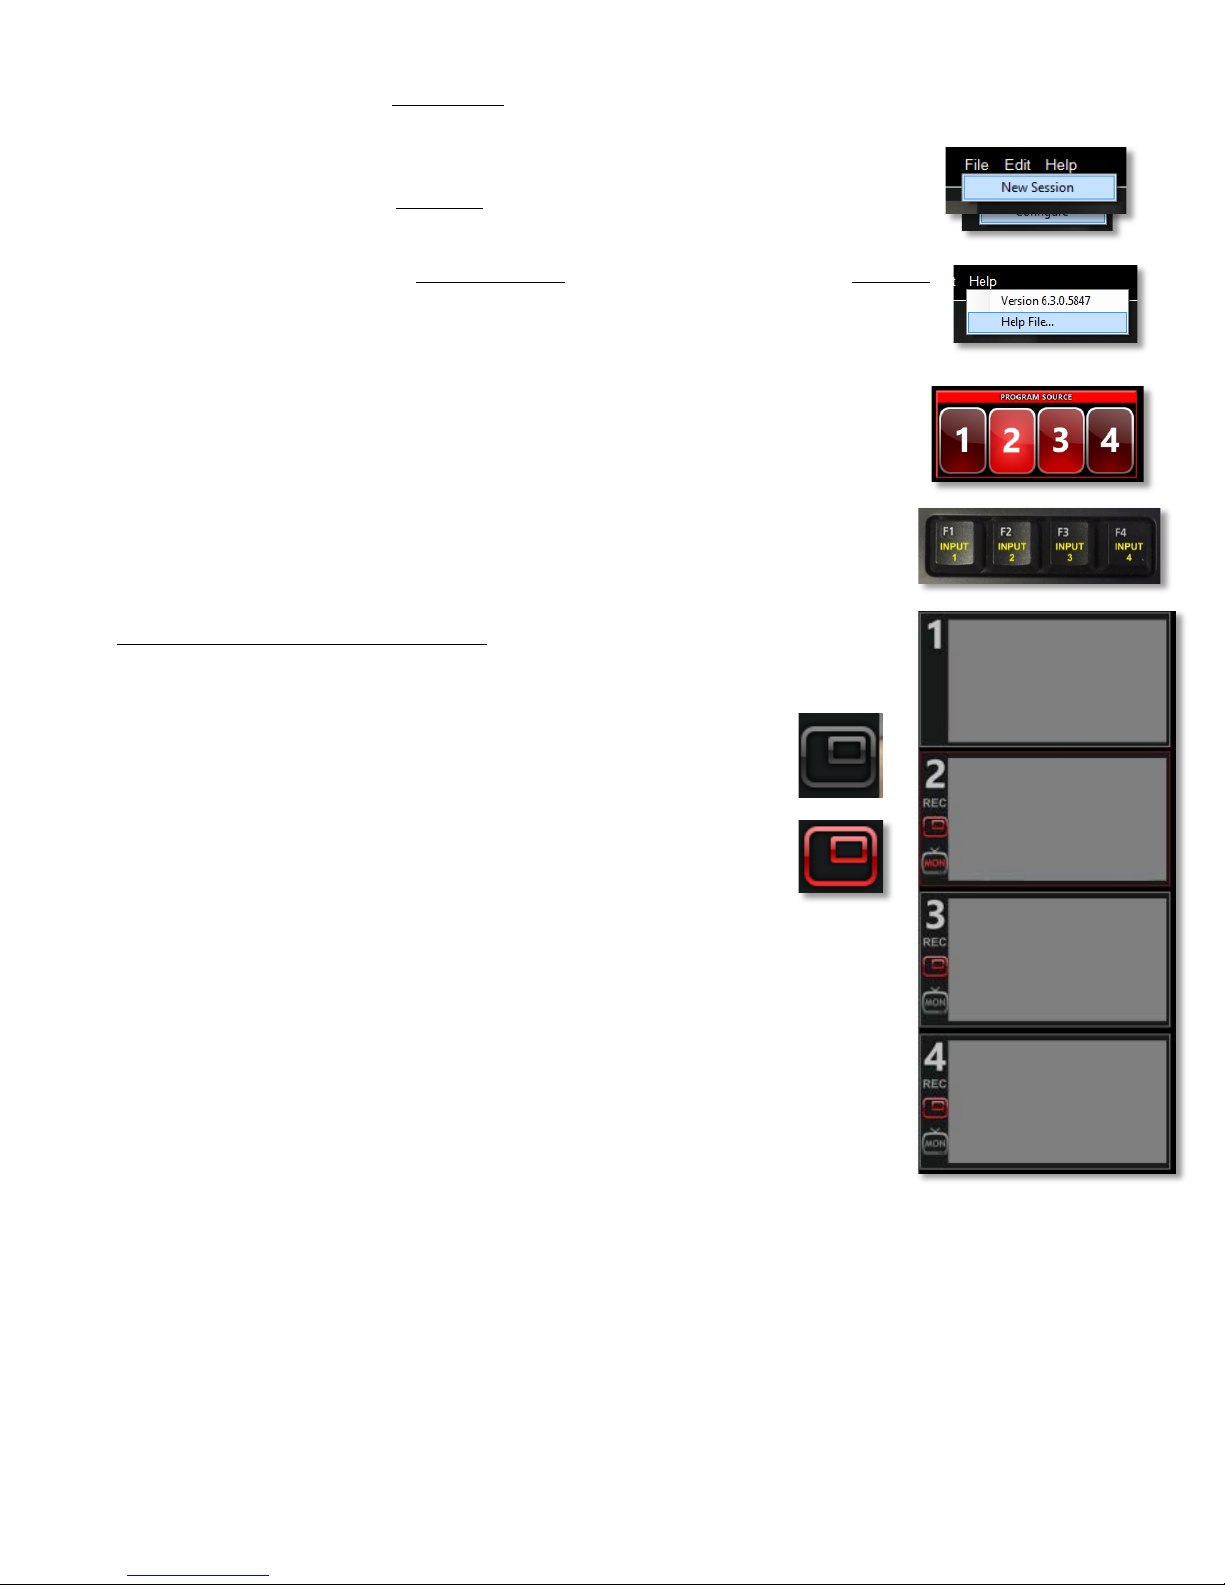
Specify ISO Input Recording
(simultaneously recording multiple inputs)
In the Configuration window, click one or more of the Input checkboxes to enable
simultaneous recording of those inputs, in addition to the default recording of the main
Program window, which is the only window that displays PiP. When you click the RECORD
button, the video signals corresponding to the checked inputs will be recorded.
NOTE: The PROGRAM is recorded as an .mp4 file (H.264), and the ISO inputs are recorded as
MPEG-2 files (.mpg).
The Program screen (with or without PiP) is always recorded, regardless of whether or not you select
individual inputs for ISO recording.
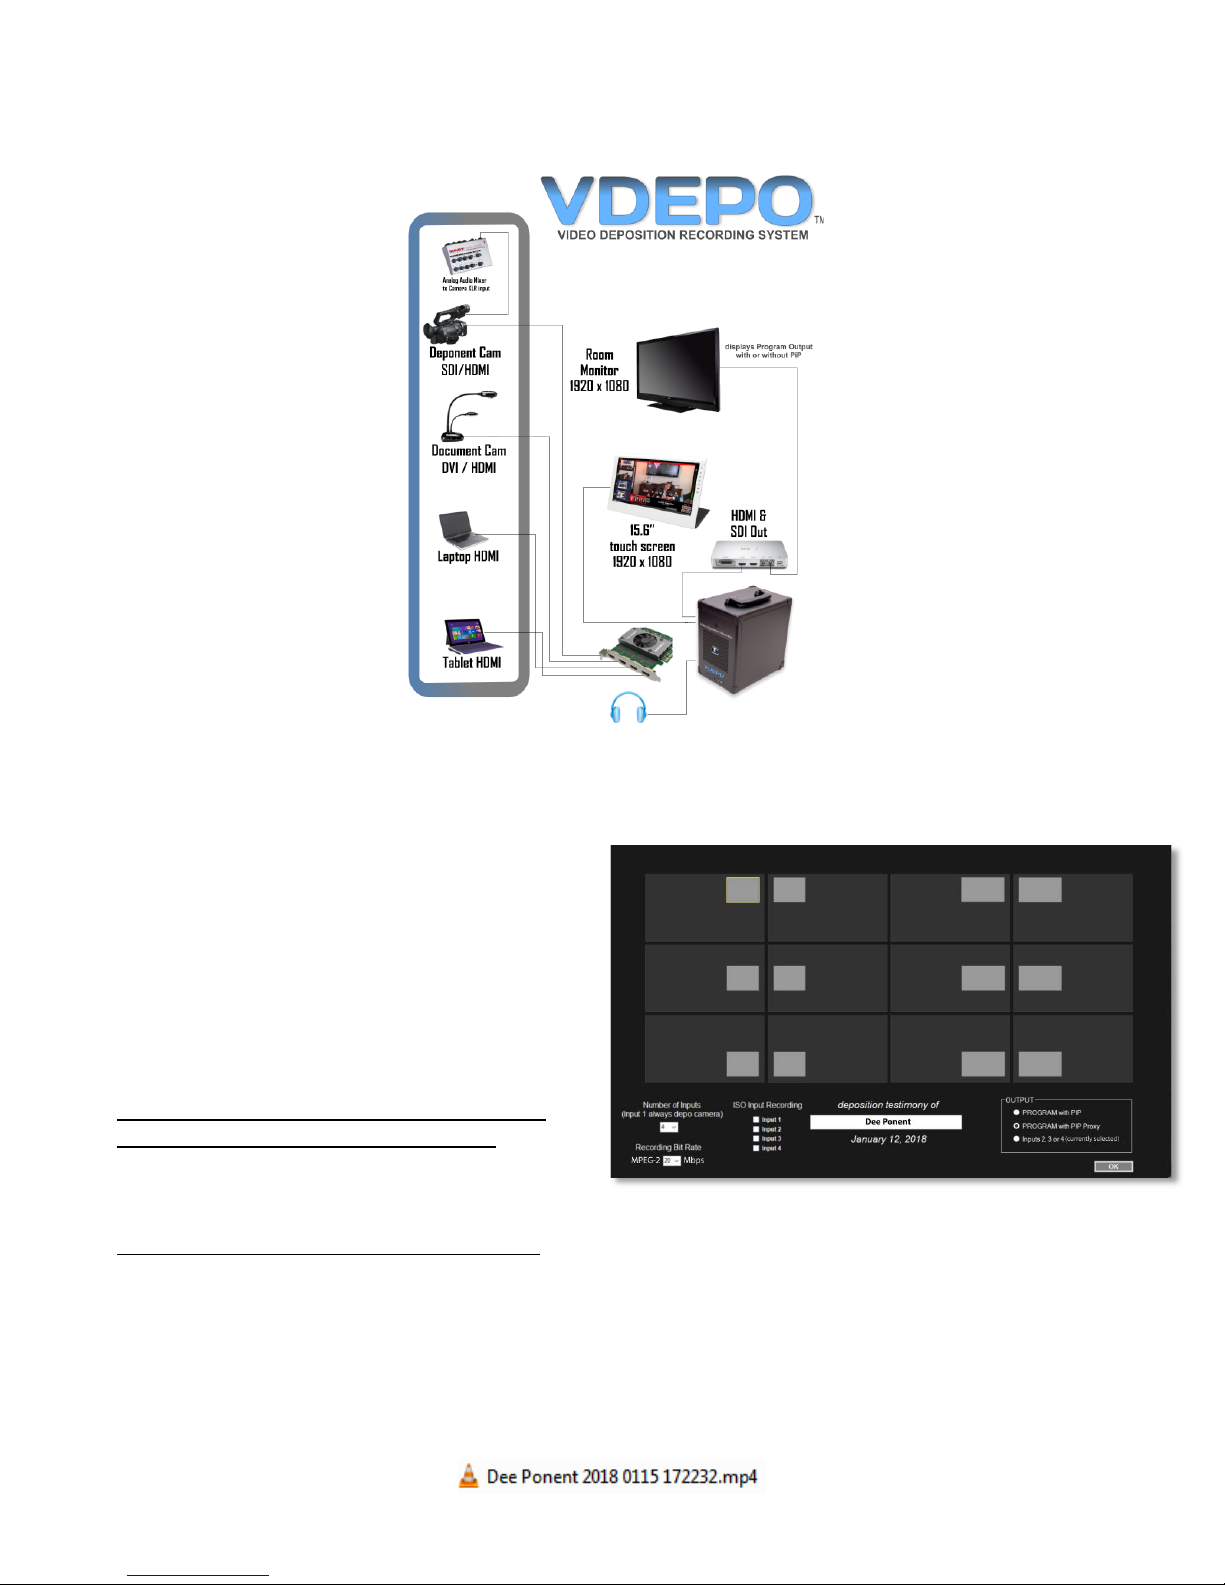
Select the OUTPUT for Display on the In-Room Monitor
Attorneys have different preferences for what they like to have visible on the in-room TV monitor, so you have
three choices. HDMI and SDI outputs are included.
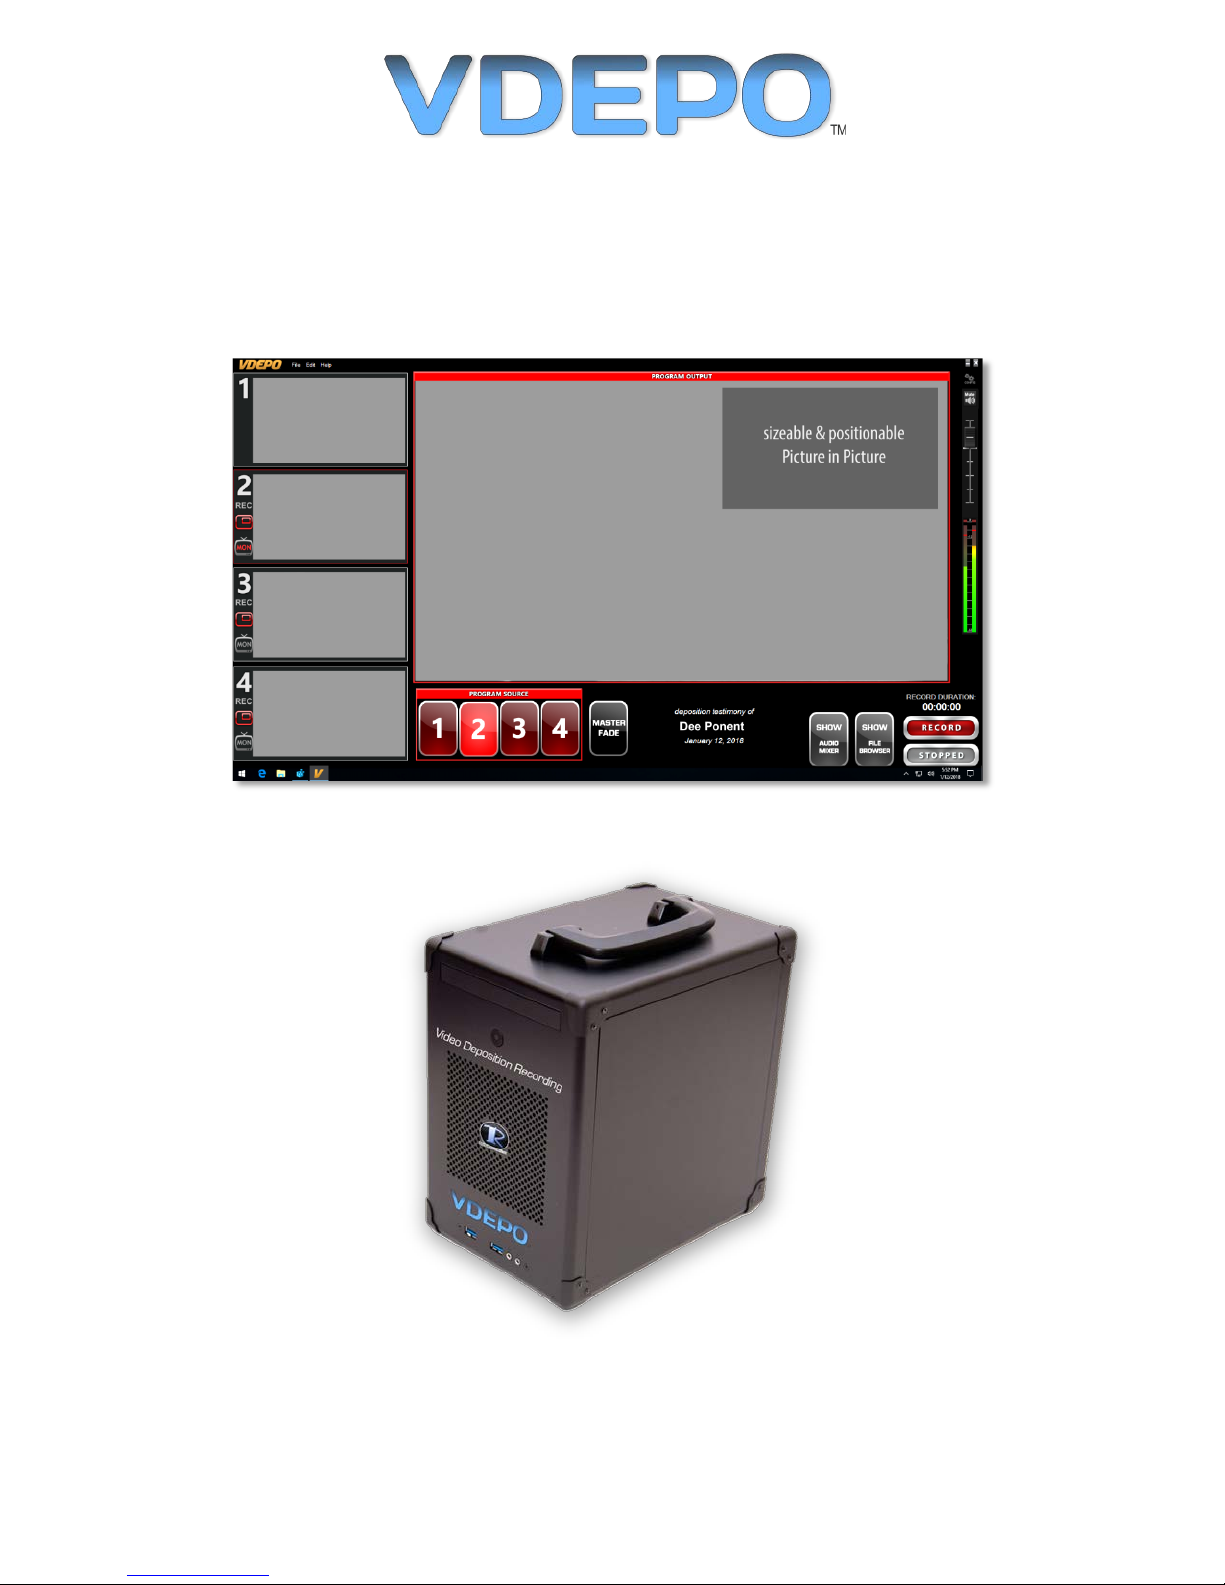
PROGRAM with PIP displays exactly what you see in the User Interface,
including the deponent’s image in the PIP window, if active.
PROGRAM with PIP Proxy displays a gray outline if a PIP is active on the
production interface. This shows participants where the PIP is on the recorded
image, but prevents the deponent’s image from displaying in the rectangle.
Inputs 2, 3 or 4 prevents the deponent camera, Input 1, from ever appearing on the in-room monitor.
Participants will only see Inputs 2, 3 or 4 during the session. If the deponent camera is selected as the full
screen image (Input 1) for the PROGRAM, the last selected input (2, 3 or 4) will remain as the output to the
monitor. Those inputs can manually be selected by the operator to display on the OUTPUT at any time when
Input 1 is full screen for recording.
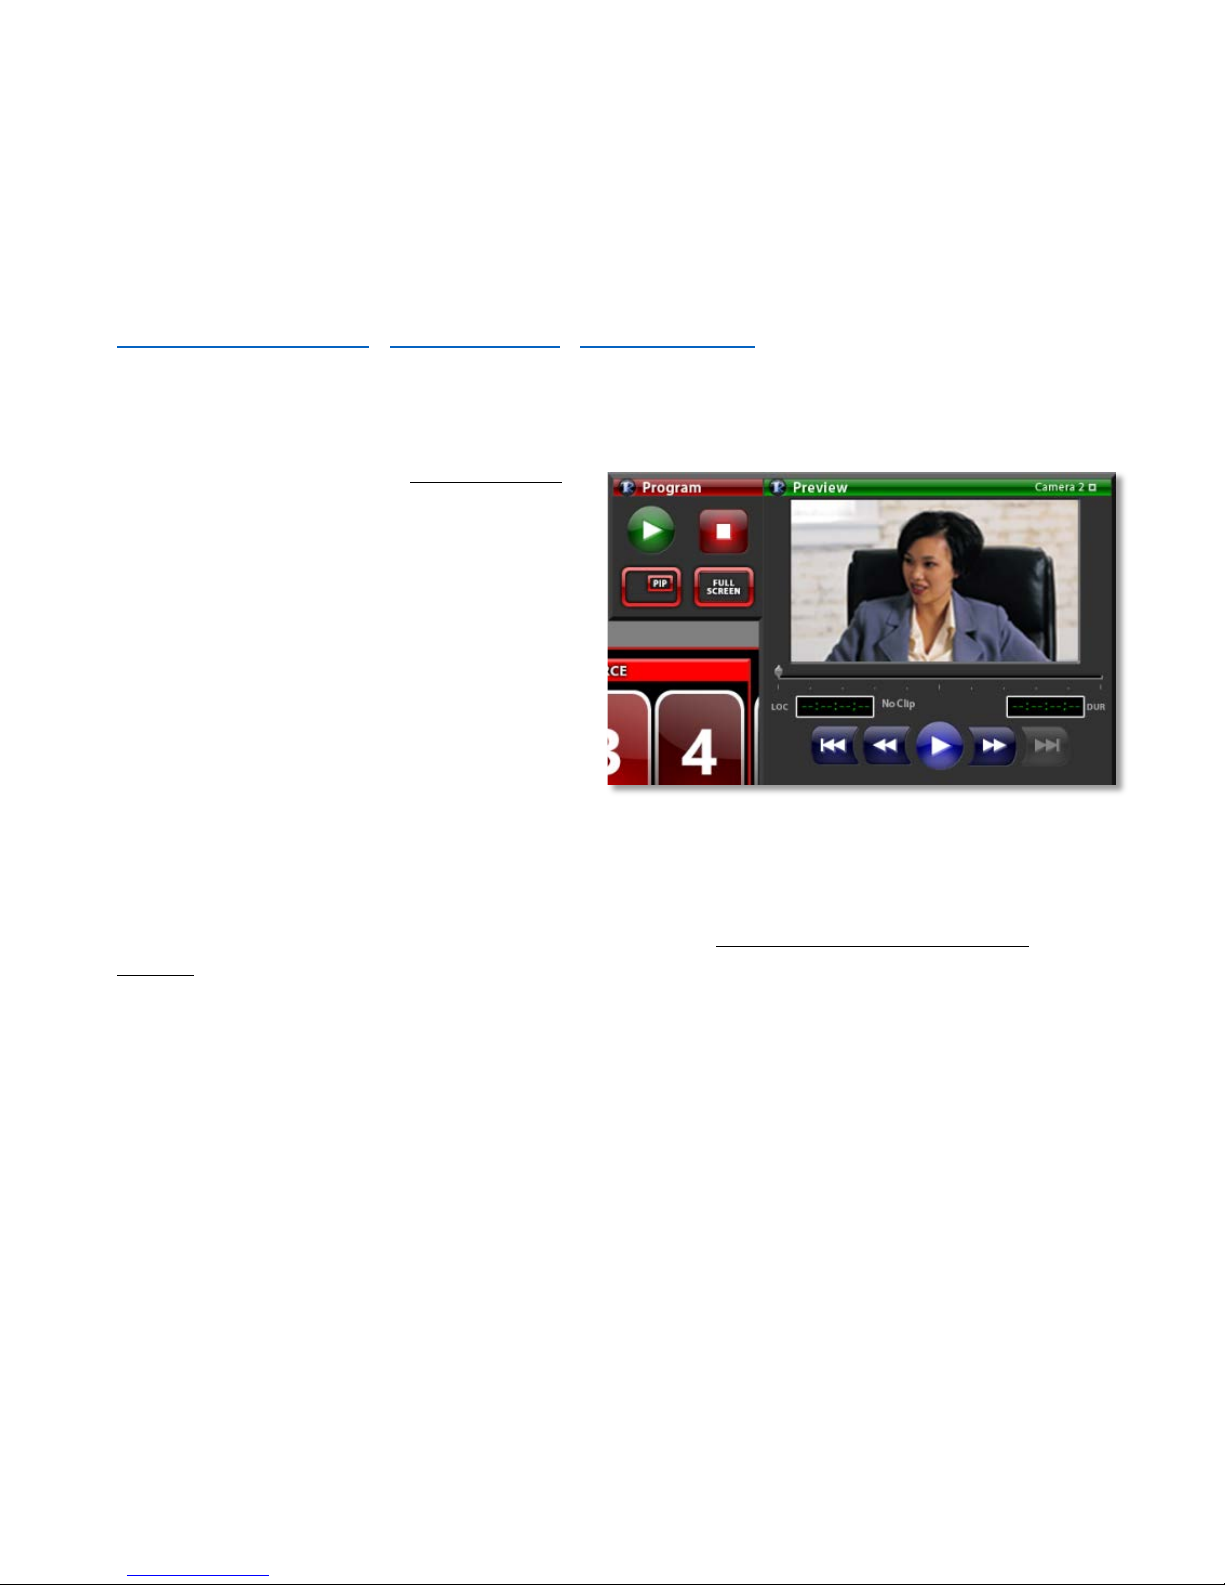
Once you’ve specified the number of inputs, the ISO recording selections, the recording bit rate, and the
OUTPUT display option - and have entered the name of the deponent - click OK, and the Configure screen
closes. The application opens with Input 1 (camera) selected. When you select inputs 2, 3 or 4 you’ll see the
PiP box with Input 1 (camera) displayed over the image from those inputs if you’ve enabled active PiP over
those inputs.
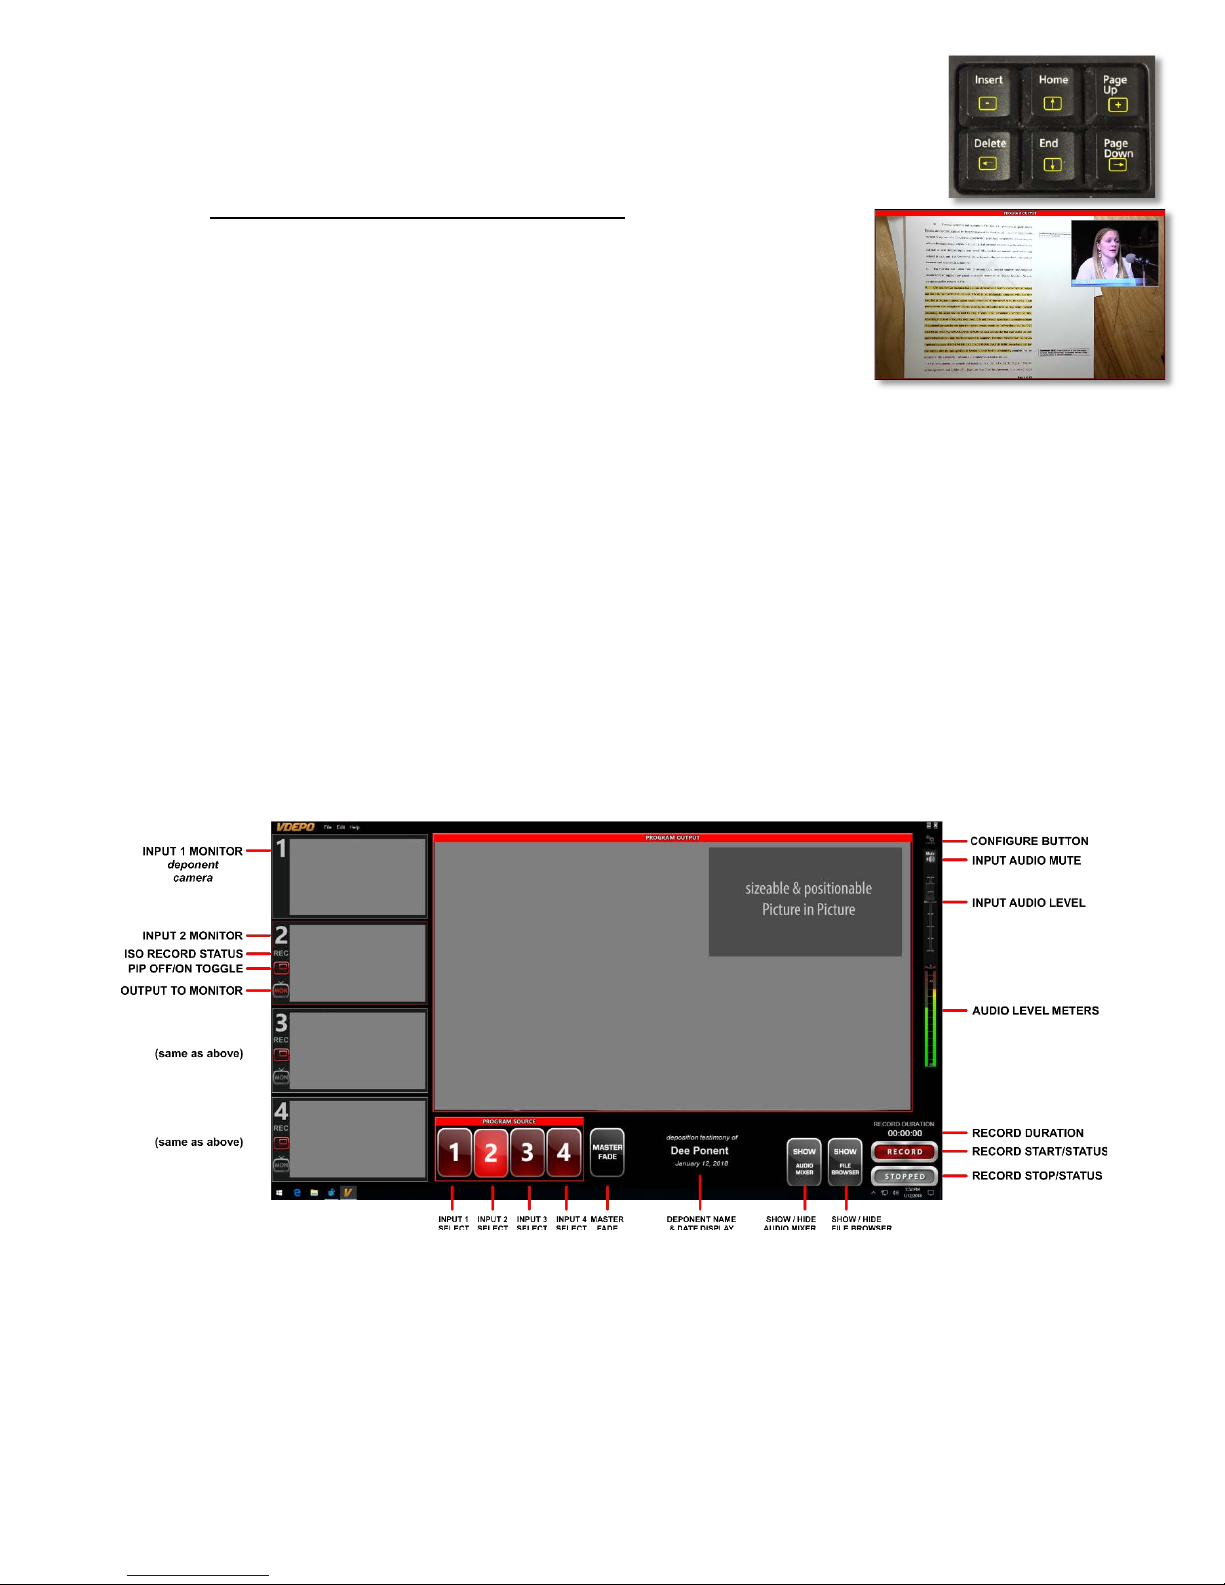
Beneath the PROGRAM window you’ll see the deponent’s name and
current date. It displays the NAME of the deponent you entered and
the current date based on the computer clock, and is there solely to
confirm that the accurate name for the deponent has been entered in
the Layout screen.