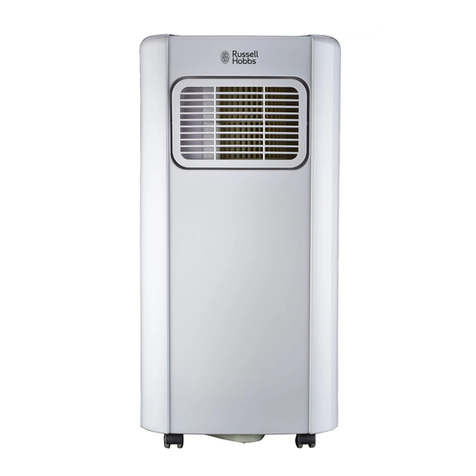
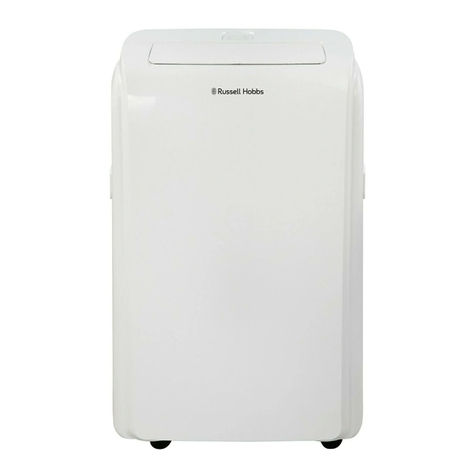
Russell Hobbs RHMA 055 Installation guide

INSTRUCTIONS & WARRANTY
MODEL: RHMA 055
MOBILE AIR CONDITIONER

Thank you for choosing this innovativeRussell Hobbsairconditioner.Wesuggestthatyou keep this
manual in asafeplacefor future reference.It describes the manybenefits andadvancedfeatures this
uniqueproducthas to offer. Before you useyour newair conditioneryou shouldcarefullyreadthese
instructions tomaximizethis product‟s performance.
For your safety pleasereadthefollowinginformation.
Warning:This appliancemust be earthed.
If the moulded mains plug is unsuitablefor the socketoutlet in yourhome or isremoved for any otherreason,
then the cutoffplug must be disposedof safely topreventthehazardof electric shock.
Mains (AC) Operation
This appliance is designed to operateon 220-240V currentonly.Connectingtoother power sourcesmay damage theunit.
The wires inthemains lead on this appliance arecolouredin
accordancewiththefollowingcode:
Green and Yellow =Earth
Blue = Neutral
Brown =Live
As thecolours may not correspondwiththemarkings
identifyingthe terminals in yourplug proceedas follows.
The green andyellow wiremustbeconnectedtotheterminal
in the plug whichismarked withtheletter E or withtheearth (N
symbol
or coloured green and yellow. Neutral (L)
Live
The blue wiremustbe connectedtothe terminal marked N or colouredblack.
The brownwiremustbeconnectedtothe terminal marked L or colouredred.

IMPORTANT SAFEGUARDS
When using any electrical appliance, basic safety precautions should always be followed including the following:
1. Please readthe instructions carefully beforeusingany appliance.
2. Always ensurethatthevoltageon the rating label corresponds tothemains voltagein yourhome.
3. Incorrectoperationand improper usecandamage thepanel heaterand causeinjury tothe user.
4. The panelheater isintended for household(wallmounted)useonly. Commercial use invalids the warrantyandthesuppliercannotbe held
responsiblefor injury or damage caused whenusing the appliance for any other purposethanthat intended.
5. The wallpanel heaters shouldunderno circumstances beusedas freestandingheaters.
6. This heateris hot wheninuse.To avoid burns,donot let bareskin touchhot surfaces.Keepcombustiblematerials, suchas furniture,pillows,
bedding, papers,clothes,andcurtains atleast 3 feet(0.9m)fromthe frontof theheaterand keep away fromthesides andrear.
7. This panel heater is not intended for use by persons (includingchildren) w ith reduced physical, sensoryor mental capabilities, or lack of
experienceandknowledge,unless they have beengivensupervisionor instructionconcerninguseof theappliance by a person responsible
for their safety.
8. Aninfantor ababy shouldnot be leftunattendedasprolonged contactwiththesurfacemay resultinan injury.
9. Check the pow er cord andplug regularly for any damage. If thecordor the plug is damaged, the manufacturer or a qualified personmust
replaceit in ordertoavoid an electricalhazard.
10. The heater must notbe mounted directly below anelectricalwall plug.
11. When firstswitchingontheheater,theremay be a slight odour during thefirstday ortwo.This is quite normal and is causedby theresidual
adhesive moisture anddoes not presentany health hazard.
12. Do notuse thepanelheater if it has been droppedor damaged in any way.Incaseof damage,take the unit in for examination and/orrepair
by an authorisedserviceagent
13. To reducethe riskof electricshock,do notimmerse or exposeassembly,plugor the powercordtowaterorany other liquid.
14. This heateris not intended for usein bathrooms,laundry areasandsimilar indoor locations.Neverlocate theheater w hereitmay fallinto a
bathtub or other w ater container.
15. Never immerse the unit in w ater or any other liquidfor cleaning purposes.
16. Remove the plug fromthe socketby gripping the plug. Do not pull onthe cordto disconnectthepanelheaterfromthe mains. Alw aysunplug
the unit whennotin use,beforecleaningor whenaddingor removing parts.
17. The use of accessoryattachmentsthatarenotrecommended orsupplied by the manufacturer may resultin injuries, fireor electric shock.
18. A shortcordis providedto reducethehazards resultingfrombecoming entangled in or tripping overalonger cord.
19. Ensure that thecordis not in a positionw hereitcanbe pulled on inadvertently.
20. Do notallow thecordto touchhot surfacesanddonot placeon ornear a hotgas or electric burnerorin a heated oven.
21. To preventa possiblefire,do notblock the spacebetweentheheaterandthewallthat is forair intake orexhaustin any manner.
22. Use of an extensioncordwiththepanelheateris not recommended.
23. This panel heater is not suitable for outdoor use. Do not use this appliance for anythingother than its intendeduse.
24. DO NOT carry theappliance by the power cord.
25. DO NOT COVER the heater under any circumstances.
26. Do notleave the applianceunattended duringuse.Alwaysunplugtheunit whennotin useor beforecleaning.
27. Always operatetheapplianceona smooth, even,stable surface.Donotplacethe unit on a hot surface.
28. Ensure that the sw itch is in the “Off” position after each use.
29. The manufacturer does notacceptresponsibility for any damageor injury causedby improper or incorrectuse,or for repairs carriedoutby
unauthorisedpersonnel.
30. In caseof technicalproblems,switchofftheunitanddo not attempt torepair it yourself.Returntheappliance to anauthorisedservicefacility
for examination, adjustment or repair.Alw ays insistontheuseof original spareparts.Failure to comply withtheabovementioned pre-
cautions and instructions, couldaffect thesafeoperation of this machine.
IMPORTANT
. • The unit is designed for indoor operation.
. • Rating: This unit must be connected to a 220-240 V / 50 Hz earthed outlet.
If you are in any doubt about the electrical installation, have it checked and if necessary modified by a
qualified electrician.
. • The air conditioner is safe. However, as with other electrical appliances, use it with care.
. • Keep out of the reach of children.
. • Do not clean the air conditioner by spraying it or immersing it in water.
. • Do not insert any object into the opening of the air conditioner.
. • Disconnect it from the mains before cleaning the unit or any of its components.
• Never connect the unitto an electricaloutlet usingan extension cord.If an outlet is not
available,oneshouldbeinstalledbya licensed electrician.
. • Any service other than regular cleaning or filter replacement should be performed by an
authorizedservice representative.Failure to do so couldresultina loss ofwarranty
. • A damaged supply cord should be replaced by the manufacturer, its service agent or a qualified
personinorderto avoid a hazard.
MAX15000 Btu/hr can beachieved at conditions closertothat you willenjoyin a cooledspace wheretheair
temperature is in the low20's,12,000 Btu/Hr is achievedat EN14511 standardconditions35°C DryBulb,WB=24°C.
This appliance is not intended for use by persons (including children) with reduced physical, sensory or
mental capabilities, or lack of experience and knowledge, unless they have been given supervision or
instruction concerning use of the appliance by a person responsible for their safety"
Children should be supervised to ensure that they do not play with the appliance
WARNING
. • Never operate this appliance if it has a damaged cord or plug. Do not lead the cord over
sharpedges.
. • Don‟tlift or move by pushing the airconditionerat the rear, but always at the front side.

PARTS
Front
Back
1. Control Panel
2. Air outlet
3. Carrying handle
4. Caster Wheels
5. Air filter
6. Air inlet
7. Exhaust air outlet
8. Cord storage
9. Water stopper / drainage point
Accessories
10. Inward adaptor - for insertion over
hose and connection with piece 1.
11. Outward adaptor - for insertion over
hose and into foam strip (or into hole
in the wall/window).
12. Round cap for filling the hole in
wall/window.
13. Exhaust hose.
14. Foam strip - for filling the open
window space and with hole for
connection to exhaust hose.
15. Foam strip - for filling the open
window space
16. Drain tube for continuous drainage
17. Active carbon filter
18. Remote control (optional)

INSTALLATION
Installation of the exhaustpipe
The unit is a portable air conditioner that may be moved from room to room.
1. Using the foam strips
FIG.5
Offer foam strips to the window gap and cut to size if necessary.
Feed exhaust hose through the foam strip and insert strip into window gaps as shown and
slide window across so that foam is held securely. Thistechnique may also be used for sash
windows. Note: Take care to maintain protection against intruders
2. Using the adaptor
FIG.6
FIG.7
Cut a 151mm diameter hole in the wall or window.
Feed exhaust hose through the window or wall and attach the threaded adaptor fromthe
outside as shown.
When not in use, plug the hole with the cover provided.
Foam strips
Wall or Window
Outward adaptor

Mountingof the exhaust pipe
Use only the hose
provided and clip
exhaust hose and unit
adaptor to the back of
the air conditioner
Avoid kinks and bends in
the exhaust hose as this
will cause expelled moist
air to build up causing
the unit to overheat and
shut down. Fig 8 & 9
show correct position
The hose may be
extended from300mm to
1500mm but for
maximum efficiency use
the shortest length
possible.
WARNING!
The length of the exhaust pipe is
specially designed according to the
specification of this product. Do not
replace or prolong it with your own
private hose as this could cause
the unit to mal-function.
FIG.8
FIG.9
FIG.10
FIG.11

Installation of the carbon
filter
1. Remove the filter frame
from the unit.
2. Separate the filter fixer
from the filter frame.
3. Remove the active carbon
filter from its plastic bag.
4. Insert the active carbon
filter into the filter frame.
5. Fix the filter by
reassembling the fixer
onto the filter frame.
6. Re-fit the filter frame inside
the unit.
FIG.12

OPERATIONfor LCD electronicMODEL
Control panel
FIG.13
1. ON/OFF (power) button
2. Sign for dehumidification/water full
3. Sign for fan (ventilation)
4. Mode button
5. Sign for heat function
6. Sign for Centigrade or Fahrenheit
(please refer to the real unit you
purchased)
7. Swing button
8. Sign for sleep function
9. Sleep function button
10. “Temperature down” button
11. Room temperature display
12. Receiver for remote control
13. Timer display
14. “Temperature up” button
15. Timer button
16. Sign for TiO2/ionizer (only for the unit with
TiO2/ionizer)
17. TiO2/ionizer button (only for the unit with
TiO2/ionizer function)
18. Fan speed display
19. Sign for automatic function
20. Fan speed button
21. Sign for cooling function

Turning ON/OFF
1. Press ON/OFF button, the unit will start automatically. If the ambient temperature is
Higher than 23oC, the unit will work in cooling mode.
Higher than 20oC but below or equal to 23oC, the unit will work in ventilation model.
Below 20oC, the unit will work in heating function (This is for cooling & heating models only.)
2. Indicators of the functions in progress come on at the same time. *NOTE! The display window
shows the ambient room temperature from 0oC to 50oC
3. To turn the unit off, press ON/OFF button again.
Setting mode/function
Press MODE button to select required working mode: automatic, cooling, fan, dehumidification or heating,
(Heating is only available for heating & cooling models.)
Sign of your selected mode comes on.
Setting temperature
1. Press 'Temperature up' or 'Temperature down' button to regulate the temperature you
desired.
2. The display window will show the temperature you set as you press 'Temperature up' or
'Temperature down' button. Otherwise, it will always show the ambient temperature.
3. The pre-setting temperature of this machine is: 24oC for cooling, 20oC for heating.
Setting ventilation speed
1. Press SPEED button tochoose the ventilation speed you need, high, medium or low. The sign of
high, low or medium ventilation will light on at the same time.
2. If the unit is in AUTO mode, it will choose the ventilation speed automatically according to the
ambient temperature.
Setting timer
1. Press TIMER button to set the operating hours you desired (1 to 24 hours, the sign of timer will light
on). When the set time has been reached, the machine will turn off automatically. The LCD will show
the hour(s) you set as you press TIMER button. If the timer button is not pressed, the unit will work
continuously.
2. By pressing the timer but without turning on the other functions, you can PRE-SET the time for the
machine to work. For example, if you press the timer to '2', the unit will work automatically after 2
hours.

Sleep function
1. In cooling mode, by pressing the SLEEP button, the set temperature will increase 1oC at the 1st
hour, another 1 oC at the second hour, then keeps at that temperature.
2. In heat mode, by pressing the SLEEP button, the set temperature will descend 1oC at the 1st hour,
another 1 oC at the second hour, then keeps at that temperature.
3. In sleep mode, the ventilation will keep at low speed. Re-press the SLEEP button, the setting
temperature and ventilation speed will return to the pre-selected one.
4. The unit will shut down automatically after the SLEEP function running for 12 hours.
5. Please note, the sleep function is not available while the machine is working in ventilation,
dehumidification or auto mode. Only available in Cooling or Heating mode.
6. When the machine is in Sleep function, the Fan Speed would turn to be LOW speed.
Swing function
By pressing SWING button, the air vent will rise in 3 different angles: 45º、60º、75º
Every time when you turn on the machine, the air vent will rise to position 75º first, then return to position
45º automatically. For re-setting the angle, the air vent will rise to 75º first, too. The interval of each
move is 4 sec.. As you turn off the air vent, the air vent will close.
FIG.14
Dehumidification function
In dehumidification mode, the temperature cannot be adjusted, the ventilation will fix at low speed.
Heating function
When using Heat Pump, it can reverses the compressor discharging the hot air indoor instead. The
Exhaust Pipe must still be fitted to allow the cold air to be removed in this mode & used in the
usual way. Under this system, the machine can run at HIGH/MED./LOW speed.
Self-diagnosis
This machine is equipped with self-diagnosis function. If something is wrong in the machine, the LCD will
show the word “E1” or “E2”. As this time, please call your service centre.
All the above functions can also be performed with the
supplied remote control.
This remote control requires 2 pcs AAA batteries to
operate
FIG.15
45o60 o 75 o

NOTICE !
1. To prolong the compressor's life, after switching-off of the unit, please wait for 3 minutes (at least)
before re-switching it back on again.
2. The cooling system will switch off if the ambient temperature is lower than the set one. The
ventilation, however, keeps working on the set level. If the ambient temperature rises above the
selected level, the cooling will return to work.
DRAINAGE
During the process of cooling, some water will be extracted from the air into the unit. If the reservoir
is full, both of the compressor and motor will stop. The “water full” sign will light up, also the
machine will beep as a reminder.
To make the cooling function work again, please empty the water tank by one of the following ways:
1. Turn off the air conditioner and avoid
moving it when full.
2. Position a container (a water tray for
example) underneath the drain hole.
3. Remove the drain knob & rubber plug
from the drain hole and allow the water
to drain out.
4. When the container is almost full,
replace the rubber plug in the drain
hole and empty the water tray.
5. Repeat until the unit is emptied.
6. Replace the rubber plug and tighten
the drain knob firmly.
7. Switch on the unit - the full water or
compressor operating indicator should
not be flashing.
FIG.16

If you wish to operate the unit without the need to empty the water tank, please:
Remove the drain knob and rubber
plug and retain for future use.
Connect the drain tube supplied to the
water outlet as shown and locate the
other end into a drain.
FIG.17
The drain tube may be extended
by adding an extension tube and
using a suitable connector.
FIG.18
Please note
1. The drain must be at or
below the outlet level.
2. Flashing comp / „full water‟
indicator will not function in
this mode of drainage.
3. If you want to extend the
water tube, you can connect
it with another tube (OD:
18mm)
FIG.19

.MAINTENANCE
Always unplug the air conditioner fromthe mains before cleaning.
To maximize the efficiencyof the air conditioner clean regularly.
Cleaning the housing
Use a soft, damp cloth to wipe the body clean.
Never use aggressive chemicals, gasoline, detergents, chemically treated cloths, or other cleansing
solutions. These all could possibly hurt the cabinet.
Cleaning the filter
Use a vacuum cleaneror tap the filter lightlyto remove loose dust and dirtfrom the filters
and then rinse thoroughlyunder running water(no hotter than 40oC).
Dry thoroughlybefore replacing.
Notice!Neveroperate the unitwithout the filters.

Drain any water in the unit before
completely operating the unit on
ventilation only mode for a few
hours, to thoroughly dry the inside.
Clean or change the filter
Unplug and store the power cord as
shown
Replace in the original carton or
cover for storage.
FIG.20

.FAULT CHECK LIST
If The air conditioner does notrun
Is the air conditioner plugged in?
Is there a power failure?
Is the comp / ‘full water’ indicator flashing?
Is the room temperature below the set
temperature?
If The machine seems to do little
cooling
Is there directsunshine ? (Please put down
the curtain.)
Are too many windows or doors open?
Are there too manypeople in the room?
Is there something in the room producing
lots of heat?
If The machine seems to do
nothing.
Is the filter dusty, contaminated?
Is the air intake or output blocked up?
Is the room temperature below your
selected temperature?
Is Toonoisy
Is the machine positioned unevenly so as
to create vibration ?
Is the floor underneath the machine
uneven?
If The compressor doesn’t run.
Is so, it is possible the overheat protection
of the compressor is on. Just wait for the
temperature to drop.
☆Never try to repair or dismantle the unit yourself

Model no.
RHMA055
Cooling capacity
12000 BTU/hr
3516 watts
Heating Capacity
1800W
Power/Ampere
consumption
1500W/ 6.7A
Air volume (max. speed)
480m3/h
Humidity removal
capacity
1.4 L/hr
Power supply
220-240V~, 50Hz
Compressor
rotary
Refrigerant
R410A (Please refer to the rating label.)
Fan speed
3
Timer
1~24 hours
Working temperature
Cooling: 18 ~ 32oC
Heating: 7 ~ 27oC
Exhaust pipe
Ø 142 x 1500mm
Net Weight
33 kgs
Dimension
450 x 365 x 825 mm (WxDxH)
Reminder:
Wasteelectricalproducts mustnot be disposedof withhousehold waste.
This productshouldbe taken to your local recyclingcentrefor safetreatment.

SERVICING THE APPLIANCE
There are no user serviceable parts in this appliance. If the unit isnot operating correctly,
please check the following:
You have followed the instructions correctly
That the unit has been wired correctly and that the wall socketis switchedon.
That the mains power supply is ON.
That the plug is firmly in the mains socket.
If the appliance still does not work after checking the above:
- Consult the retailer for possible repair or replacement. If the retailer fails to resolve the problem
and you need to return the appliance, make sure that:
The unit is packed carefully back into its original packaging.
Proof of purchase is attached.
A reason is provided for why it is being returned.
If the supply cord is damaged, it mustbe replaced by the manufactureror an authorised service
agent, in order to avoid any hazard. If service becomes necessarywithin the warranty period,
the appliance should be returned to an approved Home of Living Brands (Pty) Limited service
centre. Servicing outside the warranty period is still available, but will, however, be chargeable.
CHANGING THE PLUG
Should the need arise to change the fitted plug, follow the instructions below.
This unit is designed to operate on the stated current only. Connecting to other
power sourcesmay damage the appliance. Connecta three-pin plug as follows:
The wires in this mains lead are coloured in accordance with the following code:
Green/Yellow = Earth
Blue = Neutral
Brown = Live

PLEASE AFFIX YOUR PROOF OF PURCHASE/RECEIPT HERE
IN THE EVENT OF ACLAIM UNDER WARRANTY THIS RECEIPT MUST BE PRODUCED.
W A R R A N T Y
1. Home of Living Brands (Pty) Limited (“Home of Living Brands”) warrants to the original purchaser of
this product (“the customer”) that this product will be free of defects in qualityand workmanship
whichundernormal personal,familyor householduseandpurpose maymanifestwithinaperiod of
1 (one) year from the date of purchase (“warranty period”).
2. Where the customerhas purchased aproduct and it breaks, is defective or does not work properly
for the intended purpose, the customer must notifythe supplier from whom the customer bought
the product (“the supplier”) thereof within the warranty period. Any claim in terms of this warran ty
mustbe supported bya proof of purchase. If proof of purchase is not available, then repair, and/or
service charges maybe payable bythe customer to the supplier.
3. The faulty product must be taken to the supplier's service centre to exercise the warranty.
4. The supplier will refund, repair or exchange the product in terms of this warranty subject to
legislative requirements. This warrantyshall be valid onlywhere the customer has not broken the
product himself, or used the product for something that it is not supposed to be used for. The
warranty does not include and will not be construed to cover products damaged as a result of
disaster, misuse, tamper, abuse or anyunauthorised modification or repair of the product.
5. This warranty will extend only to the product provided at the date of the purchase and not to any
expendables attached or installed bythe customer.
6. If the customerrequests thatthe supplierrepairstheproductandthe productbreaks orfails to work
properly within 3 (three) months of the repair and not as a result of misuse, tampering or
modification by or on behalf of the customer, then the supplier may replace the product or paya
refund to the customer.
7. The customermayberesponsible for certain costs where products returned are not in the original
packaging, or if the packaging is damaged. This will be deducted from any refund paid to the
customer.
HOME OF LIVING BRANDS (PTY) LTD (JOHANNESBURG)
JOHANNESBURG TEL NO. (011) 490-9600
CAPE TOWN TEL NO. (021) 552-5161
DURBAN TEL NO. (031) 792-6000
www.homeoflivingbrands.co.za
Table of contents
Other Russell Hobbs Air Conditioner manuals

Russell Hobbs
Russell Hobbs RHPAC3001B User manual

Russell Hobbs
Russell Hobbs RHAC10 User manual

Russell Hobbs
Russell Hobbs RHMA 050 Installation guide

Russell Hobbs
Russell Hobbs RHPAC11001 User manual

Russell Hobbs
Russell Hobbs RHPAC3001 User manual

Russell Hobbs
Russell Hobbs RHAC12H Installation guide

Russell Hobbs
Russell Hobbs RHPAC4002 User manual
Popular Air Conditioner manuals by other brands

Tycoon
Tycoon TS2MVI32-09 Service manual

Daikin
Daikin RXYQ72PAYD installation manual

Fujitsu
Fujitsu AS*G09KXCA Series Service instruction

MrCool
MrCool Signature Series Owners & installation manual

Frigidaire
Frigidaire FAS155K1A1 Factory parts catalog

Mitsubishi
Mitsubishi PQHY-P200YGM-A installation manual