RUSTA SANTORINI User manual

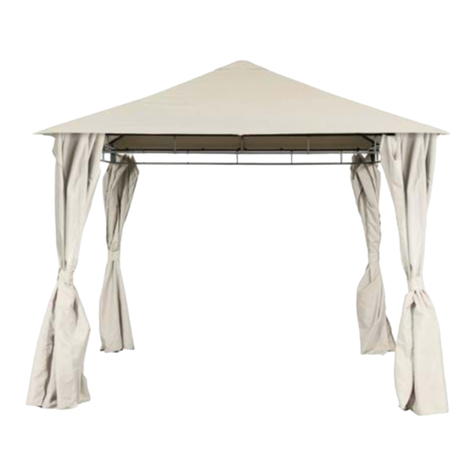
Paviljong
Paviljong / Pavillon / Pavillon
SANTORINI
Bruksanvisning
Manual/Bruksanvisning/Gebrauchsanweisung
SE
ENG NO DE
Item no. 626701400101

WARNING!
If these instructions are not followed, an accident may
lead to serious personal injury or property damage.
2
ENG
Thank you for choosing to
purchase a product from Rusta!
Read through the entire manual
before installation and use!
Pavilion Santorini
Read the user manual carefully to make sure that the product is assembled, used and
maintained correctly, as described in the instructions in this user manual. Keep the user
manual for future reference.
USE
Only intended for private use.
SAFETY INSTRUCTIONS
• For your own safety and that of others, read the instructions carefully
before assembling the pavilion.
• At least 2 adults and preferably 3 are required to assemble the pavilion.
• Tools for assembling the pavilion are supplied.
• Use a stable ladder or pallet for assembly.
• Keep children away from the area in which the pavilion will be assembled.
• Do not position the pavilion on sandy, clay or uncompacted ground
where the anchoring pegs will not provide sucient stability.
• The pavilion must be well secured.
• The pavilion is only intended for outdoor use during spring and summer.
• If possible, position the pavilion sheltered from the wind.
• Naked flames are not permitted inside or near the pavilion.
• Do not attach heavy objects to the pavilion’s roof beams.
• The roof sheet must be taut. If rainwater collects on the roof, it must be
emptied.
• Do not use the pavilion in strong wind and/or heavy rain. Take down the
roof sheet and any walls/mosquito nets if there is a risk of bad weather.
• Store the pavilion in its original packaging.
CARE AND MAINTENANCE
• Check the pavilion regularly for signs of instability or wear. Do not use the pavilion is
it is damaged or shows signs of instability. Regularly tighten the pavilion’s screws to
ensure its stability.
• Clean the pavilion by wiping it with a soft, damp cloth. Do not use abrasive cleaners on
the pavilion. Dry with a soft cloth.
• Use a soft, damp cloth to clean the roof sheet. Do not use a high-pressure cleaner.
• The pavilion has a protective exterior that prevents it from corroding. If the exterior is
damaged, there is a risk of it rusting. If rust starts to form on the frame, it is important
to treat this immediately to stop it from spreading. Remove the roof sheet and any
walls. Clean the aected area with a rust remover. Then seal the area with suitable
paint. Contact a specialist retailer for help in selecting the right product to use.
• During autumn and winter the pavilion should be dismantled and stored indoors.
3

ENG
4
Qty
APole x 6
BWall support x 6
CRoof pole x 6
DRoof Pole x 6
ERoof cover extender, roof x 6
FRoof cover extender, top x 6
GTop connector x 1
HSupport bracket outside x 6
ISupport bracket inside x 6
JFoot for pole x 6
KFoot cover x 6
LScrew M6x15 mm x 49
MScrew M6x35 mm x 6
N Screw M6x45 mm x 25
ONut x 6
PWasher x 86
QWall hook x 125
RTop cover x 1
SRoof cover x 1
TWall x 6
UMosquito net x 6
VSuspension hook for top
connector
x 1
WGround peg x 12
XAllen key x 2
YAdjustable spanner x 1

ASSEMBLY
• Read through all the assembly instructions before assembly.
• Assembly requires 2–3 adults.
• Before starting assembly: Remove all parts from the packaging and sort them using
the assembly instructions.
• If the pavilion is not complete after careful checking, please contact Rusta’s Customer
Service.
• The pavilion should only be assembled in calm weather.
• Ensure that there is enough space for the pavilion before starting assembly.
The distance to buildings, trees, bushes and other objects should be at least 2.5 metres.
• Check that the anchoring pegs can be driven into the ground where the pavilion is to
be sited.
IMPORTANT! For easier assembly, do not tighten the screws until the entire pavilion frame has
been assembled.
1
• Take pole A. Insert foot J under the pole. Use screw L and screw through the hole in the pole.
Use washer P.
• Do this on all six poles A.
5

ENG
• Take two wall supports B and attach support bracket H on the outside of the pole. Use screw N.
The washer must be on the outside.
• Take support bracket I and attach it on the inside of the pole. Use six screws L.
The washer P should be on the inside.
2
3
6

• Take one pole A and set it next to wall support B. Secure the support bracket H on the outside of
the pole. Use screw N and washer P.
• Continue around the pavilion as per steps 2 & 3 until the pavilion is able to stand upright.
Once the pavilion has been erected, you can tighten all the screws, see Figure 5.
• Now the pavilion’s frame is ready.
4
5
7

ENG
• Attach the suspension hook for the top connector V to the top connector G.
6
NOTE! Max. weight
suspension hook: 15 kg
8

• Attach all roof cover extenders E to each pole.
• Attach all roof cover extenders F up in the top connector.
• Take roof pole C and click it into the top connector G.
• Then attach roof pole C at each corner pole using screw M. Use washer P between
them and finish with nut O.
7
8
9

ENG
• Take roof cover S and lay this over the entire pavilion.
• Take top cover R and lay this over the top connector.
9
10
10

• Take wall T and mosquito net U. Attach a wall hook Q to each suspension loop.
• Attach the roof cover at every corner of the pavilion.
• Once the roof cover is attached at every corner, you can walk around and tighten the roof cover
using the extenders, which have two dierent tensioning positions.
• Do the same for the top cover.
11
12
11

ENG
• Lift the foot cover K. Insert ground peg W in the holes in the pole’s foot J.
• There is a prepared hole in each wall support B. Wall hook Q should be inserted here.
• There should be 10 wall hooks Q between two poles for wall T.
• There should be 10 wall hooks Q between two poles for mosquito net U.
14
13
12

13
RIGHT OF COMPLAINT
By law the product must be returned to the place of purchase along with the original
receipt in the event of a complaint. The user is liable for any damage to the product that
is caused by not using the product for its intended purpose or by not following this user
manual correctly. The right of complaint will not apply in these instances.
INFORMATION ABOUT HAZARDOUS WASTE
Used products should be handled separately from
household waste. They should be taken for recycling in
accordance with local rules for waste management.

ANVÄNDNING
• Endast avsedd för privat bruk.
SÄKERHETSFÖRESKRIFTER
• För egen och andras säkerhet, läs bruksanvisningen noggrant
innan du monterar paviljongen.
• För montering av paviljongen krävs minst 2 vuxna personer, helst 3.
• Verktyg för montering av paviljongen medföljer.
• Använd en stabil stege eller pall vid montering.
• Håll barn på avstånd på området där paviljongen monteras.
• Placera inte paviljongen på sandigt, lerigt eller löst underlag där för-
ankringspinnarna inte fäster tillräckligt bra.
• Paviljongen måste förankras väl.
• Paviljongen är endast avsedd för utomhusbruk under vår och
sommar.
• Om möjligt, placera paviljongen på en vindskyddad plats.
• Öppen eld får inte förekomma i eller nära paviljongen.
• Fäst inga tunga föremål i paviljongens takbalkar.
• Takduken måste vara spänd.
• Om det uppstår vattensamlingar på taket vid regn, måste de tömmas ut.
• Använd inte paviljongen vid hård vind och/eller kraftigt regn.
• Ta ner takduken och eventuella väggar/myggnät om risken för
dåligt väder föreligger.
• Förvara paviljongen i sin originalförpackning.
VARNING!
Om föreskriften inte efterföljs kan en olycka leda till
allvarlig person- eller egendomsskada.
14
Tack för att du valt att
köpa en produkt från Rusta!
Läs igenom hela bruksanvisningen
innan montering och användning!
SE
Paviljong Santorini
Läs bruksanvisningen noggrant och se till att produkten installeras, används och under-
hålls på rätt sätt enligt instruktionerna. Spara bruksanvisningen för senare bruk.

SKÖTSEL OCH UNDERHÅLL
• Kontrollera regelbundet paviljongen efter tecken på instabilitet eller slitage.
Använd inte paviljongen om den är skadad eller visar tecken på instabilitet. Efterdra
regelbundet paviljongens skruvar för att säkra dess stabilitet.
• Rengör paviljongen genom att torka av med en mjuk, fuktig trasa. Använd inte
slipande rengöringsmedel för att rengöra paviljongen. Torka torrt med en mjuk trasa.
• Vid rengöring av takduken, använd en mjuk, fuktig trasa. Använd ej högtryckstvätt.
• Paviljongen har ett skyddande ytskikt som skyddar paviljongen från korrosion. Skulle
ytskiktet skadas finns risk för ytrost. Om ytrost skulle börja bildas på stommen är
det viktigt att detta åtgärdas omgående för att förhindra spridning. Ta av takduken
och eventuella väggar, rengör den drabbade ytan med rostborttagningsmedel. Lacka
sedan ytan med täckande färg. Kontakta fackhandel för att få hjälpa med vilka
produkter du ska använda.
• Under höst och vinter måste paviljongen monteras ned och förvaras inomhus.
15

16
AStolpe x 6
BVäggbalk x 6
CTakbalk x 6
DTakbalk x 6
ETakduksförlängare tak x 6
FTakduksförlängare topp x 6
GTakfäste x 1
HBalkfäste utsida x 6
IBalkfäste insida x 6
JFot til stolpe x 6
KKåpa till fot x 6
LSkruv M6x15 mm x 49
MSkruv M6x30 mm x 6
N Skruv M6x45 mm x 25
OMutter x 6
PBricka x 86
QVäggkrok x 125
RToppduk x 1
STakduk x 1
TVägg x 6
UMyggnät x 6
VUpphängningskrok till
takfäste
x 1
WMarkpinne x 12
XInsexnyckel x 2
YSkiftnyckel x 1
Antal
SE

MONTERING
• Läs igenom hela monteringsanvisningen innan montering påbörjas.
• Till monteringen krävs 2–3 vuxna personer.
• Innan montering påbörjas: Ta ut alla delar ur förpackningen och sortera dem med
hjälp av monteringsanvisningen.
• Skulle paviljongen trots noggrann kontroll inte vara komplett, ber vi dig att kontakta
Rustas kundtjänst.
• Paviljongen ska endast monteras vid lugnt väder.
• Se till att det finns tillräckligt med yta för paviljongen innan montering påbörjas.
Avståndet till byggnader, träd, buskar och andra föremål ska vara minst 2,5 meter.
• Kontrollera att förankringspinnarna går att driva ner i marken där paviljongen ska
placeras.
VIKTIGT! För enklare montering, dra inte åt skruvarna förens hela stommen till
Paviljongen är monterad.
1
• Tag stolpe A. För in foten I under stolpen. Använd skruv L och skruva igenom stolpes hål.
Använd bricka P.
• Gör detta på samtliga 6 stolpar A.
17

SE
2
3
18
• Tag två stycken väggbalkar B och fäst balkfäste H på utsidan av stolpen. Använd skruv N.
Brickan ska sitta på utsidan.
• Tag balkfäste I och sätt denna på insidan av stolpen. Använd sex stycken skruv L. Bricka P ska
sitta på insidan.

4
5
19
• Tag en stolpe A och ställ denna intill väggbalk B. Sätt fast balkfäste H på utsidan av stolpen.
Använd skruv N och bricka P.
• Fortsätt runt paviljongen enligt steg 2 och 3, tills Paviljongen kan stå.
När Paviljongen står på plats kan alla skruvar dras åt, se steg 5 nedan.
• Nu är Paviljongens stomme klar.

SE
• Sätt fast upphängningskrok till täkfäste V i takfäste G
6
OBS! Max vikt
upphängningskrok: 15 kg
20
This manual suits for next models
1
Table of contents
Languages:
Other RUSTA Tent manuals

RUSTA
RUSTA SAMOS User manual

RUSTA
RUSTA 62561123 User manual

RUSTA
RUSTA 626511360101 User manual

RUSTA
RUSTA MAUI 626701490101 User manual

RUSTA
RUSTA EASY UP User manual

RUSTA
RUSTA 604013690102 User manual

RUSTA
RUSTA 751511760101 User manual

RUSTA
RUSTA 626511370101 User manual

RUSTA
RUSTA MAUI 626701490201 User manual

RUSTA
RUSTA 307011640101 User manual