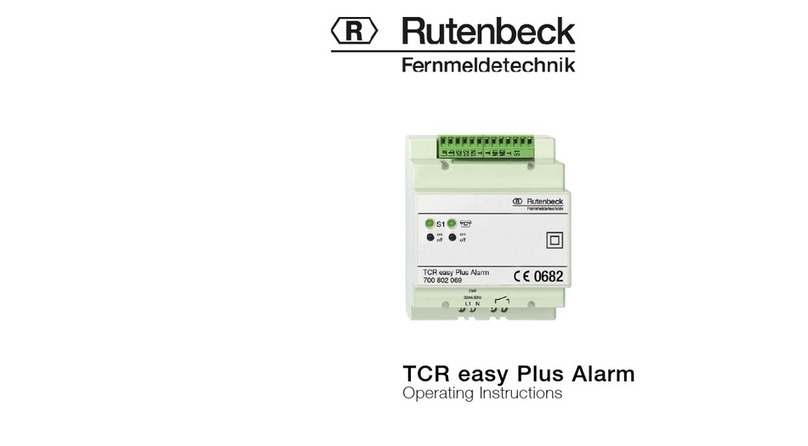
Rutenbeck TC Easy Plus User manual

Overview .....................................2
Accessory ....................................2
General ......................................5
Installation ....................................6
Wall Mounting ..................................6
Putting into Operation .............................7
Factory Settings .................................8
Connection of Telephone Line, Plug Power Supply,
Inputs and Temperature Sensor......................9
Connection of Outputs and Pushbuttons ..............10
Operation
State Request .................................12
General Settings. . . . . . . . . . . . . . . . . . . . . . . . . . . . . . . .13
Menu Settings .................................14
Alarm Phone Numbers ...........................14
Own Phone Number .............................15
Answering Machine Mode .........................15
Table of Contents
3

4
Ringing Signals ................................16
Code Number .................................16
Impulse Time ..................................16
Temperature Level ..............................17
Setting Procedures..............................18
Switch Devices and Impulse Time, Check the State
of Devices and Temperatures ......................25
Alarm Messages................................27
Unprotected Mode ..............................29
Time out .....................................29
Power Supply. . . . . . . . . . . . . . . . . . . . . . . . . . . . . . . . . .29
Behavior at Power Failure .........................30
Technical Data................................31
Current Consumption ............................33
Guarantee ...................................34
Service......................................34
Manufacturer’s Declaration ......................35

5
The TC easy Plus is a remote
switching and alarming de-
vice. It allows the switching
of five electrical devices and
can send off two alarm mes-
sages via the telephone net-
work. Each alarm input can
automatically dial a phone
number and notify with a
voice message, if an alarm
input has been activated by
a connected contact.
The switching takes place
with DTMF-signals (DTMF=
Dual-tone multi-frequency).
This can either be performed
with a DTMF-telephone or a
DTMF pocket dialer.
Individual user data are easy
to program by a telephone
call. The operation is sup-
ported by announcements.
The temperature can be ac-
quired via the telephone, if a
temperature sensor is con-
nected to an analogue input.
An alarm call can be initiated
if a temperature level is set.
Two of the five switching
outputs are equipped with
relays for the connection of
devices with low voltage up
to 48 V AC/DC. The remai-
ning three outputs deliver a
control voltage of 12 V/
150 mA for relays (i.e.
SAR 2 GB 500 101 05).
The TC easy Plus is placed
in a housing for surface
mounting.
The switching functions can
be carried out via the tele-
phone line as well as with
the built-in pushbuttons (s.
p. 10).
They will be protected by
use of a 4-digit code num-
ber.
All settings and switching
states of the outputs will be
saved during a power failure
and be restored after return of
power.
General

6
The TC easy Plus can be
mounted directly on the wall.
1 Attach the base plate at
the upper left and lower
right corner with dowels
and screws. The screw
terminals of the printed
circuit board must show
to the bottom. Slotted
holes allow an exact ad-
justment ( see figure, A).
2 There are performed re-
ceptacles for holding i.e.
the strain relief of the plug
power supply cord (see
figure, B).
3 Lead the necessary in-
stallation cables for the
devices A1 to A5 through
the other entry points of
Installation
Wall Mounting
the base plate (see fig-
ure, C).

7
1 Connect the subscriber
line at the screw terminals
La and Lb (ring and tip).
Additional telephone jacks
can be connected to ter-
minal a2 and b2 (see
page 9).
The TC easy Plus can
also be connected at an
extension of a telephone
system.
2 Connect the black wire of
the plug power supply
with ” ” and the red/
black wire with ”12V” (see
page 9). If the wires are
cross-connected the de-
vice will not be damaged
but simply will not oper-
ate.
3 The wiring for the de-
vices must carried out ac-
cording to the diagram on
page 10.
4 Install the equipment to
be switched, respectively,
the control relays as
shown in the connection
diagramm an page 10.
5 Insert the plug power
supply in the 230-V-po-
wer outlet.
Putting into Operation

8
The default settings of the
delivery state can be re-
stored any time by pressing
pushbutton ”S1” and ” ”
until the LEDs start blinking
while powering up the TC
easy Plus.
Enter your own settings in
the right column. The follow-
ing parameters are set:
Alarm phone
number 1: none
Alarm phone
number 2: none
Own phone number: none
Answering machine
mode: off
Ringing signals: 2
Code number: 0000
Impulse time: 3 sec.
Temperature level: none
Own Settings:
_ _ _ _ _ _ _ _ _ _ _ _ _ _ _
_ _ _ _ _ _ _ _ _ _ _ _ _ _ _
_ _ _ _ _ _ _ _ _ _ _ _ _ _ _
_ _ _ _ _ _ _ _ _ _ _ _ _ _ _
_ _ _ _ _ _ _ _ _ _ _ _ _ _ _
_ _ _ _ _ _ _ _ _ _ _ _ _ _ _
_ _ _ _ _ _ _ _ _ _ _ _ _ _ _
_ _ _ _ _ _ _ _ _ _ _ _ _ _ _
Installation
Factory Settings

9
Installation
Connection of Telephone Line, Plug Power Supply, Inputs and Temperature
Sensor

10
Connection of Outputs and Pushbuttons
Installation

11
Installation
The external pushbuttons
for local operation are con-
nected electrically parallel
to the integrated pushbut-
tons S1 to S5. The outputs
A1 and A2 have relay con-
tacts with a load capacity of
48 V/2 A AC/DC. The out-
puts A3 to A5 can deliver 12
V/150 mA.

12
State Request
After calling and seizure of
the telephone line as well
as correct entry of the code
number, one can check the
state of the connected de-
vices, switch the devices on
or off, or modify the individ-
ual settings of your TC easy
Plus – like alarm phone num-
bers, own phone number,
answering machine mode,
ringing signals, code num-
ber, impulse time or temper-
ature level.
The automatic call accept-
ance will be activated with
the pushbutton ” ”. The as-
signed LED lights up. The
device seizes the telephone
line after reception of the
programmed number of ring-
ing signals (see page 16 and
21).
The LED ” ” starts blinking
after receiving the first ringing
signal. With the pushbuttons
S1 to S5 devices connected
to the output can be
switched on or off. The as-
signed LEDs S1to S5 indi-
cates the switching state
(LED lit = on).
Operation
Call the TC easy Plus and
dial the code number.
”Please dial a digit.”
input device digit 1-5
or 6 request for tem-
perature
or # all devices
input state (not after
digit ”6”)
0 switch off device
1 switch on device
6 impulse mode
# state request
temperature or state
announcement

13
Operation
Call the TC easy Plus and
dial the code number.
”Please dial a digit.”
setting digit
9 menu settings
*
disconnection
settings announcement
With *
disconnection
without announcement.
General Settings

14
The TC easy Plus has two
alarm inputs. If a connected
contact is activated, the pro-
grammed alarm phone num-
ber for the alarm input will
automatically be called and
an announcement can be
heard at the called party. An
alarm occurred during a tel-
ephone conversation will be
processed after releasing
the telephone line. The alarm
phone numbers (max. 24
digits) can be programmed
with the telephone and
DTMF in the menu settings
(“1”, respectively “2”).
Alarm Phone Numbers
9 impulse time in
hours
announcement of
menu item
input of value
1-24 digits number
confirmation
# Confirmation of input
*abort of input
announcement of value
input or menu settings
announcement
Operation
Menu Settings
Call the TC easy Plus and
dial the code number and
the digit „9“ for the selection
of the menu settings.
menu item
0 temperature level
1 alarm phone num-
ber 1
2 alarm phone num-
ber 2
3 own phone number
4 answering machine
mode
5 ringing signals
6 code number
7 impulse time in sec.
8 impulse time in min.

15
If no confirmation takes
place, alarm messages will
be announced at the pro-
grammed alarm phone num-
ber up to two times within in-
tervals of circa two minutes,
independent from wether
or not the called party an-
swered the call.
In order to address a con-
nected answering machine
instead of the TC easy Plus
via the telephone line, the
device can be set to an an-
swering machine mode in
the menu settings (“4”). If the
answering machine mode
has been activated, the base
module will not switch on
at an incoming call. If the
caller releases the telephone
line after one ringing sig-
nal, waits at least 10 sec-
onds and calls again within
60 seconds the base mod-
ule switches on after the first
ringing signal.
Answering Machine Mode
If the TC easy Plus sends off
an alarm message via the
telephone line, it will first an-
nounce the own phone num-
ber. The own phone number
(max. 24 digits) will be pro-
grammed in the menu set-
tings (“3”).
Own Phone Number
Operation
Alarm Phone Numbers

16
Impulse TimeCode Number
The four digit code number
can be set in the menu set-
tings (“6”). In delivery state
the code number “0000”
is set. If the code number
“1111” is set, the testing of
the code number is left out
(see page 29). The default
settings can be restored by
a procedure (see page 8) if
you have forgotten your code
number.
The connection will be re-
leased, after entering the
wrong code number three
times.
The number of ringing sig-
nals until answering an in-
coming call by the TC easy
Plus can be set in the menu
settings (“5”). The default
setting is “2”.
If the answering machine
mode is activated, the set-
ting of the number of ringing
signals does not have any
meaning.
Ringing Signals
Operation
With the impulse time the
outputs can be activated for
a pre-determined time. For
instance, a door opener can
be activated for a short time
or a pump can be turned on
for several hours. The se-
lected impulse time (“7”, “8”
or “9” in menu settings) is
valid for all outputs. The im-
pulse time can be selected
from 1 second and up to 24
hours. In delivery state the
impulse time is set to 3 sec-
onds.

17
Temperature Level
If a temperature sensor is
connected to the analogue
input, an alarm call can be
initiated if a certain temper-
ature level is reached. In
this case, the alarm phone
number 1 will be called and
an announcement will in-
form about the temperature.
The programming (“0”) in
menu settings can be done
in a way, that the exceed-
ing (“more than”) or the falling
short (“less than”) of a cer-
tain temperature will send off
an alarm call. Negative val-
ues can be set by placing a
“9” before entering the tem-
Operation
perature level. The adjusta-
ble range comprises temper-
atures from -9 °C to 40 °C.
The TC easy Plus has a hys-
teresis of 3 °C, that means,
if for instance a temperature
level of more than 25 °C has
been reached, a new alarm
will only be send off again,
if the temperature has fallen
below 22 °C before.

18
the amount of ringing sig-
nals, press 5. To set the
code number, press 6. To
set an impulse time in sec-
onds, press 7, for minutes
press 8 and for hours press
9. To set a temperature level,
press 0.”
The announcement will be
repeated several times. It
can be interrupted at any po-
sition by entering a DTMF-
digit. During a voice mes-
sage, the entry will not
always be recognized, so
that the entry of the digit
eventually must be repeated.
Setting Procedures
For programming the param-
eters the phone line of the
TC easy Plus must be called
from a telephone. After en-
tering the code number, the
menu settings can be se-
lected by dialing the digit
“9”. The menu will start with
the following announcement
described as “setting an-
nouncement” in the exam-
ples: ”Settings. To set the
alarm phone numbers, press
1 for input 1 and press 2
for input 2. To set the own
phone number, press 3.
To set the answering ma-
chine mode, press 4. To set
Operation
An overview of the opera-
tional sequences is printed
on the supplementary sheet.
The following examples show
how the below stated values
can be set starting from de-
livery state.
alarm phone no. 1
4711
alarm phone no. 2 0815
own phone no. 0235582224
a. machine mode off
ringing signals 7
code number 1873
impulse mode 35
sec.
temperature level > 28 °C

19
Call the TC easy Plus:
Dialling of code number:
Changing to the menu set-
tings:
Set alarm phone number 1:
”Here is the TC easy Plus.
Please dial the code num-
ber.”
”Please dial a digit.”
setting announcement
”Phone number one. Please
dial. For confirmation press
the pound key, for cancalla-
tion the asterisk key.”
”Phone number one: 4711”
Phone number of the TC
easy Plus line
”0000”
”9”
”1”
”4711#”
Setting Procedures

20
Set alarm phone number 2:
Set own phone number:
setting announcement
”Phone number two. Please
dial. For confirmation press
the pound key, for cancella-
tion press the asterisk key.”
”Phone number two: 0815”
setting announcement
”Own phone number. Please
dial. For confirmation press
the pound key, for cancella-
tion press the asterisk key.”
”Own phone number:
0235582224”
”2”
”0815#”
”3”
”0235582224#”
Setting Procedures
Table of contents
Other Rutenbeck Security System manuals
Popular Security System manuals by other brands

PORTMAN
PORTMAN TLU100N Operation and installation manual

Siemens
Siemens FDM275 Mounting manual

Swann
Swann SW344-DPS Specifications

GeoVision
GeoVision GV-NAS SYSTEM quick start guide

Politec
Politec PARVIS MES SMA INSTALLATION AND MOUNTING MANUAL

Mircom
Mircom FX-350 Series Installation and operation manual